Dashcams are becoming more and more popular in cars and trucks in recent years and not without good reason. With costs of vehicle repairs and associated injuries always on the rise, having a video of an incident might provide crucial evidence in determining fault in the event of a crash.
Finding dashcams for a car or truck is rather easy with a lot of choices available at various price points. Motorcycle camera systems, however, are much fewer in number. This is likely due to two factors:
- Motorcycles require more durable systems that can cope with the elements as at least some parts, the cameras, for instance, will be exposed to the great outdoors.
- Motorcycles are greatly outnumbered by cars and trucks (in the United States anyway) making the potential market for motorcycle specific devices much smaller.
These factors have lead to very few systems available that will work for the motorcyclist. There are several inexpensive systems on eBay and Amazon that hover around the $100.00 (USD) mark and then there are systems such as the Innovv K1 that run over $250.00 which we reviewed back in 2015. (The new Innovv K3 system currently available runs over $330.00!)
While I haven’t handled the very inexpensive systems the price makes me wonder about their quality to the point where I wouldn’t be willing to risk time and money on them. Recently, a thread on the popular adventure riding website Adventure Rider popped up with someone mentioning a new system he just purchased called the Halocam M1. This system cost under $200.00 and his opinion was that the system performed well considering the price.
Of course, I had to find out for myself what this system was all about. Let’s all have a look.
Shopping Now? We Recommend:
webBikeWorld has worked closely with Amazon over the years to provide our testers with products to review. In addition to being a great site to shop from, they’re also a great partner.
Amazon
![]()
Free shipping (with Amazon Prime)
30-day return policy
Excellent selection
Competitive pricing
The HaloCam M1
After learning about the HaloCam M1 I reached out to our editor at wBW and asked if he would be interested in a review. He was very interested and gave me the green light to order the system. I mention this because less than two weeks after I placed my order he contacted me letting me know that the HaloCam rep reached out to him to see if we wanted to review the system.

Obviously, we told them that we already had begun the process but thanks for the offer. Frankly, in a case where we have a lesser-known vendor, I prefer the maker not to be aware the unit is being purchased for review so that I can be assured I’m getting the same experience as any other consumer.
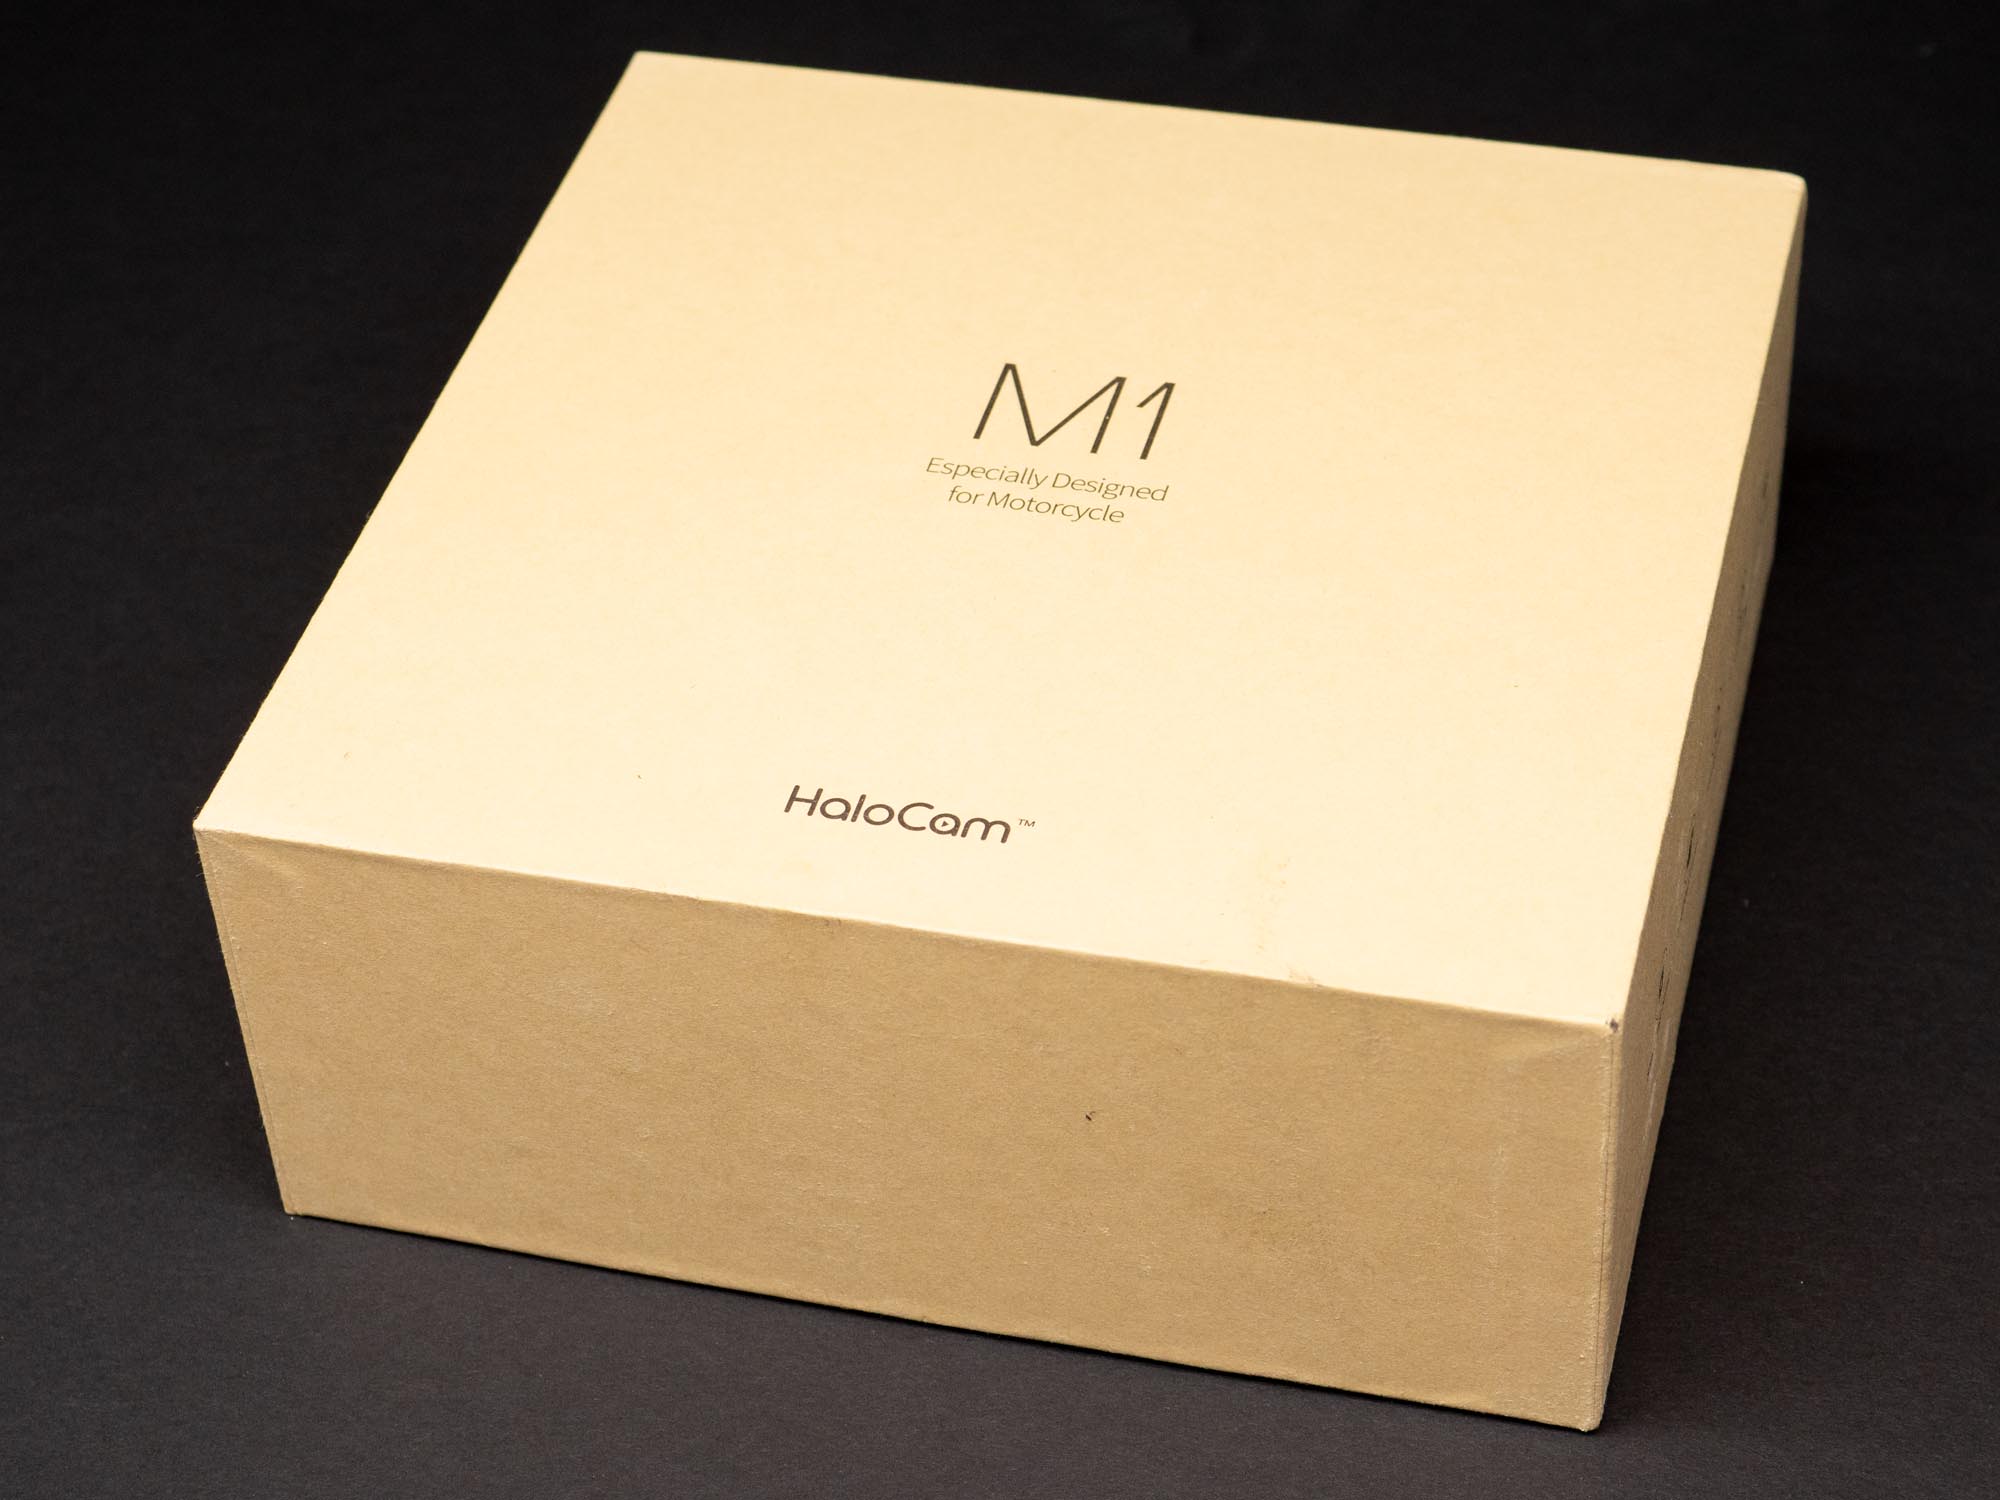
Presentation is Everything
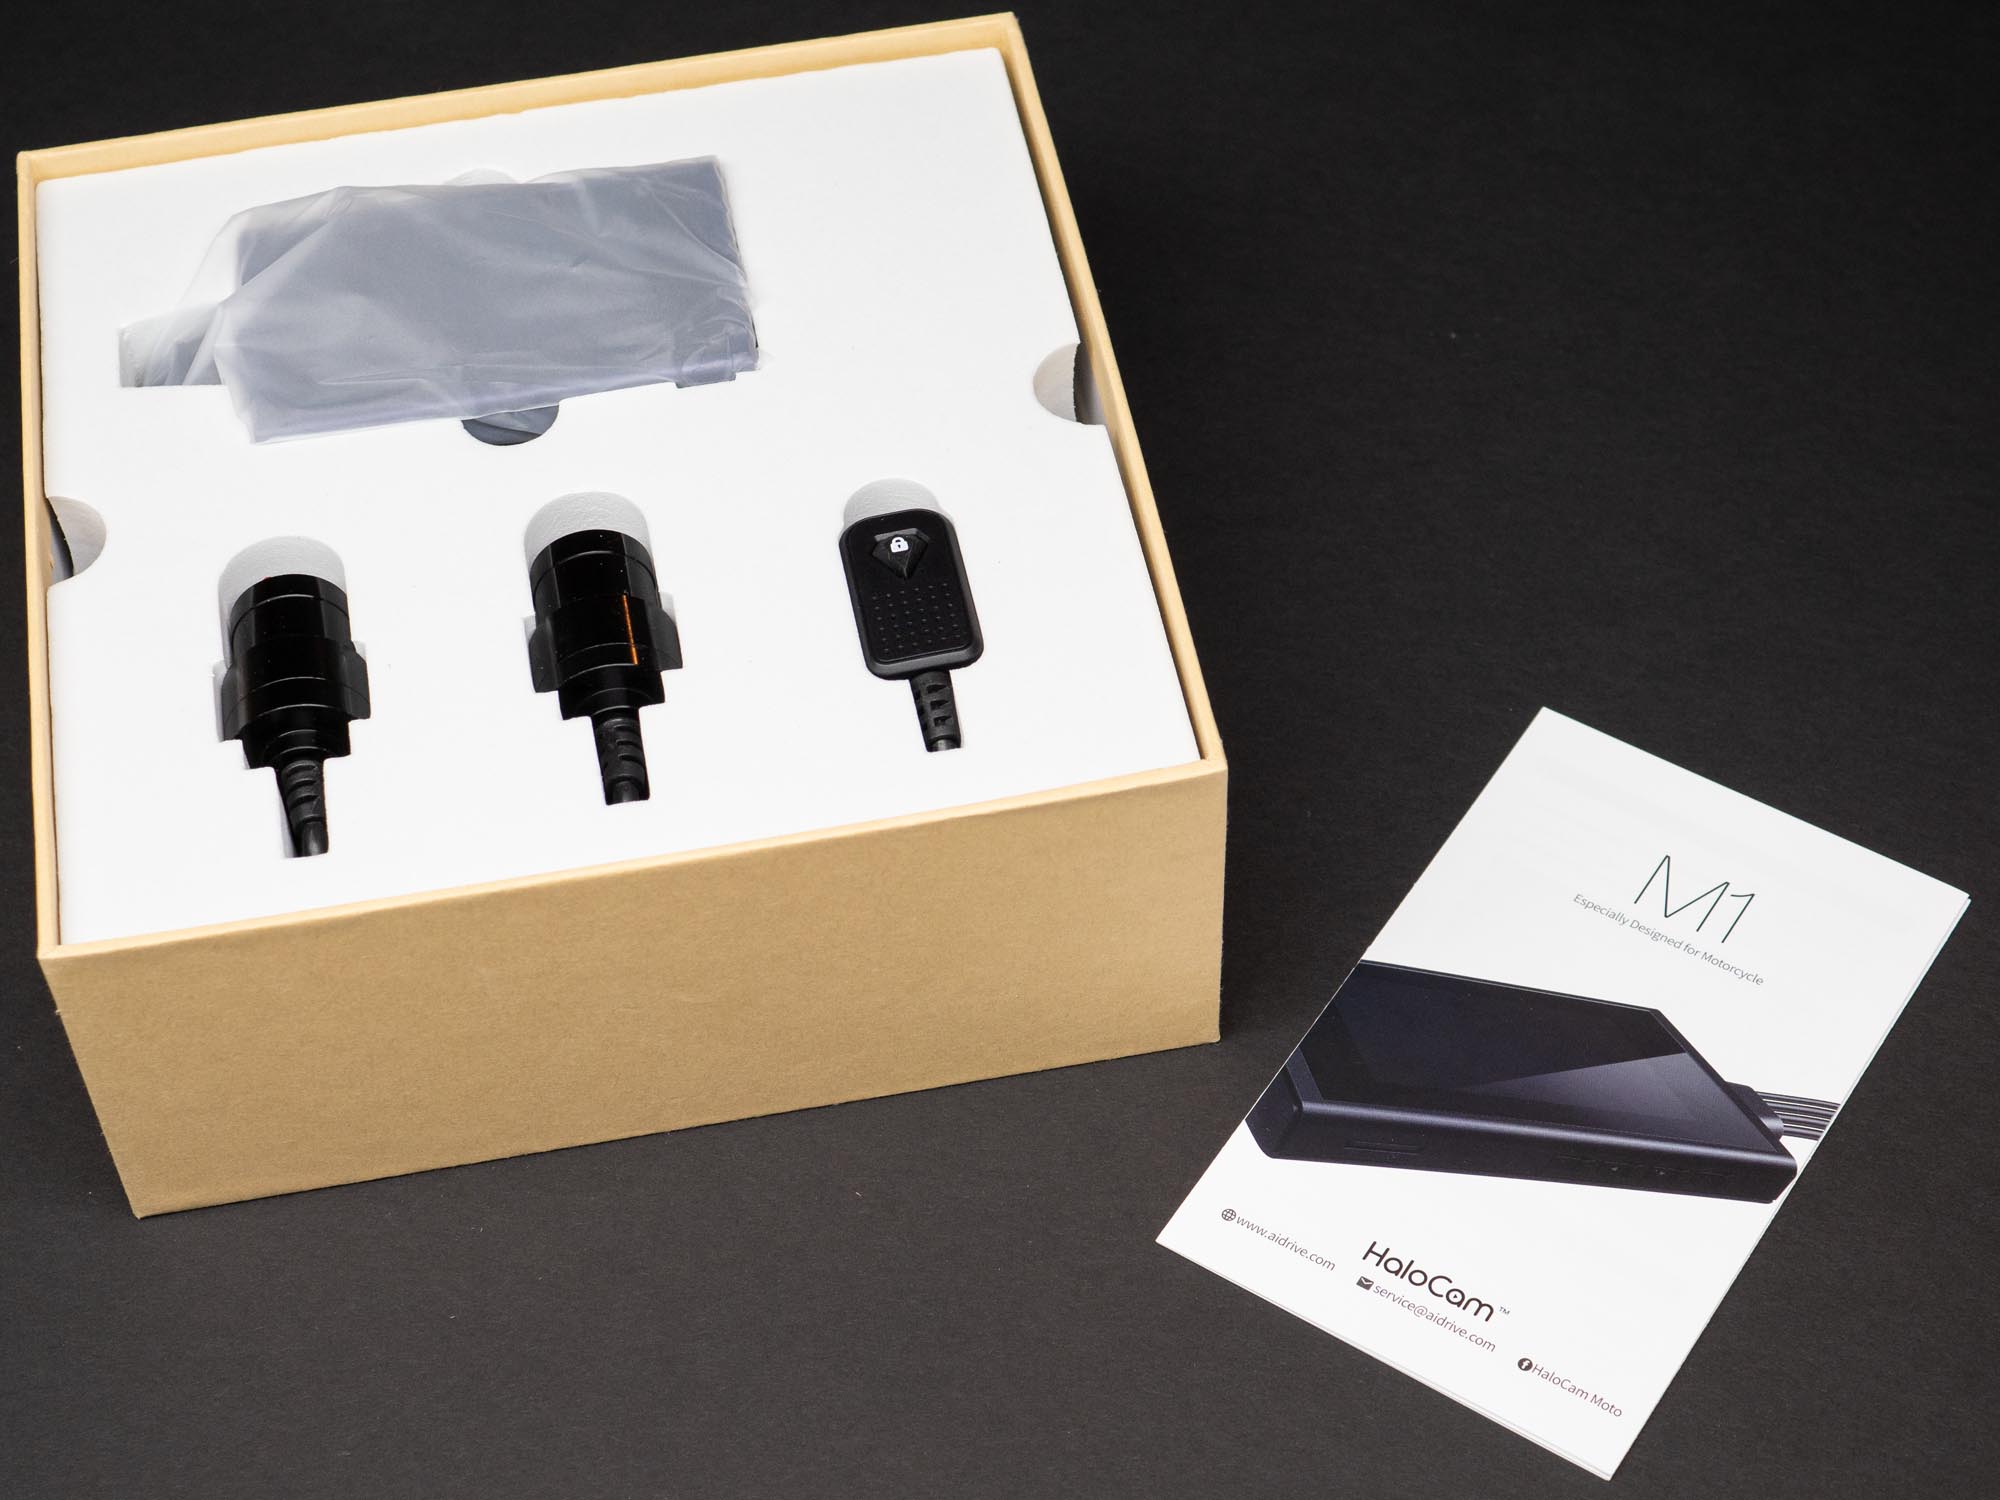
Once I received my box from Amazon containing the HaloCam system and opened it, I was impressed. Not by the camera system but just by the box itself. Instead of the plain white box I expected, the system came in a nice looking brown box with some nice printing and design on it.
Opening the box presented me with a white foam interior cut to fit the major parts of the system. Everything had its place and was well packed in a thoughtful design. Their marketing team certainly wanted to make a nice impression and it worked. Looks aren’t everything and despite the adage “presentation is everything” – results are much more important than a pretty box. Before we get to the results though, let’s see what’s in that box.
What’s in the Box
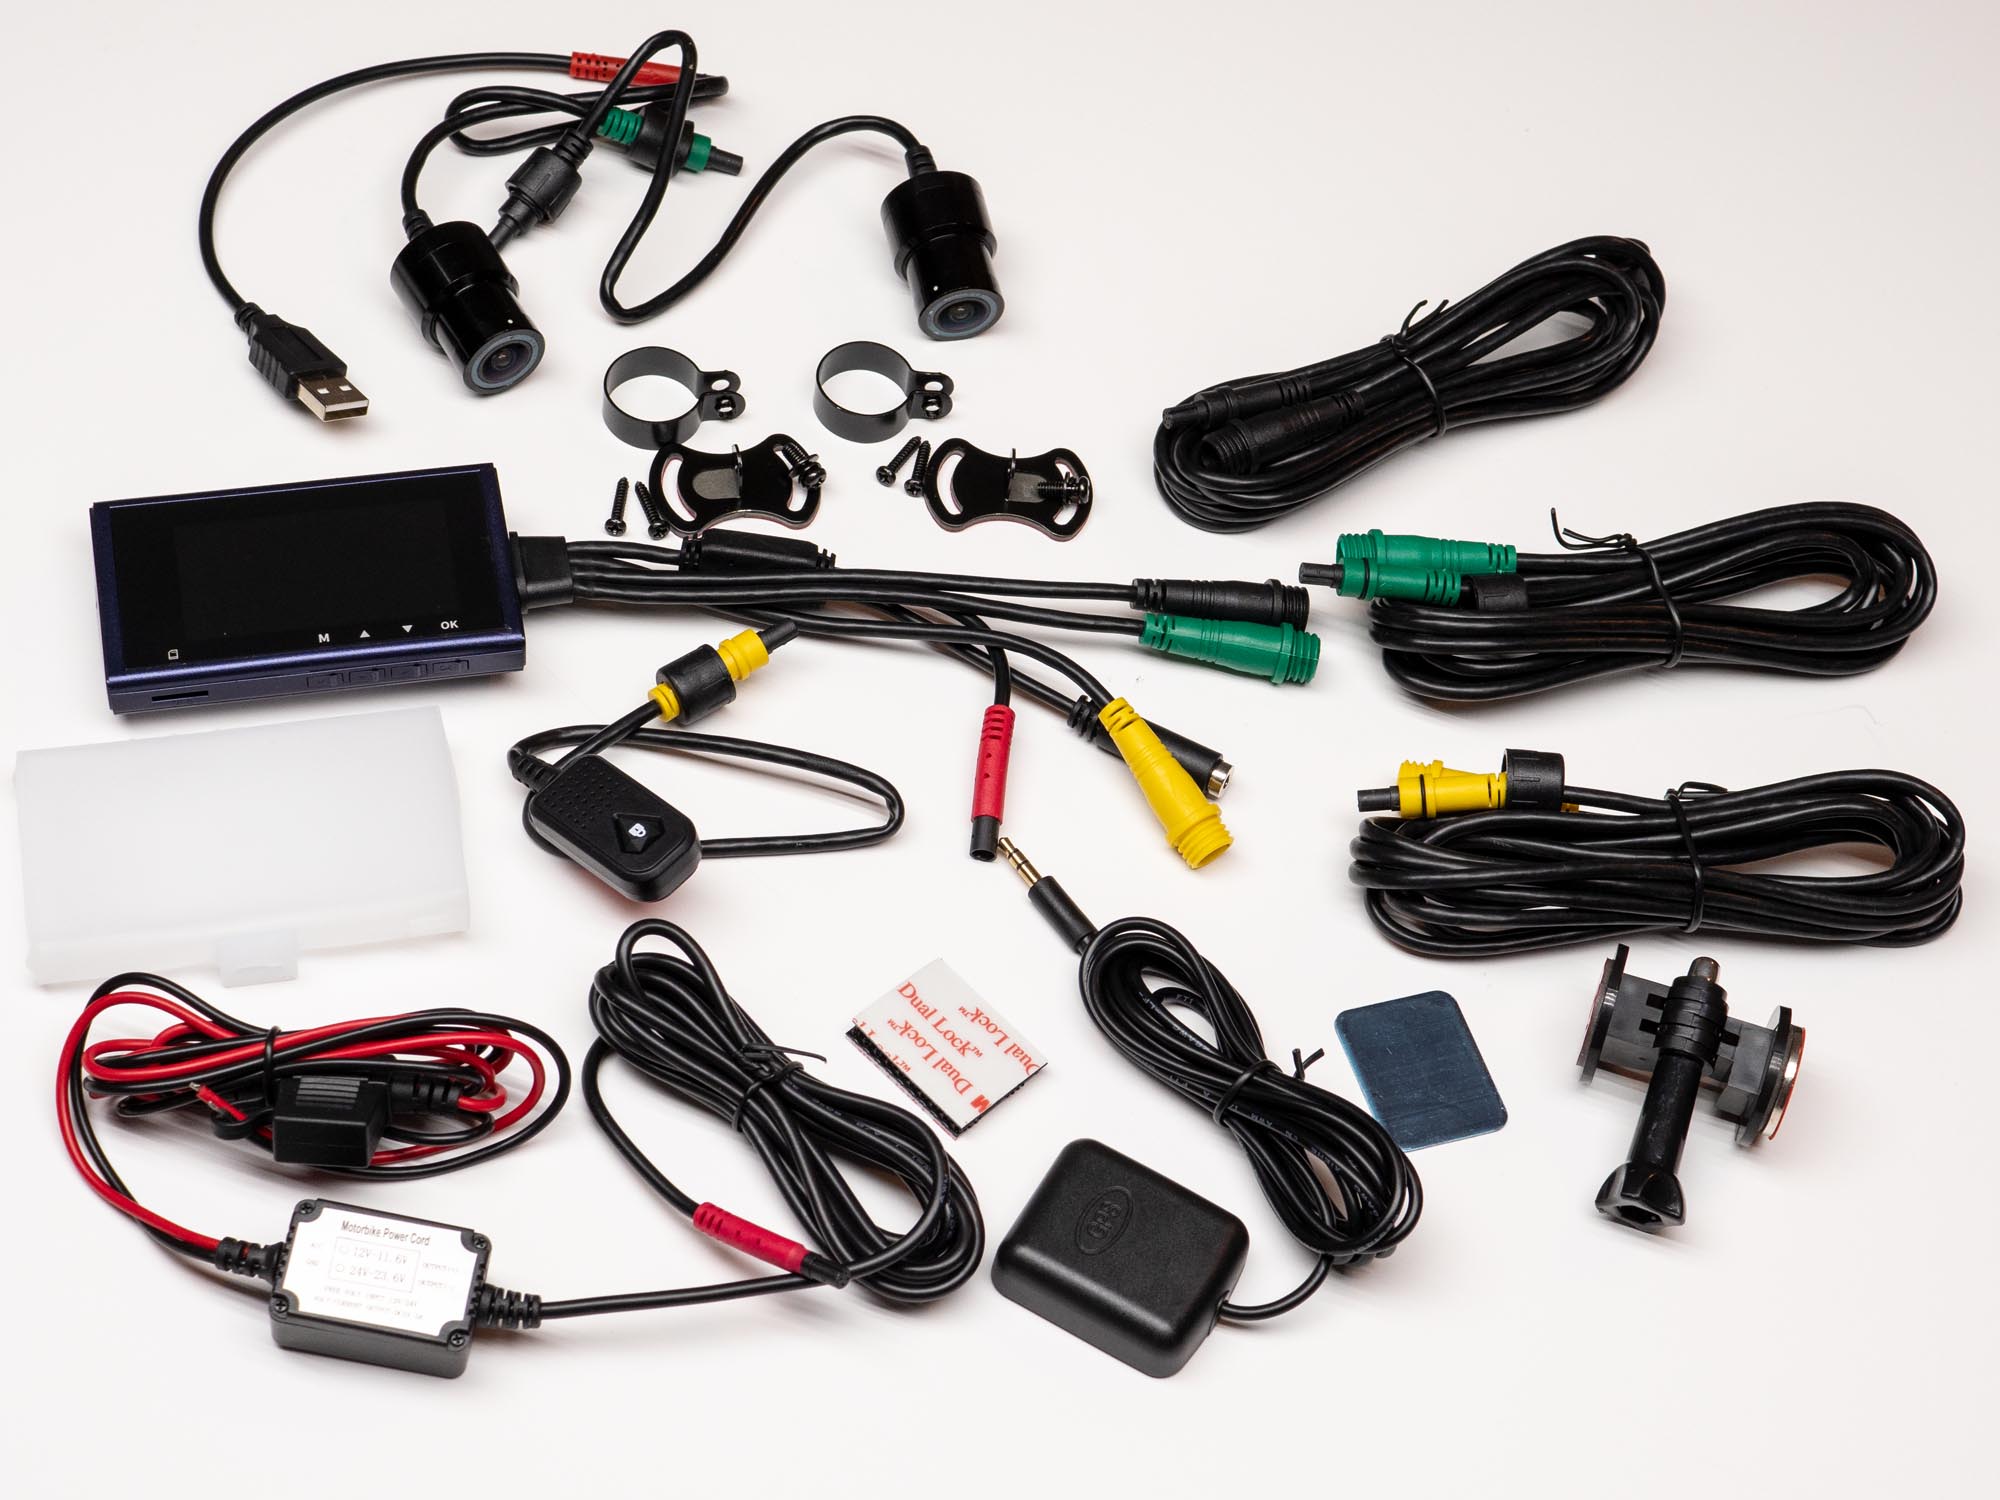
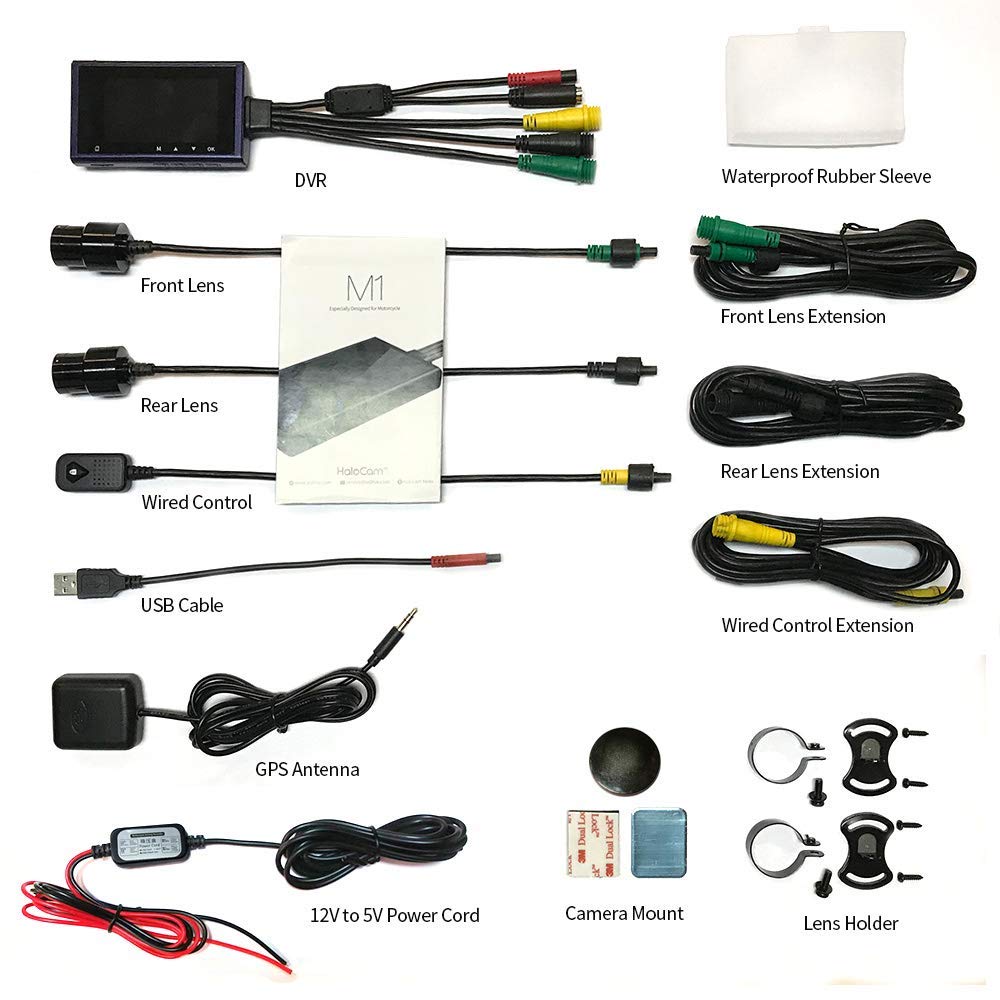
The contents of the packaging provide pretty much everything required to completely install the system (few more zip ties would have been nice). However, zip ties notwithstanding, the system is comprehensive. Here’s the rundown:
- The DVR Module
- (2) Cameras
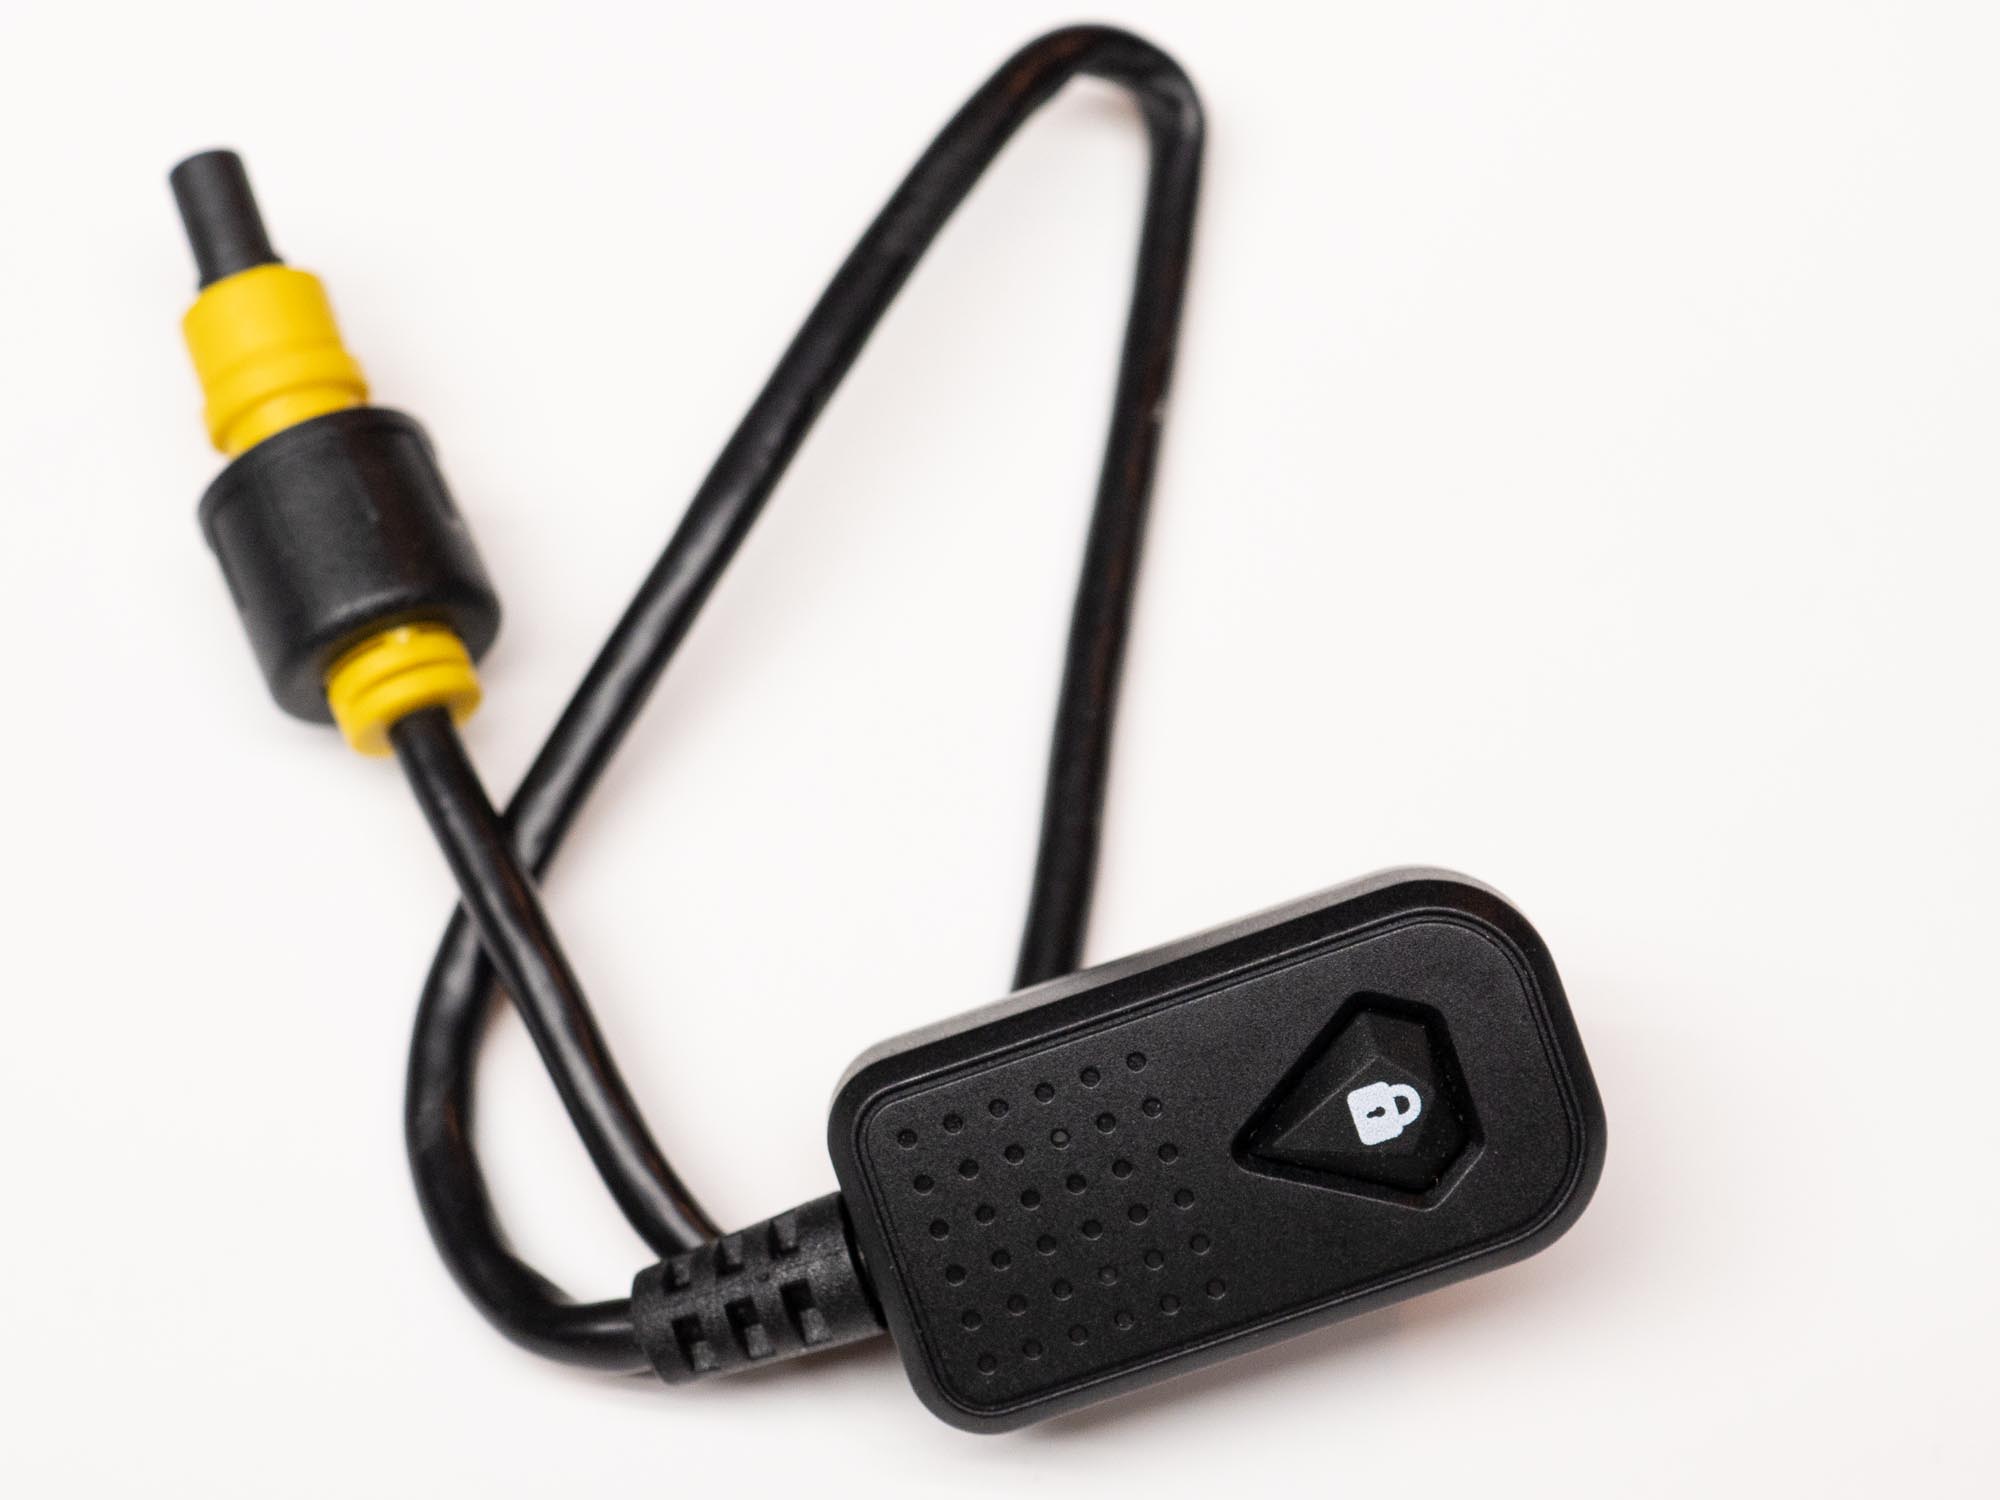
- A remote switch
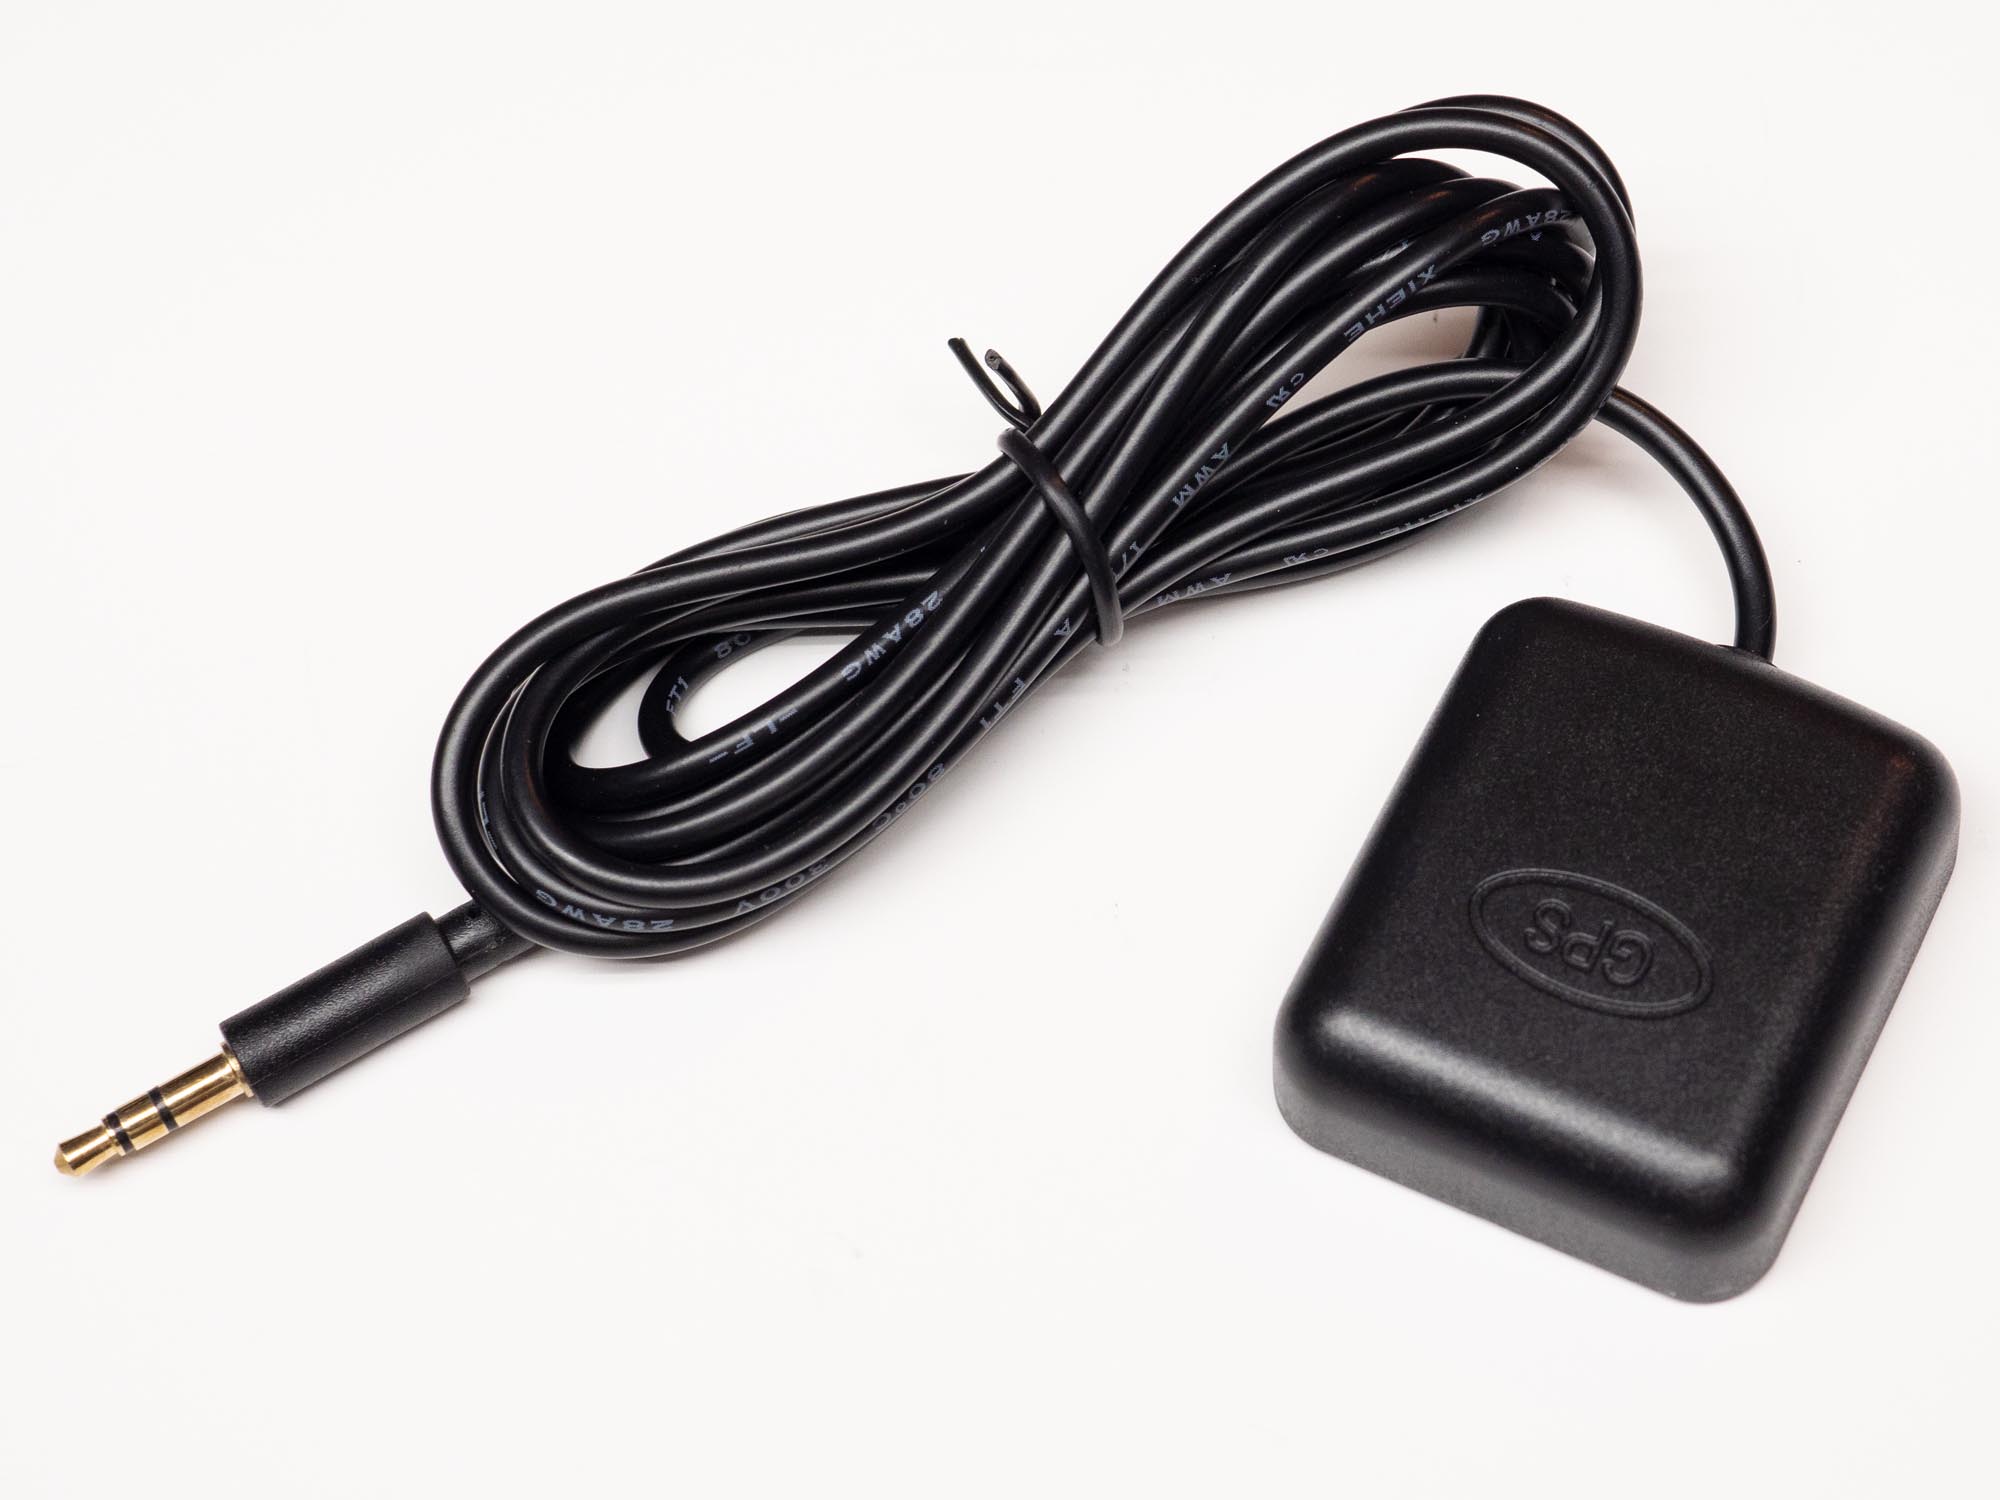
- A GPS antennae
- Camera mounting brackets (with screws)
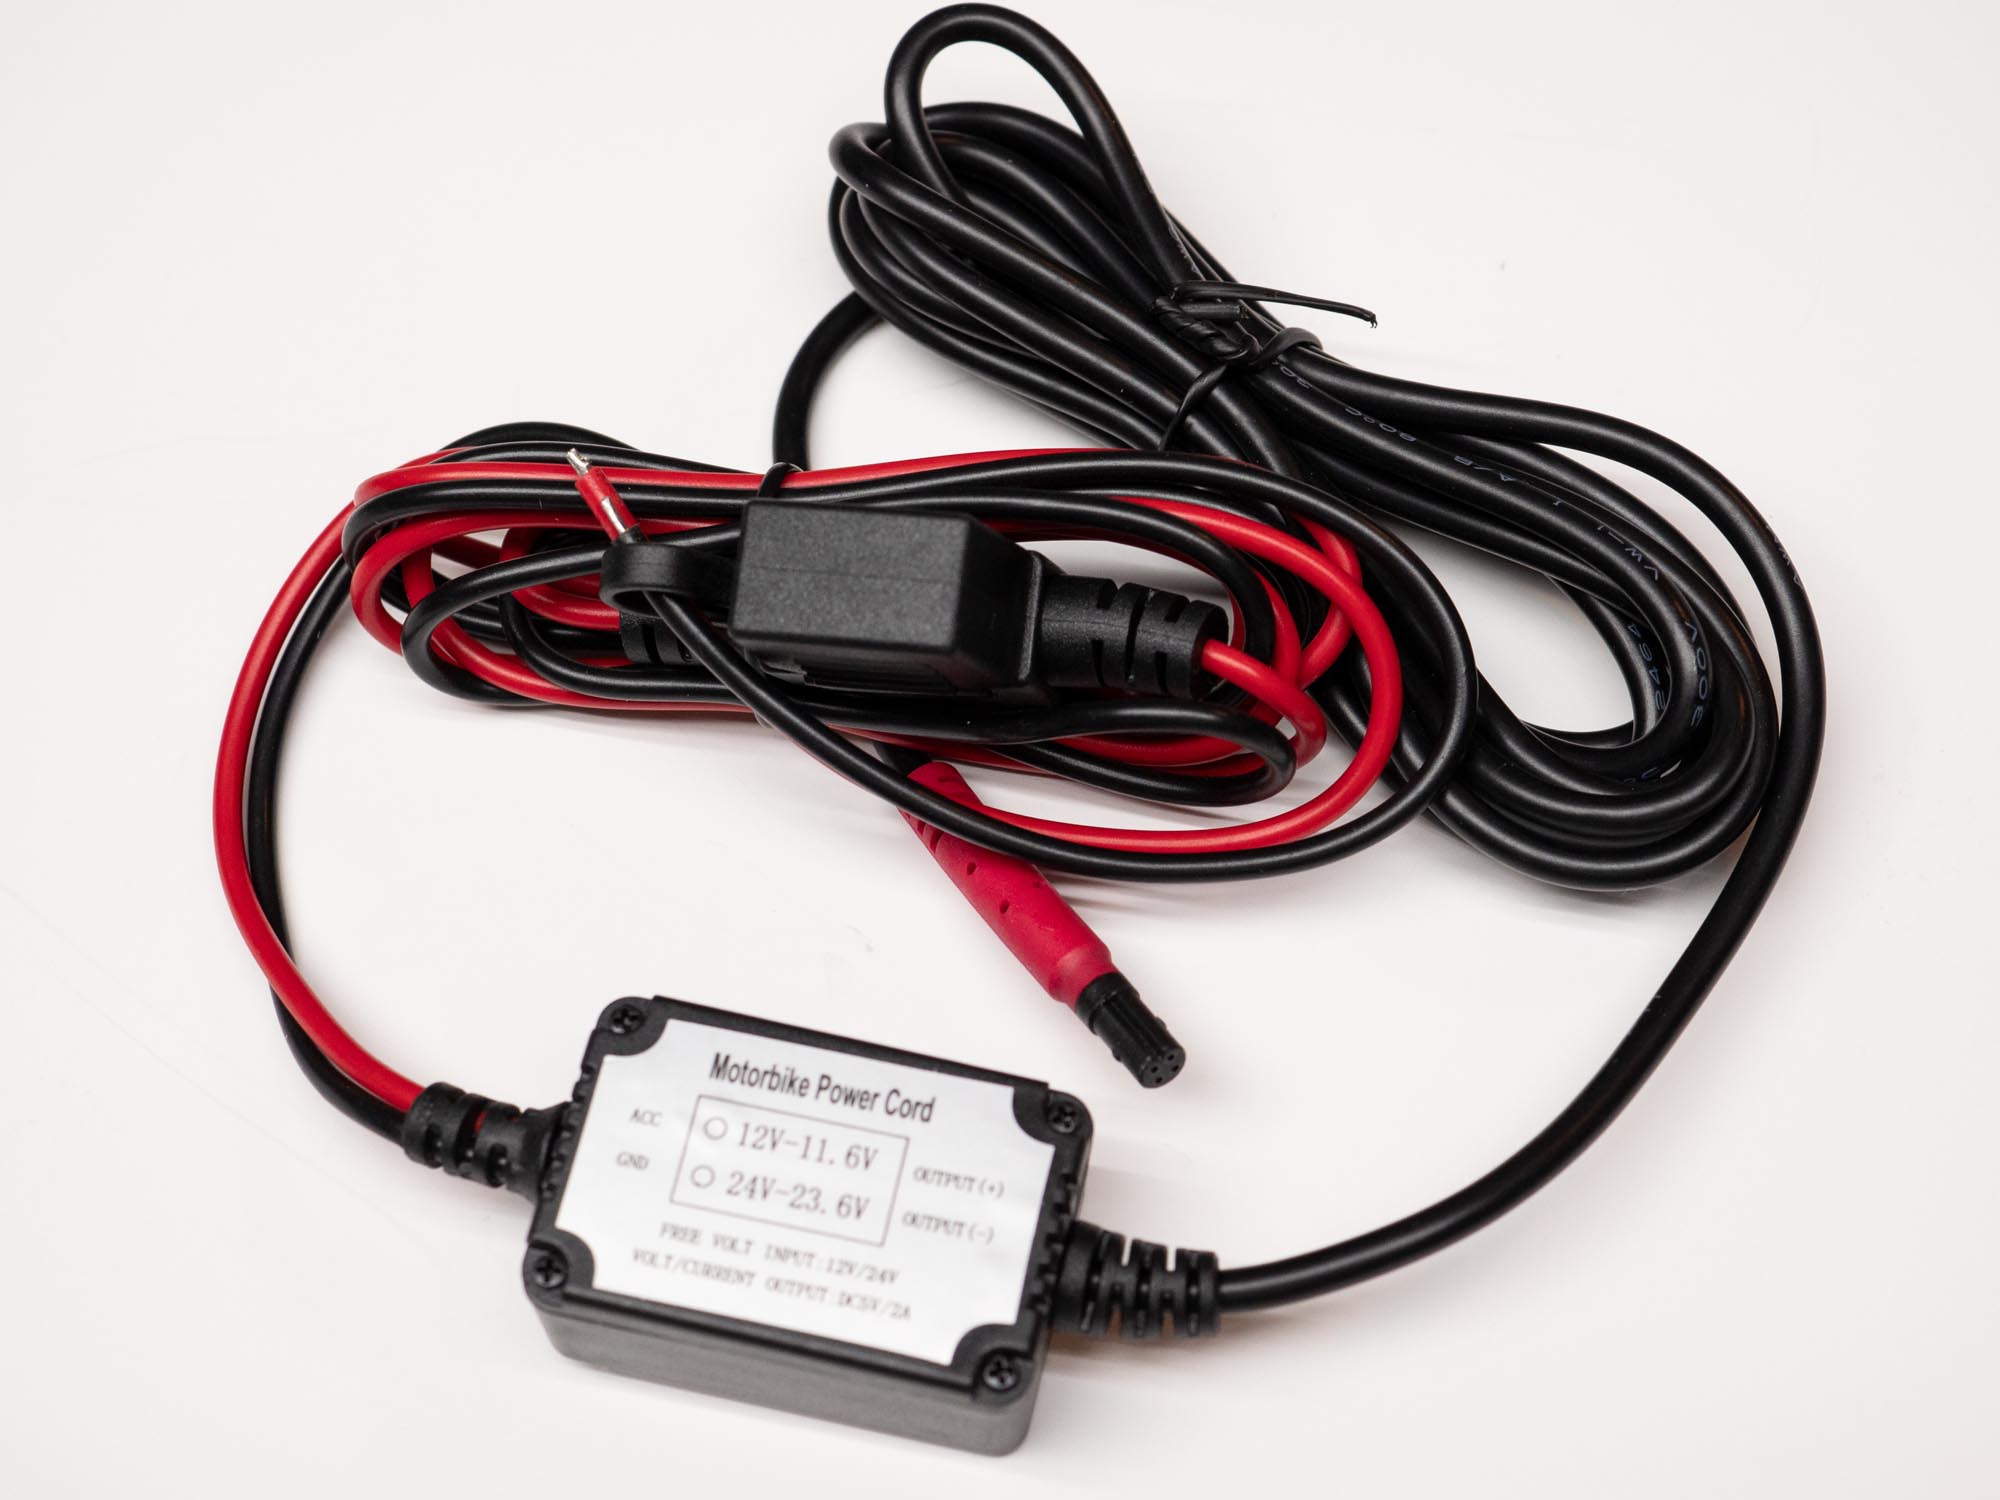
- The power supply module
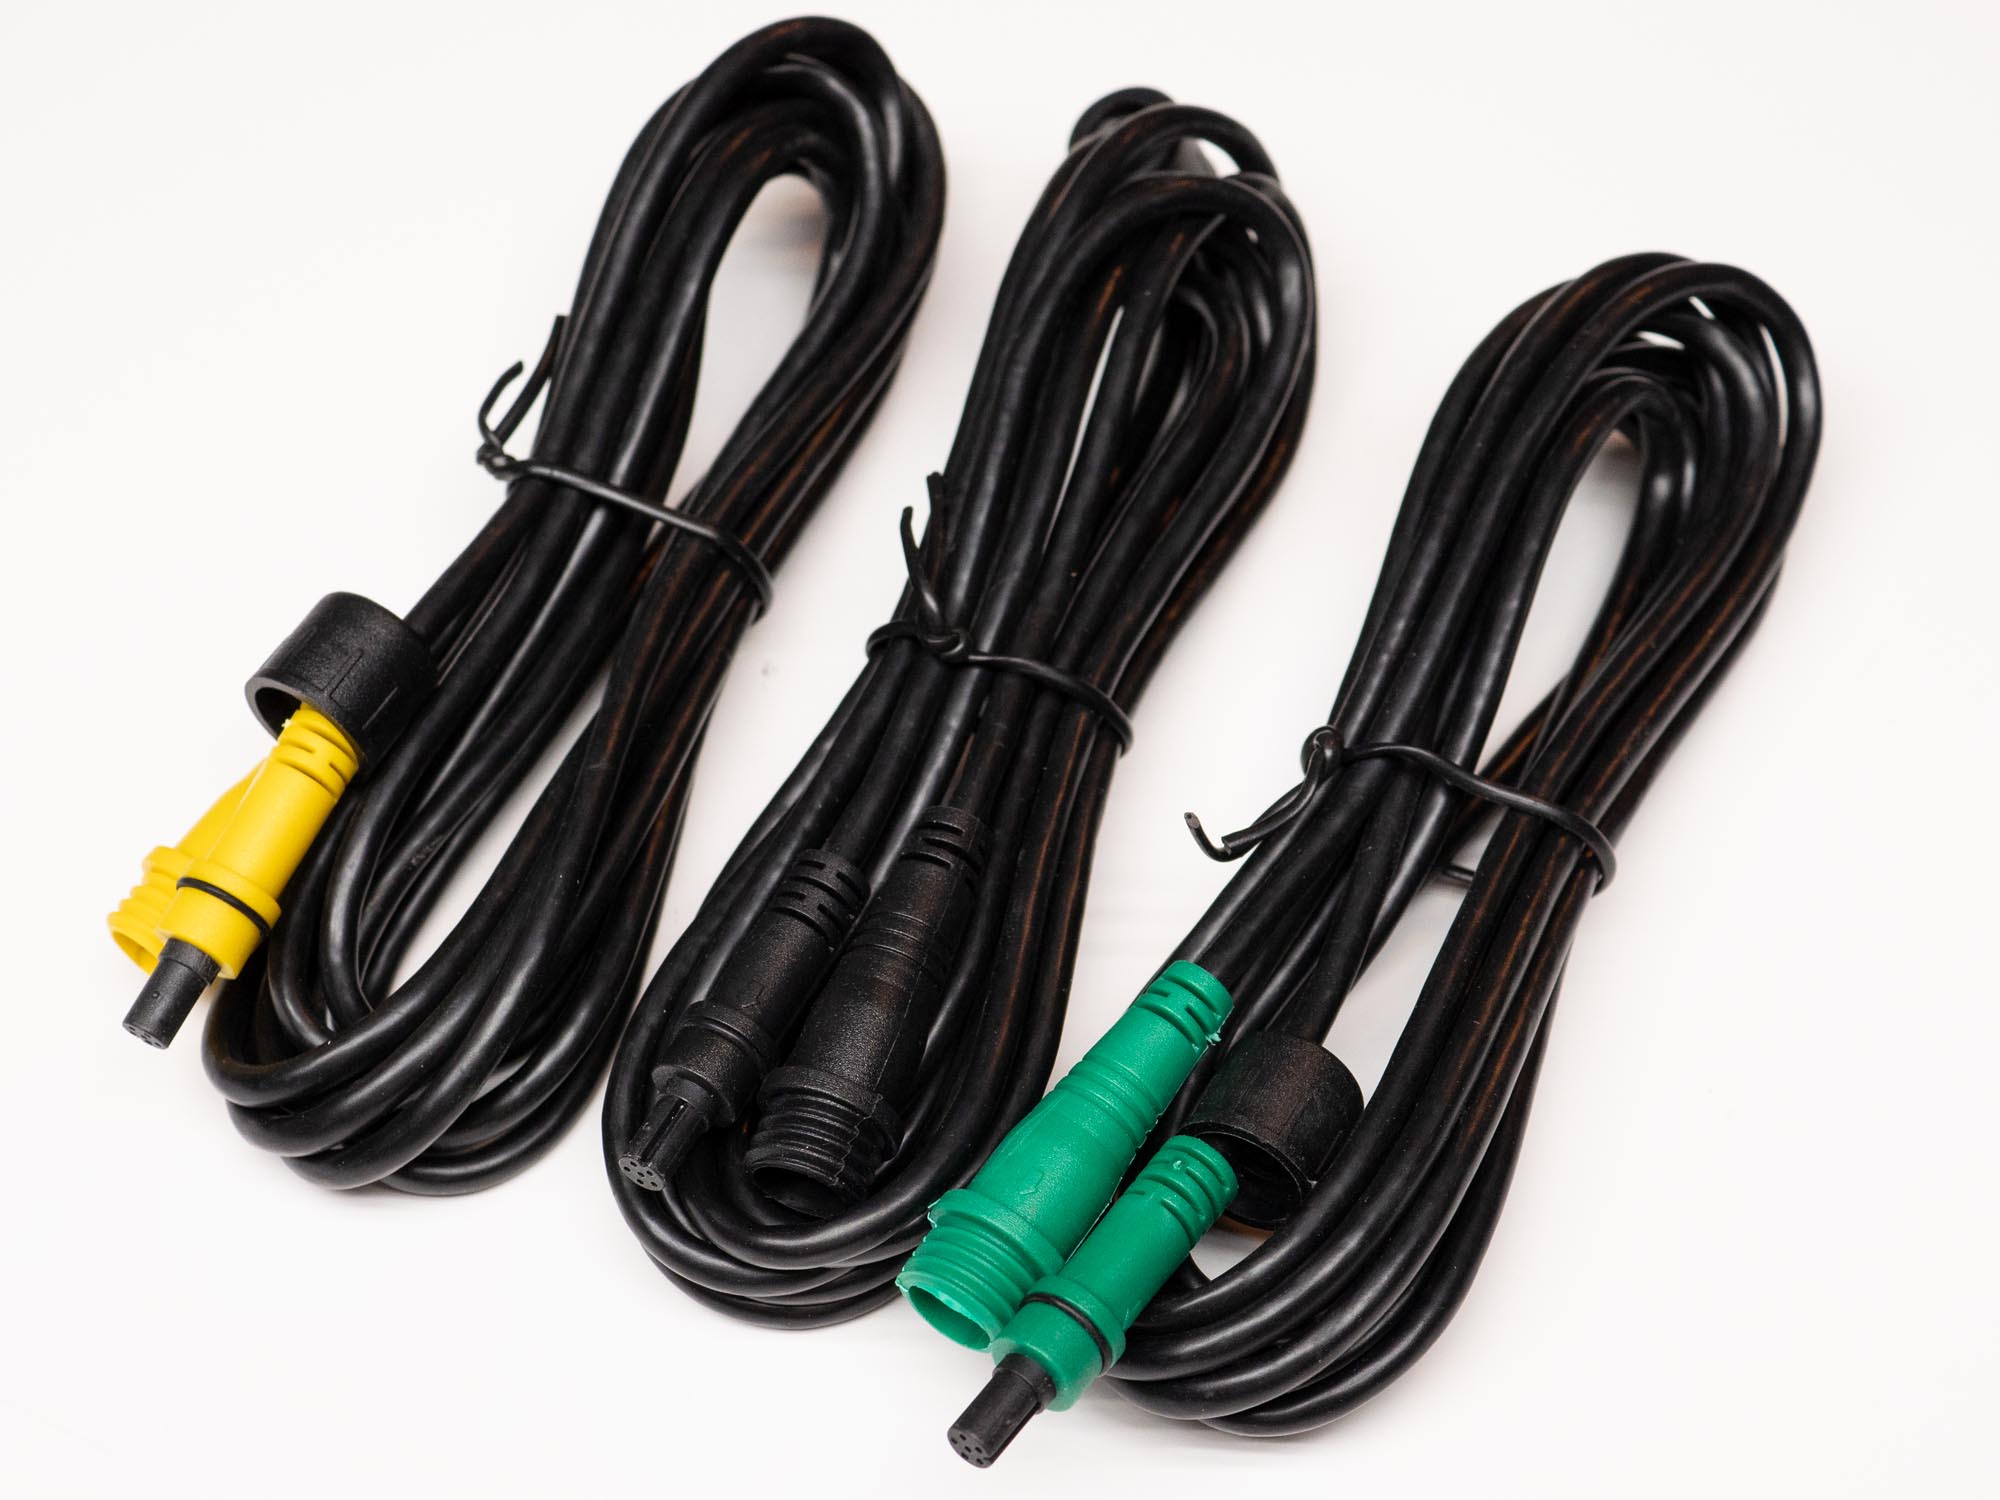
- (3) Extension cables
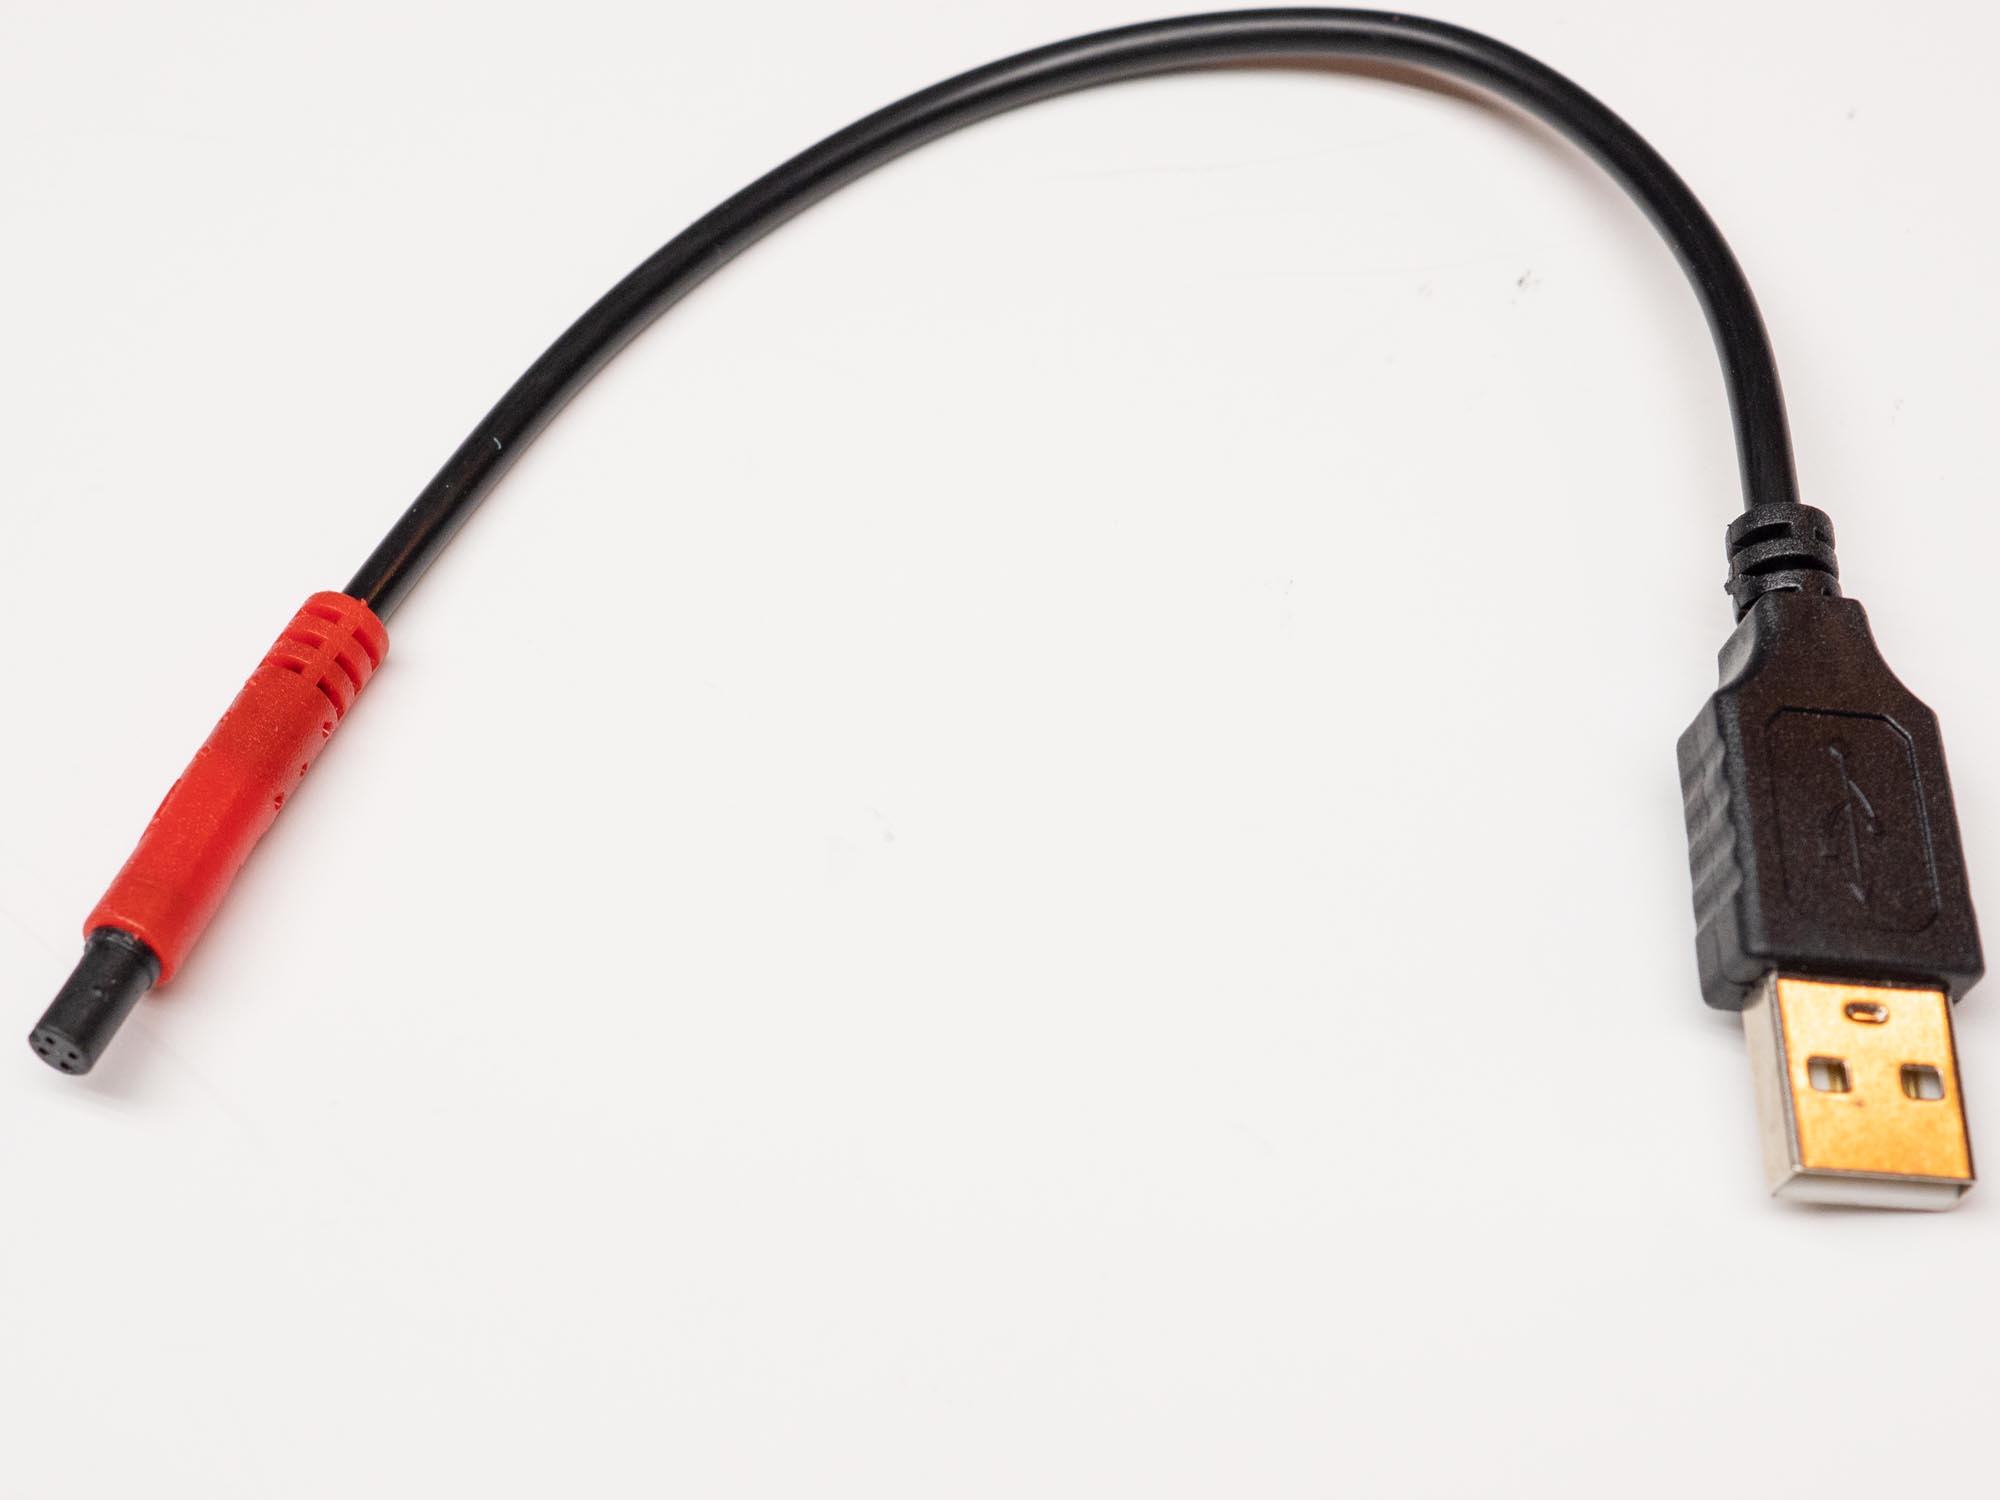
- A USB power supply adapter
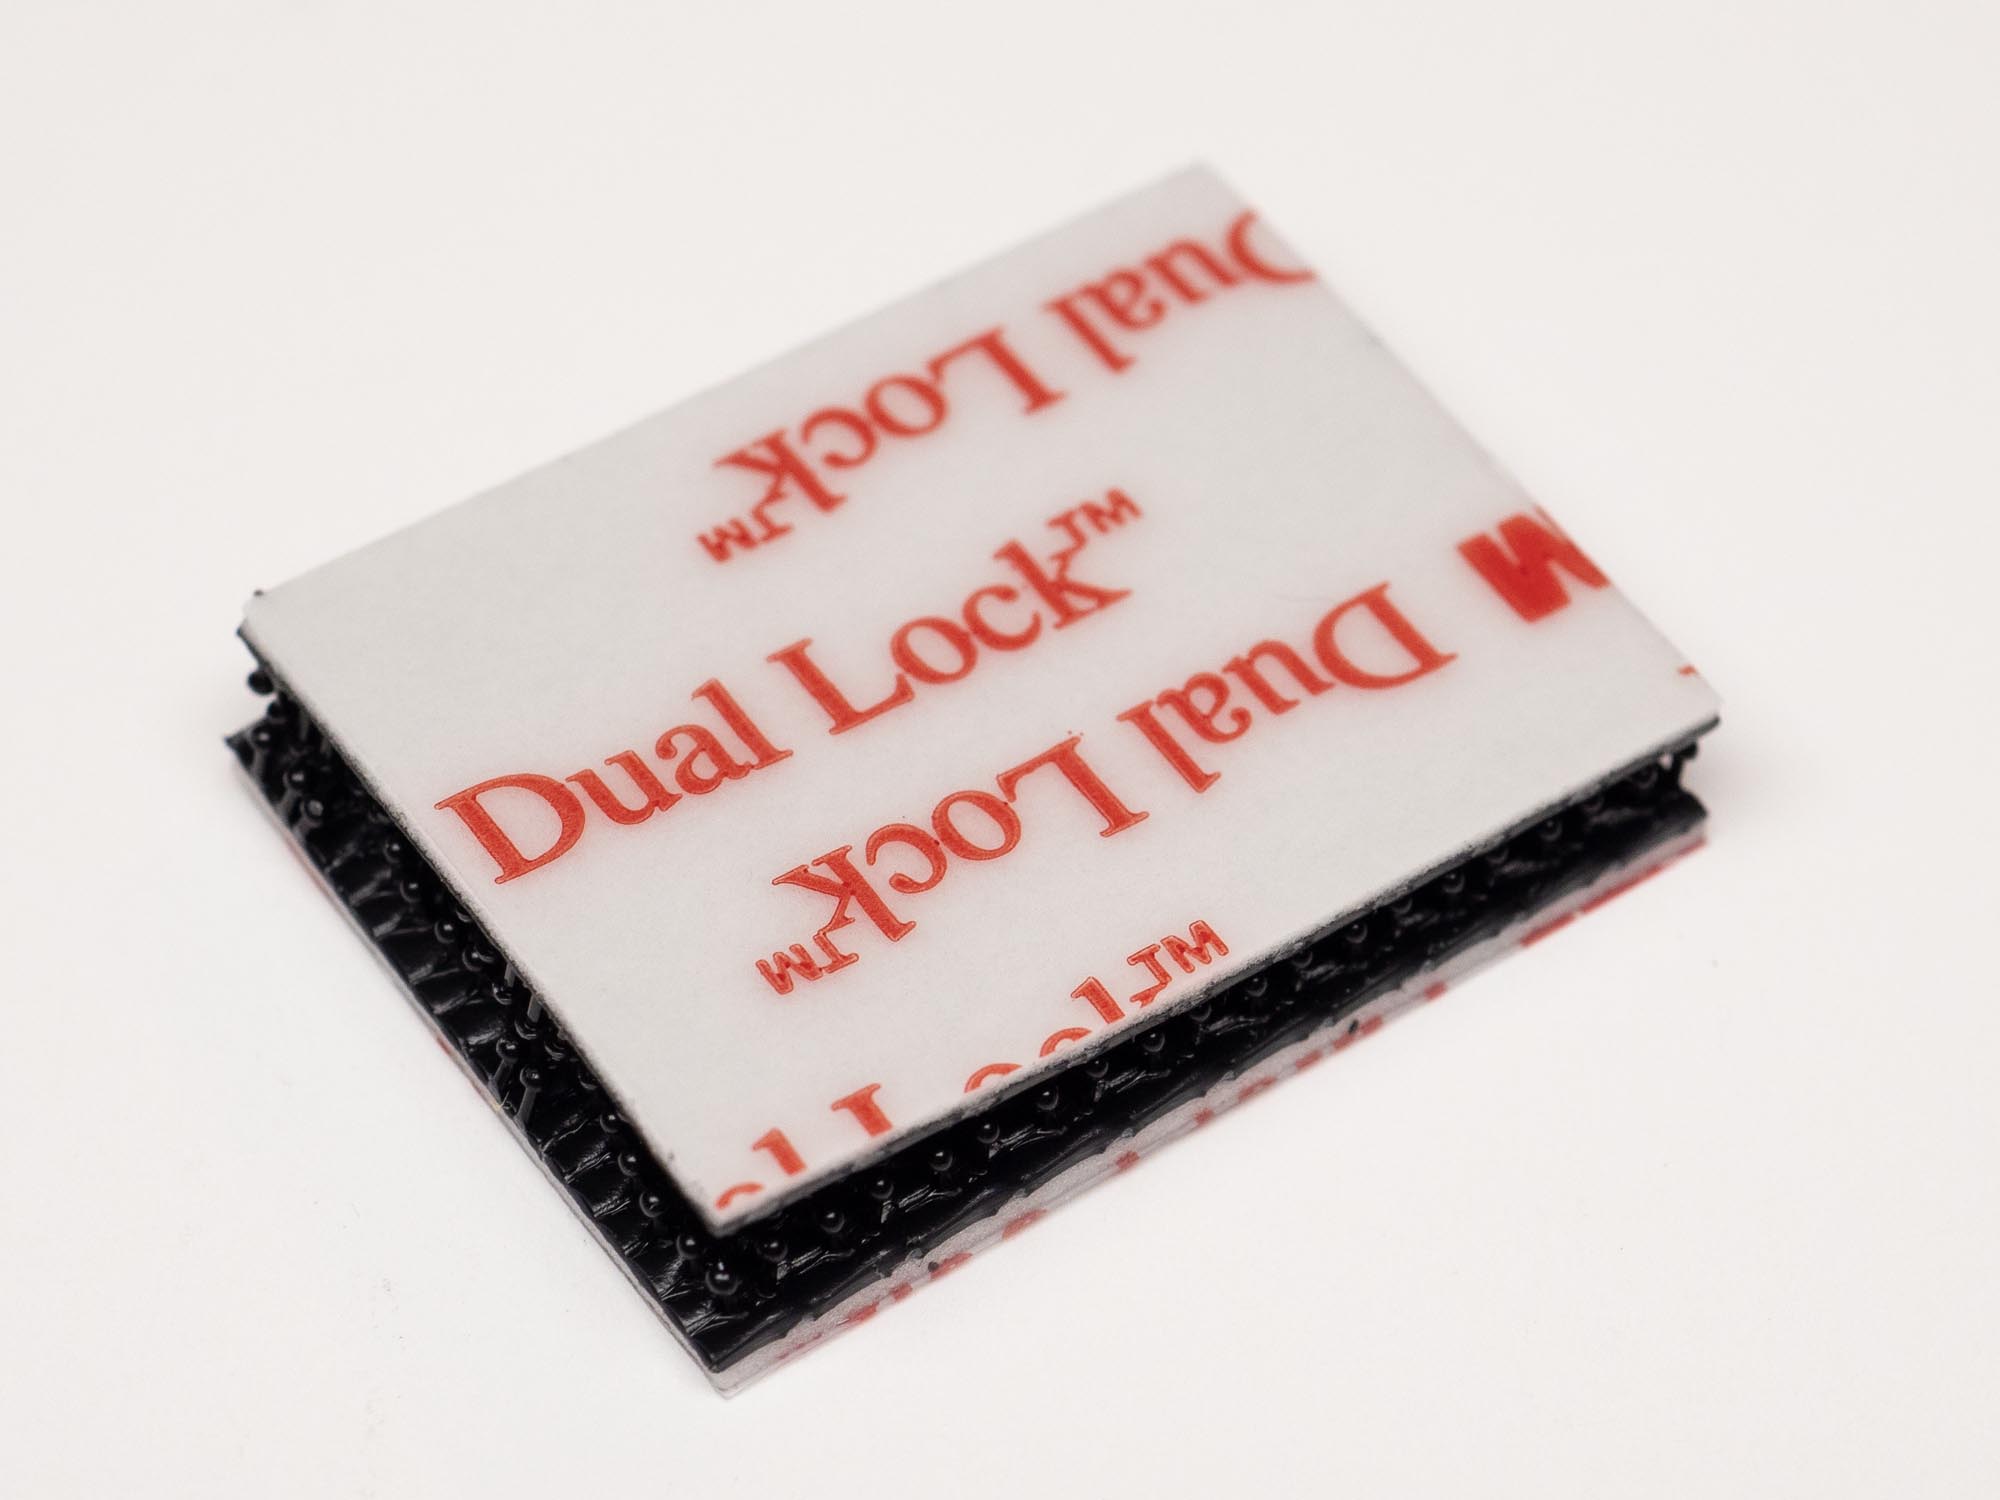
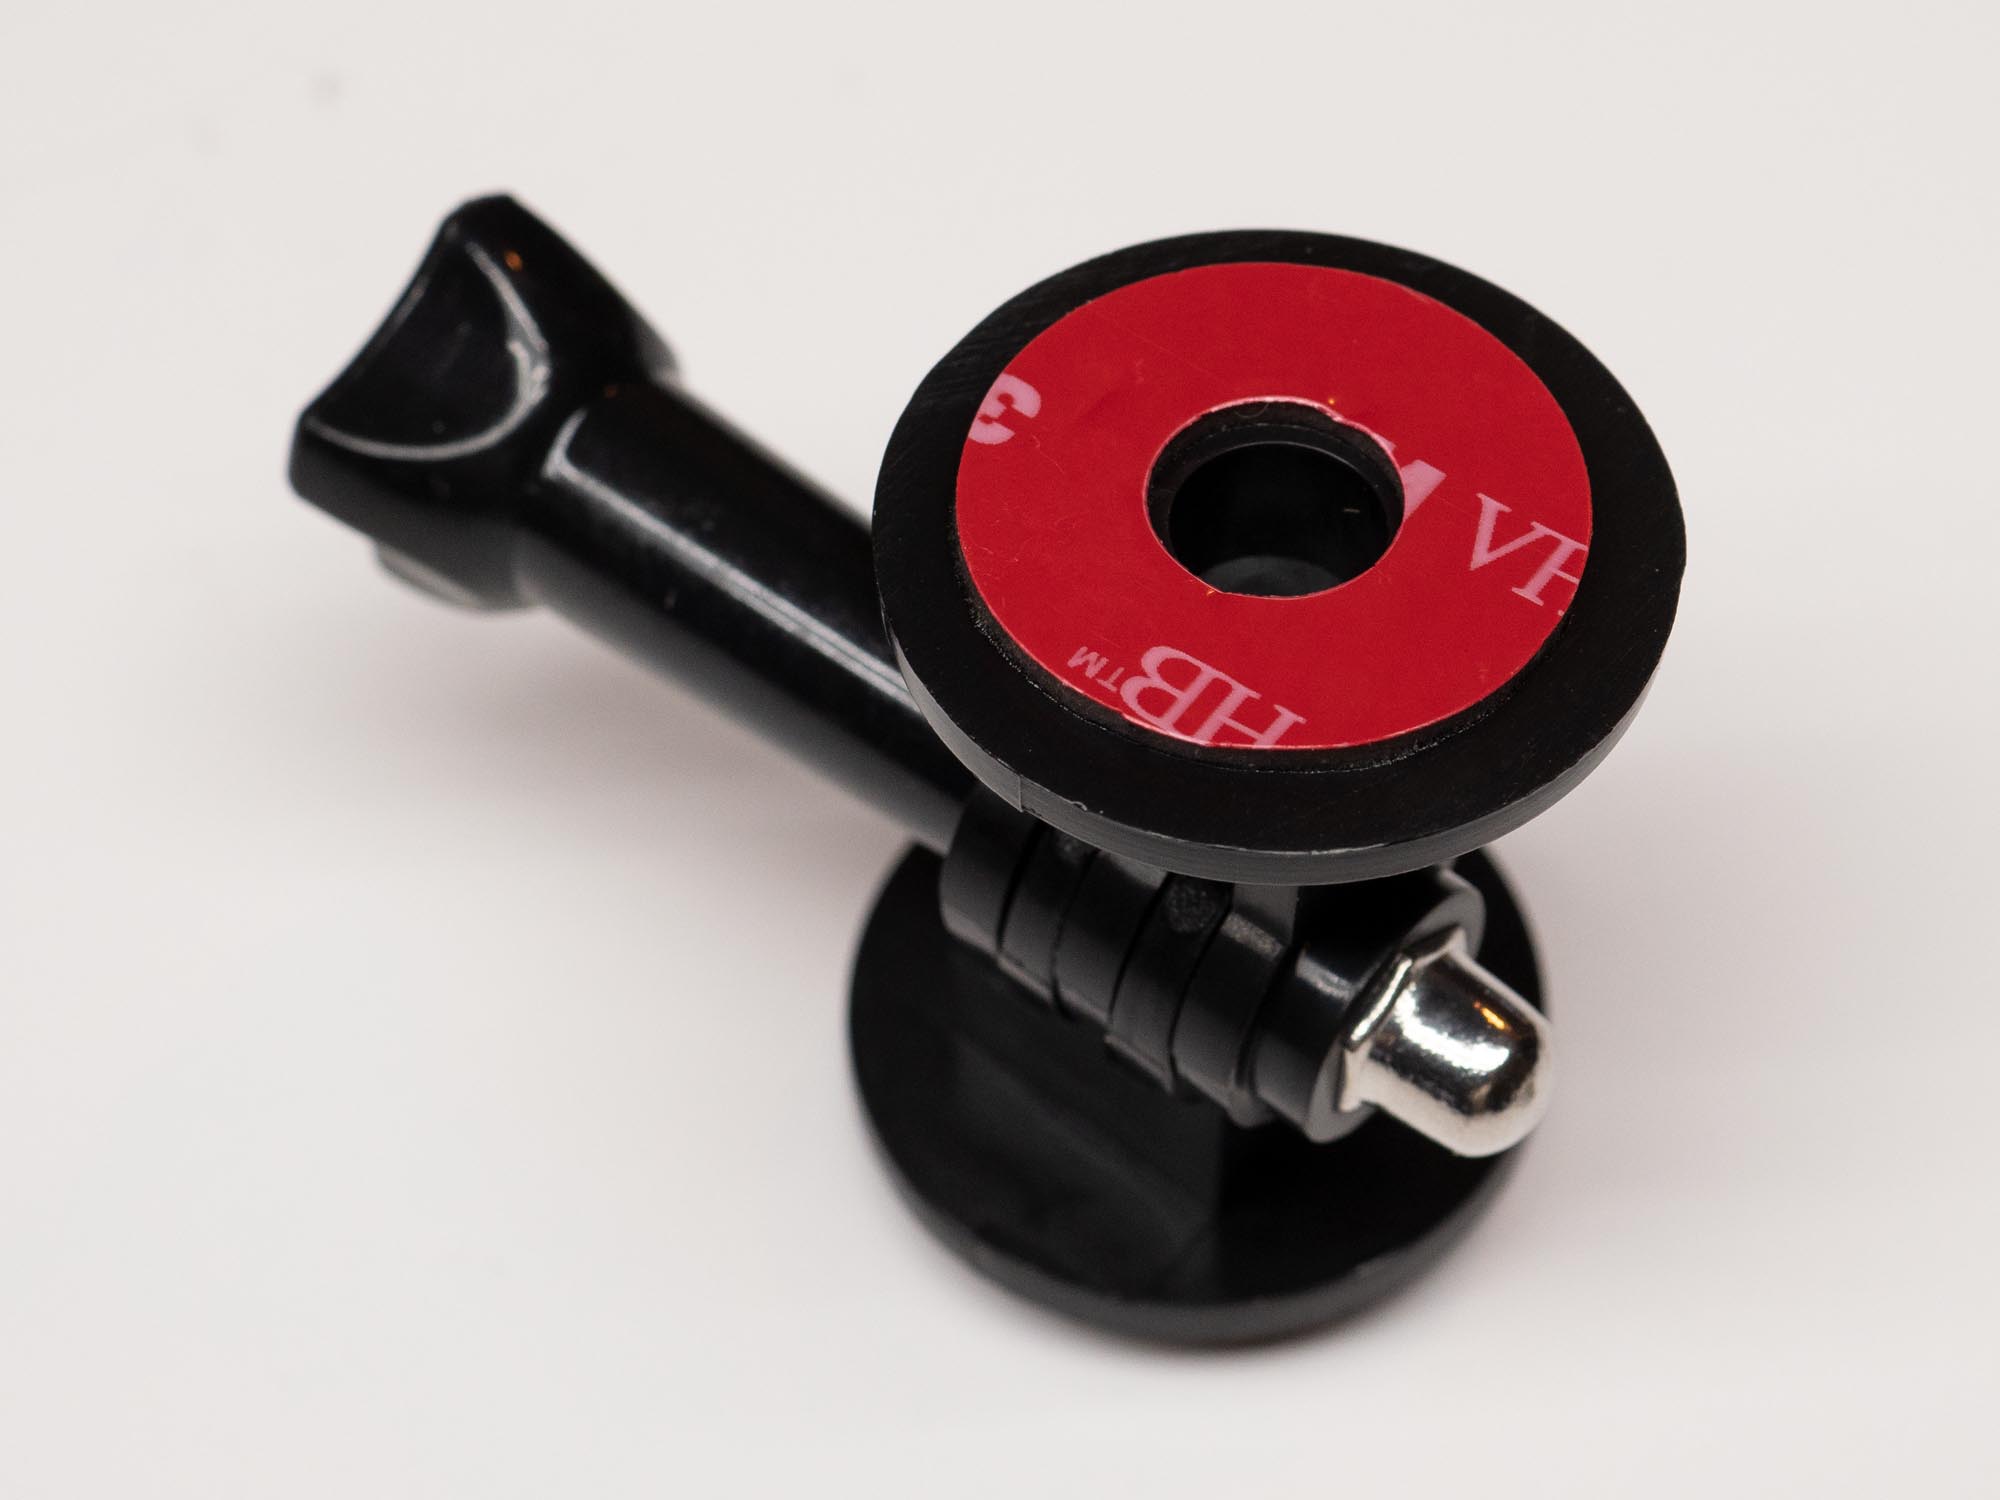
- A magnetic mount for the DVR module
- 3M dual lock fastener pad
- A rubber cover for the DVR module
- A printed quick start guide
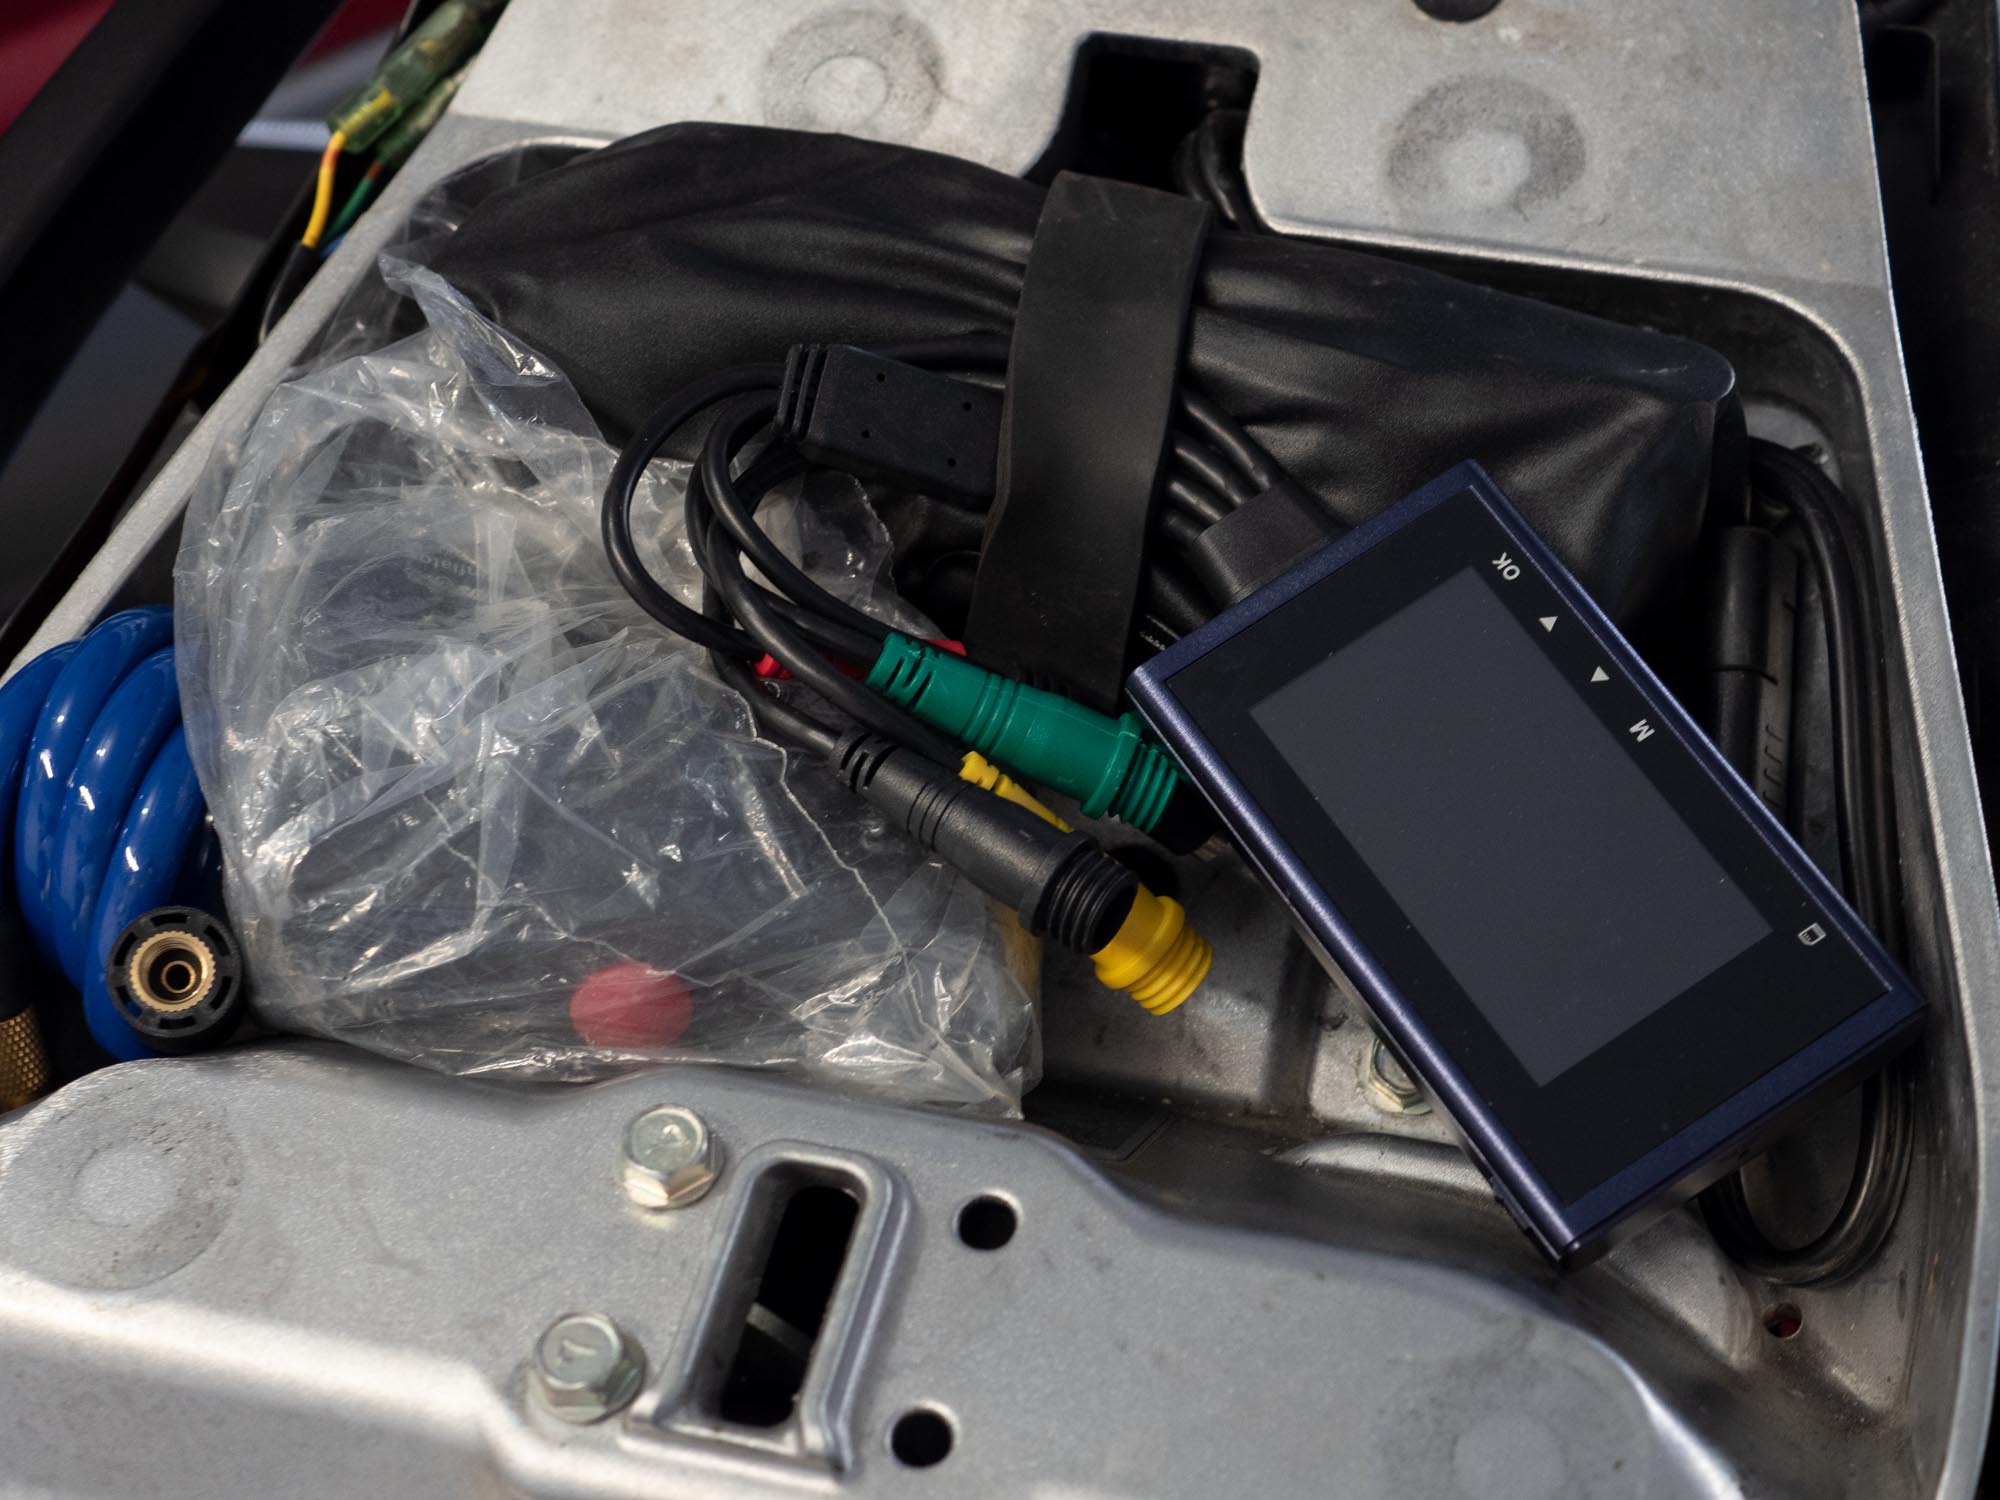
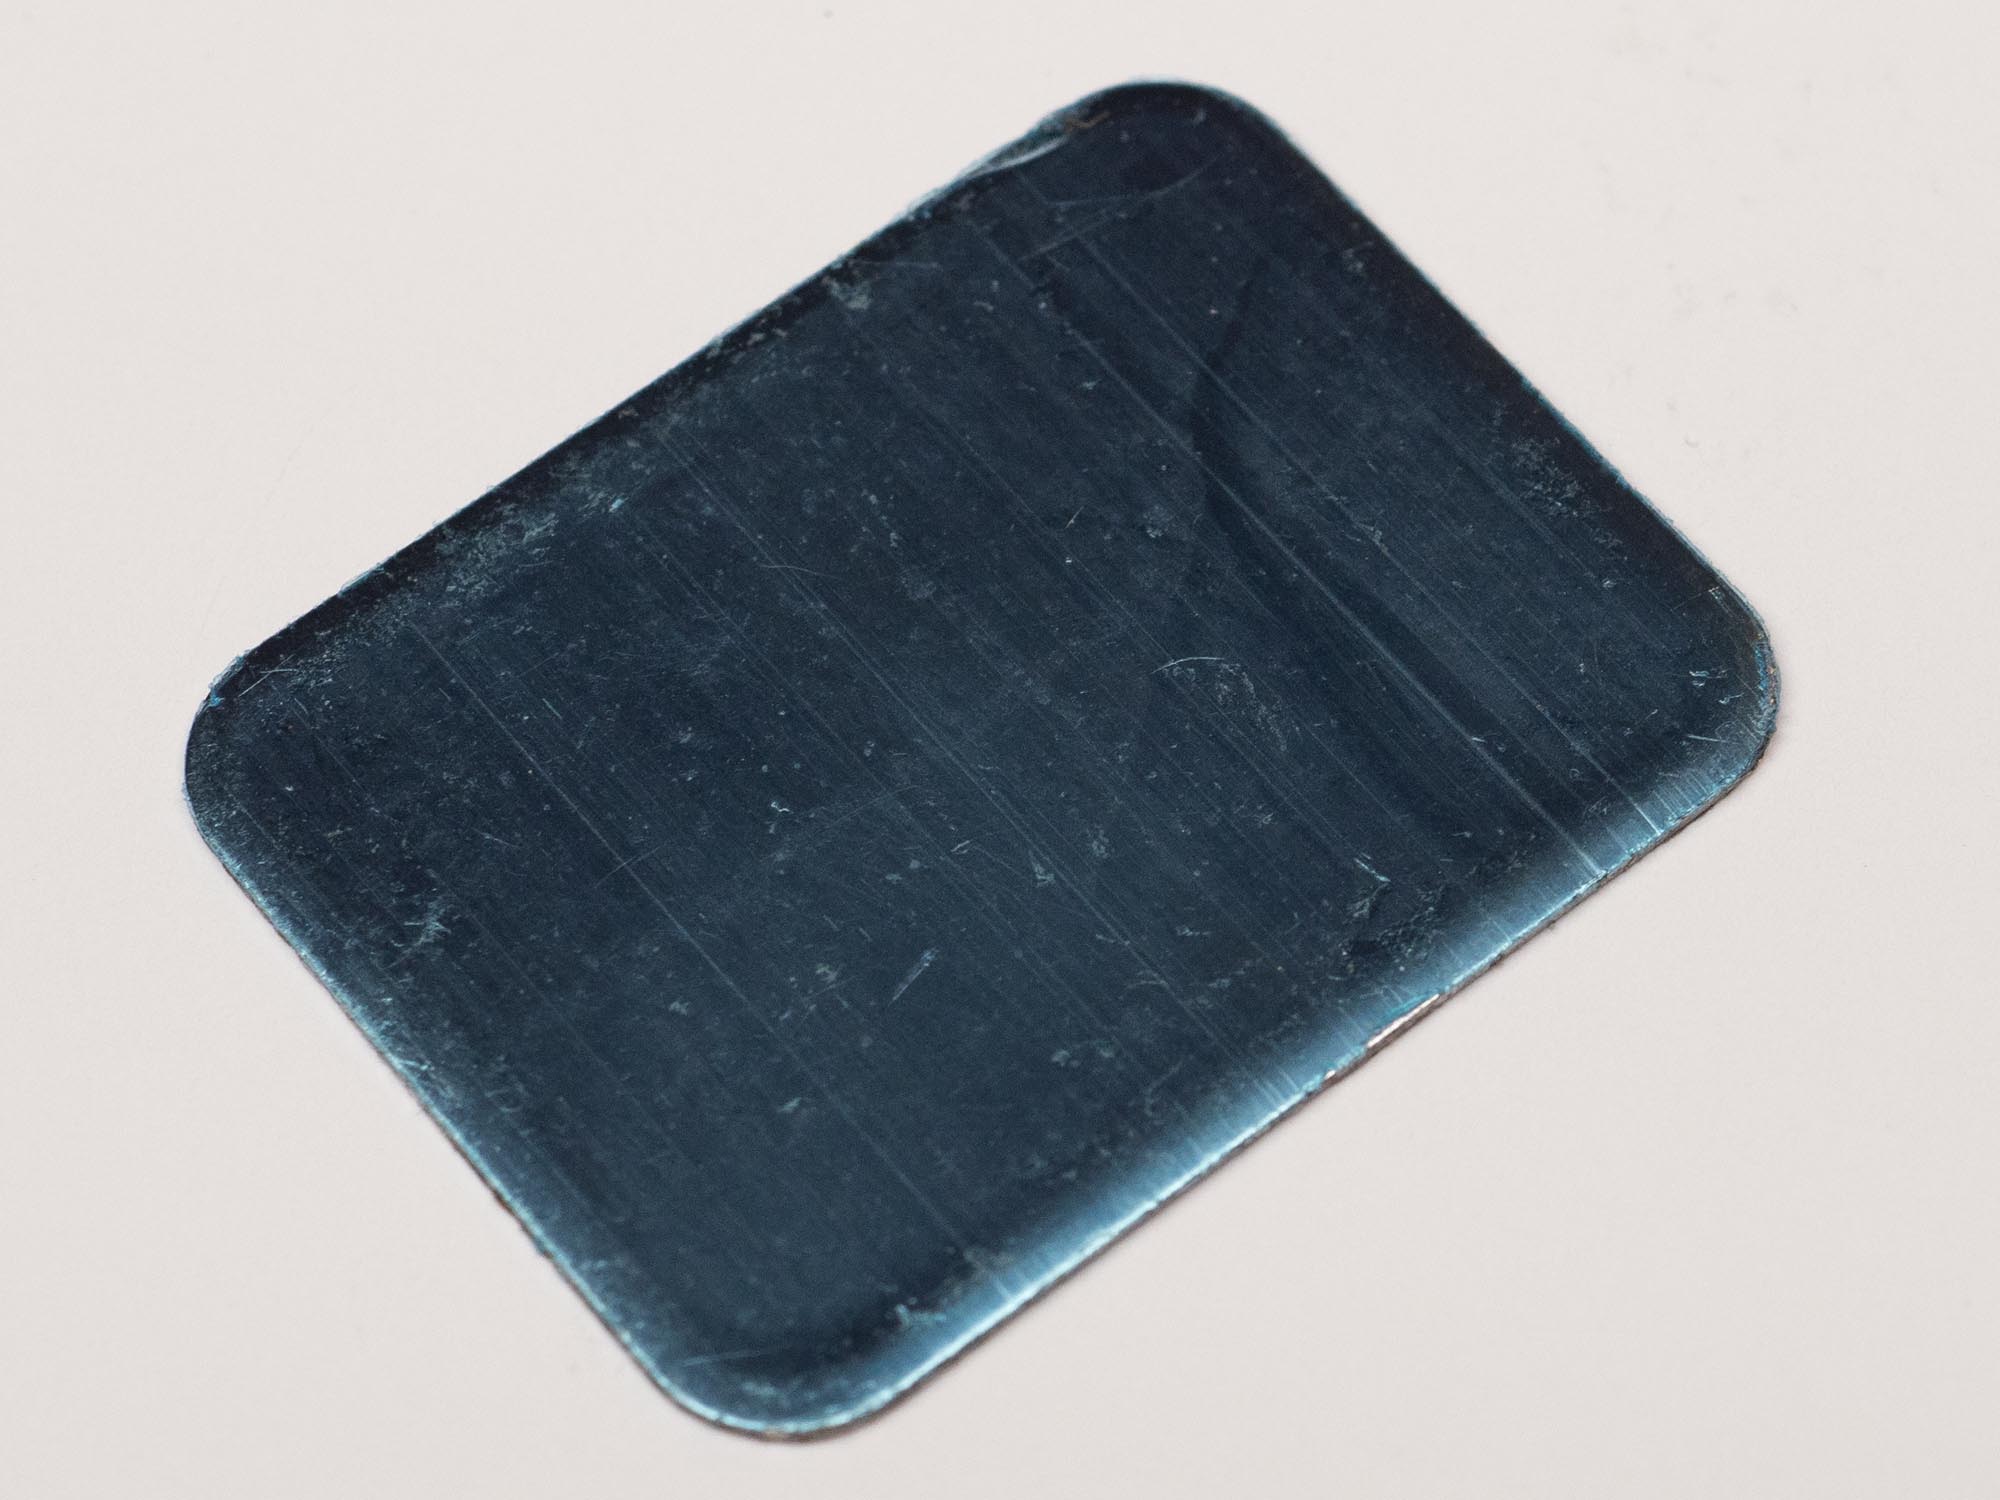
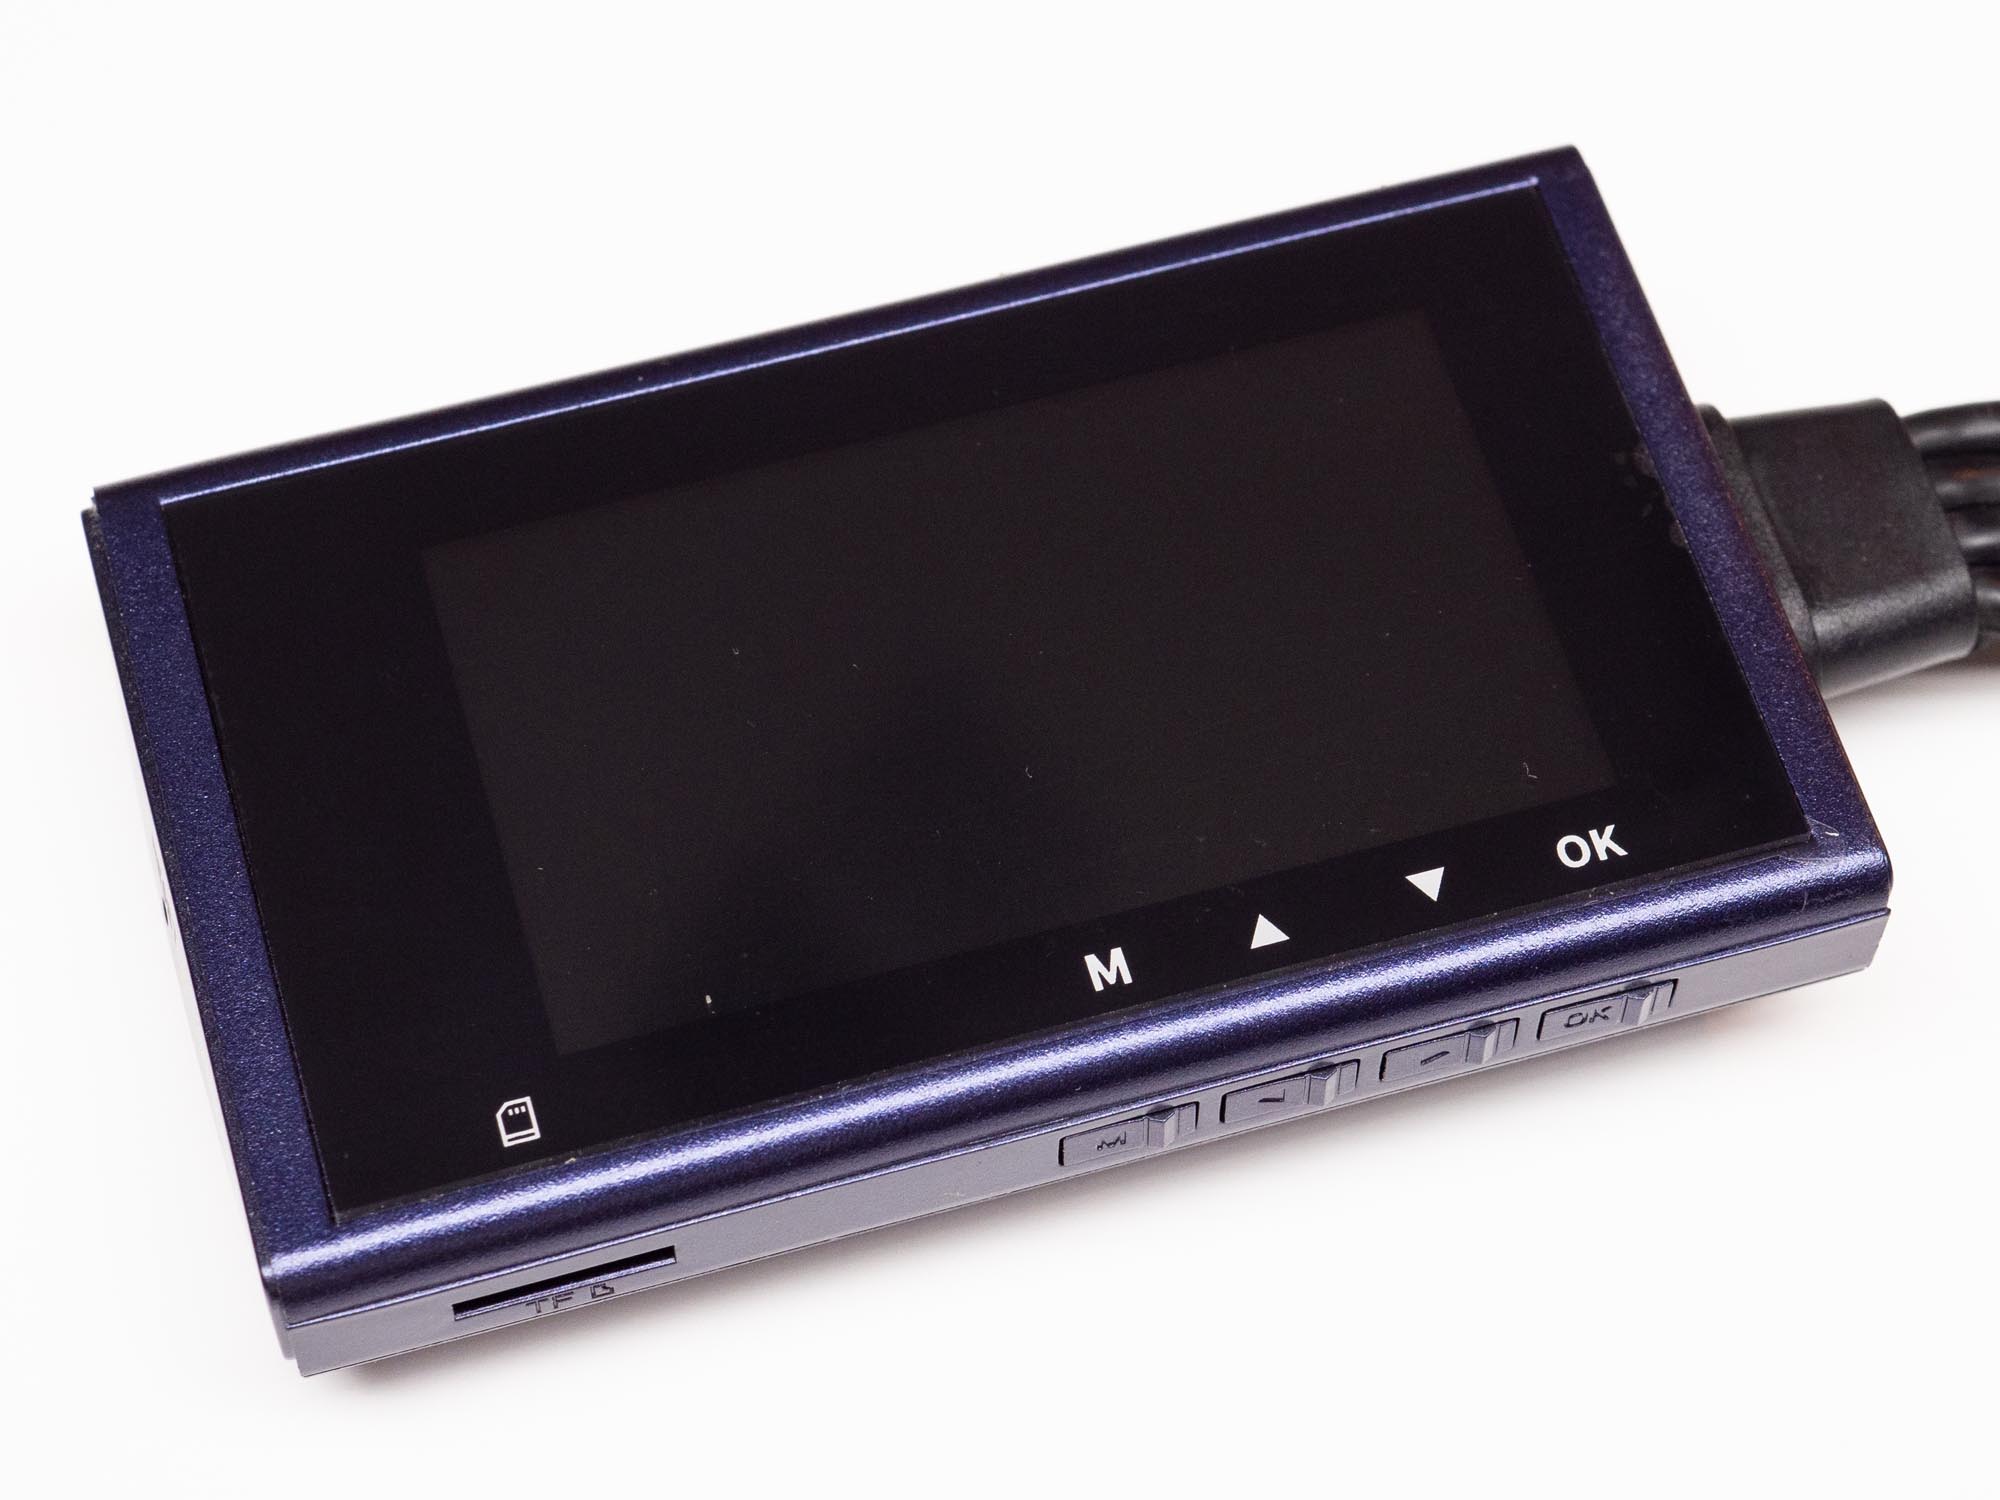
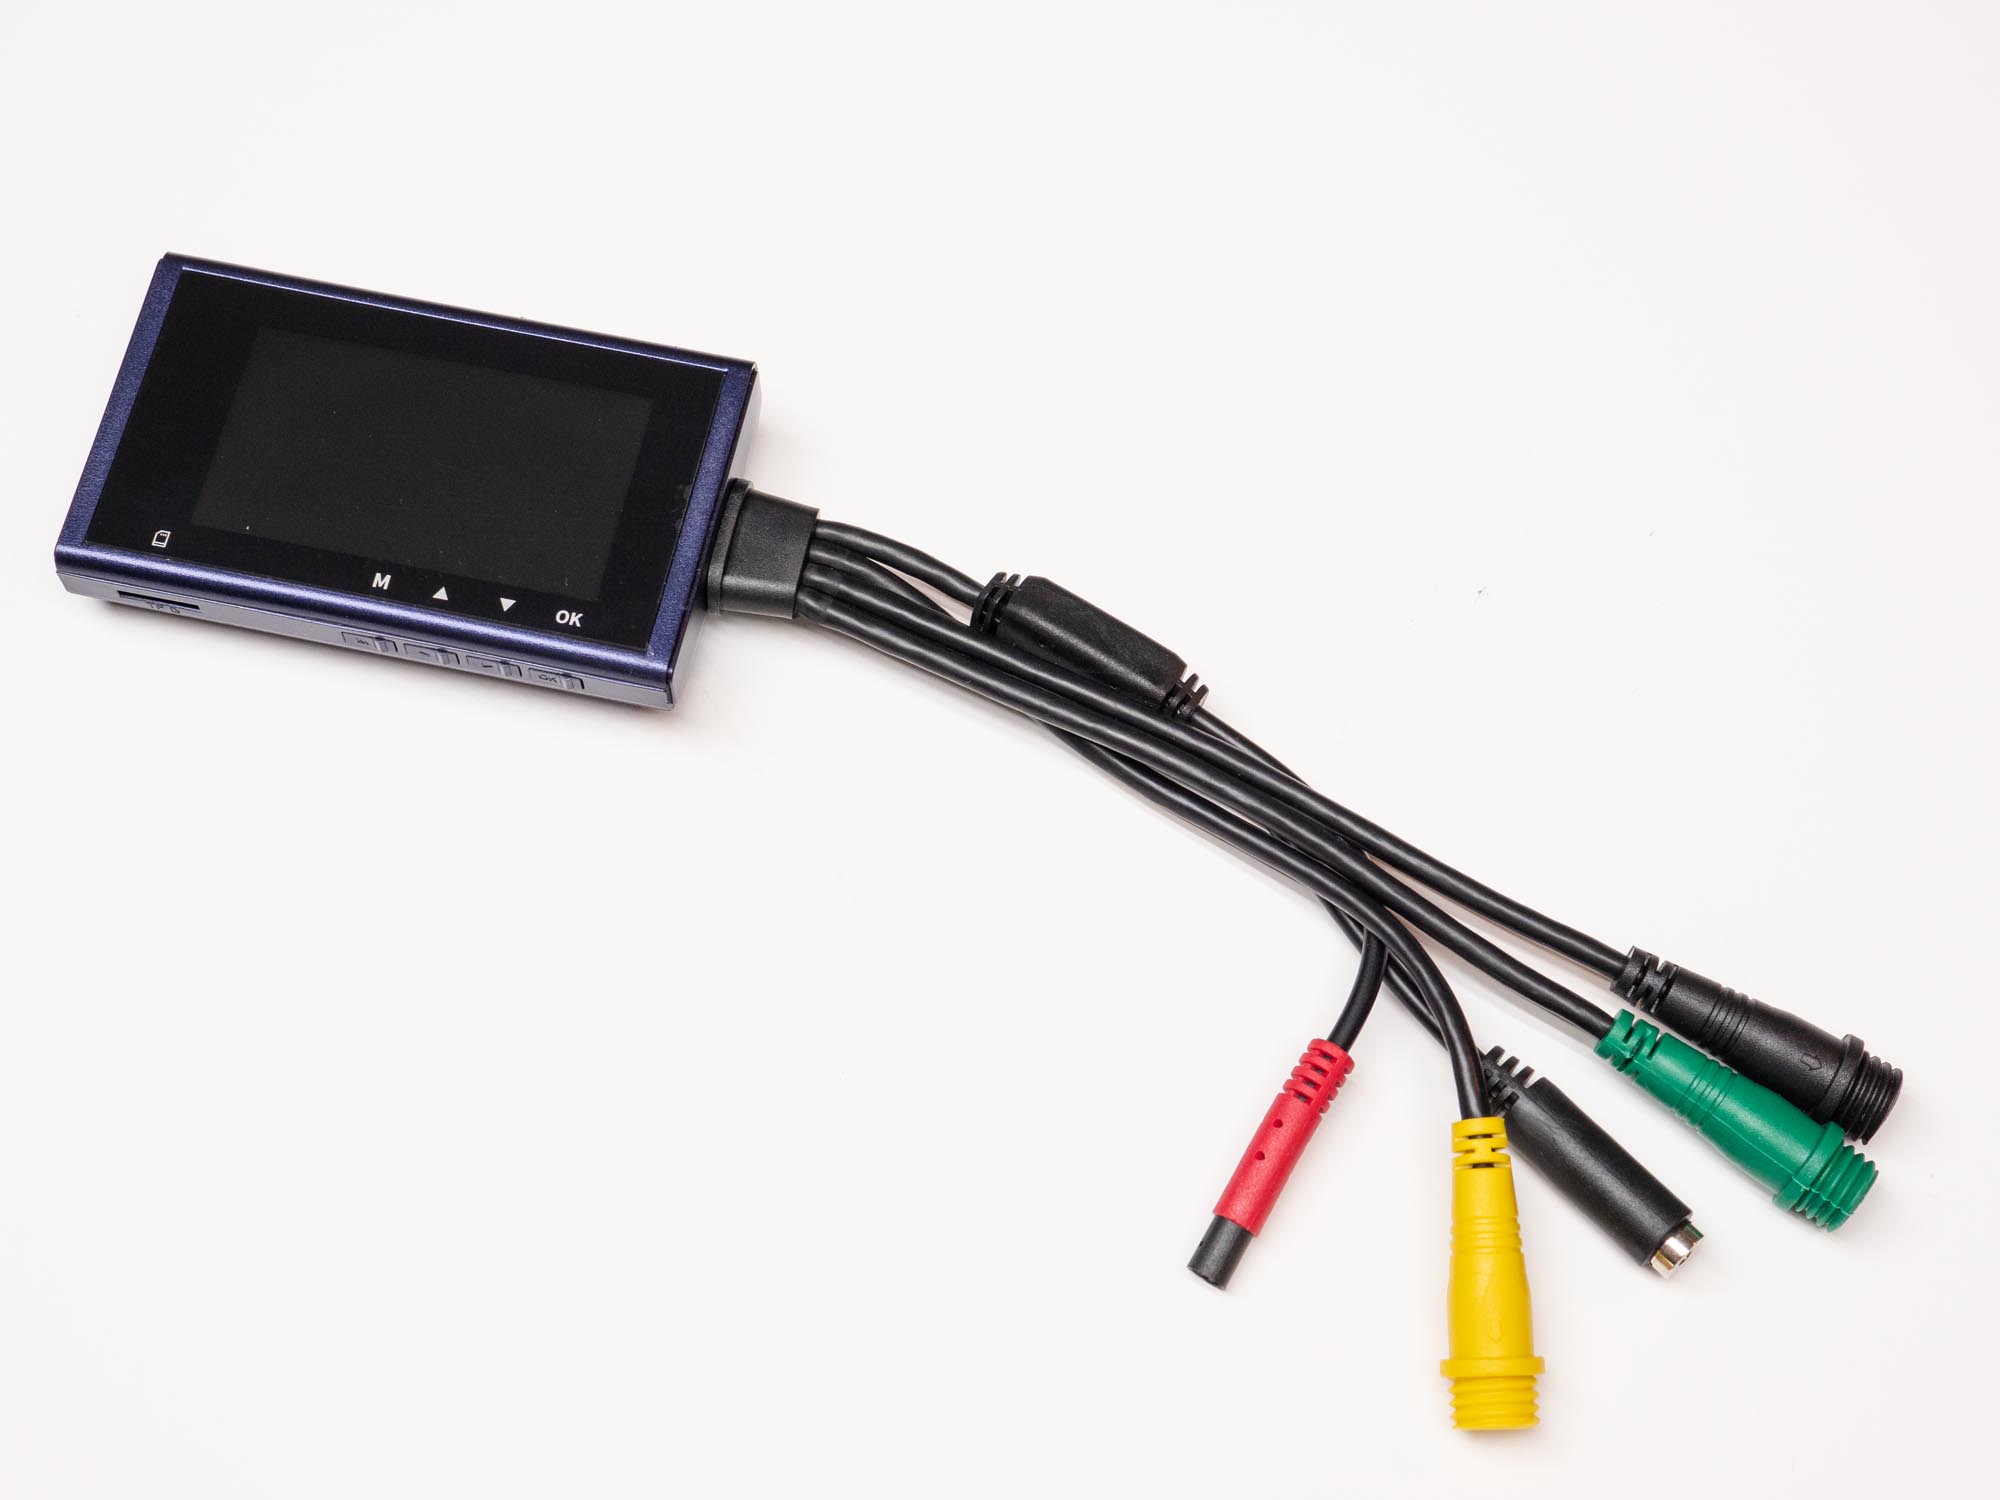
The DVR module is a compact unit measuring 3.5x 2 x.3 inches (89x 51 x 8mm) and, despite the advertising photos, has a blue casing instead of black. The unit is also very lightweight though it’s hard to quantify since the connection cable “pigtails” is permanently attached. Suffice to say it’s not the most sturdy feeling device.
On the DVR unit is a 2.75 inch (70mm) screen for viewing live and recorded video as well as menus for device setup. The top edge has a single button to power on the DVR module. On the long lower edge are four buttons for navigating the menus as well as a MicroSD card slot.
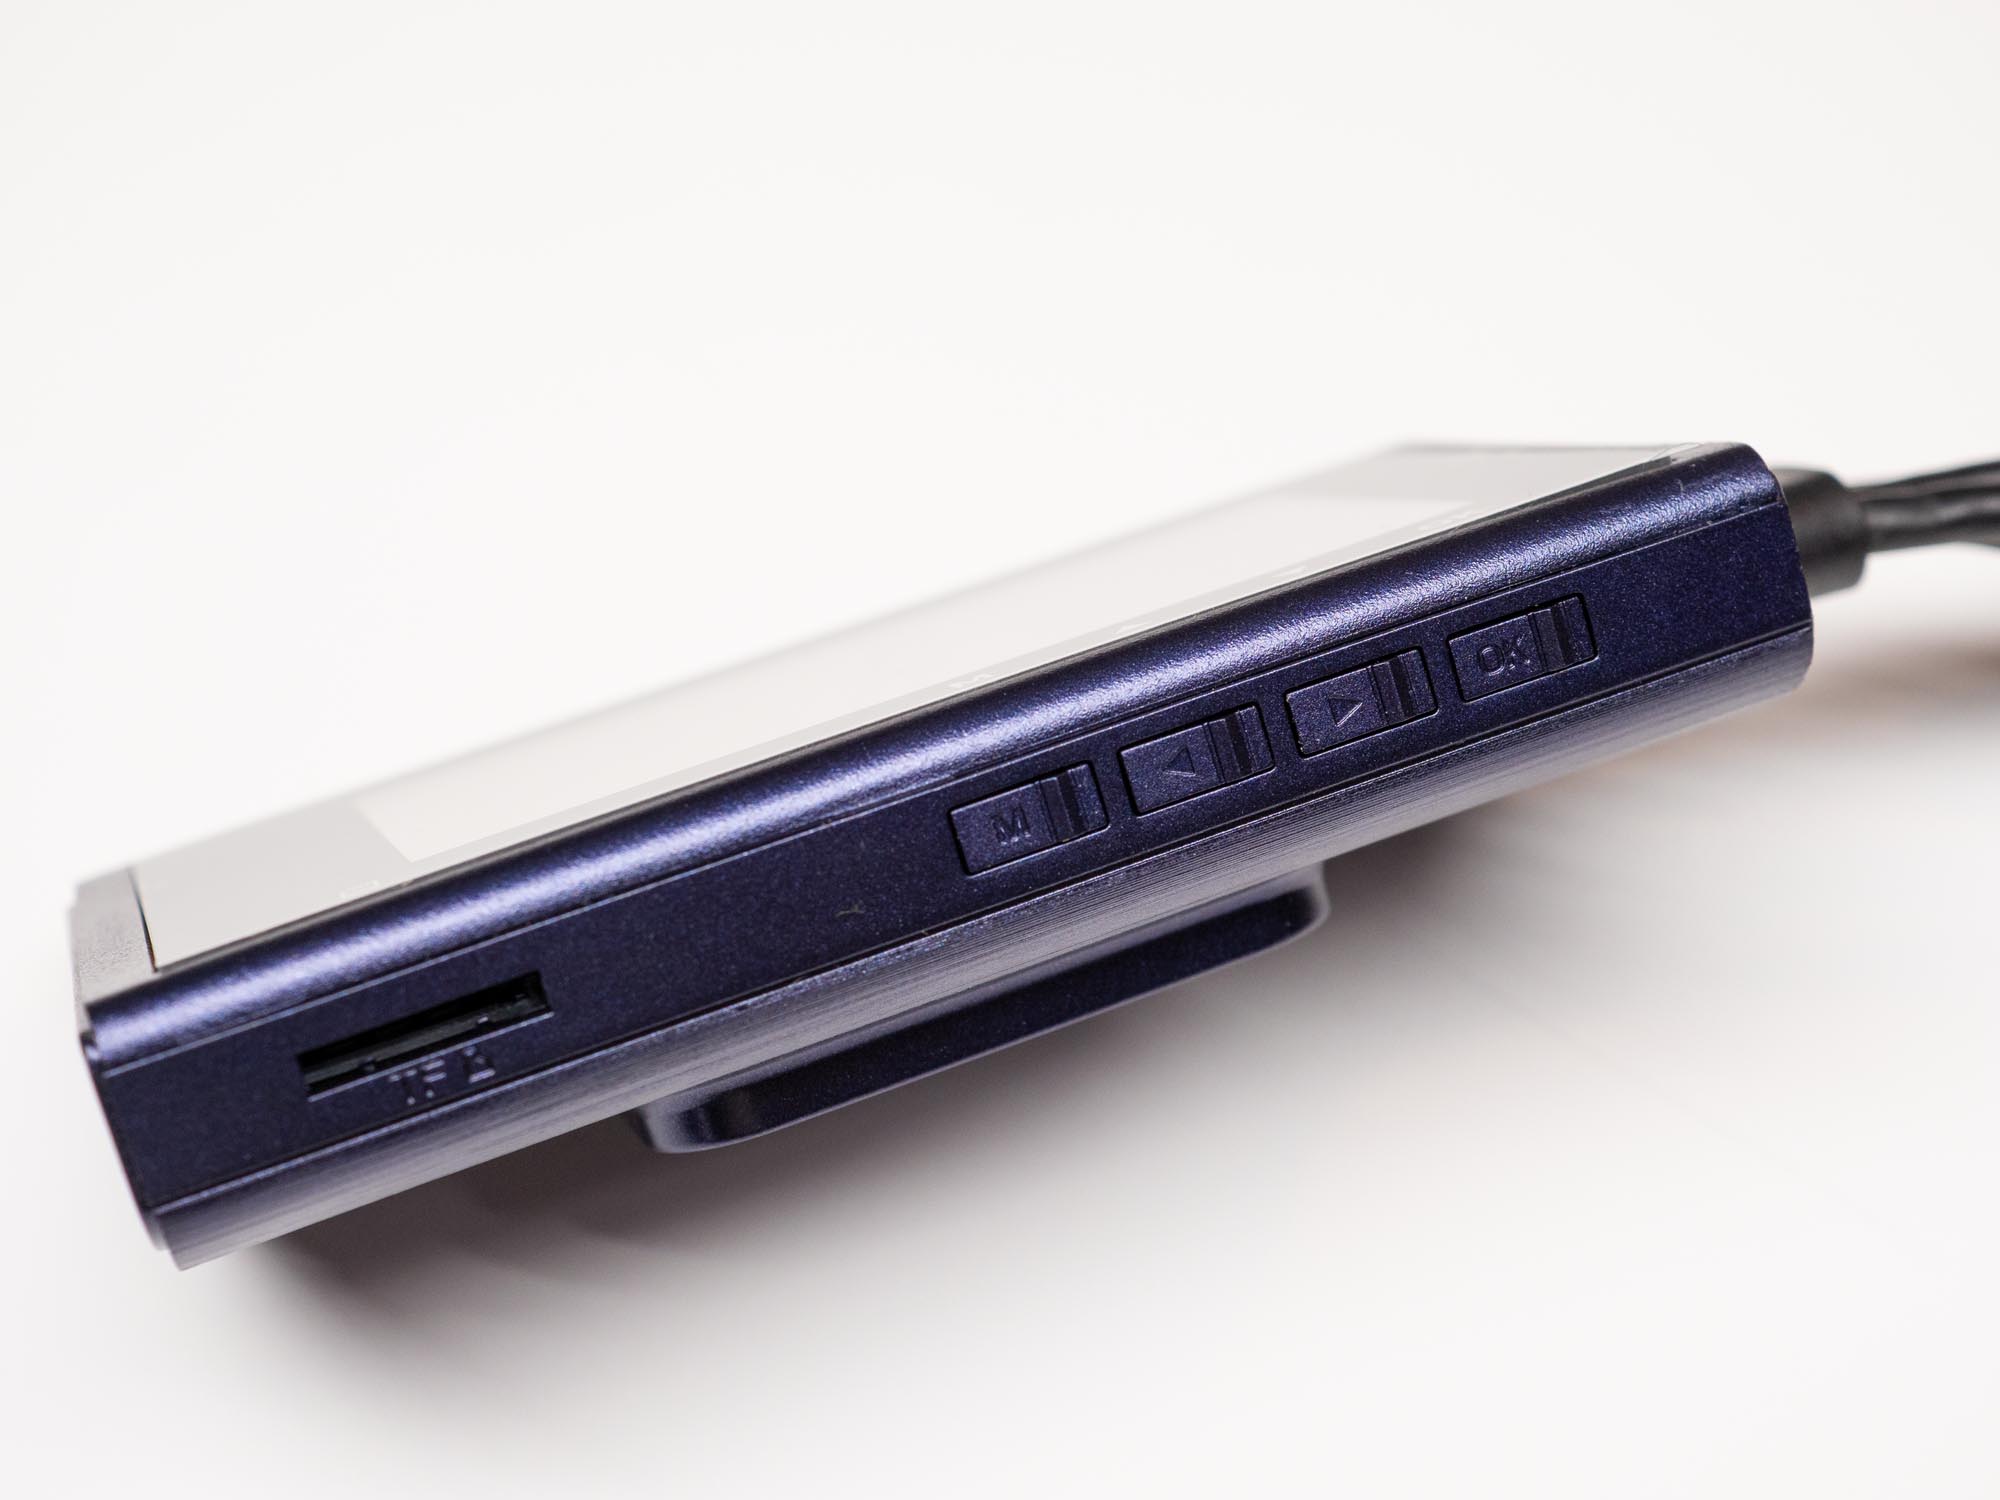
The slot is actually labeled TF which refers to the TF Card standard but the term is now considered interchangeable so Micro SD cards will work fine. As always I would recommend a card from a major manufacturer with a good reputation for best results and durability.
On the subject of durability, it’s evident via a cursory examination that the device is not waterproof or even resistant. A “waterproof” rubber sleeve is included with the device but since one side is almost entirely open it is best to assume it will help reduce shock and vibration and a little bit of water resistance. As such it is best to find a reasonably well-protected location for installation of the DVR module.
Cameras, power, and control switch connections use keyed connectors so they can only be installed the “correct” way. The camera and switch connections are (fortunately) all cross compatible so if one should accidentally run the “front” connection cable to the “rear” camera, it will still work just fine. I’ll demonstrate this in the installation section in a minute.
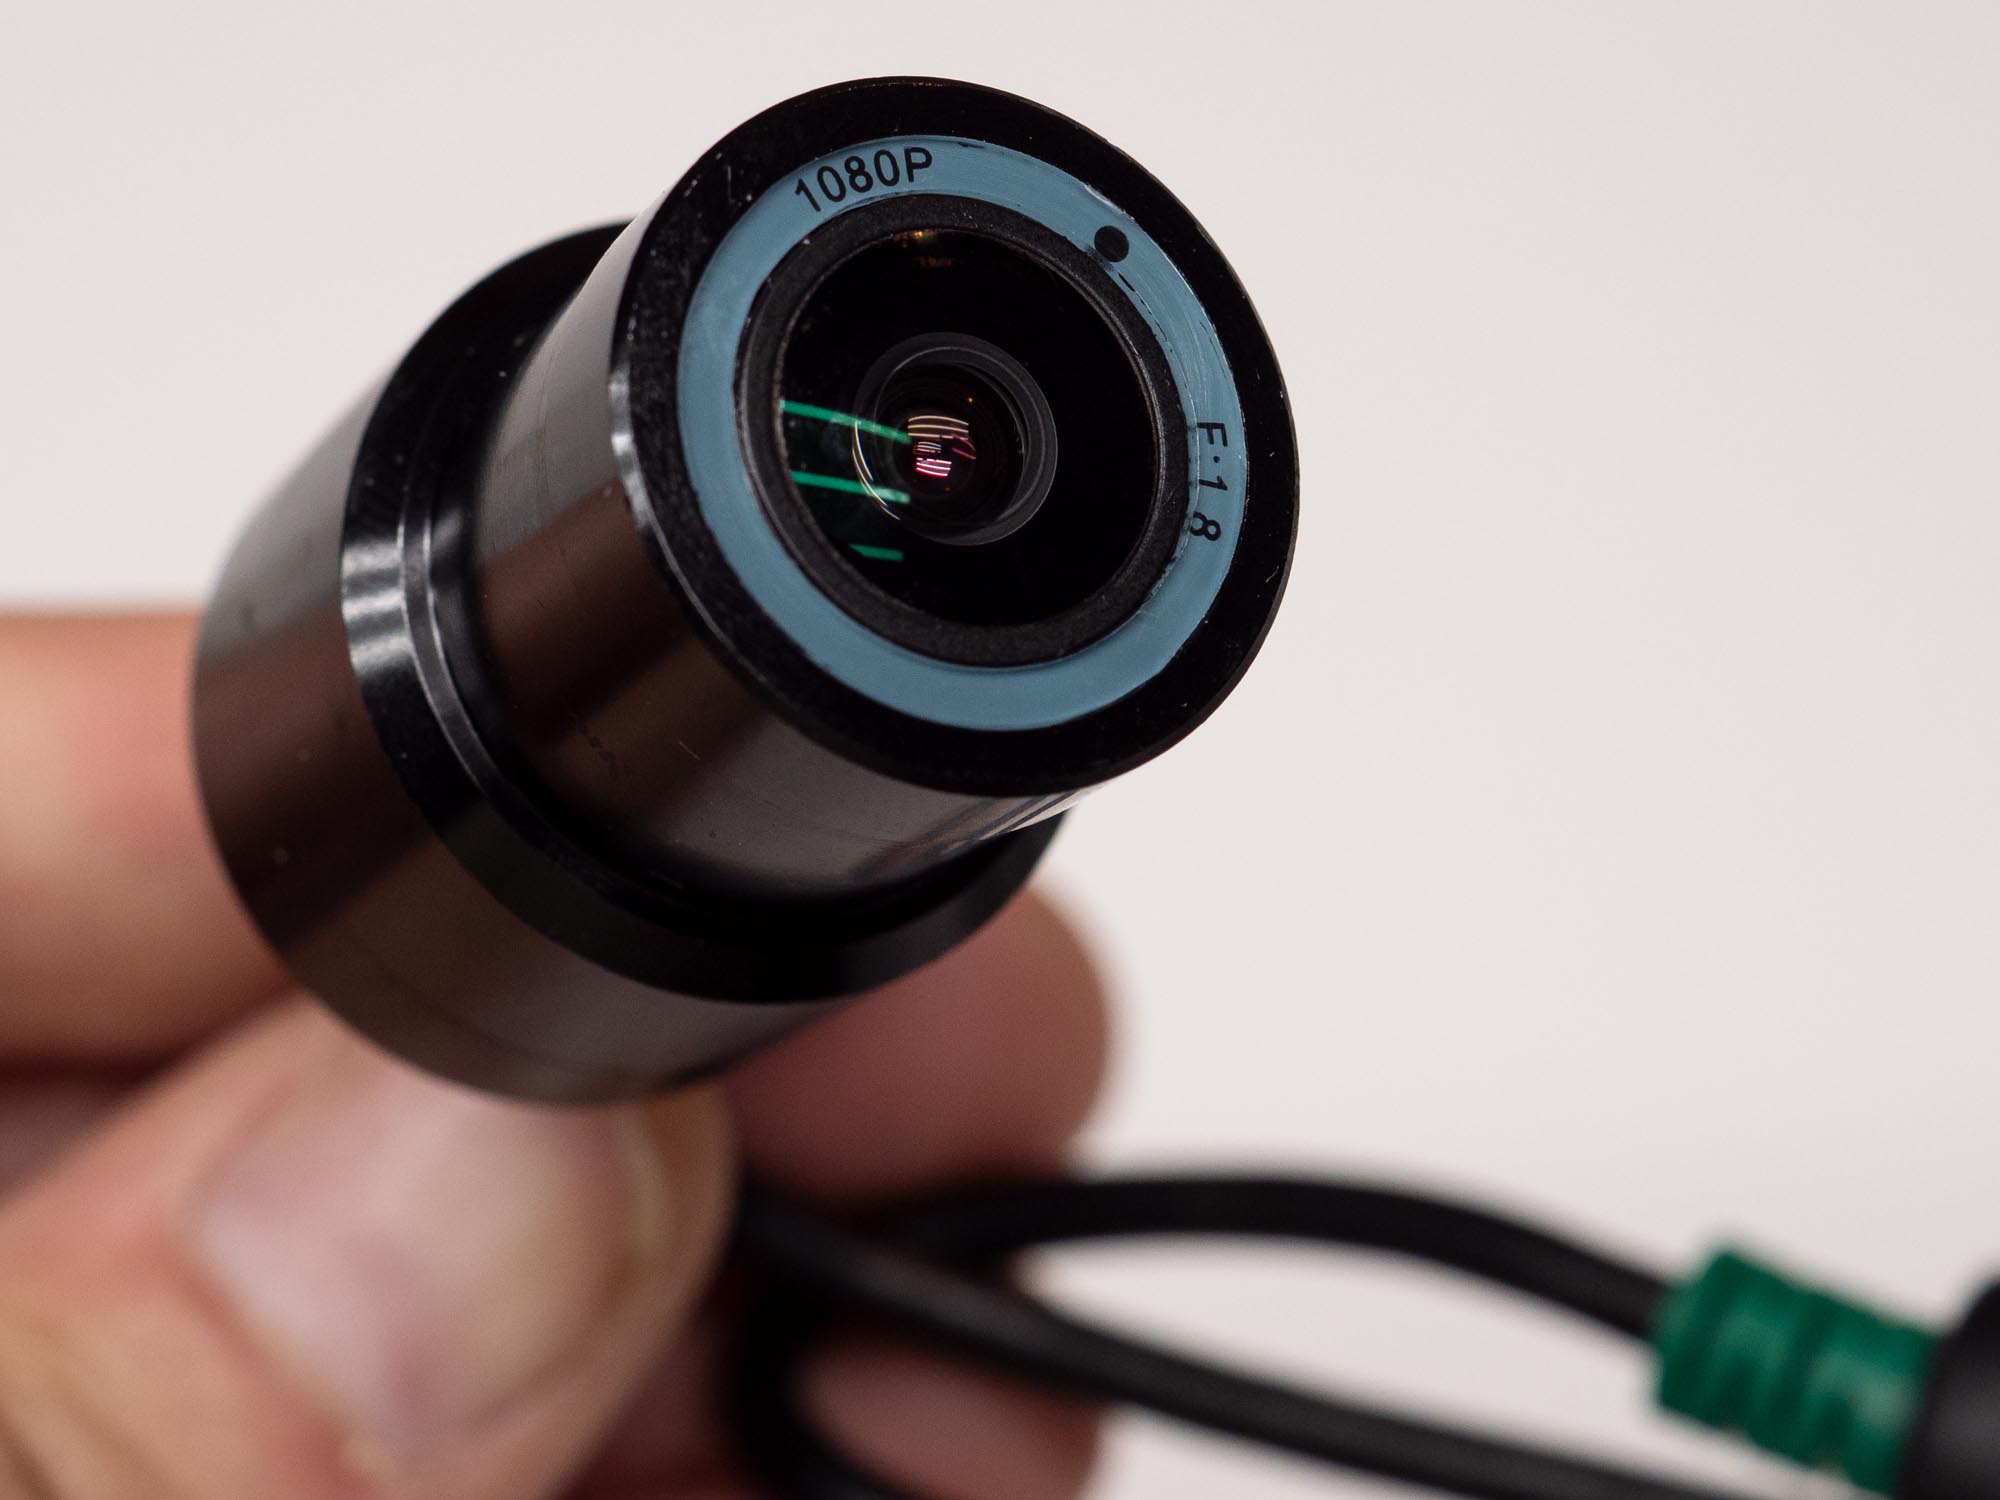
The camera units are a little larger and heavier than I expected but they have large coated glass elements which are a good sign for creating contrasty video footage. Also, the weight suggests a pretty solid metal housing which is warranted considering the durability required for long life being attached to a motorcycle.
The advertising for the HaloCam M1 claims that these are Sony lenses and Sony sensors. I can give the benefit of the doubt on the sensor side of things as I can’t take them apart but the lenses, I have doubts. The omission of “Sony Lens” and focal length printed on the front is very unusual for a product from Sony and most any major camera/lens manufacturer.
Now let’s see how all the pieces come together and install on my Ninja 1000.
Shopping Now? We Recommend:
webBikeWorld has worked closely with Amazon over the years to provide our testers with products to review. In addition to being a great site to shop from, they’re also a great partner.
Amazon
![]()
Free shipping (with Amazon Prime)
30-day return policy
Excellent selection
Competitive pricing
Installation
Installation is not complicated but it can take some time. In my case, I wanted to avoid cutting or drilling any plastics on my bike. At the same time, I wanted to have a relatively “clean” installation so I spent almost as much time planning as I did the actual installation.
Before We Begin
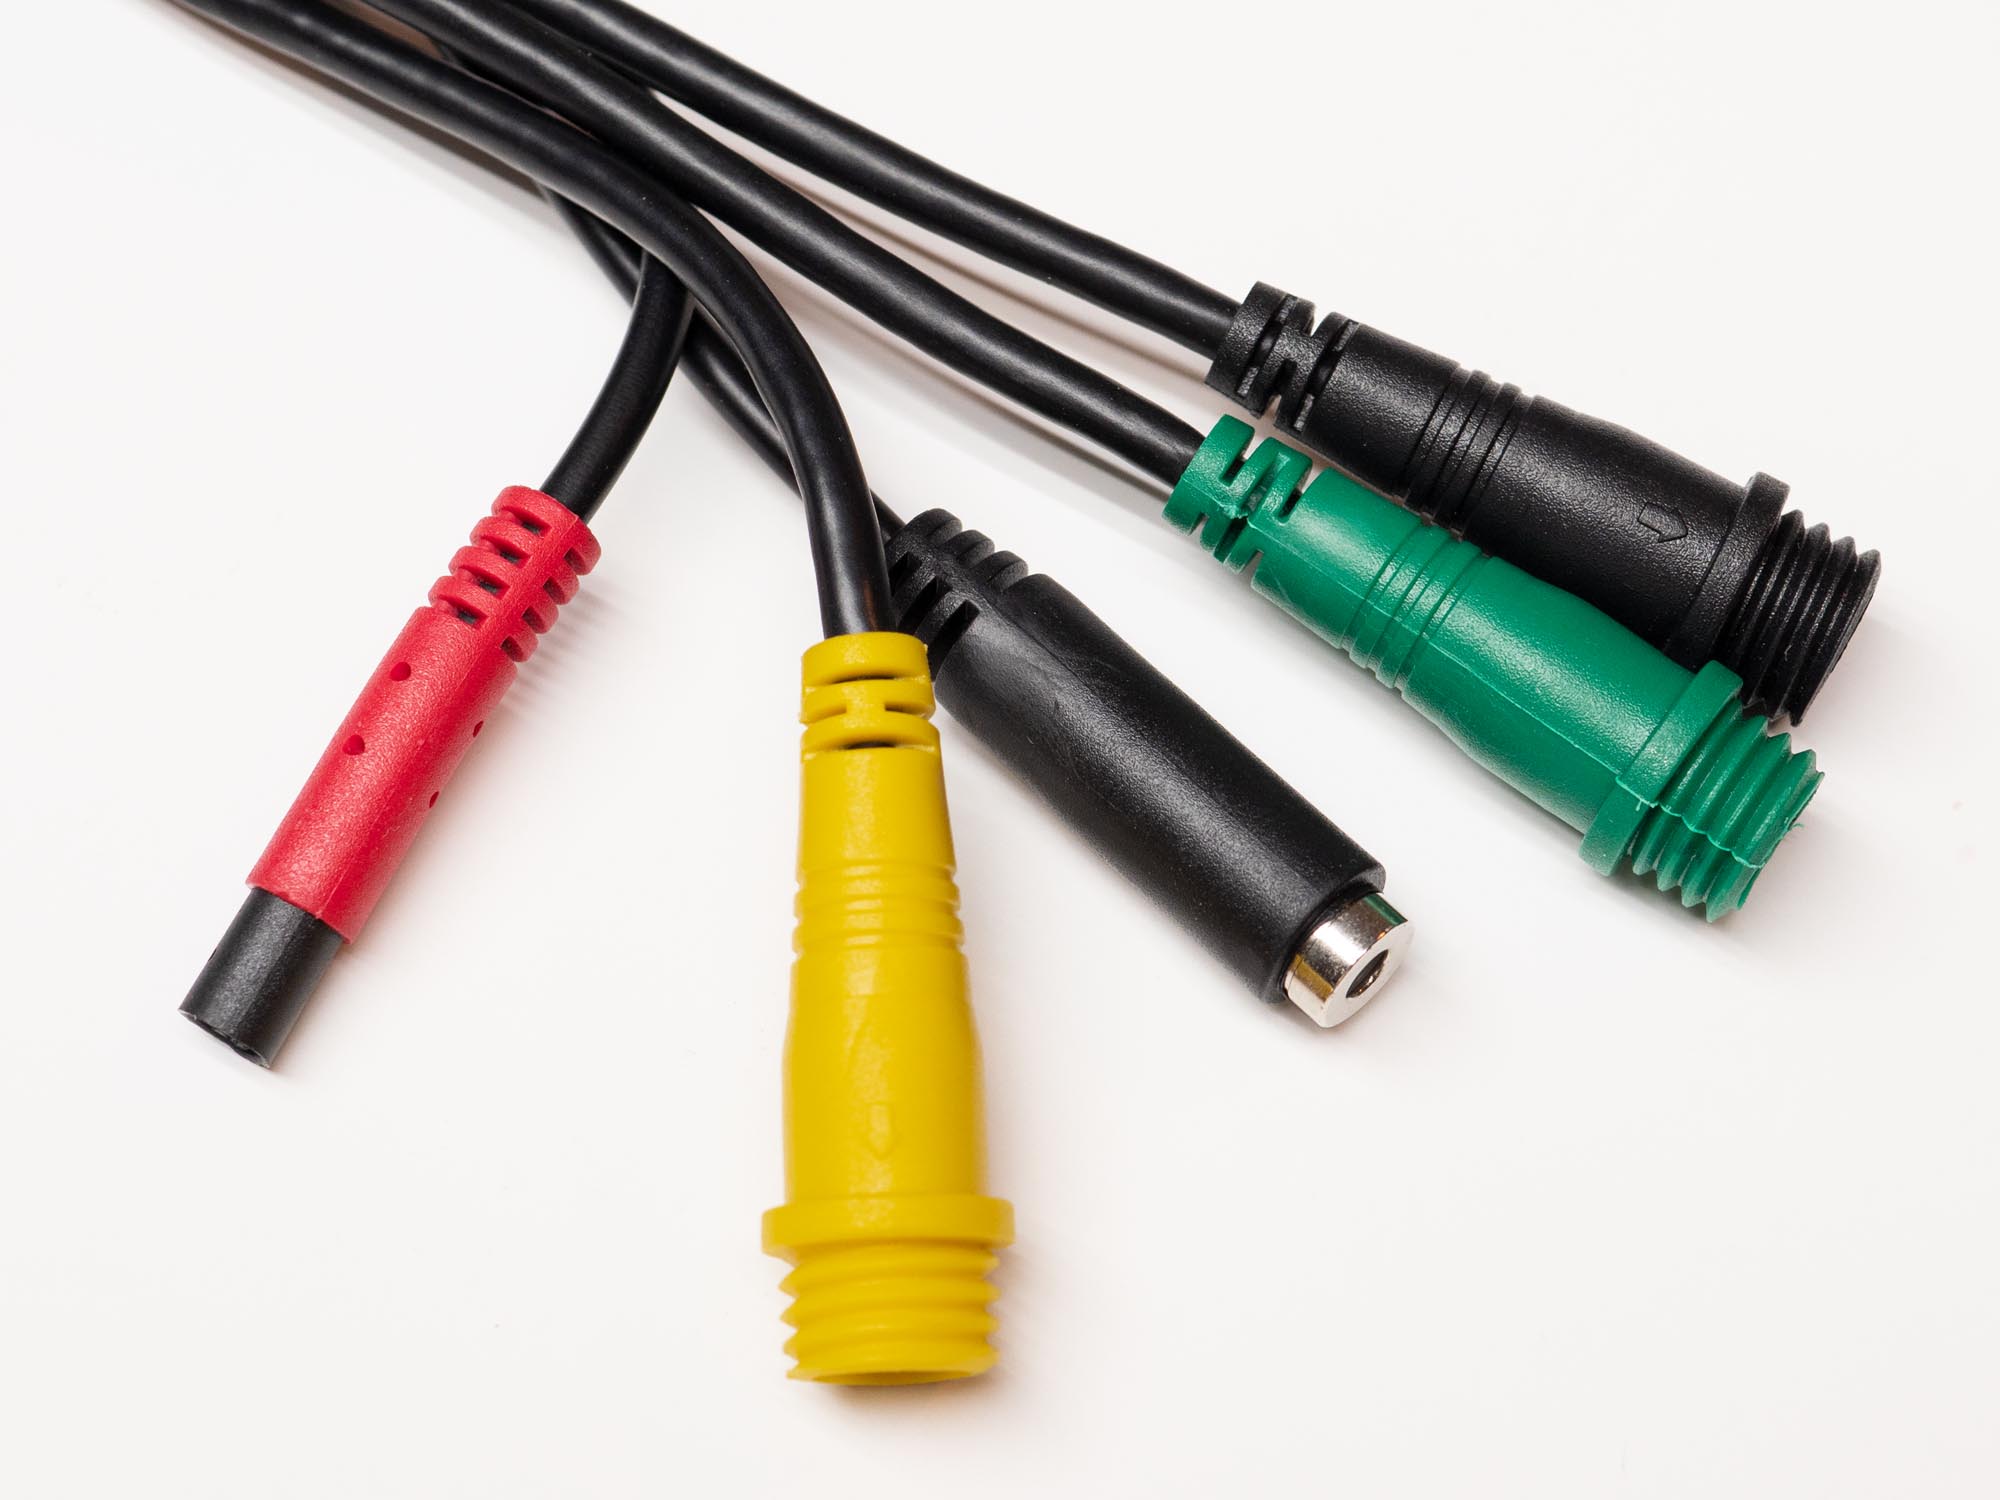
Something important I want to point out is that the Green connector on the DVR is for the front camera and the Black one is for the rear. I want to save others the trouble of trying to figure this out as it is NOT called out in the meager instructions. I found this after some trial and error. I didn’t know at the time but there is an image (shown below) on the Amazon product page that calls all the parts out.
Where to Start
Since every bike is different I’m not going to go into too much installation detail here (thank goodness, right?) and instead we’ll just take a high-level view. The main things to consider are locations for cameras, the DVR, GPS module, and lock button. Also, power needs to be considered.
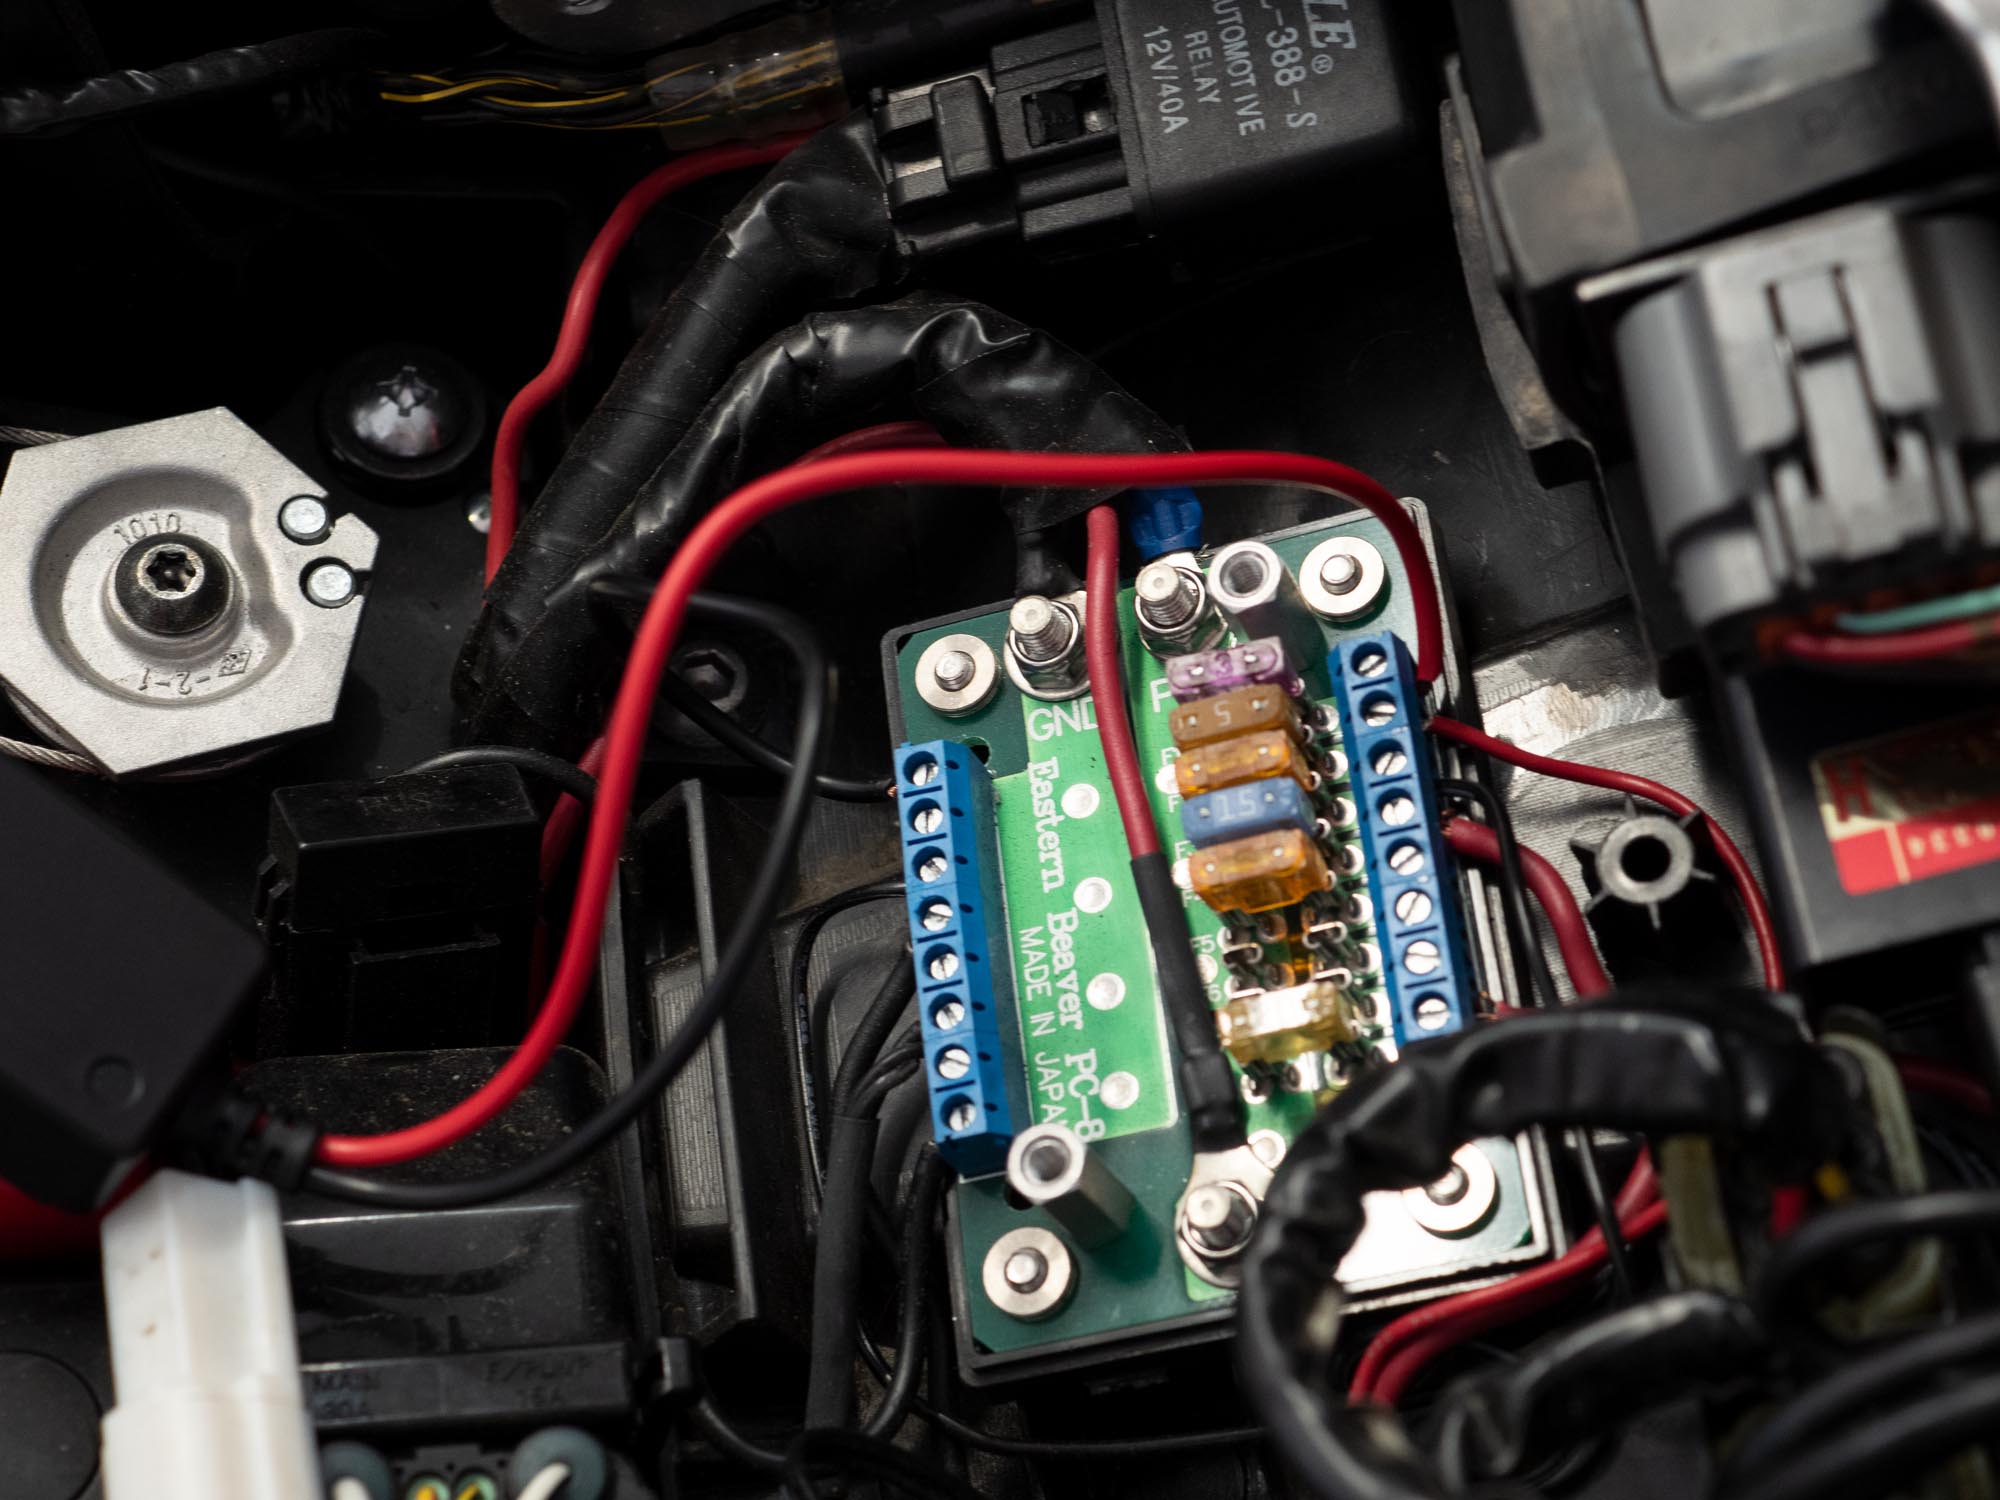
Powering Up
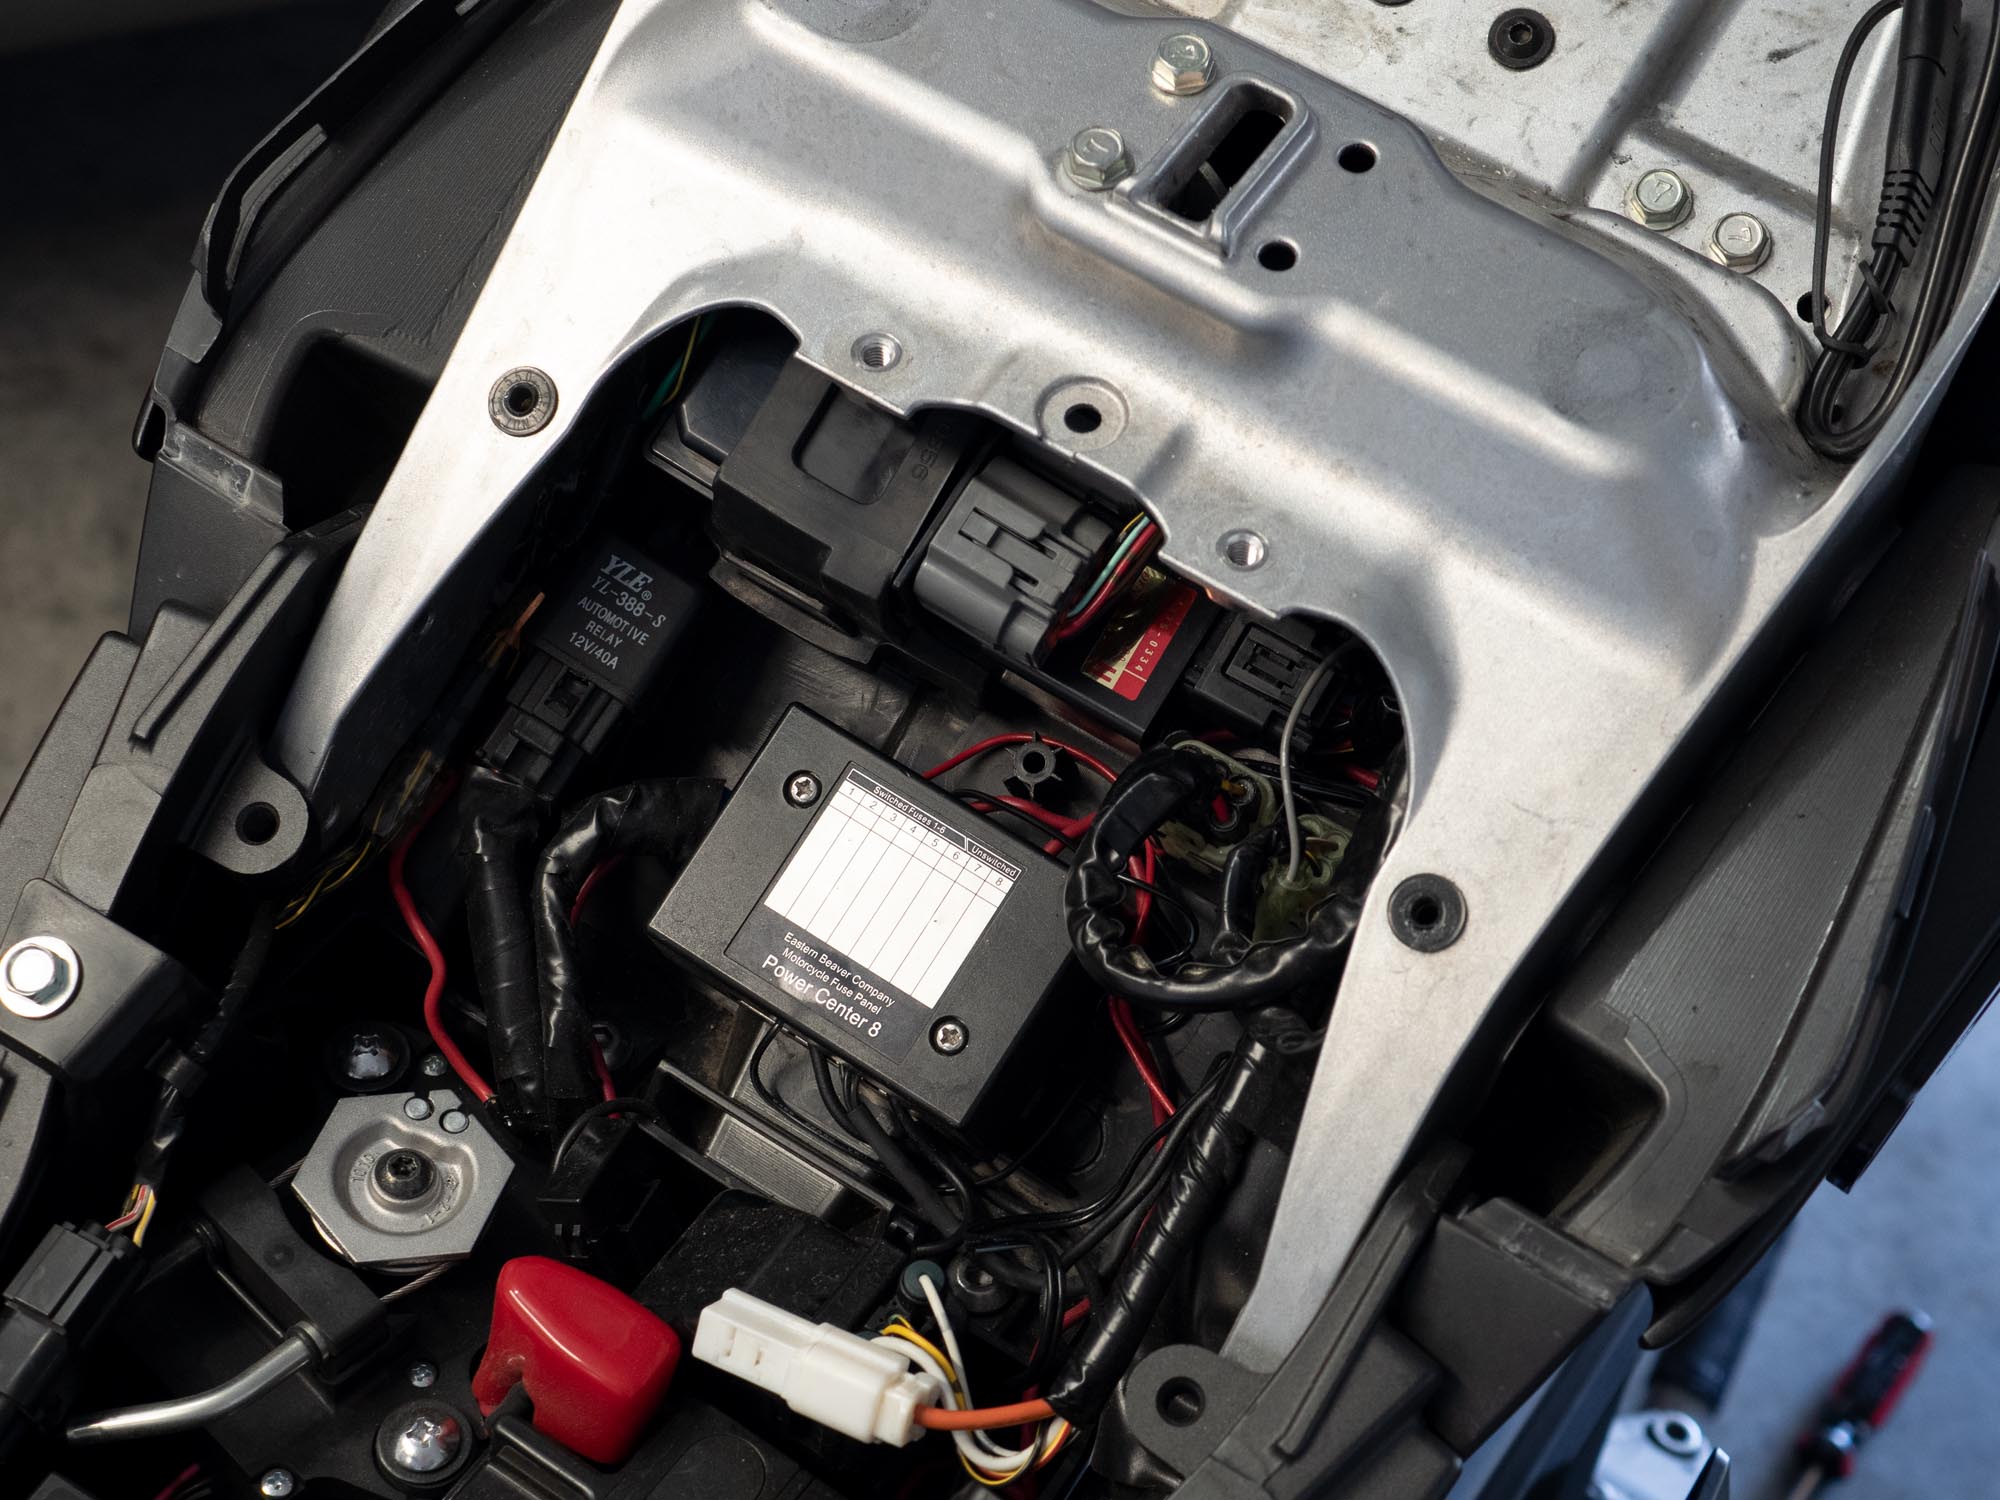
I’ll start with the last point first. The power supply module should be connected to a switched power source such as running lights or other “ignition on” source. I already have an Eastern Beaver fuse panel installed under the seat of my bike so I have switched power already available.
I mention all this because the advert on Amazon states “Constant Power Supply & Connect then forget”. This isn’t very clear but it could be taken to mean just connect to a constant power supply like the battery. Do not do this as the system will remain on all the time until it runs the battery down.
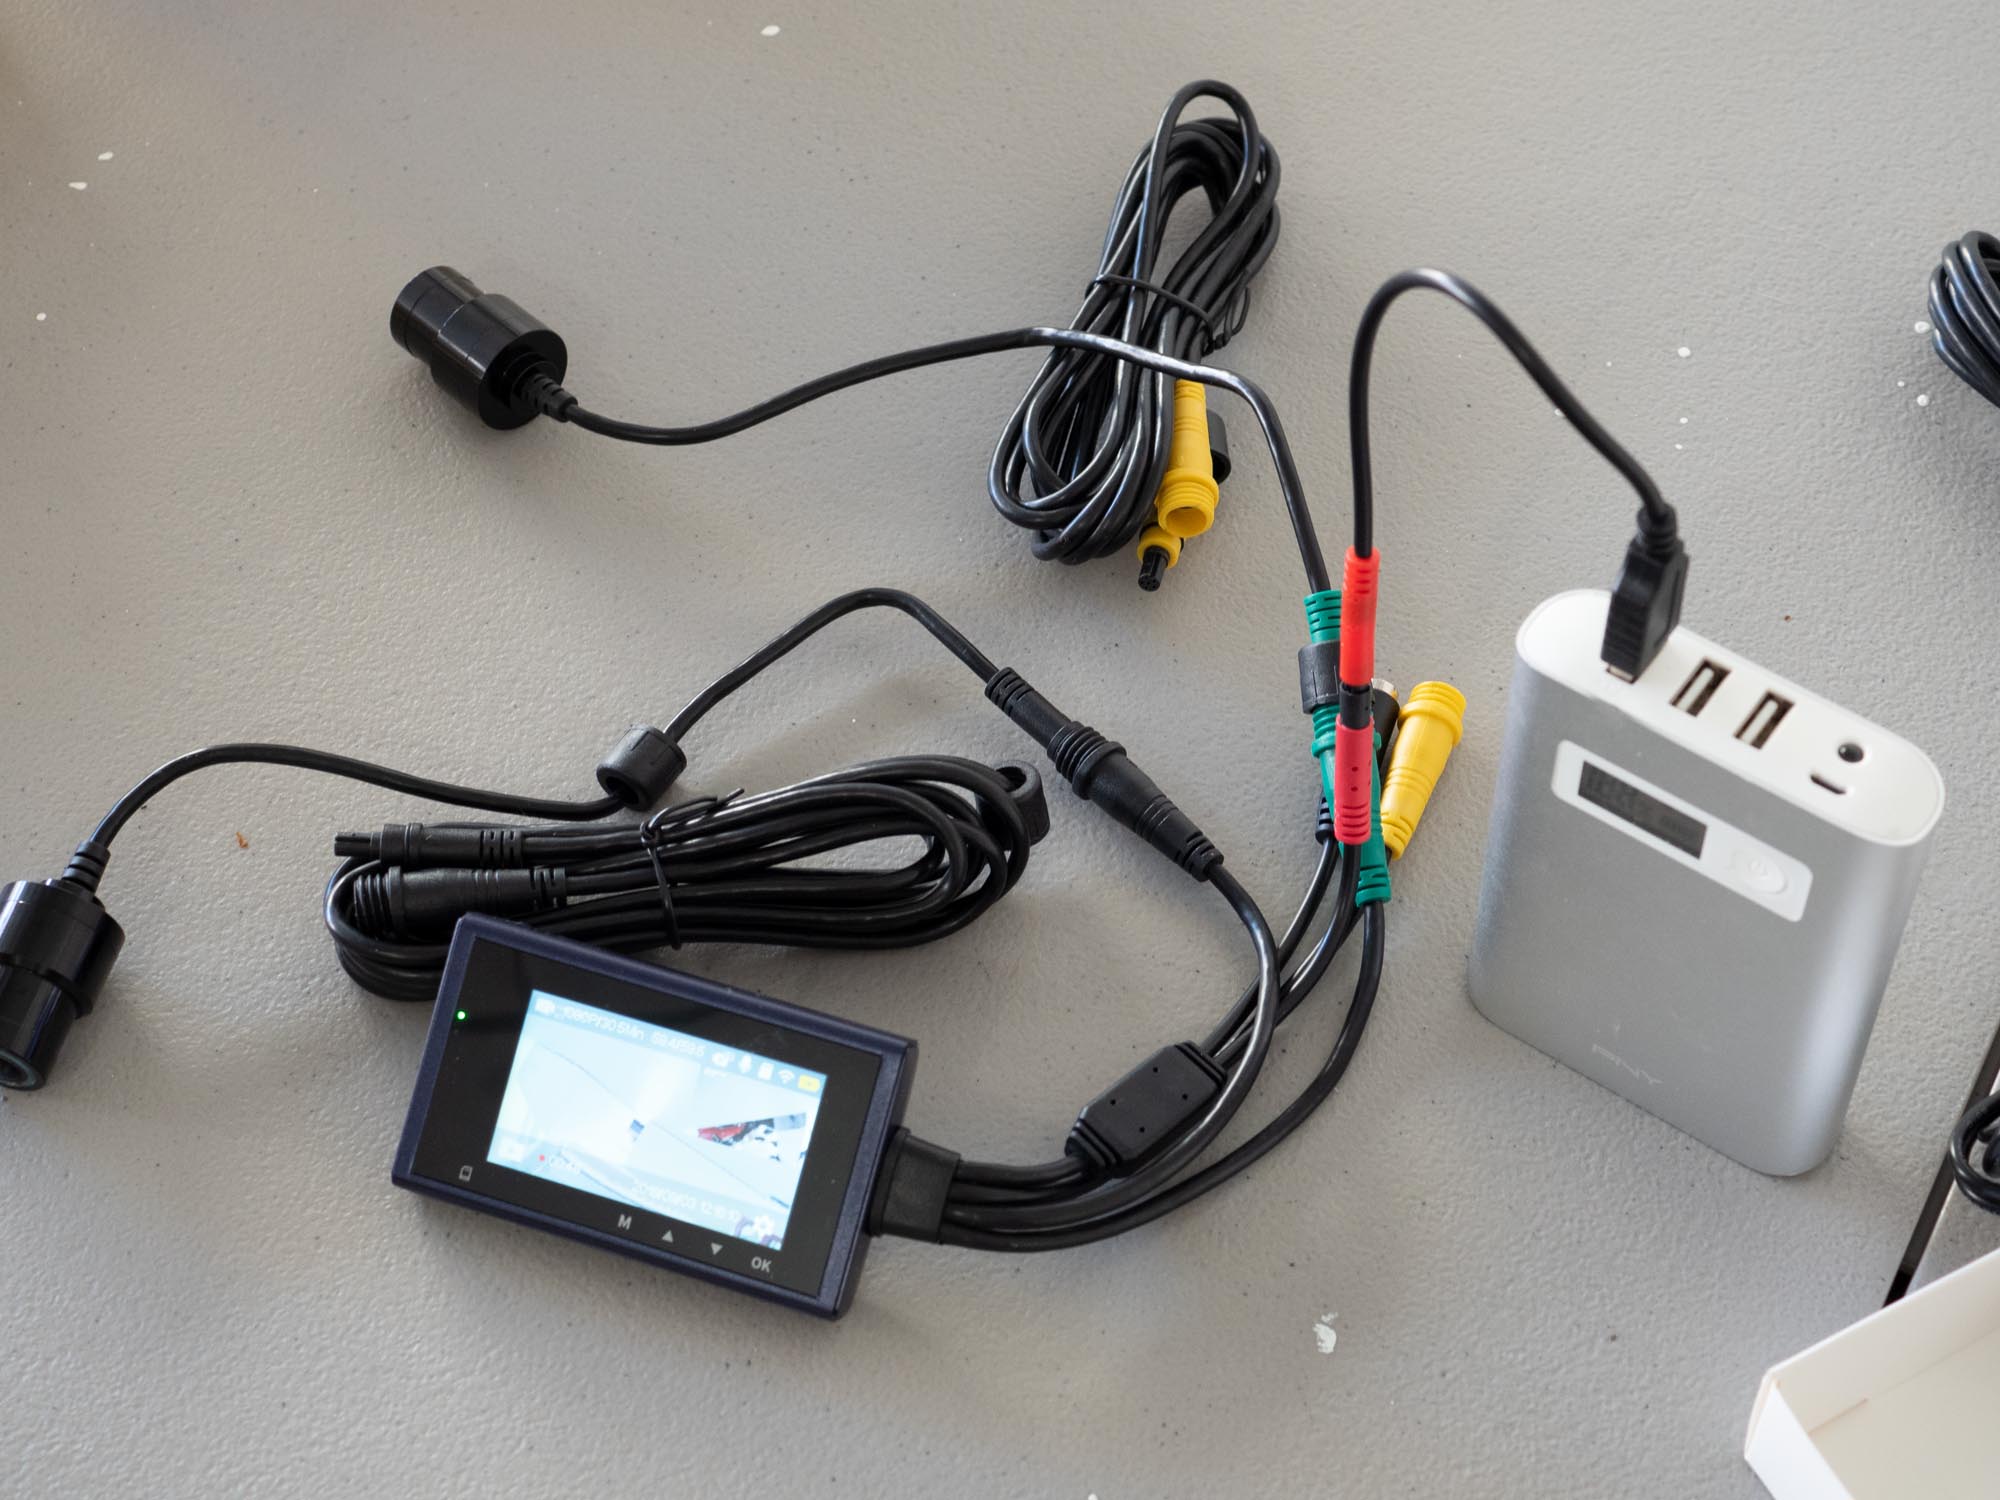
The HaloCam M1 comes with a USB power connector which allows one to power up the system away from the bike. This was very handy for doing the initial set up inside at the table using just a USB power bank.
There was an initial concern on my part about how the system would be able to gracefully stop recording once the ignition is turned off. This seemed to me like it could cause corrupt files but it turns out there is an internal rechargeable battery that can provide the unit with power to run for several minutes (or more?) after the power has been turned off so files are saved properly once the bike is turned off and the unit shuts down a few seconds later.
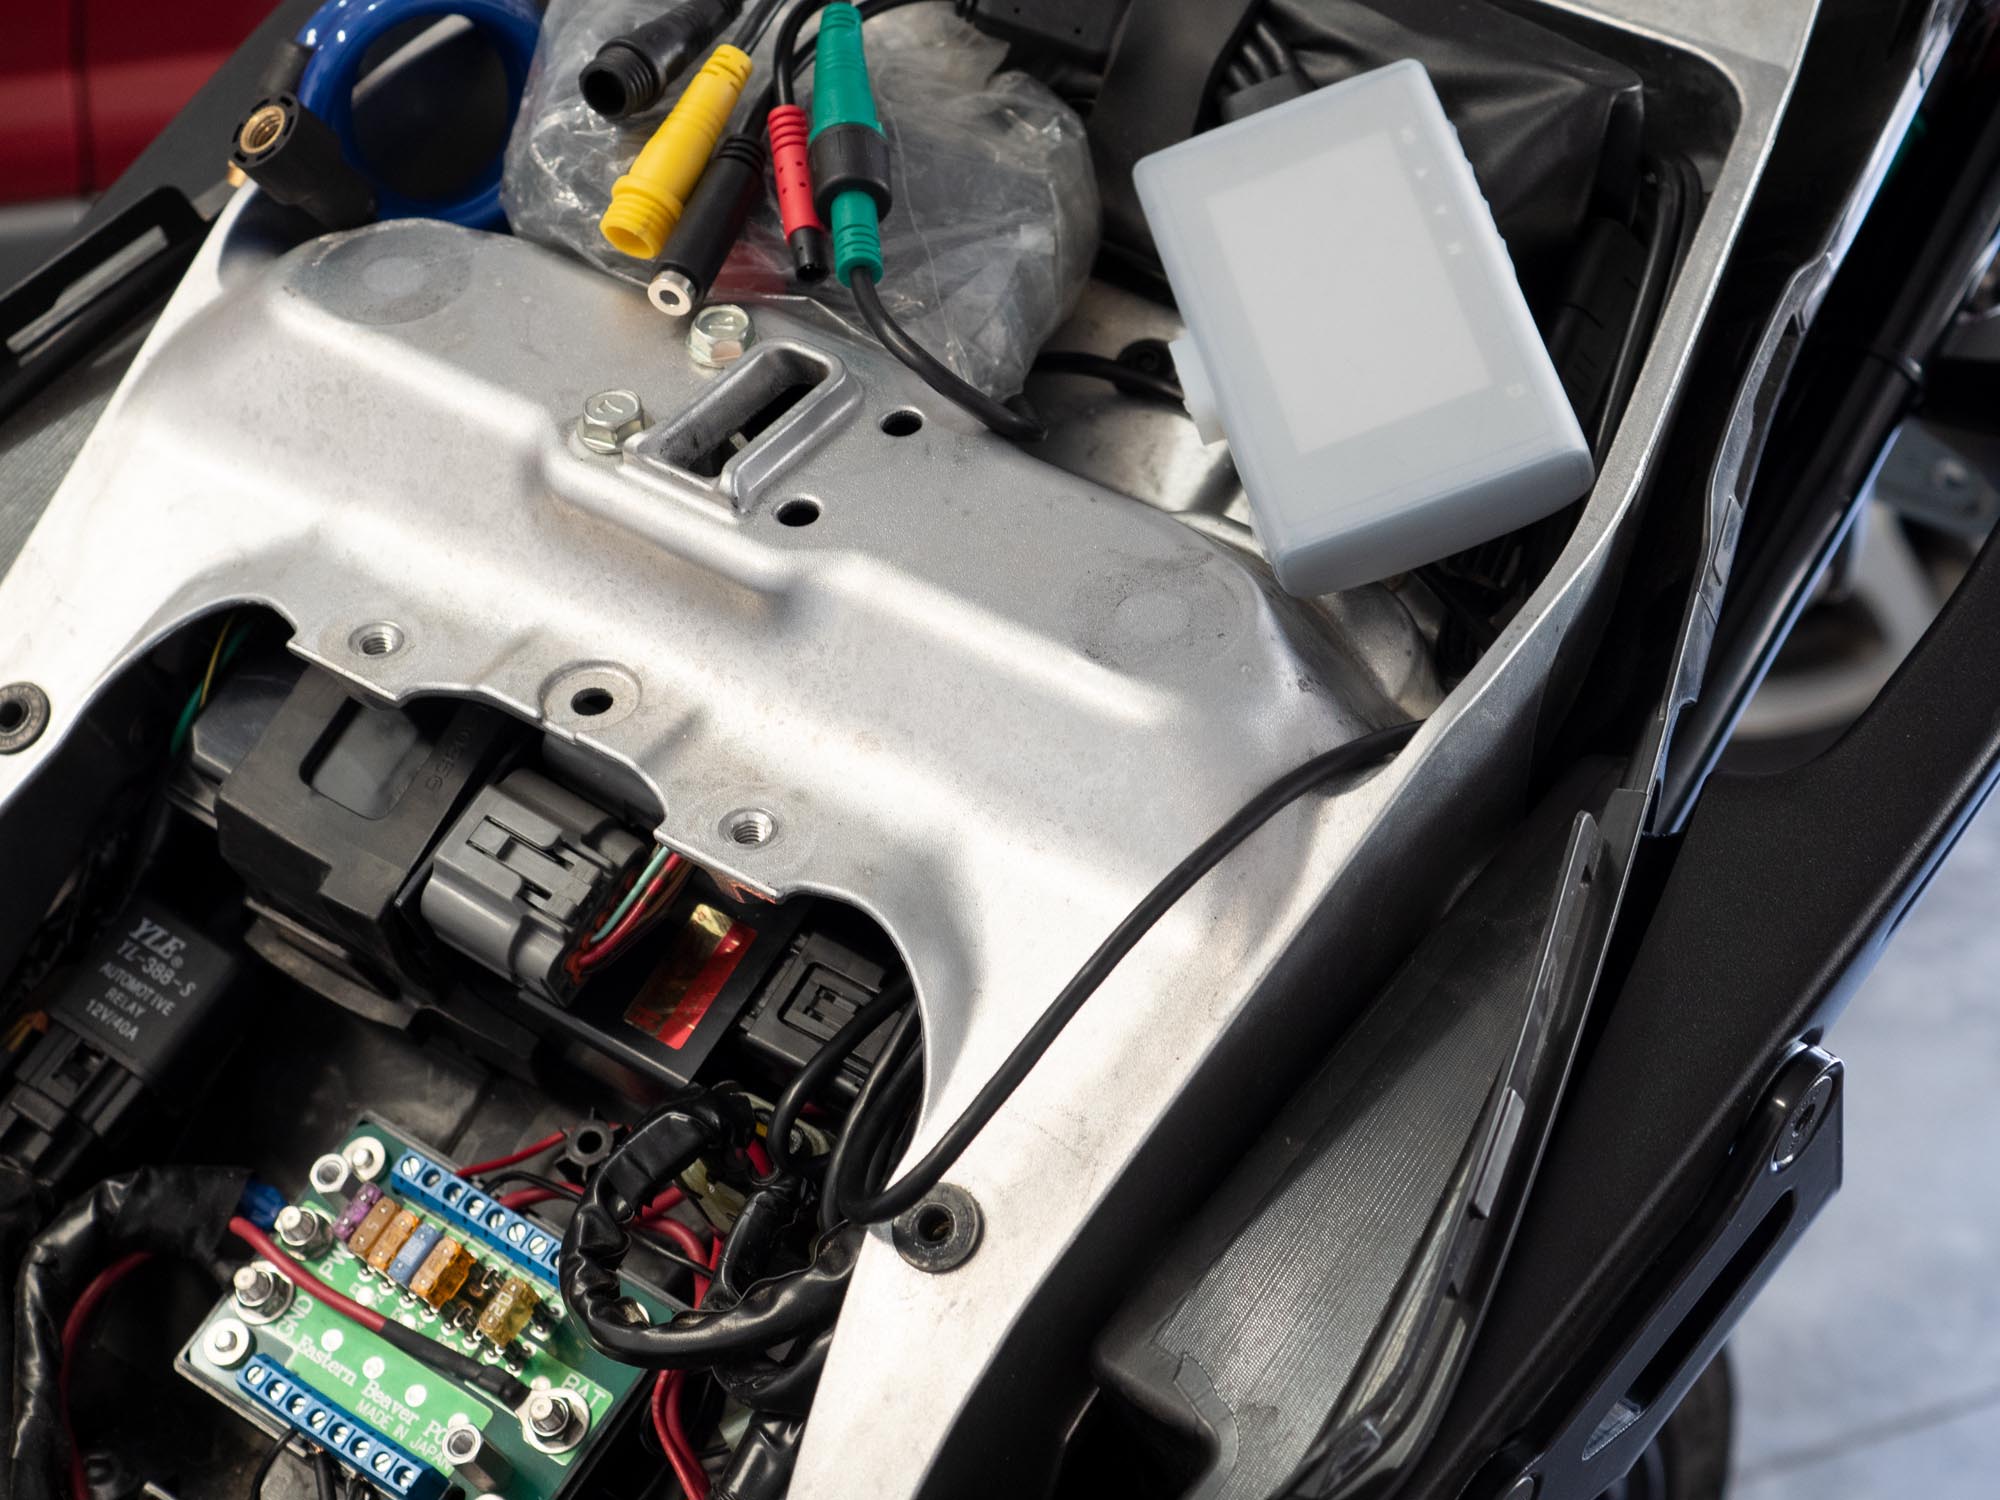
Spot for the DVR
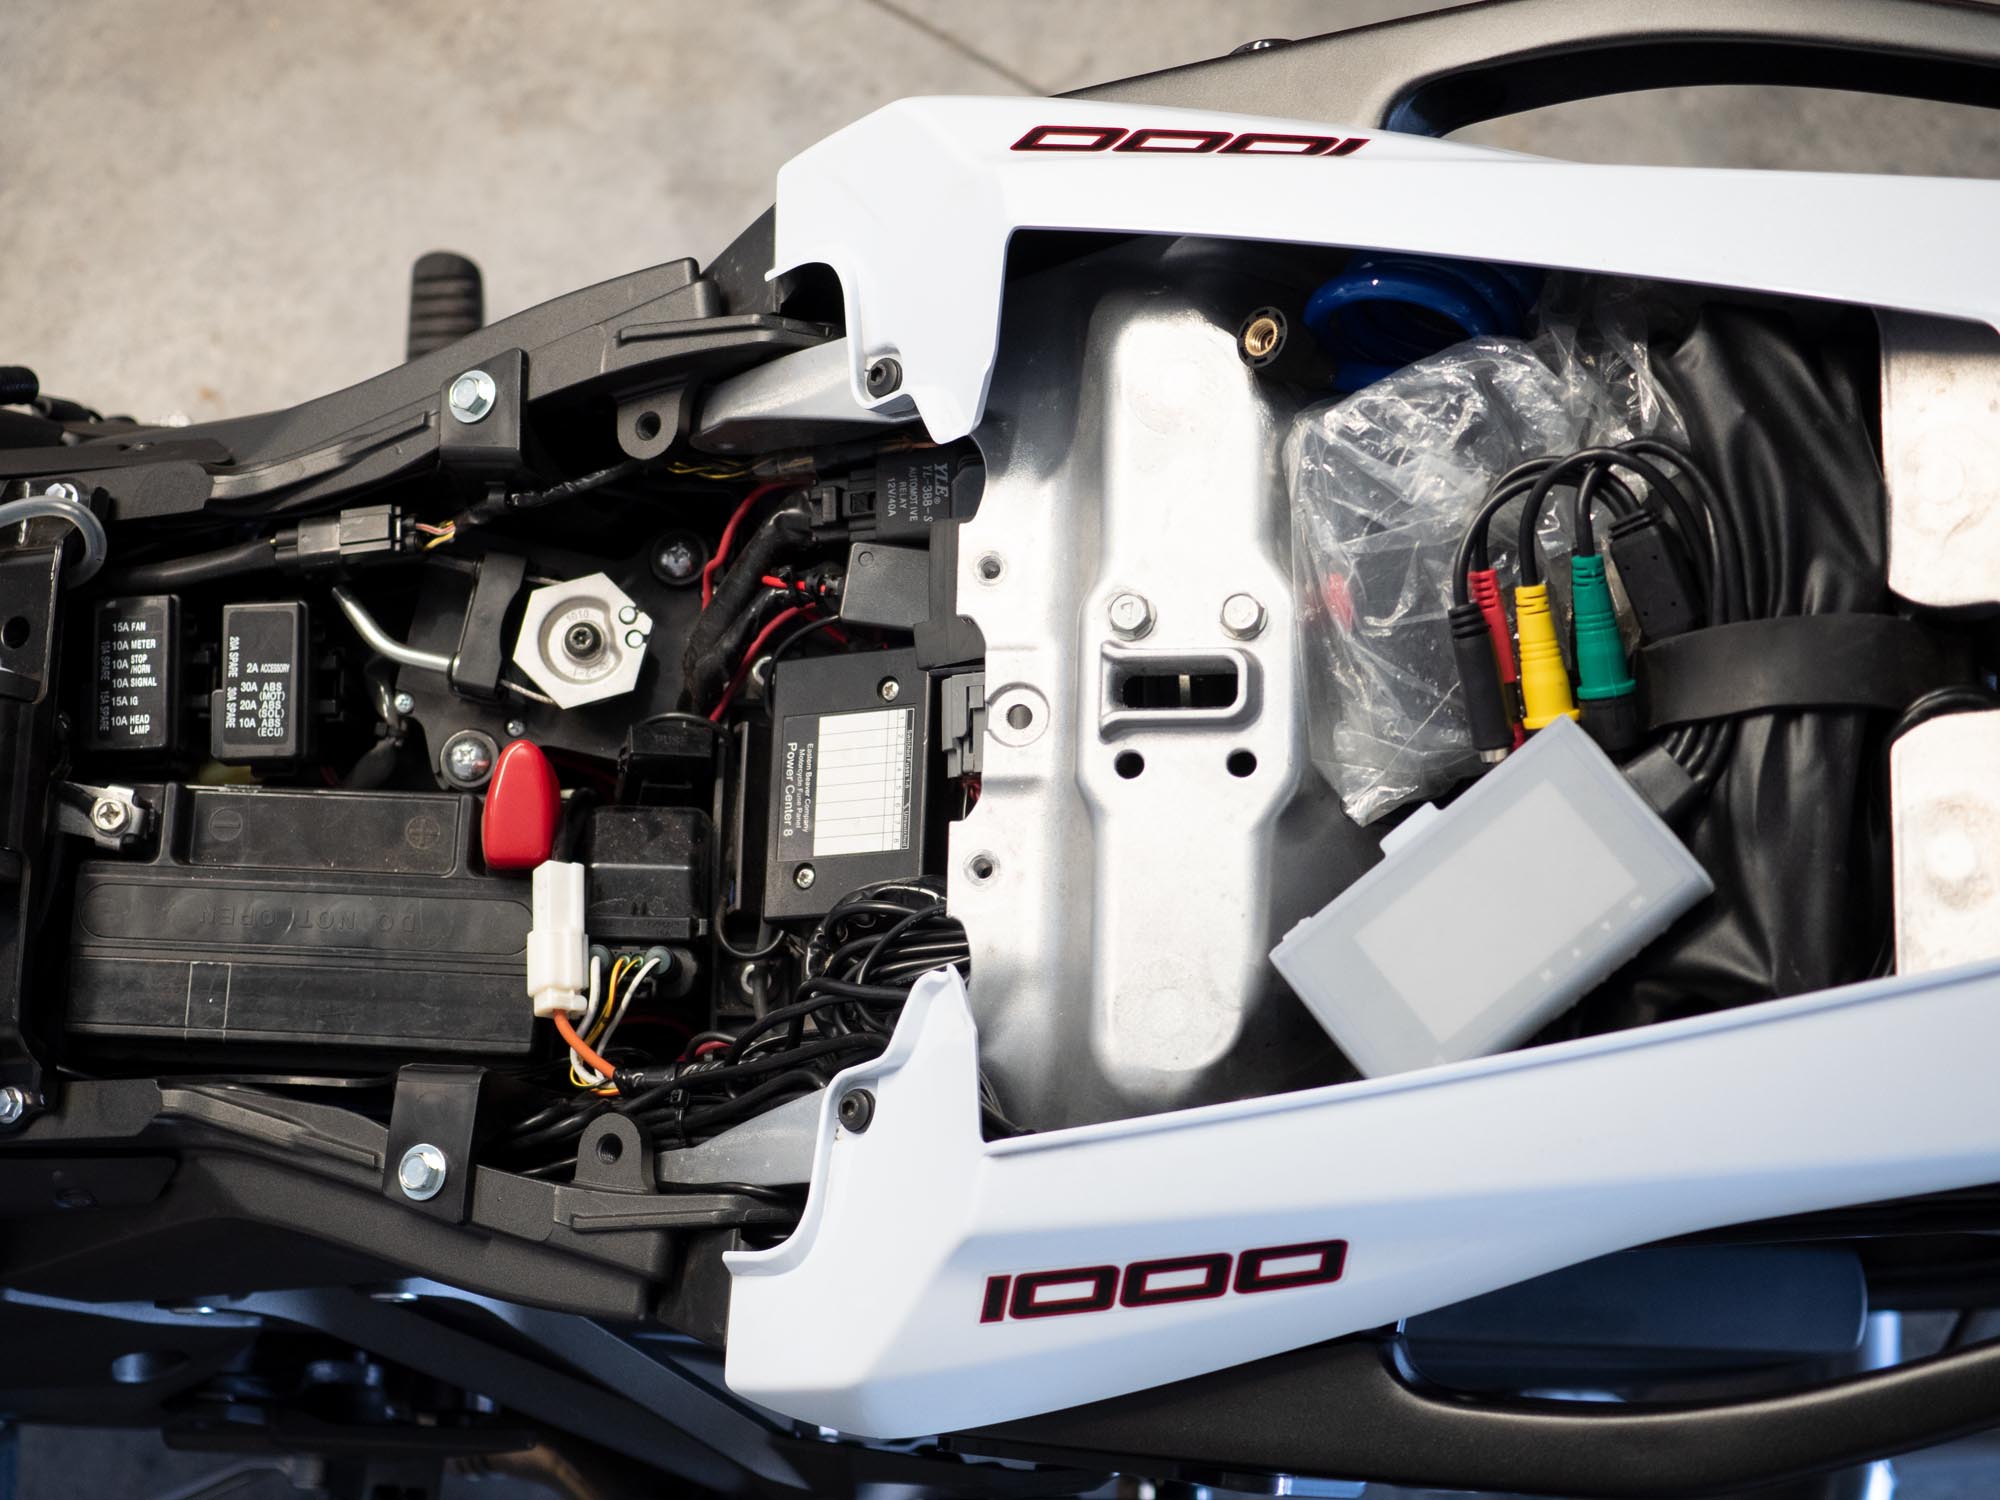
After getting the power sorted, the next step should be to find a suitable location for the DVR unit. Since it is not waterproof I would recommend a location that is well protected such as under a seat or other storage compartment. In my case, I placed the unit under my passenger seat.
Placing the Cameras
Next, place the cameras. I wanted to put the cameras in unobtrusive locations that also offered a decent view. The rear was easy enough on my bike as I just attached it under the top case rack. This offered a good view of the rear which, while it does cut off some of the tops of the view, provides more than enough view to do the job as a “dashcam”.
 |
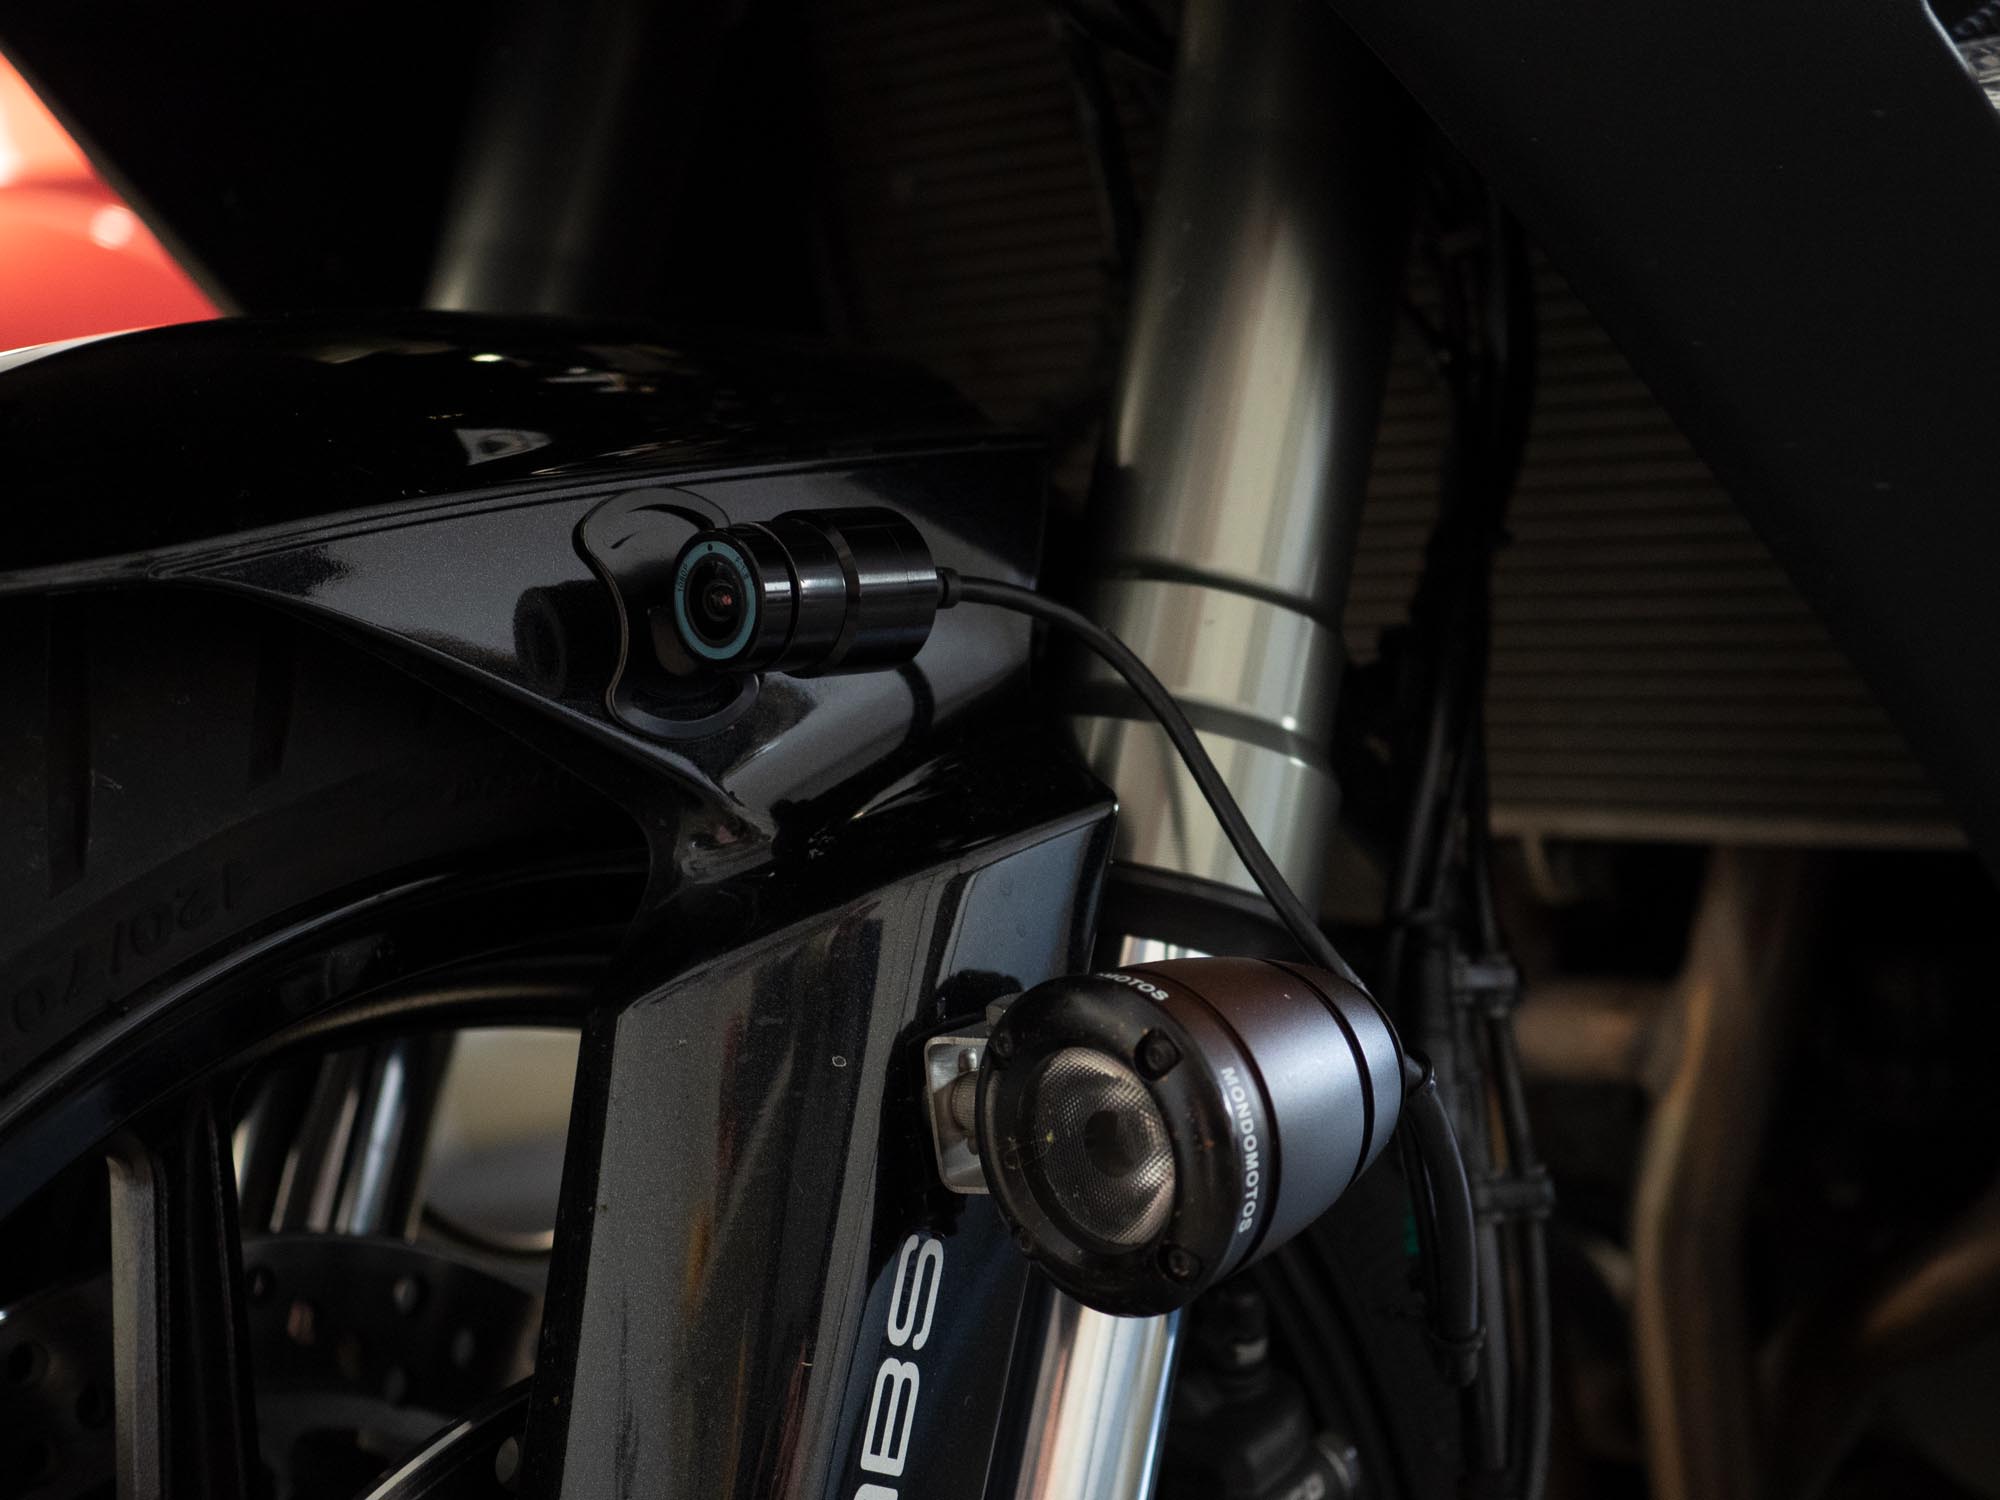 |
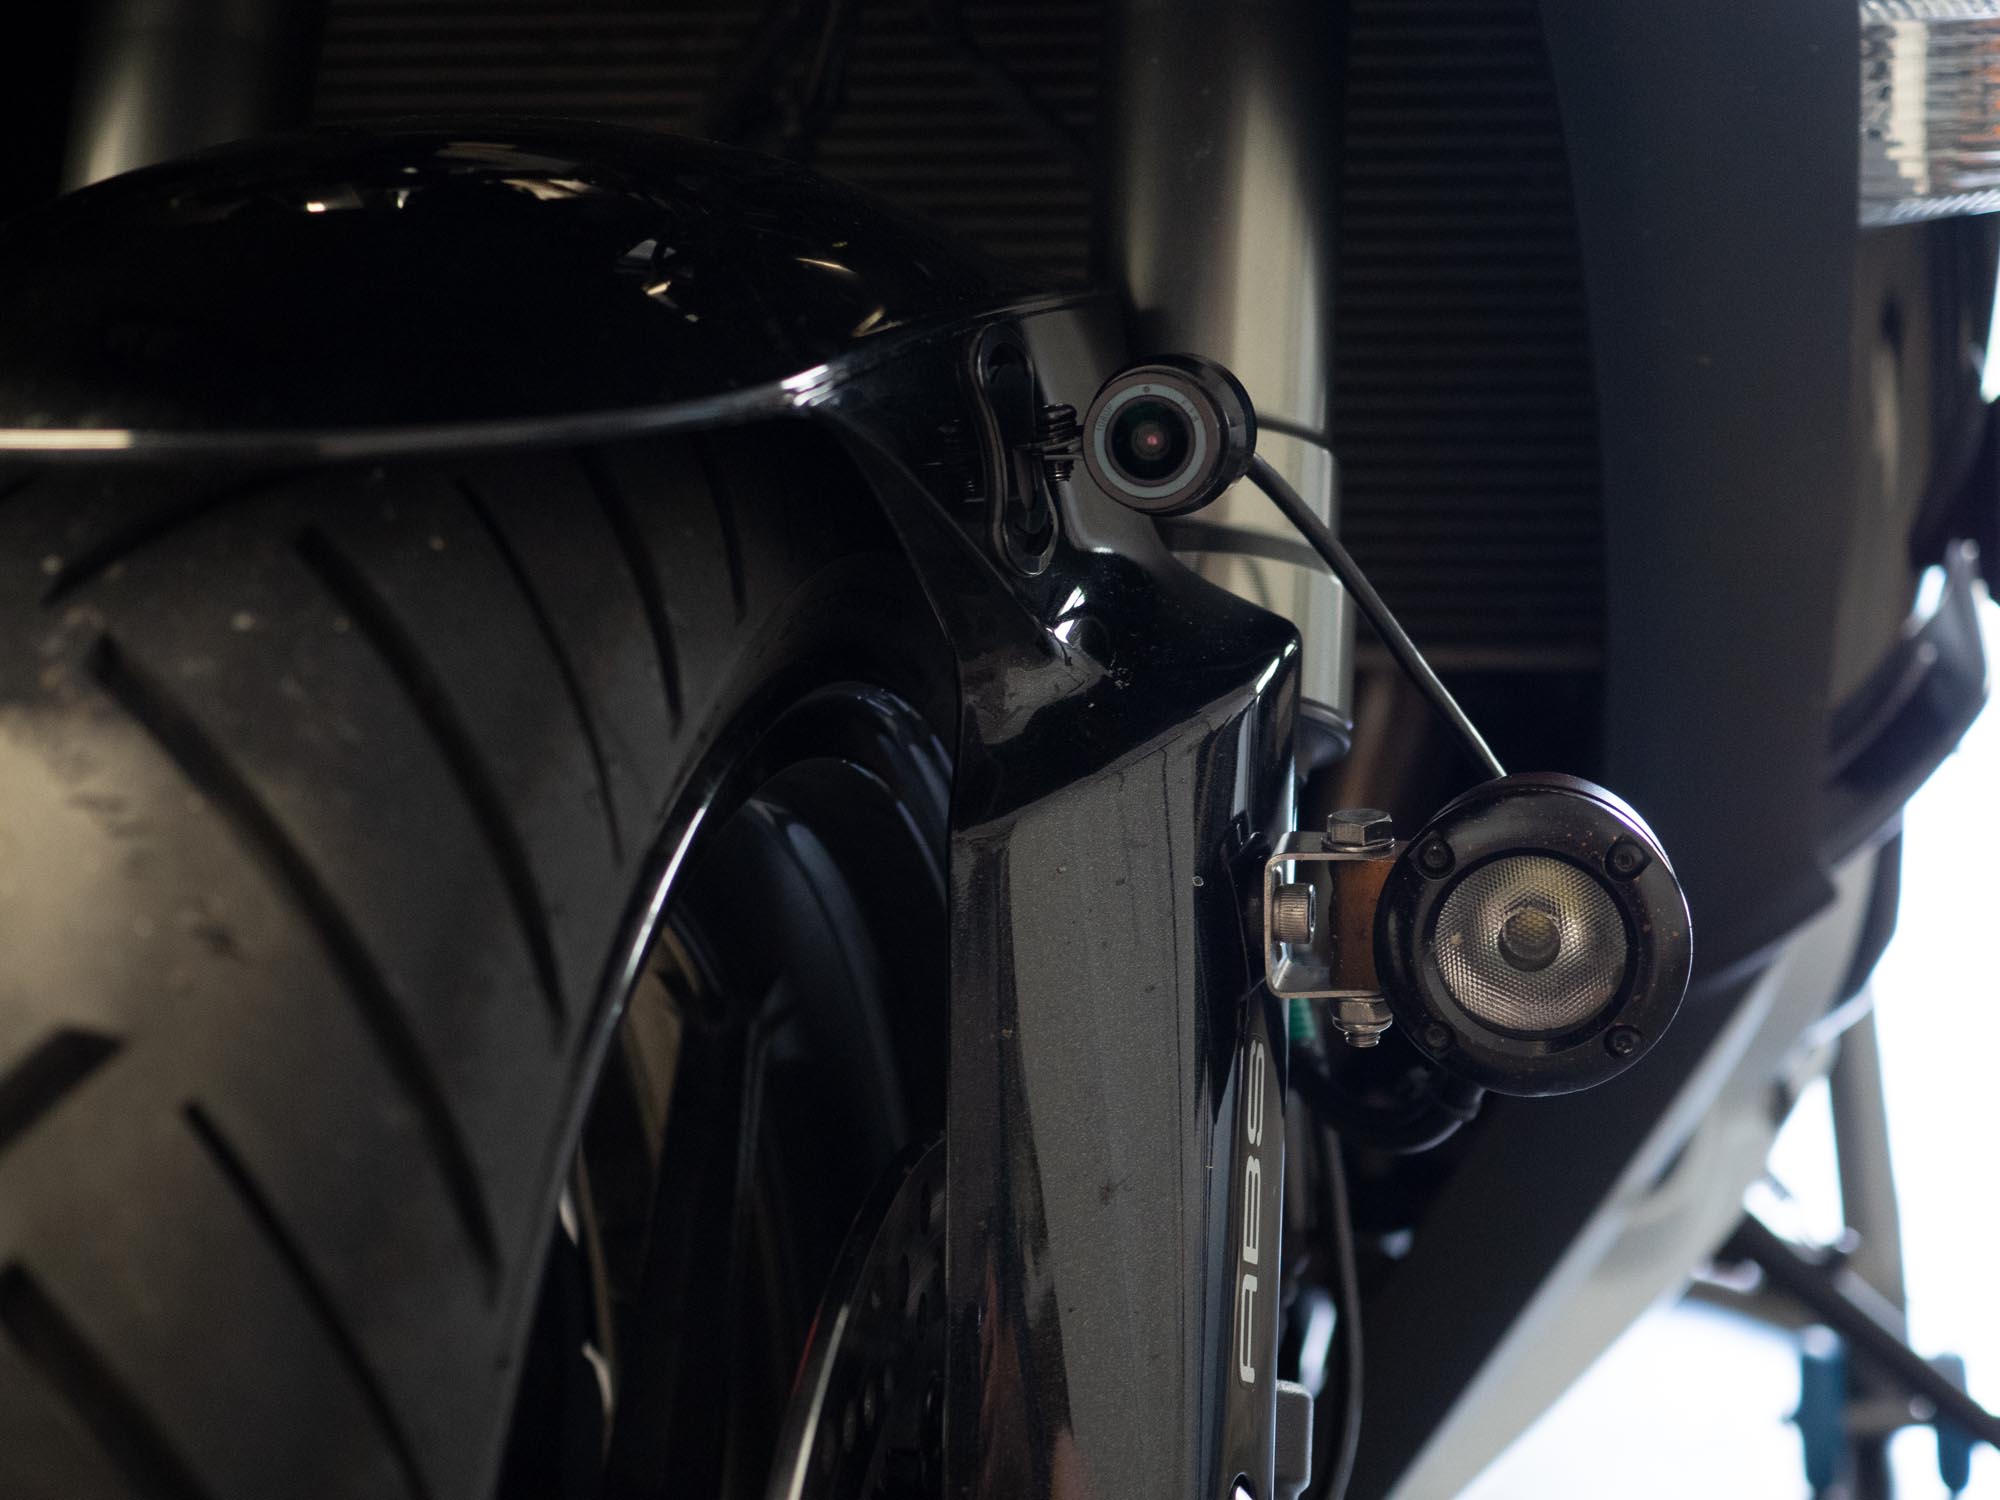
The front was a little more difficult as I couldn’t find a place I felt good about. Right under the fairing nose posed the possibility of the camera contacting the front fender over a big bump and there weren’t other places I liked. Eventually, I attached it to the side of the front fender. This location does have a portion of the fender blocking some of the right side views but still offers enough view to do the job of “dashcam”.
I didn’t want to drill holes in the plastics to attach the brackets for the cameras with the included screws so I used Scotch Extreme Mounting tape to attach the brackets to the bike. This tape has worked very well for me on other projects and has held the cameras in place for weeks now in the summer heat with no issues. *Your “mileage” may vary so if that stuff doesn’t work for you please don’t come after me :).
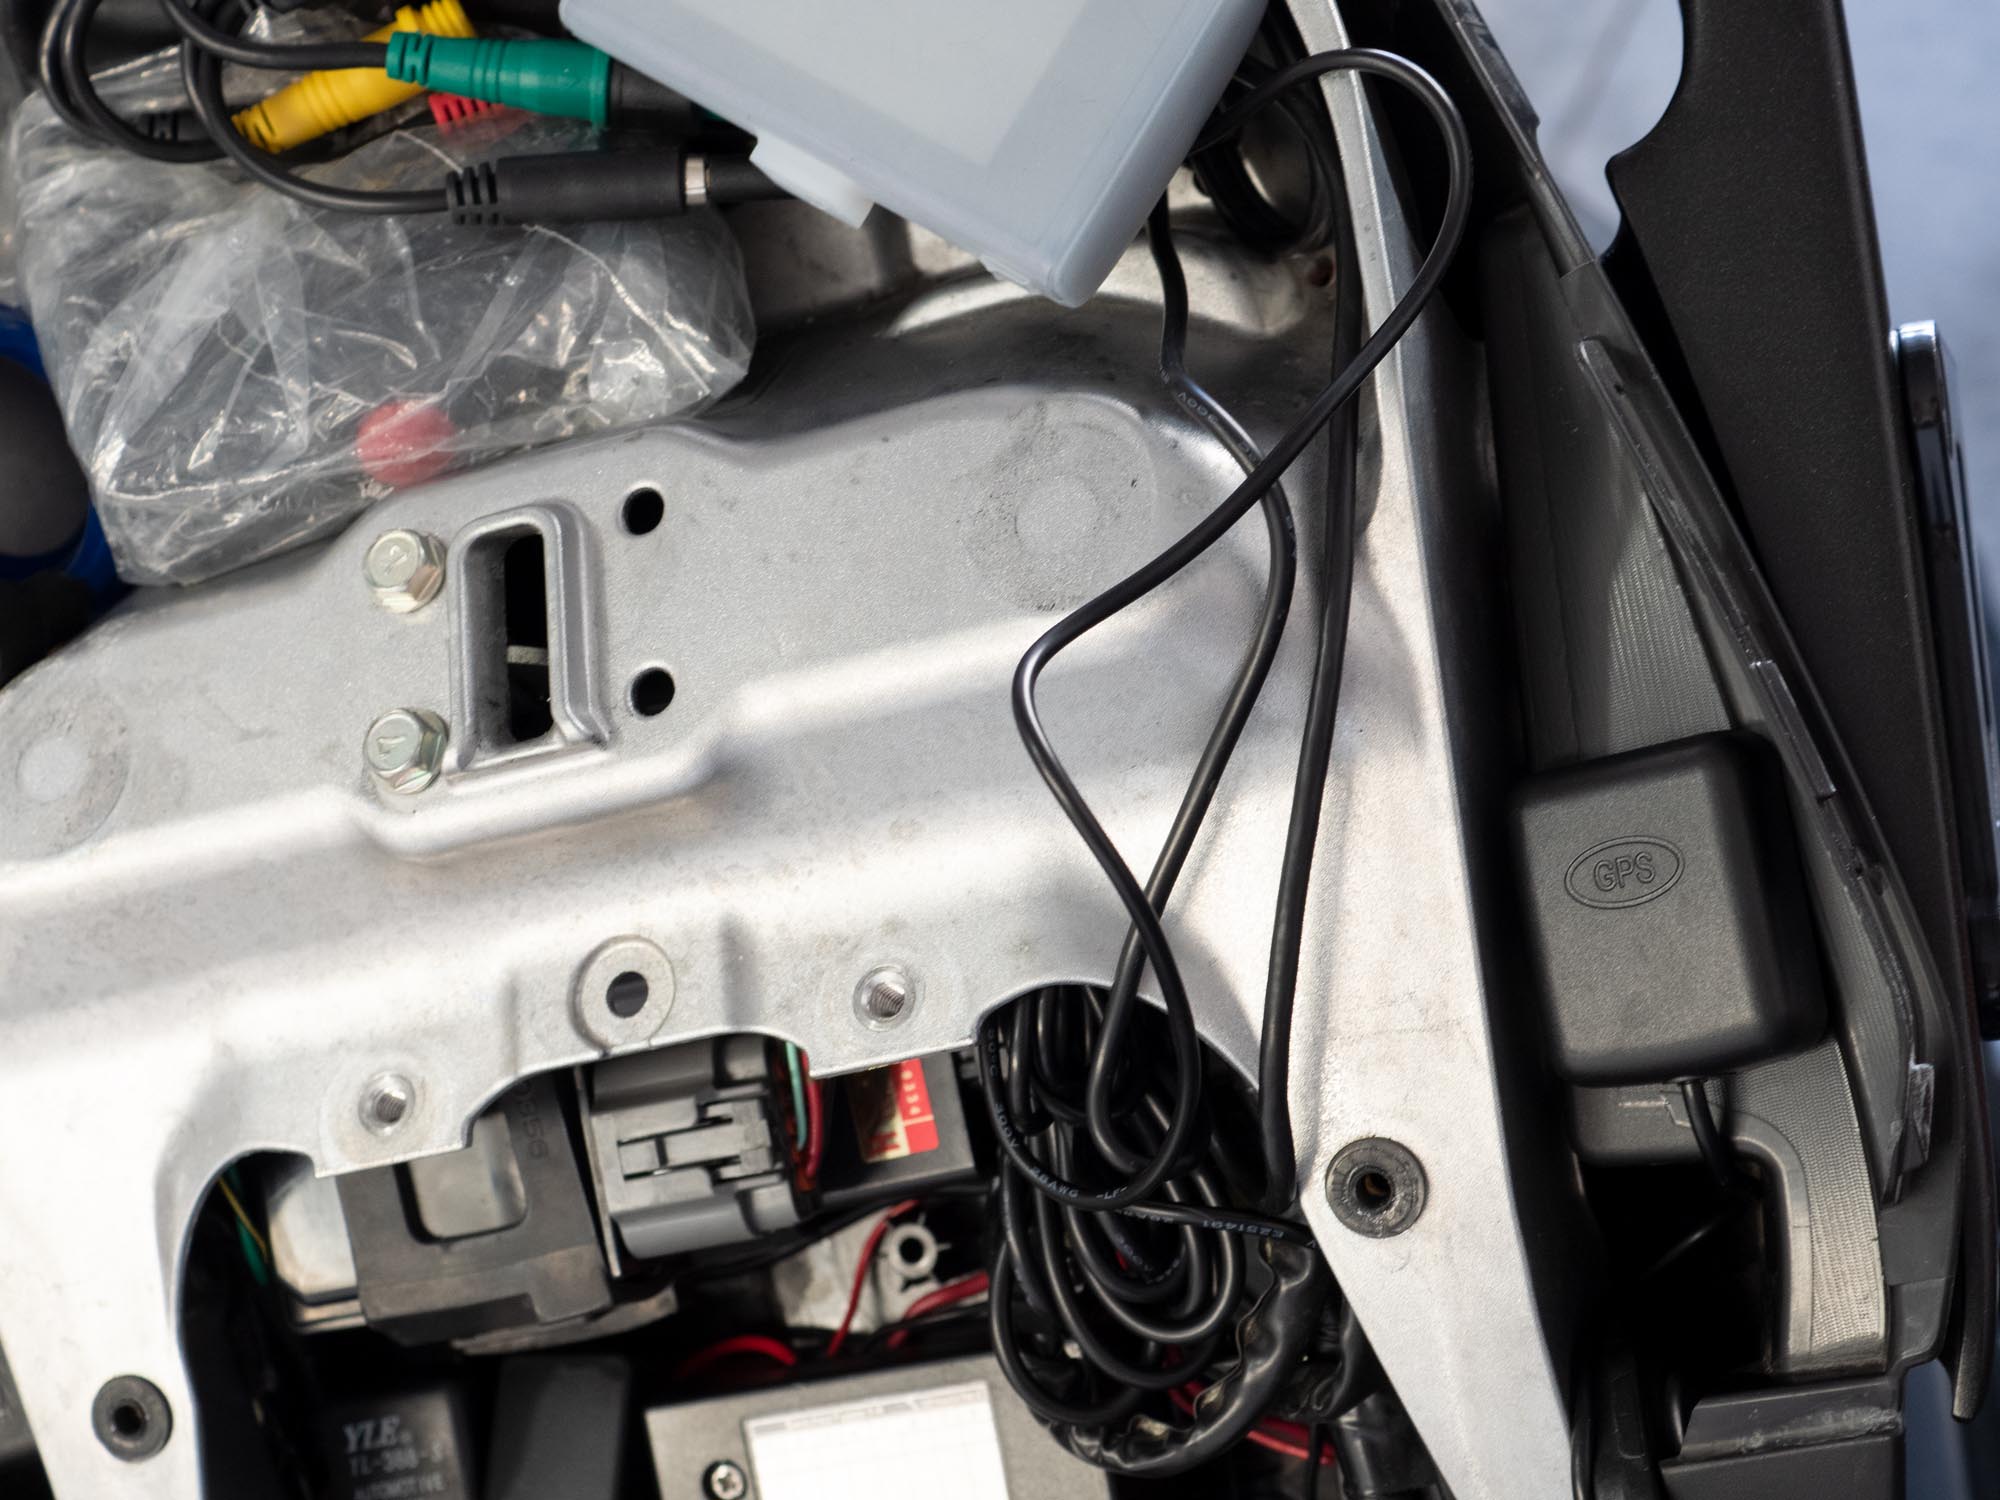
GPS Antenna
With the cameras and DVR in place, the last piece of the puzzle was to find a good spot for the GPS antenna. Since I had removed some of the rear plastics around the subframe during the wire routing planning, I found a good spot on the left side of the subframe which will be covered by the plastics once they are re-installed.
The thin plastic shouldn’t cause an issue with the GPS reception and since the unit was able to locate satellites from inside our house during initial testing I felt pretty good about this.
Potential “Gotchas”
While I was planning my wire routing I found there were several routing options that were not compatible due to the relatively large size of the waterproof connectors for the extension cables.
Some areas that might have been large enough to allow the cable to pass through discreetly were much too small to get these larger connectors to pass through. In some cases, removal of more parts from the bike could have made this work but the return on time investment didn’t seem worth it to me.
The other thing to be aware of is that the small metal brackets for the cameras are not that robust and in the kit I received, the loop portion of the bracket that encircles the cameras were too large to securely keep the cameras properly positioned.
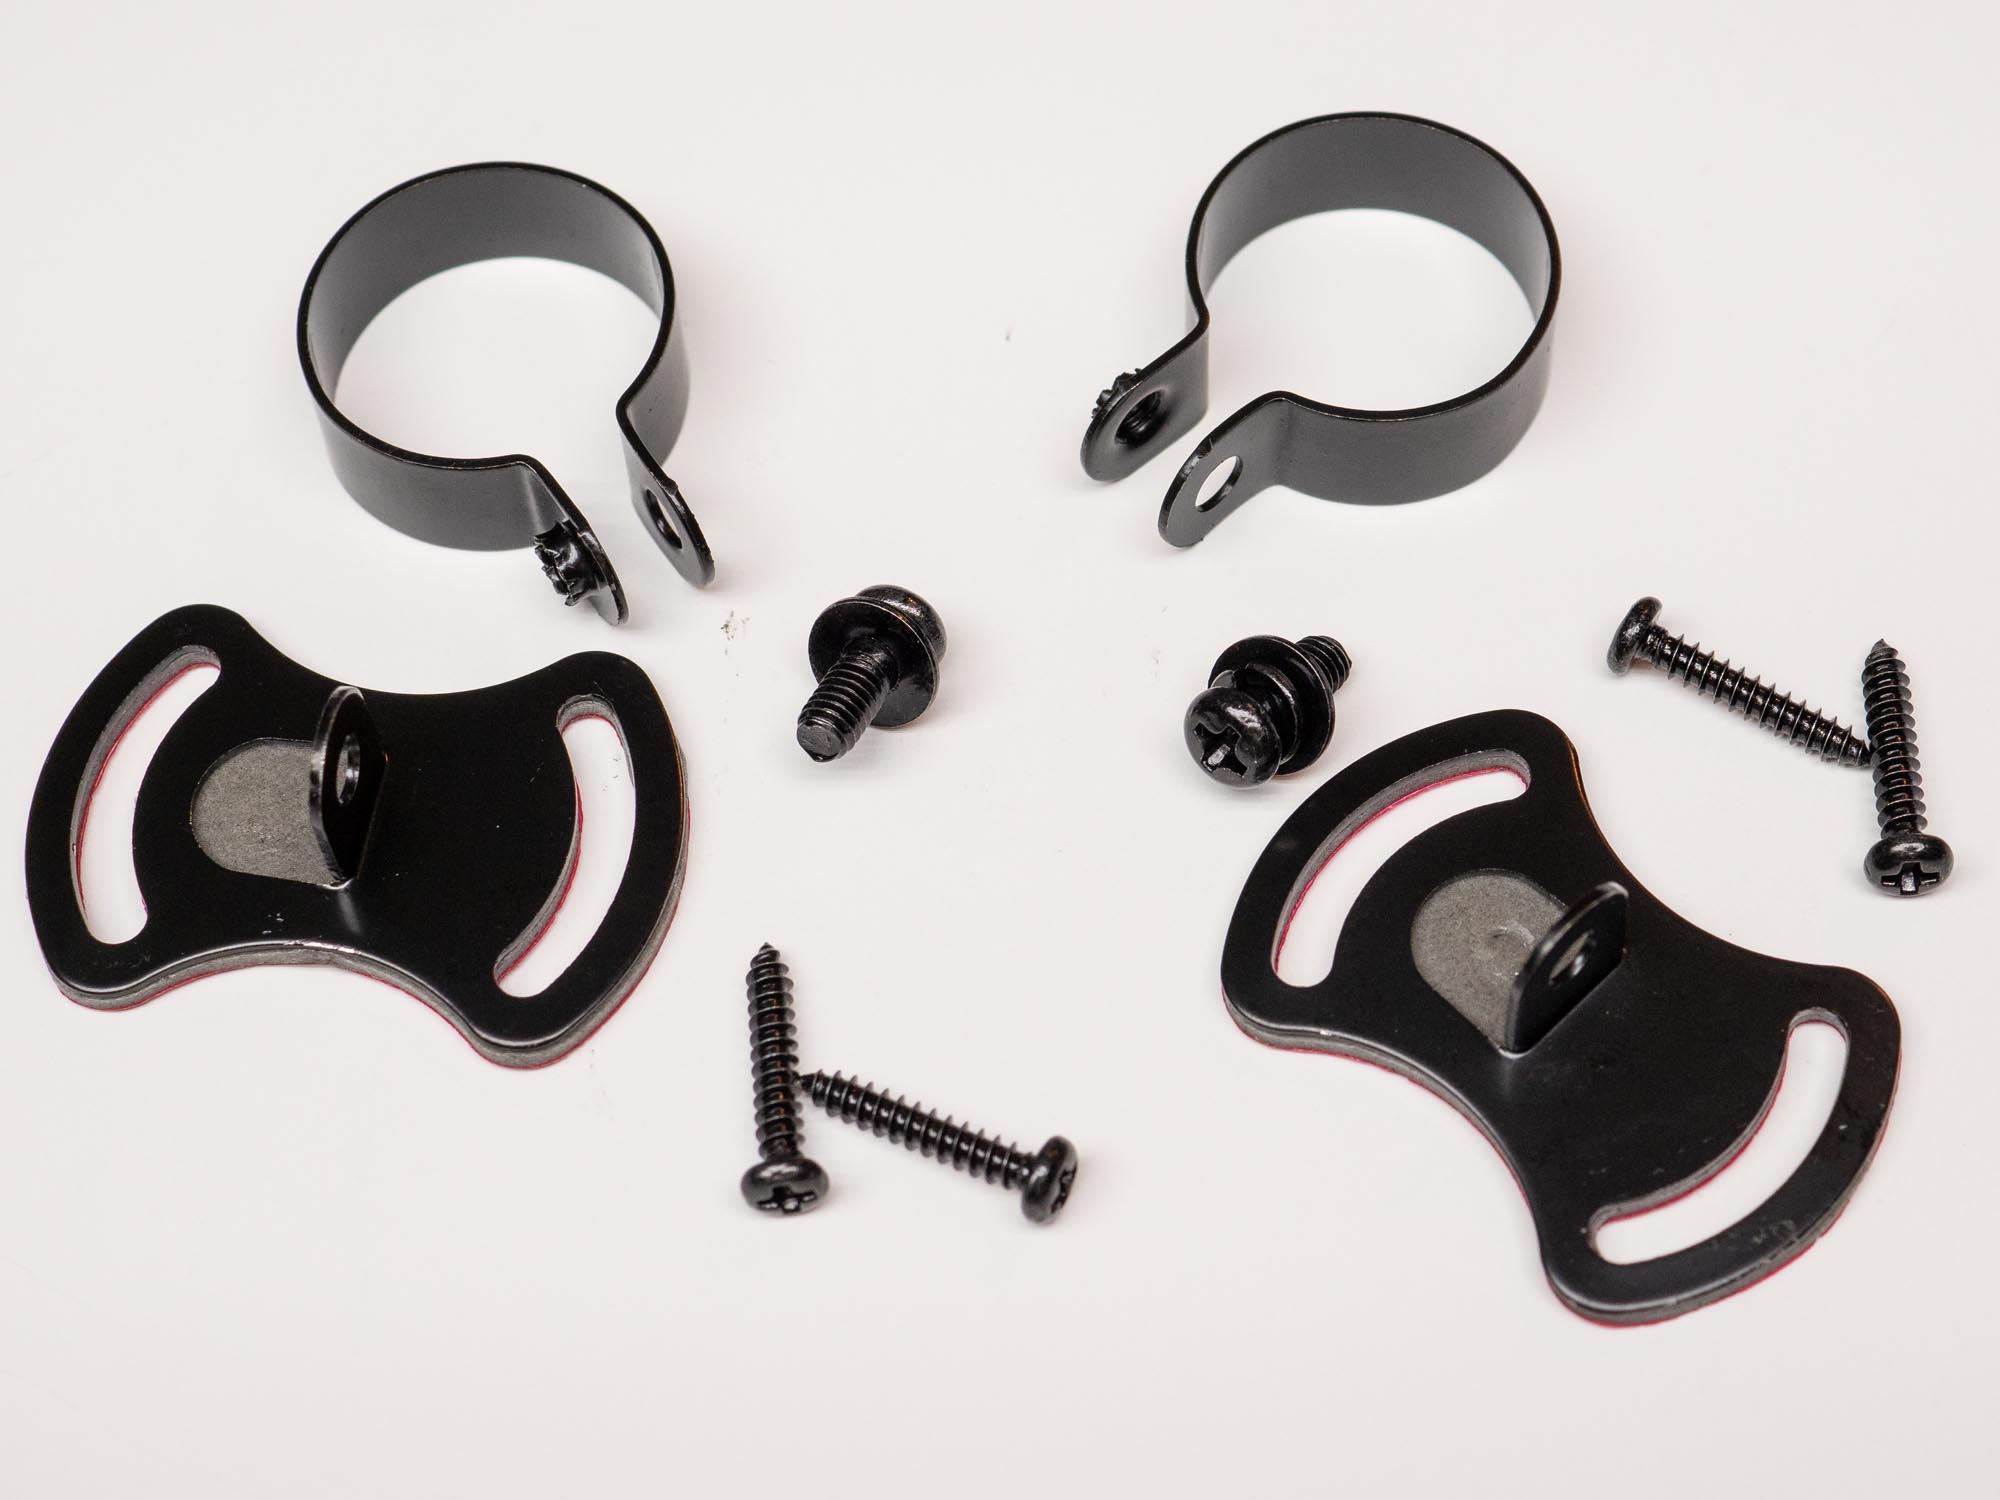
That isn’t to say the cameras would fall out but they were too loose to maintain their correct rotational position allowing them to twist in the mount. This was a pretty easy fix using a very small strip of tape on the interior of the metal band. Once in place, the bracket could be tightened down enough to hold the camera firmly in position.
One last thing to keep in mind is that the extension cables are quite long and a bit thick. Since they contain several conductors (wires) they are not easily cut and spliced. As such I ended up with a lot of excess wire to bundle up and “store” under the seat. I had sufficient space to tuck this wire bundle on my Ninja 1000 but not every bike will have space like this so be sure to include room for this in your installation if you want to have a “neat” final installation.
Shopping Now? We Recommend:
webBikeWorld has worked closely with Amazon over the years to provide our testers with products to review. In addition to being a great site to shop from, they’re also a great partner.
Amazon
![]()
Free shipping (with Amazon Prime)
30-day return policy
Excellent selection
Competitive pricing
In Use
Once installed and underway, the system is automatic. Recording starts a few seconds after the ignition is turned on and shuts down a few seconds after being turned off. It really couldn’t be easier.
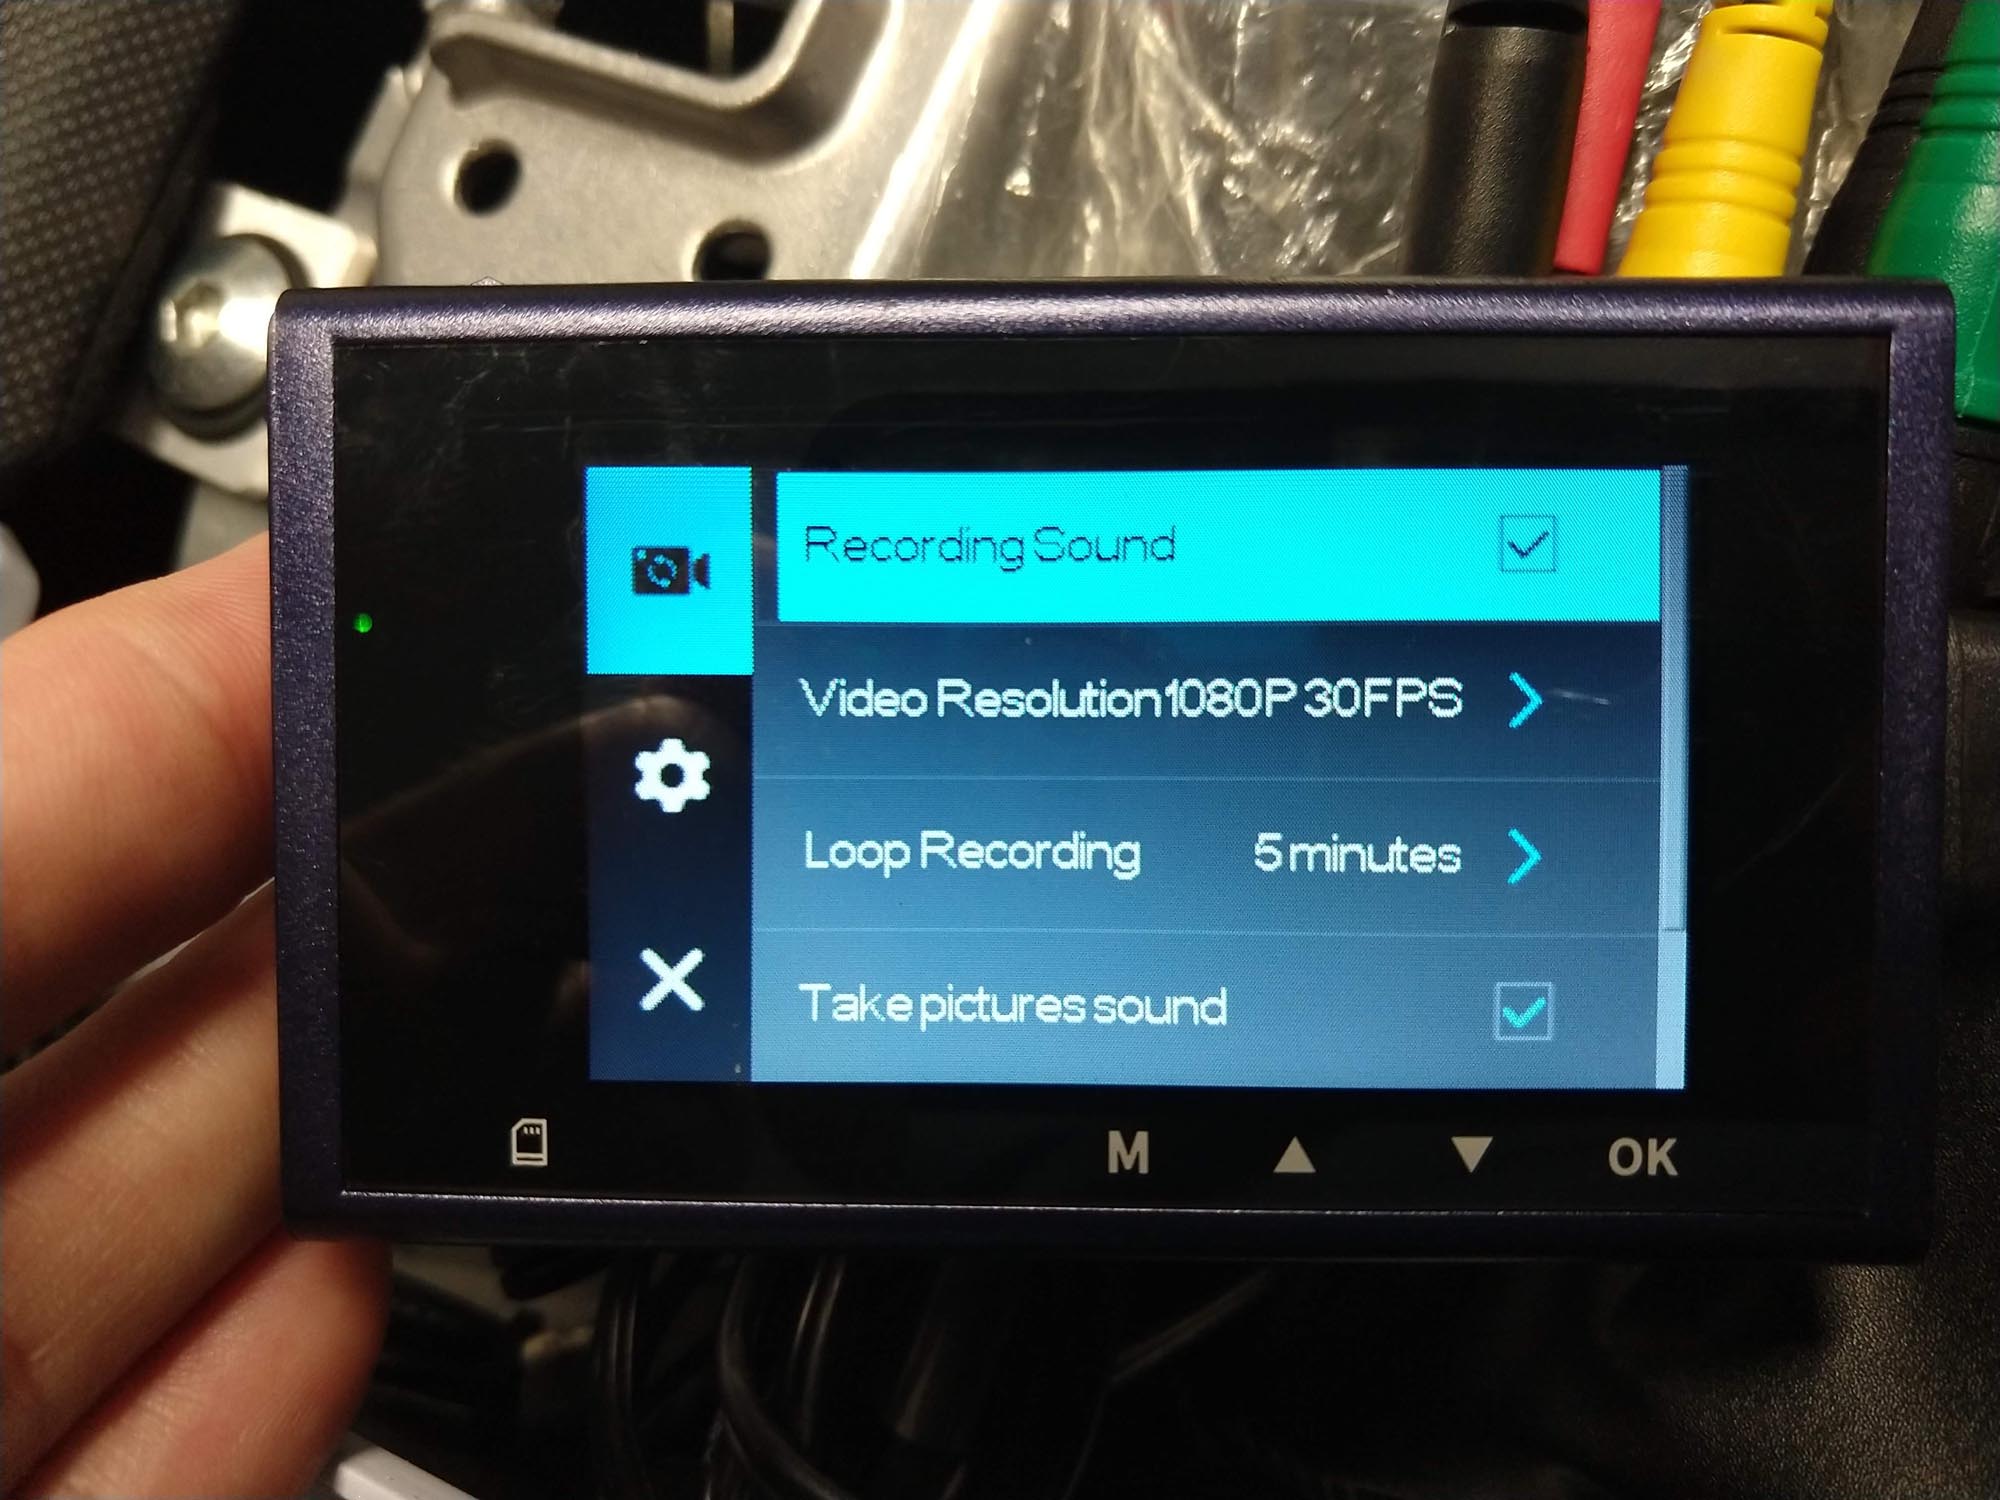
Setting up the options is fairly straightforward. Resolution can be set for 720p or 1080p and if using the 1080p setting, a high-speed card is recommended as two 7mbps video streams are being captured at the same time.
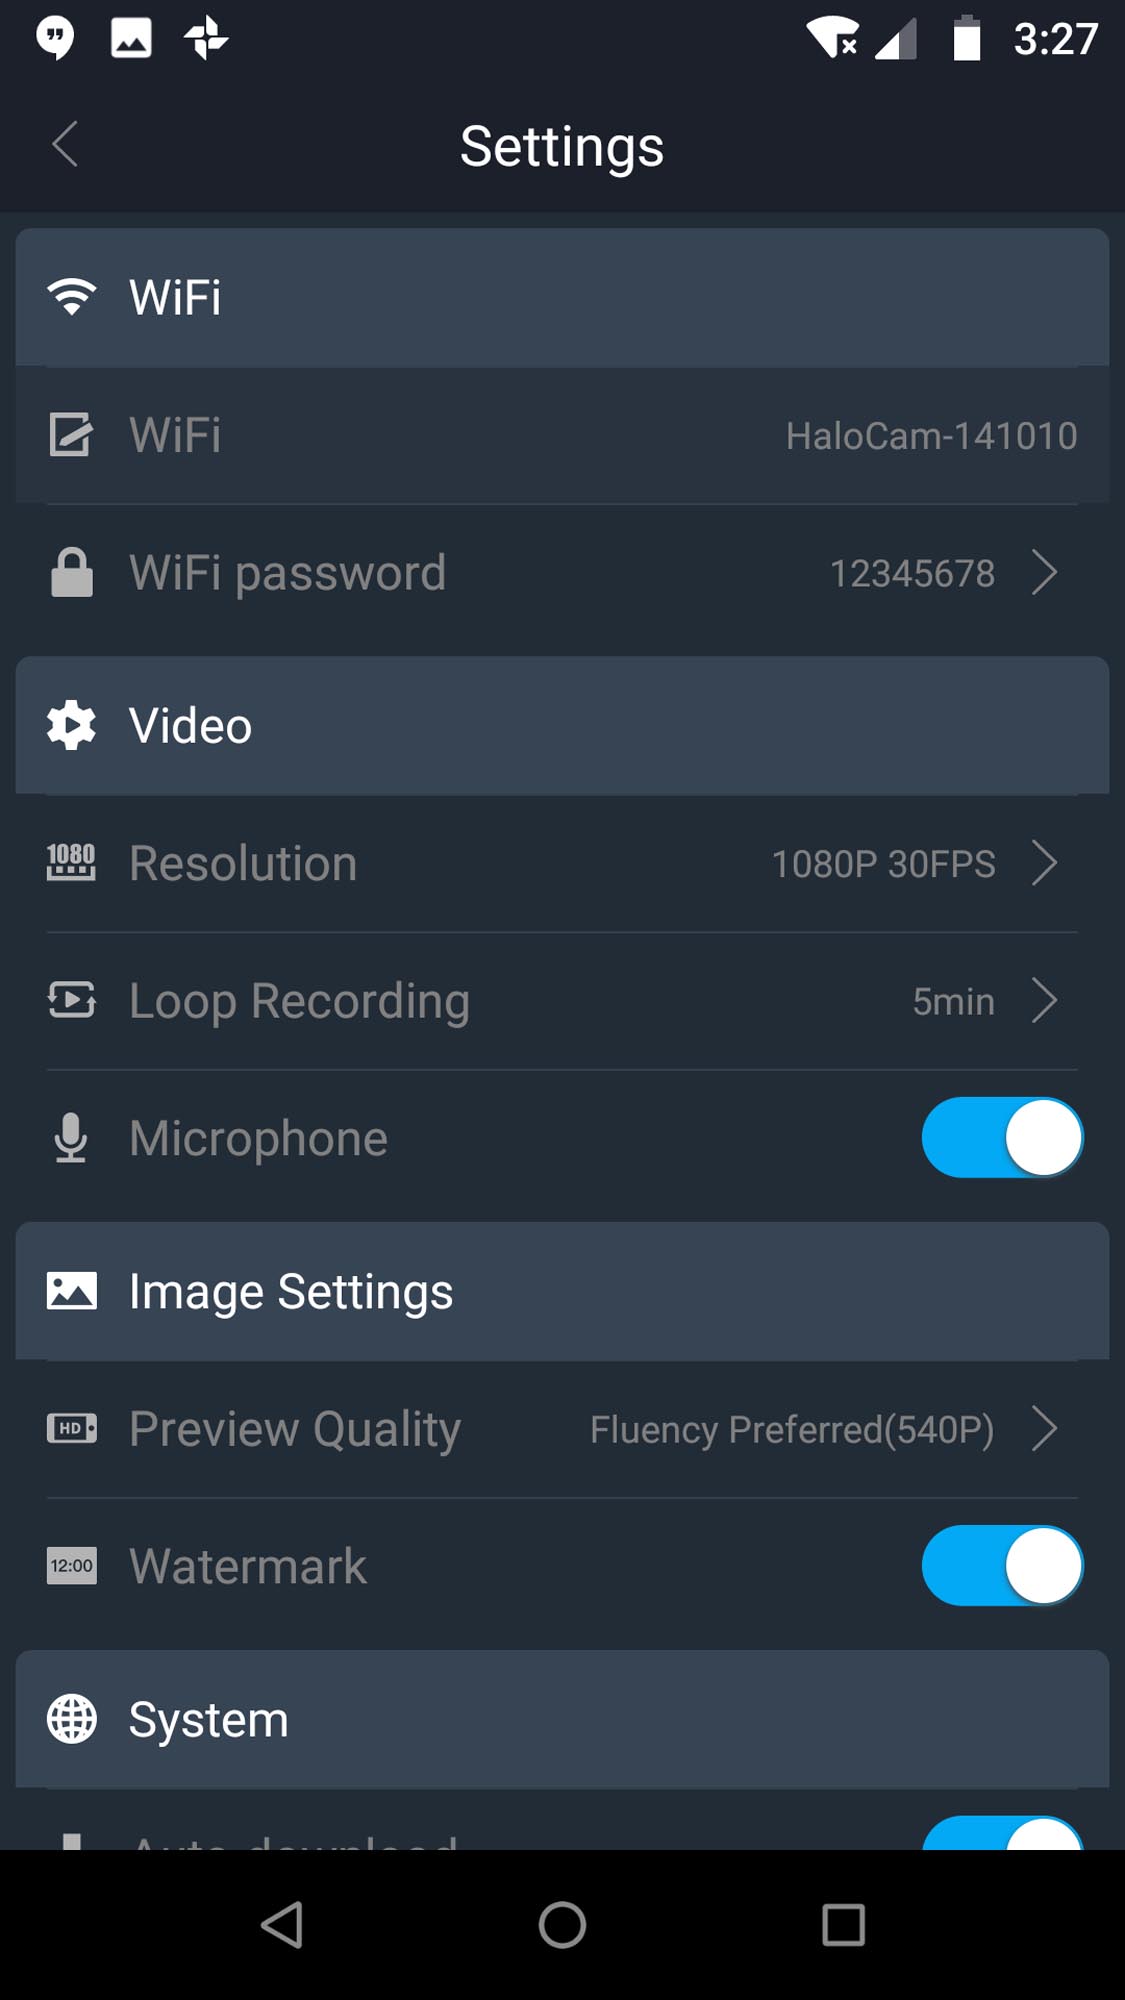
Settings can be adjusted through the phone app (Android or iPhone) over Wi-Fi. The DVR unit acts as the access point so one will need to connect their device to the Wi-Fi specs called out in the manual. The Wi-Fi settings can be adjusted if desired.
Control Button
The included control button allows one to capture a 15 second “Wonderful Video” and a photo by pressing the button briefly. Holding it down for a long press (more than one second?) will lock the video preventing it from being overwritten. Depending on the size of the SD card, this might be unnecessary but it can be done nonetheless.
Just to be clear, “Wonderful Videos” are simply video clips that start from 5 seconds before you press the button and then run for a total of fifteen seconds from that point. This doesn’t appear to interfere with regular recording but rather it just “clips” this segment and saves a copy to the Wonderful Video folder on the card. These videos come from only the front camera and are really for the convenience of finding that brief moment of desired footage later.
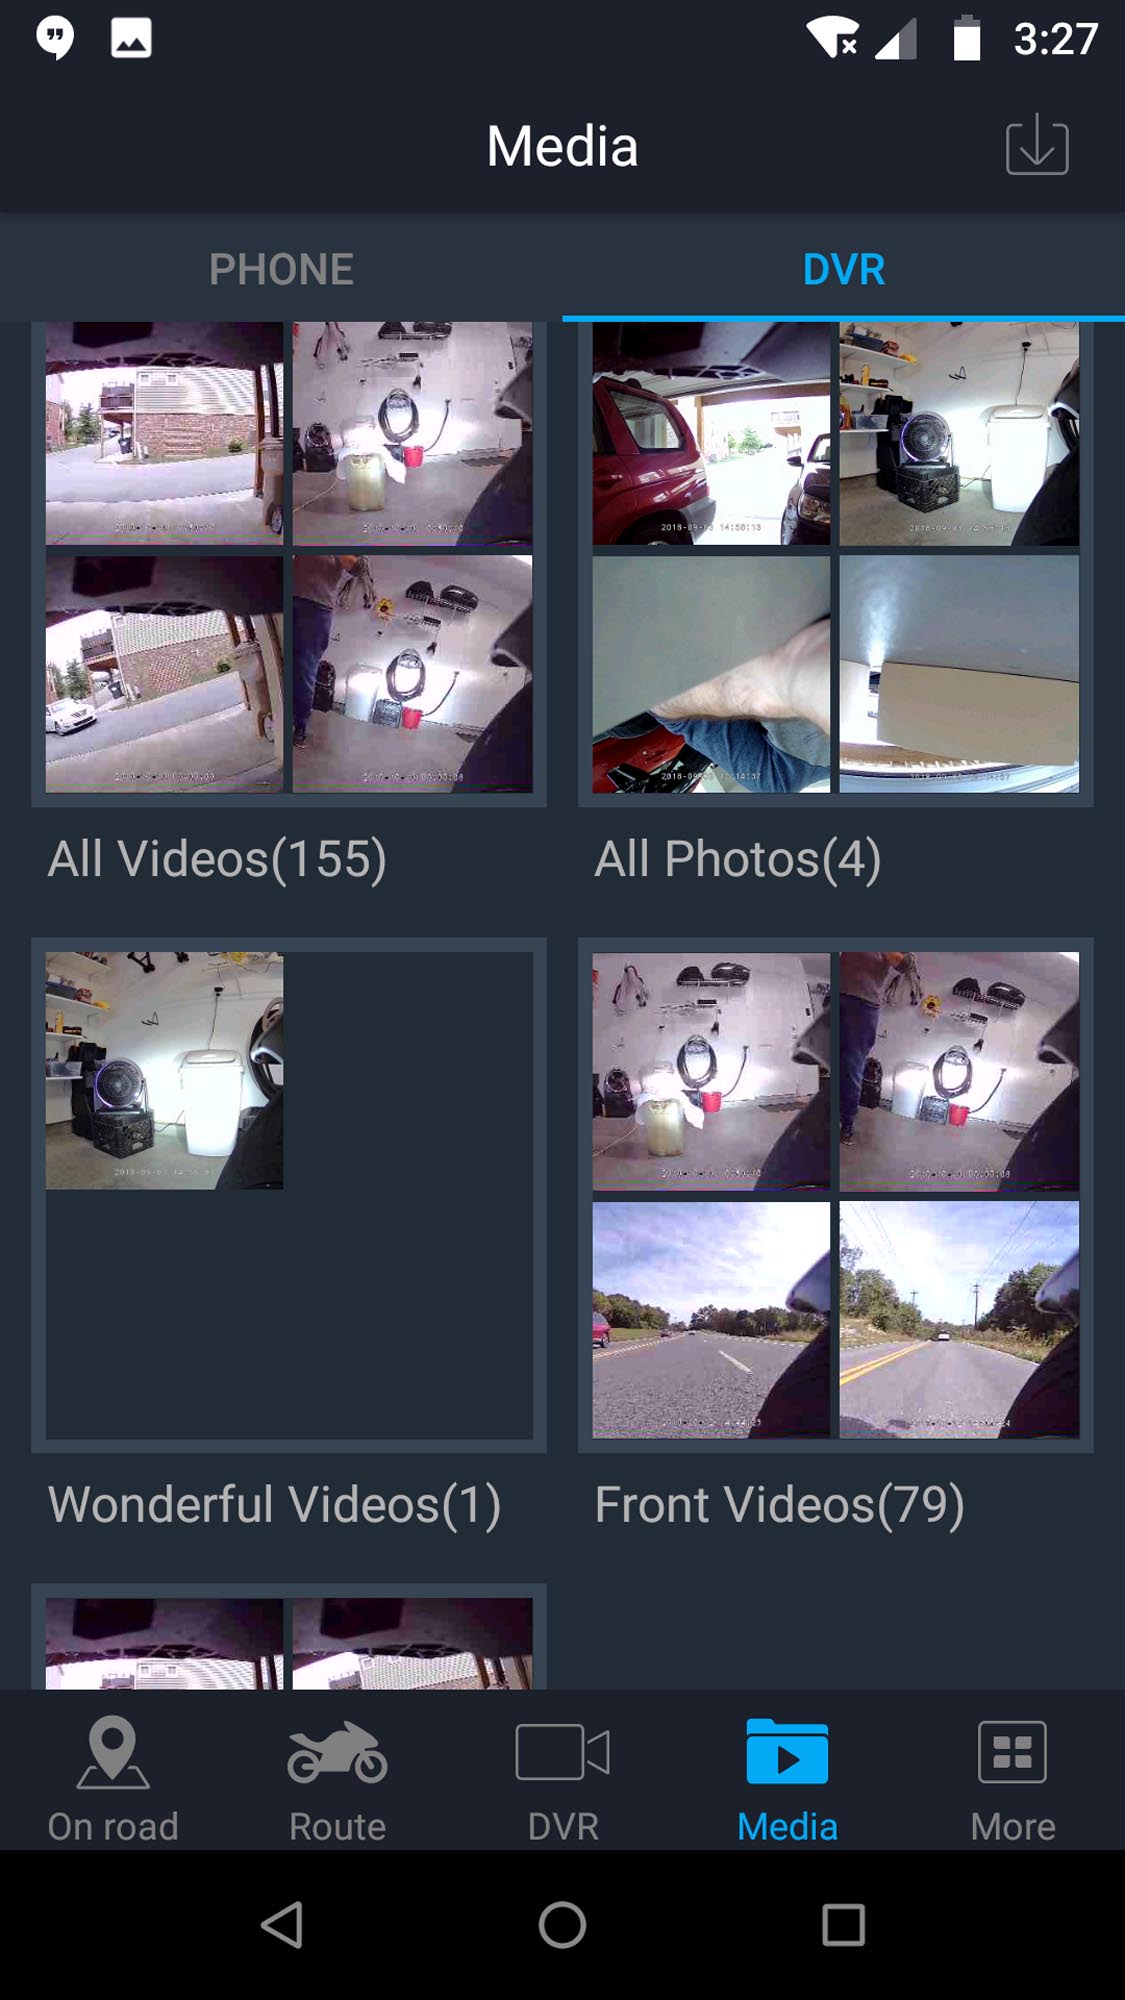
Accessing Your Video Clips
One of the settings is the clip length with the shortest being one minute and the longest, five. I chose the five-minute clip length simply as it makes fewer files. Keep in mind this is just the length of each clip that is recorded. They are continually recorded and “stack” upon the card until it is full, then the oldest files are overwritten as a new video is captured.
 |
 |
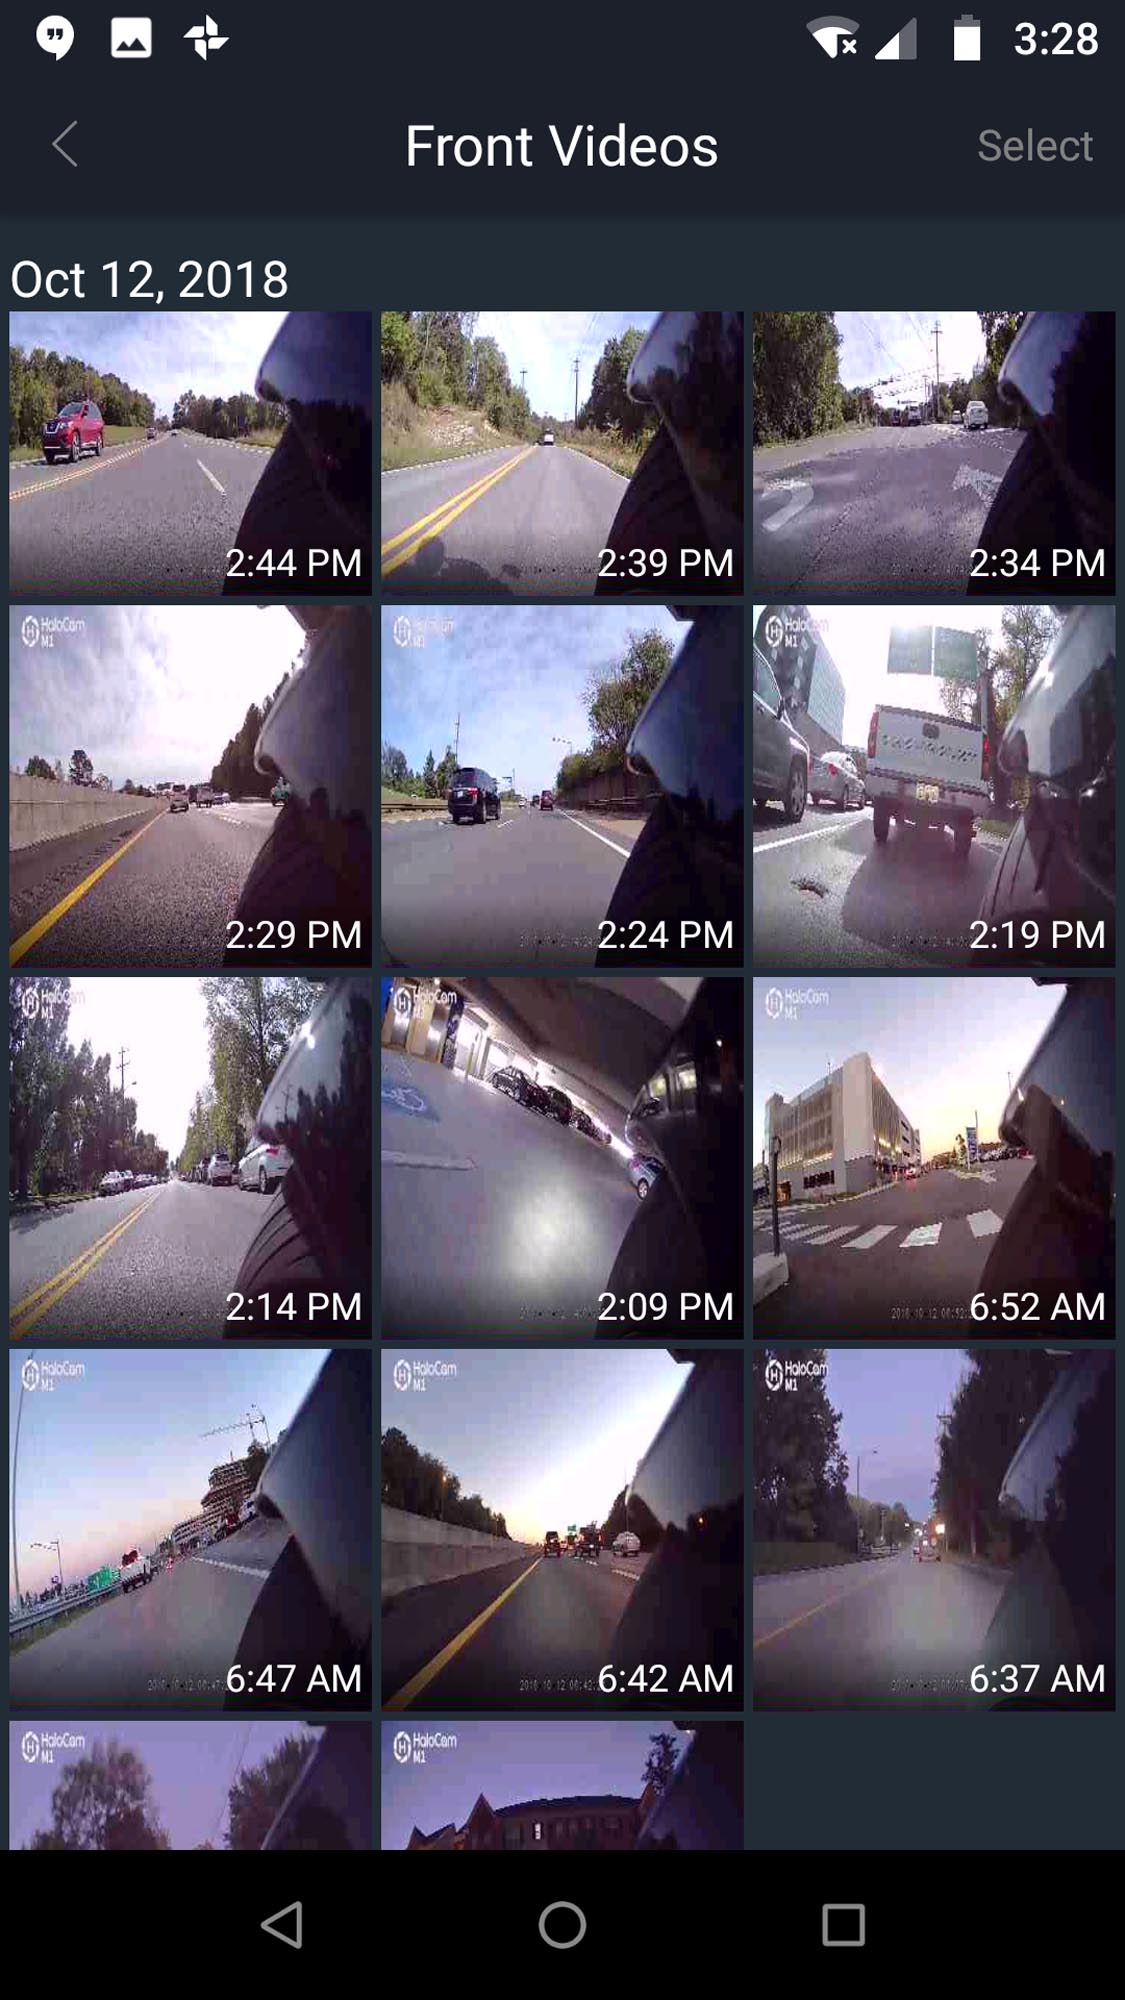 |
The menu system on the DVR module is pretty easy to sort out and it can be used to view the live video as well as recorded clips and still photos. The phone app includes the same access to settings and offers a more robust interface for viewing photos and videos.
There is also the option of signing into the HaloCam sharing service where one can upload their videos. The sharing function has an easy to use editor allowing one to trim the video, remove the audio, and even choose some music from some included options. The videos are shared with their server and can also be sent to Facebook, Twitter, Wechat, and Moments. Strangely there is no YouTube option.
Where Was I?
The HaloCam M1 comes with a GPS antenna but how exactly to access the GPS data was a bit of a mystery. As I stated earlier in the review, the included instructions are rather brief. Fortunately, the support from the vendor was very quick to respond.
While they were quick to respond, the actual instructions were a bit vague and consisted of a series of screenshots from the phone app. After following along I understood that one has to connect their phone to the DVR unit via the DVR Wi-Fi. Then, the data gets synchronized to the phone.
 |
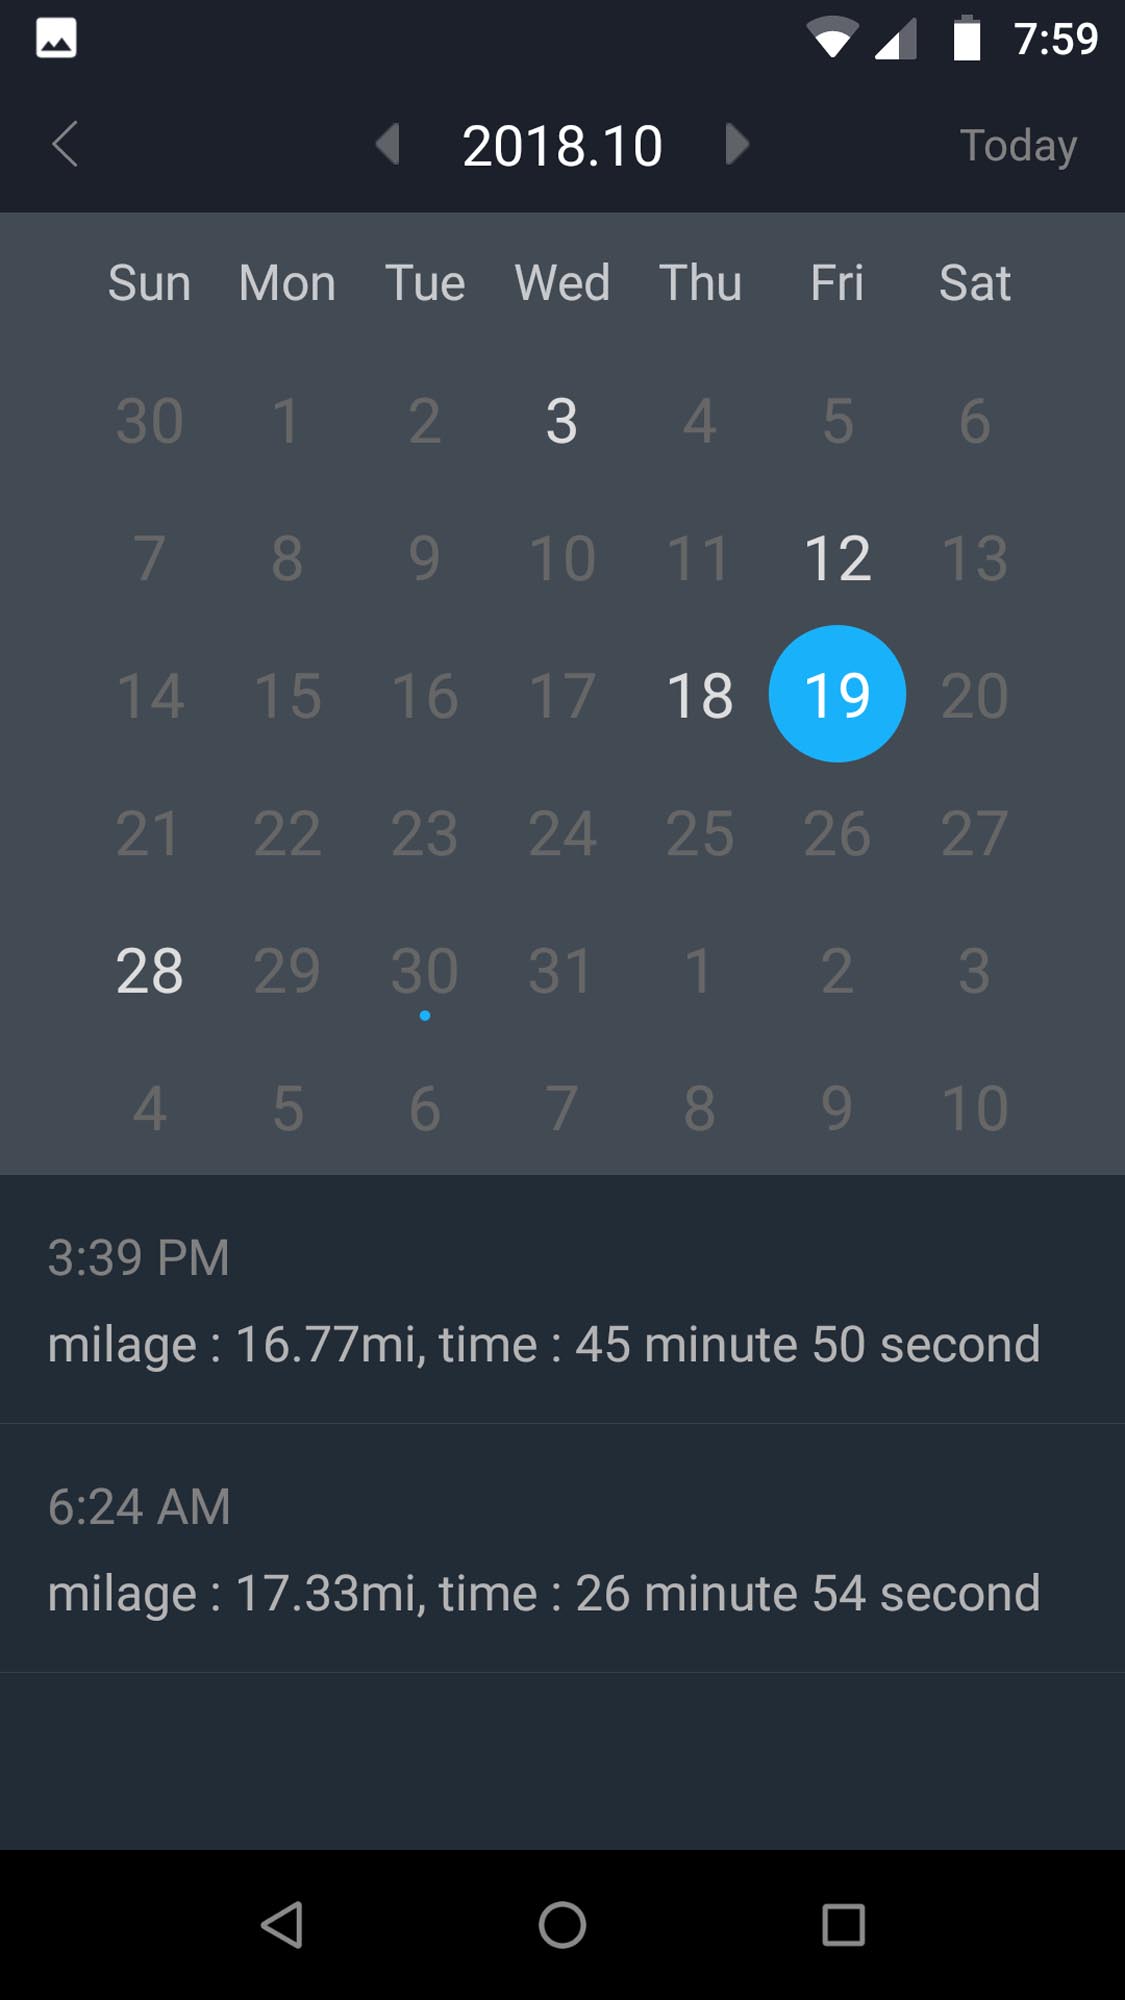 |
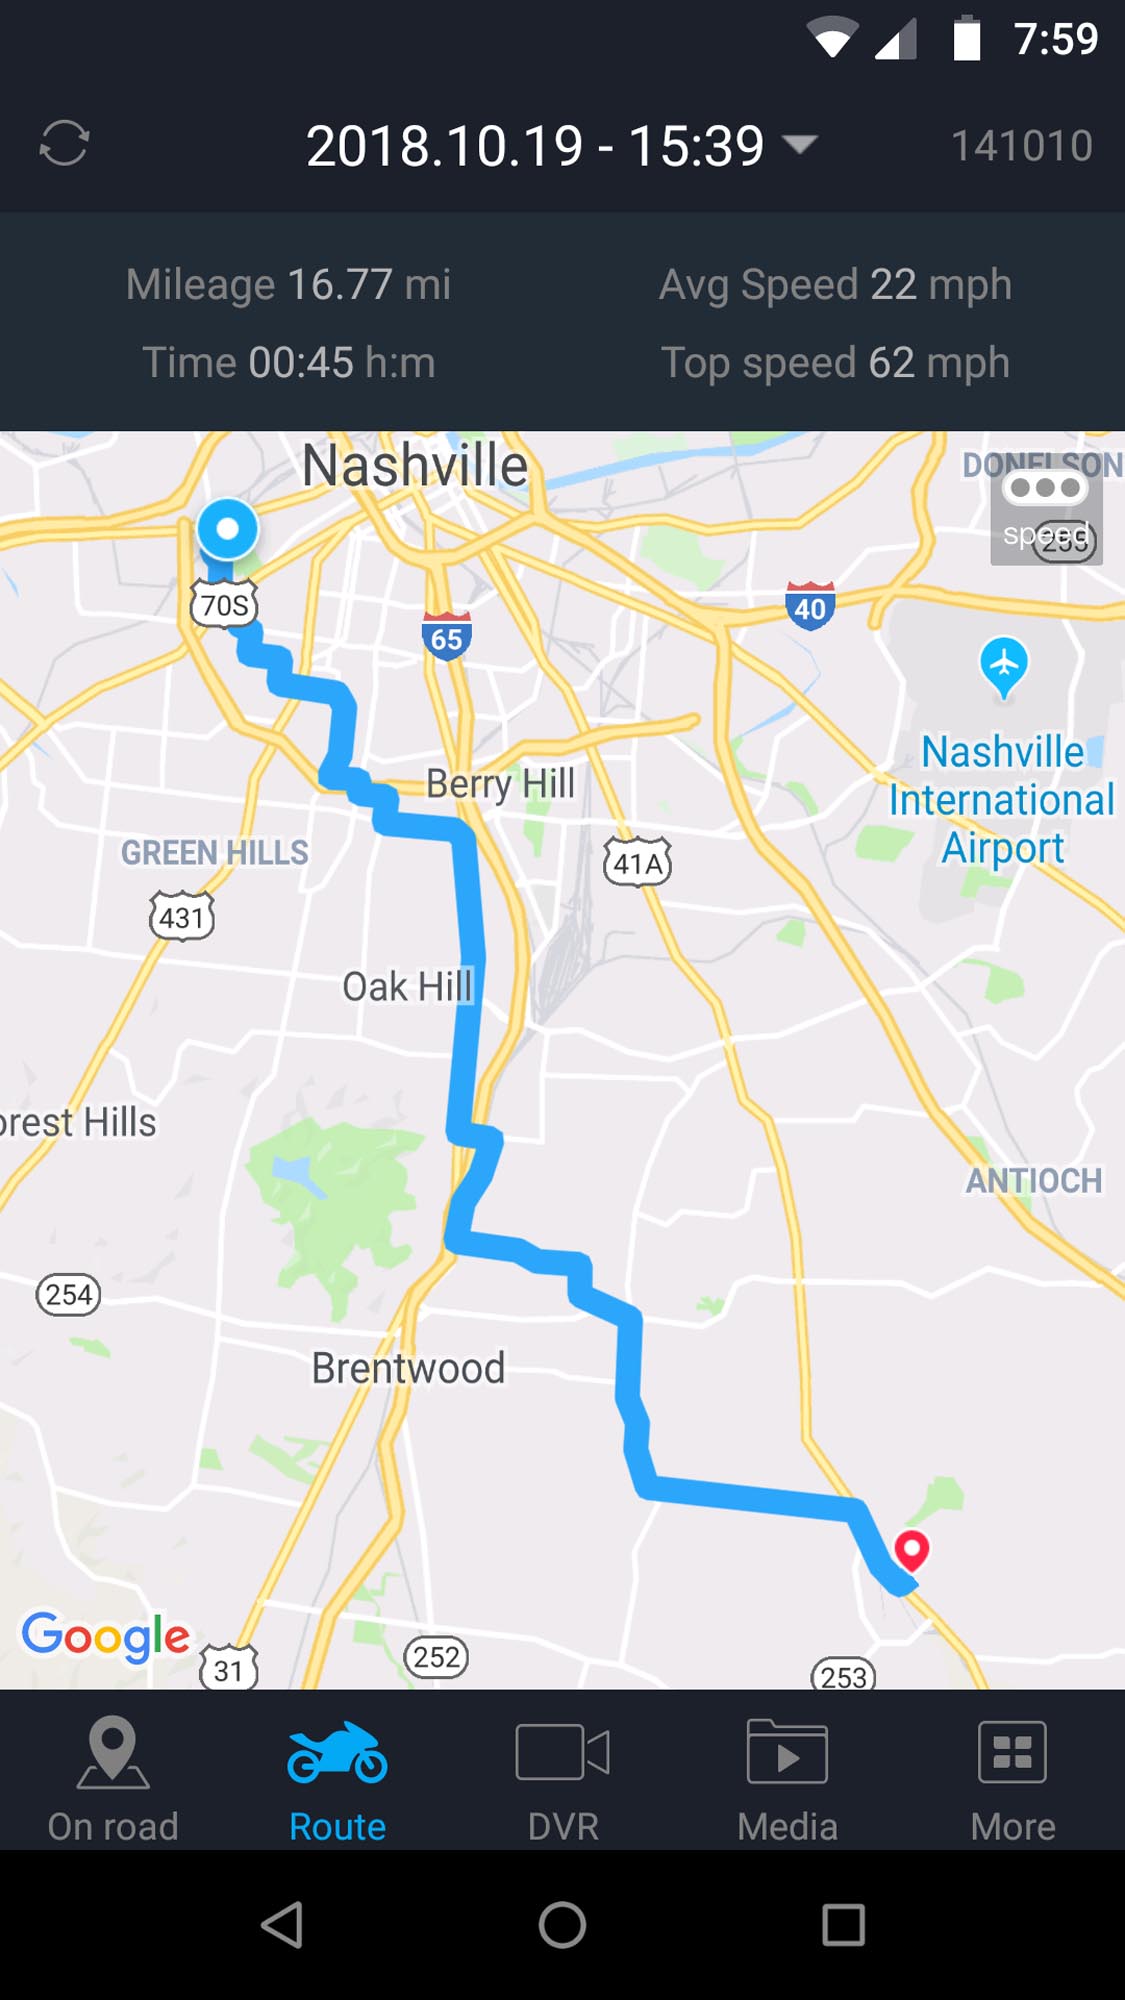
After the synchronization, one has to switch back the phone back to their cellular or Wi-Fi internet connection and then upload the data to the HaloCam server. After this step one can view the GPS data.
Historical GPS data can be viewed by date on the phone app but be sure you are not connected to the DVR unit or it will not show. It’s a bit counterintuitive but I was able to view the routes I took on the days when the system was running. Furthermore, there is a small “speed” icon that allows one to see various mph data along the route. The only thing I would like to see is a way to download the GPS data to a computer.
Video Quality
Video quality from the system is a mixed bag that leans more toward utility than “pretty”. For the mission of this camera system, I think that is just fine. The footage from both front and rear cameras is certainly sharp and contrasty making it easy to decipher details like license plate characters and street signs.
[Insert Video Sample Here]
Colors are a bit flat and the wide angle optics induce the expected distortion typical of the breed. The effects of rolling shutter can be seen as well indicating the slow readout speed of the CMOS sensors used in these cameras.
All that may sound harsh, and it would be if I was expecting GoPro levels of image quality. Instead, I am happy to give up some aspects of the quality of the footage in order to get those important details that could be necessary for the event of a crash. Law enforcement (if it comes to it) isn’t going to be concerned about the precision color of the footage.
About Law Enforcement
It’s important to note that the legal use of dashcam’s and similar devices for judging fault in the event of a crash will likely vary from state to state (or country to country). I highly recommend one research the proper use regulation of these devices for their local area before relying on them as legal evidence.
Conclusion
In the end, the Halocam performs adequately. The video footage is good enough to provide clear enough details for recording events happening in front and behind the motorcycle. While the video isn’t going to win any awards for color and exposure, it looks pretty good.
Like the video footage, the interface on the DVR as well as that in the phone application does the job but isn’t particularly intuitive. The email support is quick enough but trial and error may likely be part of the recipe for learning the ropes of using the Halocam M1.
As far as the build quality and durability of the DVR unit, it has held up well so far but the unit is so lightweight it doesn’t instill confidence that it will take a lot of punishment. Obviously, the device should be placed in a “safe place” on the bike but motorcycles make a lot of vibration and are subject to varying weather conditions. Time will tell how long it will hold up.
Pros
- Small and lightweight DVR module
- Video quality good for the intended purpose
- Well packaged
- Price is reasonable for the quality of video footage
Cons
- Camera cables are a little bulky
- DVR module feels “cheap” and doesn’t inspire confidence in long-term durability
- Instructions are very basic, some experimentation required to sort out settings
- Included brackets needed a little “adjustment”
Specs
- Manufacturer: AiDrive
- Price (When Tested): $179.89 (USD)
- Made In: China
- Review Date: November 2018
Shopping Now? We Recommend:
webBikeWorld has worked closely with Amazon over the years to provide our testers with products to review. In addition to being a great site to shop from, they’re also a great partner.
Amazon
![]()
Free shipping (with Amazon Prime)
30-day return policy
Excellent selection
Competitive pricing
Halocam M1 Image Gallery

OLYMPUS DIGITAL CAMERA
OLYMPUS DIGITAL CAMERA
OLYMPUS DIGITAL CAMERA
OLYMPUS DIGITAL CAMERA
OLYMPUS DIGITAL CAMERA
OLYMPUS DIGITAL CAMERA
OLYMPUS DIGITAL CAMERA
OLYMPUS DIGITAL CAMERA
OLYMPUS DIGITAL CAMERA
OLYMPUS DIGITAL CAMERA
OLYMPUS DIGITAL CAMERA
OLYMPUS DIGITAL CAMERA
OLYMPUS DIGITAL CAMERA
OLYMPUS DIGITAL CAMERA

OLYMPUS DIGITAL CAMERA
OLYMPUS DIGITAL CAMERA
OLYMPUS DIGITAL CAMERA

OLYMPUS DIGITAL CAMERA
OLYMPUS DIGITAL CAMERA
The post Halocam M1 Motorcycle Dashcam Installation & Review appeared first on Web Bike World.