Get your Hands Dirty
Most everyone has one or two friends that are total gearheads. They can fix nearly anything and even better they can take something that runs well and make it run better for longer.
I’ve always admired people with that skill set. My Grandfather was a multi-talented tradesman. A tinsmith, machinist and aircraft mechanic who often wowed me with his abilities.
That admiration inspired me to become a heavy duty mechanic myself. One of my main goals in becoming a mechanic was to be able to save the money I would have given a shop to repair my motorcycles and instead spend it on nicer motorcycles, better parts, and gear.
You Can Do It Too
If you’re reading this chances are good you feel intimidated or unsure of how to go about maintaining your bike and are looking for some encouragement and instruction. I aim to do both in this piece by discussing some simple engine maintenance anyone can do with basic tooling and care.

Specifically, I’ll be focusing on fuel injected engine maintenance, which really is 99% the same as maintenance for a carbureted motorcycle.
Even the most knowledgeable technicians weren’t born that way and started out learning the basics. You may never be at quite their level, but don’t need to be at the mercy of those who are pros. A little knowledge goes a long way in protecting yourself from being taken advantage of by unscrupulous repair shop owners.
Get A Service Manual
Most bikes come with a basic owner’s manual that outlines the checks everyone should be doing before every ride and most of the regular maintenance too. I was quite surprised at the amount of information and detailed step by step instructions in the manual for my 2014 KTM 1190 Adventure for example. I love it when they give nut and bolt torque specifications in the instructions.

All the same, it’s better to have more information than you need and a service manual from Clymer or the equivalent is never a bad thing to invest in. The Clymer is usually easier to understand than the manufacturer’s manual in my experience but can be fairly pricey.
For my KTM I actually found a PDF copy to buy on eBay for about $8 that I downloaded and printed off. Lots of times you can even find them free to download with some persistent googling.
YouTube is a great resource for watching how to do maintenance as well. I find the Fail Army videos distracting at times and delay a simple job if I don’t stay focused.
Consider carefully the source of your chosen video to trust as there are plenty of people on there showing you the wrong way to do things.
When in doubt go to a reliable source like this one or Revzilla to get sound advice. Compare it to the service manual just to be sure it’s on the level. Typically I’ll read a procedure three times and watch two different videos before I tackle a bike repair or maintenance project.
Engine Air Filters
Replace or Clean?
Engine air filters are important to keep clean to ensure good power and fuel efficiency. I change/clean mine at least once per year depending on how much I’m riding and in what conditions. Dirty conditions = much more servicing.
Removal and Installation Notes
On certain bikes, it’s a surprisingly big job to get access to the engine air filter like on my KTM 1190 and you won’t want to tackle it at all or at least without a lot of time and planning. Most times it’s not that bad though so read up beforehand to see what you’re getting into.
Any time you remove an air filter take a damp cloth and wipe out the airbox to get rid of any dirt you may have knocked in. A shop vac helps for fine dirt and dust removal, too. When you reinstall the filter see that it seats correctly and seals completely around its rubber edge and the airbox.
Kinds of Filters
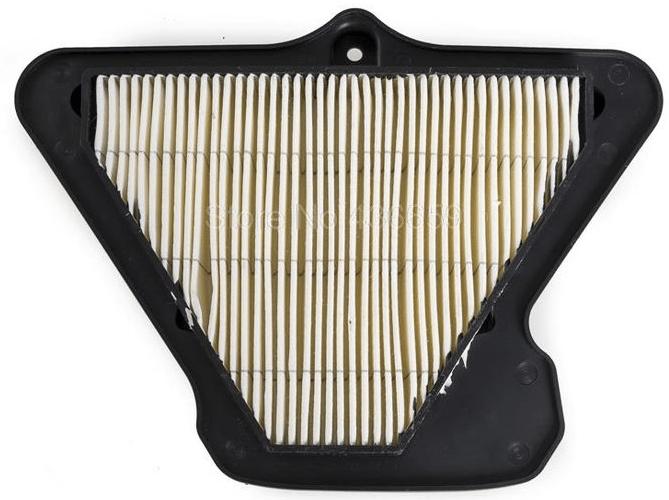
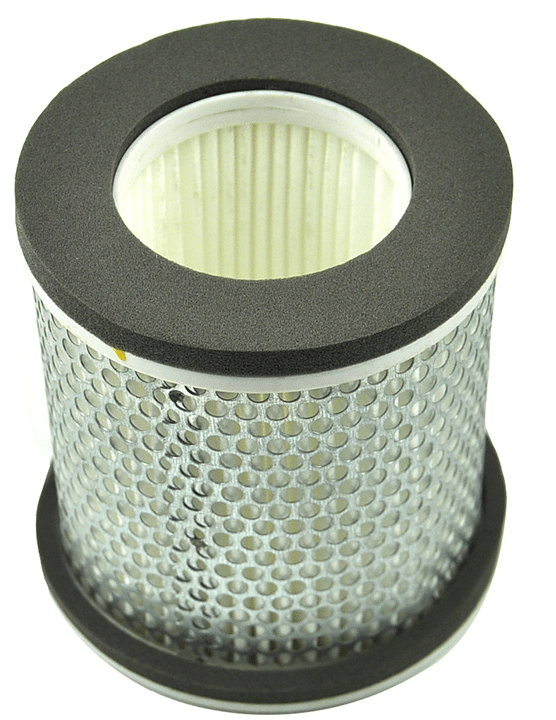
Air filters come in a wide variety of shapes and sizes, but generally just two kinds: Replaceable and Reusable.
Replaceable air filters for the engine intake have a filtering element made of paper which should always be replaced instead of cleaned. Some people choose to use a blowgun and compressed air to blast dirt buildup off the filtering element at their own risk. It’s not hard to unknowingly poke a hole in the paper with the air blast resulting in leakage of dirty air flow directly into the engine. It won’t take long to dust an engine this way and then need expensive overhauling to repair.
If you’re riding in extremely dirty conditions and not able to replace it you can gently tap it out to help clear the pleats out a bit before reinstalling, but for that environment, you really should switch to a different kind of reusable air filter.
Paper filters are usually white or yellow in color and feel like what they are: paper. It’s pretty tough on paper to wash it with water so don’t bother trying.
Sometimes there’s a removable foam pre-filter cover which can be washed using air filter cleaner or just dish soap. Rinse all the cleaner out thoroughly and allow to dry before installing again.
Reusable Filters
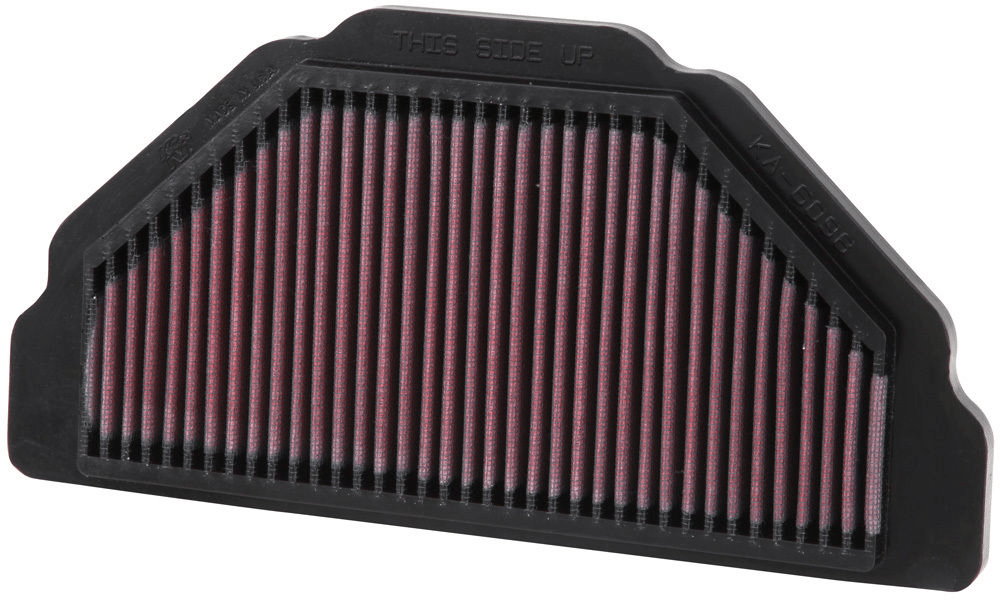
Several companies like K&N, Uni, Twin Air and BMC make reusable filters that can be washed using air filter cleaning kits.
The filter elements are made of cotton or synthetic cloth reinforced with wire mesh making it like a strong T-shirt you can clean the dirt out of. The cleaning kits have a solution to spray on the filter element to let sit for about 10 minutes then rinse out with cool water.
Let them air dry and then apply the filter oil that comes in the kit to help filter out dirt and debris. The oil usually is red in color, showing you whether there’s even coverage on the filter element when you apply it.
Let a newly oiled filter sit for about 30 minutes before running the engine to let the oil soak in first.
This video from K&N explains the procedure perfectly.
R2C Performance Products make very tight sealing, high flowing, reusable filters for extremely sandy conditions that don’t require oiling. Just vacuum them or blow compressed air through them to clean. Unfortunately, they mostly build filters for cars and side by side applications, not for too many motorcycles that I’m aware of. All the same, if you can find one of these to fit your bike you’ve really got it good.
High Performance
Besides being reusable the other advantage of using these synthetic cloth filters is that air flows through them much easier than paper ones. This makes them higher performance and can increase fuel efficiency as long as they’re kept clean.
Engine Oil and Filter
Keeping It On The Level
One of the most important services you can do on any engine is keeping the engine lubricant clean and at the correct level.
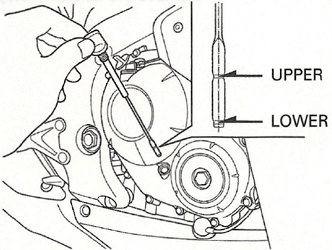
Your bike might have a dipstick (often attached to the filler cap) to check the oil level or a sight glass on the side of the engine. Make sure you understand where the level should be maintained depending on whether the engine is hot or cold.
Generally, it should be maintained near the upper mark when cold but not right up to the top mark to allow for expansion when warm. Some bikes need it checked sitting upright or on the center stand while others are checked on the side stand. The Owner’s manual should have that information in it.
Engine Oils
Engine oil formulas are so chemically advanced now that service intervals are being pushed out longer and longer by manufacturers. Not a bad idea considering the high cost of engine oil, especially synthetic ones.
The additive packages in modern engine oils absorb moisture, clean debris, and carbon off internal engine surfaces and help create effective barriers between metal parts better than ever before.
Be sure to follow what your specific bike maker recommends for oil viscosity or weight and maintenance schedule to keep your engine happy. This can vary from bike to bike and also depend on what sort of oil you’re using.
Full synthetic oils can run much longer between changes than mineral ones. Synthetics also protect better at low and higher running temperatures and are worth the extra cost in my opinion.
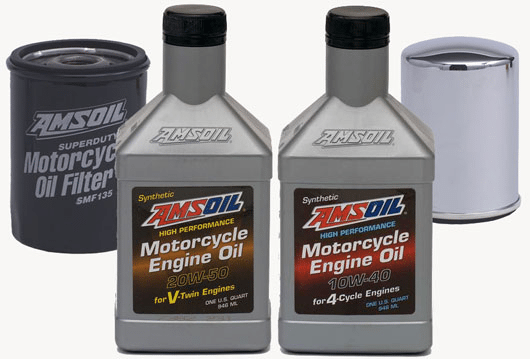
I’m a fan of using Amsoil in my bikes, especially air-cooled engines, but there are plenty of other good synthetic oils on the market.
Filters
Like air filters, there are a few different types of oil filters available: replaceable, cartridge and reusable.
The cartridge (or internal) ones are a little different in that they have an outer housing connected to your engine and it’s just the inside element you replace. Sometimes you’ll need a special socket to remove these cartridge filter housings. Check the service manual.
Reusable oil filters are in theory the last one you will need to buy because you can wash them out instead of replacing them. I haven’t tried these filters out personally, but they sound like they would work just fine. You may have to replace the rubber seals over time and possibly the filtering screen inside.
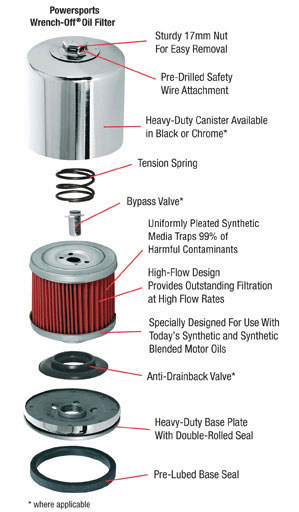
Don’t skimp on the filters you use on the engine. Some people run premium synthetic oil but not a matching filter. Synthetic oils need a filter that will allow higher flow and match their specific chemical makeup. The bike’s engine design may need other qualities in a filter that only OEM ones will provide: like an anti-drain-back valve for example.
When in doubt always go with the OEM brand of filter and oil.
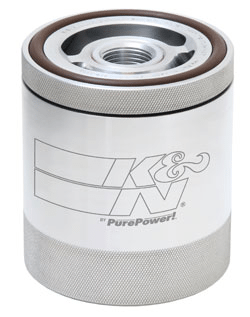
Quality aftermarket oil filters have built-in anti-drain-back valves to keep them full of oil even when the engine isn’t running. I’ve had good success using K&N oil filters and would recommend them as they meet or exceed OEM specs. They even have a limited warranty against defects when installed correctly.
RECALL NOTICE For KN-204 Filters
One type of K&N motorcycle filter was found to be defective due to possible leakage and was recalled recently. Only filters manufactured between March 1, 2016, and September 30, 2016, were affected. Exact details available here.
Necessary Tools and Supplies
- A socket set and ratchet are a must along with a set of wrenches. Some bikes need Allen sockets or even Torx so have a look before you start working on your bike to gauge things.
- Nitrile gloves are good to have because dirty engine oil is a known carcinogen.
- Paper towel or shop rags along with a catch pan that will hold about 10 quarts.
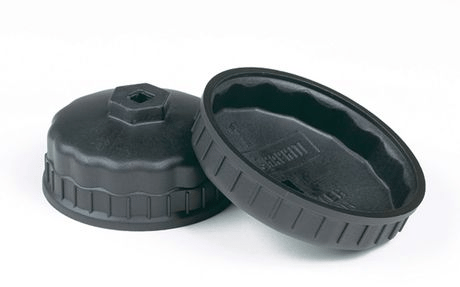
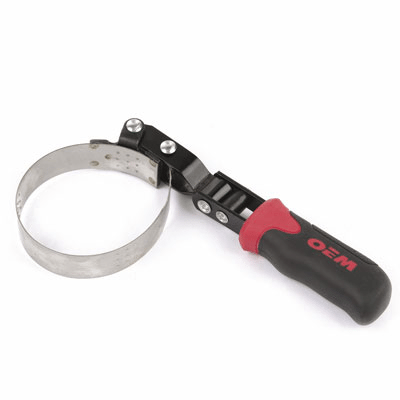
A couple of different styles of filter wrenches are nice to remove the filter. I prefer the socket type because it can be used to remove or install a filter easily with a ratchet and socket set. The downside to them is that they will only fit a specific size of the filter while a strap swivel type filter wrench has a range of filter diameters it will work on. I keep both handy just in case.
- Finally, you’ll need a new filter, seal for the drain plug (if it uses one) and the recommended amount of replacement engine oil. I usually buy an extra quart just in case. Sometimes the manual might not have the right quantity listed.
General Procedure Guidelines
Every bike is a little bit different when it comes to how to change the oil, but here’s a general idea:
- Warm up the engine to operating temperature and shut off the bike.
- Remove the oil drain plug and allow oil to drain into a big enough pan to hold it.
- Remove the filler cap from the engine oil or dipstick cap and the oil will drain faster. Do this only after you remove the drain plug so oil doesn’t rush out as quickly on your hand.
- Remove the oil filter while waiting for oil to drain
- Wipe off and inspect the drain plug for damage. Replace it if it’s stripped or the threads damaged and replace the sealing washer or O ring then reinstall the plug. Tighten it to the specified torque in your manual.
- Wipe the mounting surface for the filter clean making sure the rubber seal from the old filter isn’t still attached. Smear clean engine oil on the rubber sealing surface of the new filter and install it on the engine. Thread the filter on until the rubber seal touches the engine and then further twist the filter on ¾ of an additional turn.
- Add ¾ of what you think the recommended engine oil capacity is and check the level. I give myself this last chance to make sure I correctly know how much oil to add before I overfill it. If I check and the sight glass is already full or the dipstick measures oil level over the full line I stop and figure out what I’ve missed. If I don’t see any oil in the sight glass or starting to appear on the dipstick again, I stop and figure out what’s wrong.
- Once the level is correct, start the bike and check for leaks. Finding none shut the bike off and let it sit for a minute. Recheck the level as described in your owner’s manual. The oil level may have dropped a bit at this point to fill the new filter so you may need to add a little more oil. Overfilling is not a good thing. Just keep the oil where it should be in the acceptable range shown on the dipstick or sight glass.
Revzilla’s Lemmy does a great job in this video showing how to change the oil on a 2012 Harley Davidson Street Glide. He talks about how to read your old oil before you drain it. I like his technique overall and his choice of oil, filter, and tools. He does things in the best order to be efficient and make the least mess (plastic bag trick!).
The only thing I would change is that Lemmy doesn’t use a torque wrench on the drain plug. If you’re experienced like him that’s fine to do, but if you’re new it’s best to trust your torque wrench.
Even with a torque wrench, you don’t want to get carried away as sometimes they aren’t calibrated correctly. Over torquing a drain plug can strip the threads or crack the engine crankcase. Neither predicament is any fun to experience.
Inspect Your Old Engine Oil
Obviously, you’re changing the oil because it’s dirty or surpassed the amount of time it should be used and it’s not going to look brand new. There’s a difference between dirty oil and contaminated oil.
Milky Oil

If it looks really light-colored or almost like milk that’s a sign that it’s been contaminated by water or coolant. If you have just ridden through a lot of puddles or streams while off road it’s maybe somewhat acceptable to see some milkiness and changing the oil and filter should suffice.
If you haven’t been in the water chances are good you’ve got an internal leak in your engine that needs addressing right away. Take your bike to a professional to troubleshoot and repair or you risk doing serious damage your engine.
Fuel System Maintenance
Fuel injected bikes aren’t prone to the dreaded dirty carburetor nuisance like older bikes were, and are lower maintenance that way. There are other things you can and should do to keep the fuel injection system clean though.
Seafoam Additive
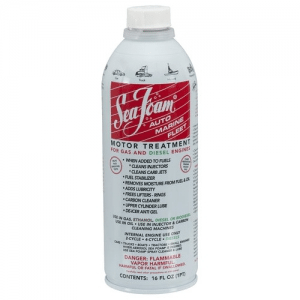
Seafoam is a cleaning and stabilizing additive for gasoline and diesel engines. It works in two strokes and four-stroke engines equally well. It’s not a harsh chemical mixture, but petroleum based and more of a lubricant and cleanser. It dissolves gum and varnish deposits in the fuel system within the injector passages, gas tank. and fuel lines.
When your fuel level is getting low in the tank it’s a good time to add Seafoam directly and take the bike for a spirited ride up the highway to “burn the gunk out”. The recommended mixture rate is 1 ounce of Seafoam per gallon of capacity the fuel tank holds. A 5-gallon tank gets 5 ounces poured in.
You can treat your gas as often as you like this way to keep your low idle smooth and engine starts easy.
If you really want to clean things up double the dosage to 2 ounces per gallon and in extreme cases, you can run a 50/50 mix of it with the gas.
Don’t be alarmed if you notice copious amounts of white smoke coming out of your exhaust while doing this treatment. It’ll go away as the Seafoam gets used up or you fill the tank full of gas again. I treat my bikes with it at least once or twice a season and add a heavy dose when I put the bikes to sleep during our Canadian winter to stabilize the fuel in the tank.
Add To The Engine Oil
Seafoam Motor Treatment can also be added to your engine oil directly and will help clean up deposits in the engine on piston control rings, in oil galleries and other small passages that get obstructed over time.
Pour 1 to 1.5 ounces per quart of oil in the crankcase into the oil filler opening when you’re 100 to 300 miles away from changing the engine oil and run the bike normally. This works out to half a bottle for a vehicle holding 5 quarts of oil. Only treat the oil once this way between oil changes.
You’ll notice the darkening color of your oil over the next while which is the Seafoam working. Once that happens, go ahead and change your oil and filter as it has dissolved the built-up oil residue in the engine and is ready to be replaced with new, clean oil.
The treatment is demonstrated on a truck in this video made by Seafoam on YouTube. Nothing to it.
Spark Plugs and Wires
Types of Spark Plugs
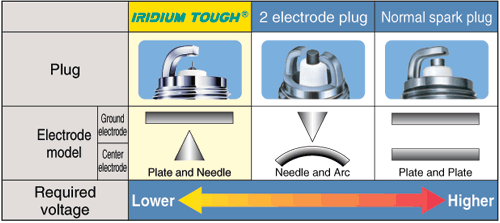
Standard or normal plugs have a flat center electrode that looks a bit like a black button while iridium plugs have a small and pointy one instead. They both work well and the main difference between the designs is the amount of voltage required to create an arc. It’s much lower with the iridium ones and that seems to be the way most engines are going these days for better efficiency and less demand on the electrical system.
Some plugs have more than one ground or negative electrode arm while others only have one. Again the design difference has to do with efficiency and electrical demand. More arms = less voltage necessary to spark effectively.
Which Type To Buy?
Keep it simple and trust the manufacturer by buying the spark plugs they recommend. It’s really that simple. Unless you’re a mechanical engineer and can calculate a better option, chances are good the company that designed the engine will know what plug is the best fit for your bike.
I tend to stick with NGK, Denso and Bosch brand names.
Access and Removal
This can be really challenging on some motorcycles depending on the design so again, don’t dive right in without doing some reading beforehand even if it seems obvious. Adventure bikes like my KTM 1190 can involve removing the gas tank and lots of panels just to gain access to the plugs. There are also two spark plugs per cylinder on many engines these days, doubling the cost and work.
Tools and Supplies Needed
- Correct new spark plug(s)
- Socket to fit your plugs, ratchet and possibly extensions and torque wrench
- New plug wires. (Return them to the store if you don’t need them)
- Spark plug gapping tool and or feeler gauges
- Dielectric grease and high-temperature anti-seize lubricant
- Blowgun and compressor
Wire Removal from the Plug Terminal End
Naked or bikes without fairings like Harleys make it a 15-minute job or less because gaining access only involves pulling the boot off and getting a socket on the plug. Some boots come off with a little wiggling back and forth while others are a real hand workout.
Keep track of which wire goes to which hole for when you put them back on at the end.
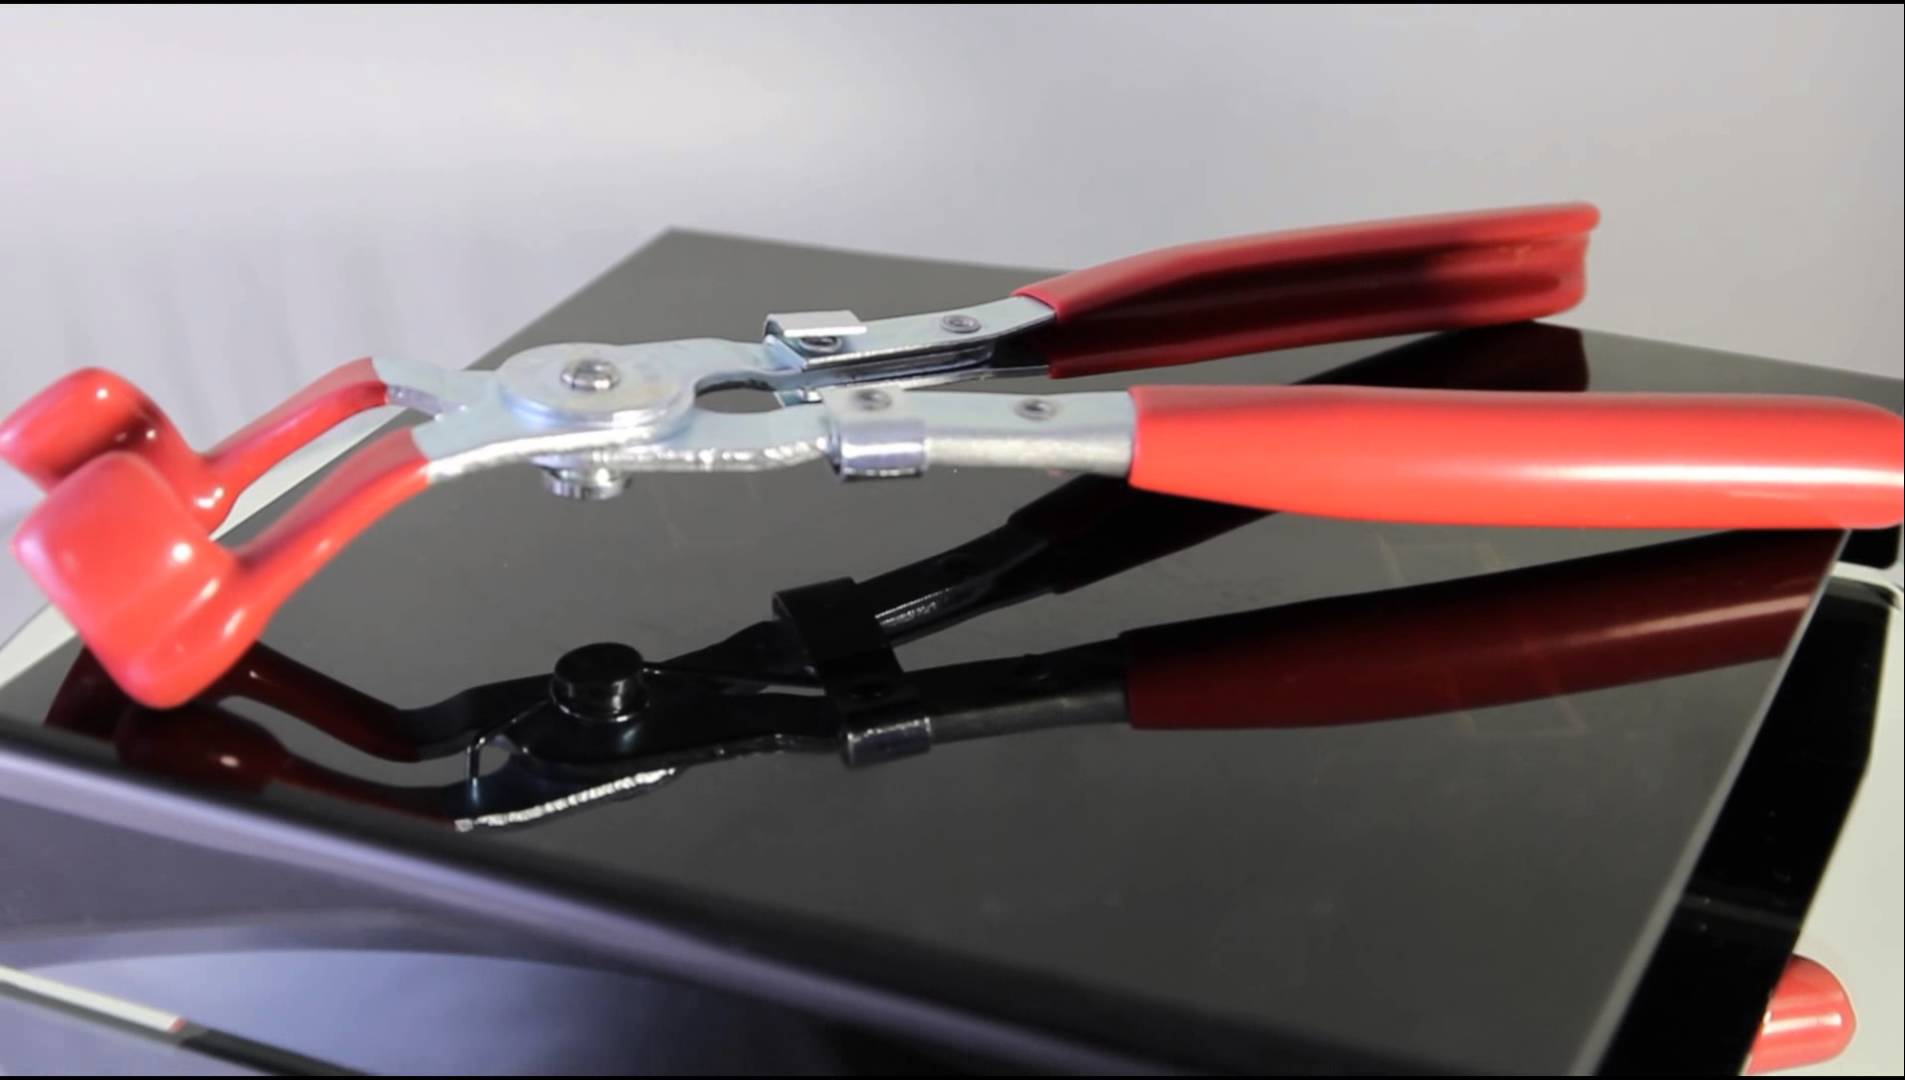
Tip for boot removal: avoid pulling on the plug wire attached to the boot when removing it. Grip only the boot to avoid damage. There are specially made pliers for gripping the boot better than your fingers can to make the job easier. I find I can get them by hand quite easily on bikes.
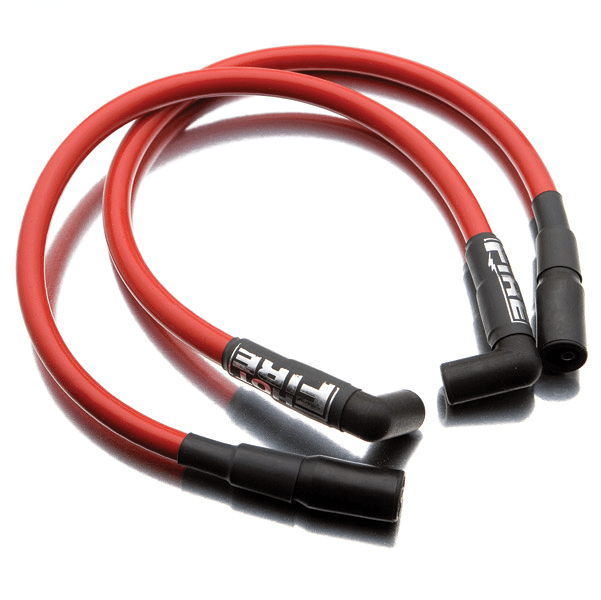
Sometimes the boot will separate from the wire when you pull on them because they get old and worn out. It is possible to replace the boot only, but best practice is to change out all the wires as a set if one breaks. A rough idle or hard starting can be caused by bad plugs and wires.
Changing them one at a time to keep them straight is wise. If you see cracks forming in the rubber or any other damage it’s time for a change too. Your maintenance schedule will also tell you when to do it.
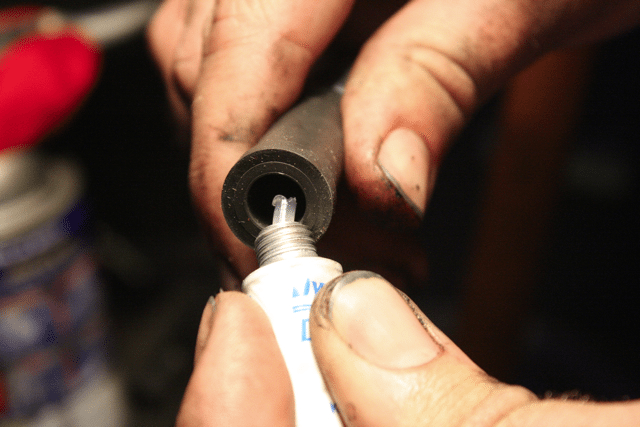
Tech Tip for plug wires/boots: Put a small dab of dielectric grease in the opening of the boot before installing on the terminal end of the plug. It helps keep water and moisture out. Ditto for the other end of the plug wire that attaches to the coil housing.
Spark Plug Removal and Install
Once the boot is off of the plug take your blow gun and blast air into the hole to clear out anything that might be lurking in there. We don’t need anything falling into the engine once the plug comes out.
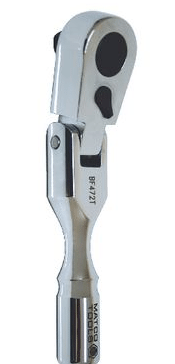
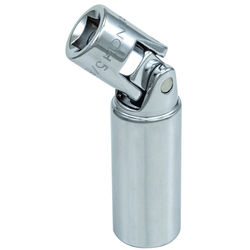
There are specialty sockets and long-handled ratchets with flexible heads made for removing plugs. They aren’t necessary but can make the job easier. The plugs often are down in a hole meaning you can’t get a wrench on them. The specialty plug socket has a rubber insert to grip and hold on to the plug once you push the socket on the terminal end firmly. The plug will come out with the socket and you can install the plug using the same method in reverse.
Plugs shouldn’t be in very tight so once you get the socket on you should be able to turn the ratchet with one hand and spin out the plug. Give the hole another blast of air with the blowgun in case you dislodged something getting the plug out.
Have a Look at Your Plug Electrodes
The condition of the business end of the spark plug can tell you something about what’s been going on inside your engine.
The chart below shows how what might appear to be bad might actually be ideal and vice versa. If you do have something less than ideal color going on it might be time to take it into a mechanic for further investigation. Keep the plug to show them what you found.

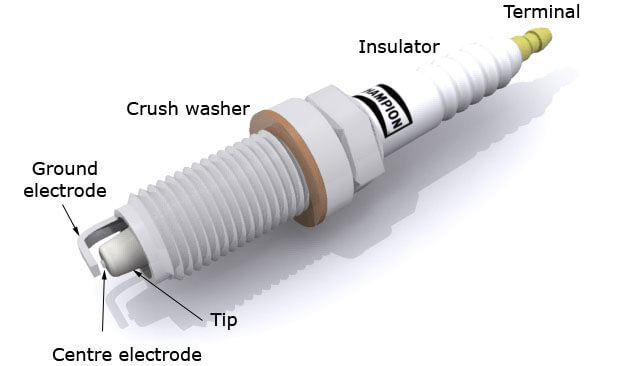
Check the Electrode Gap
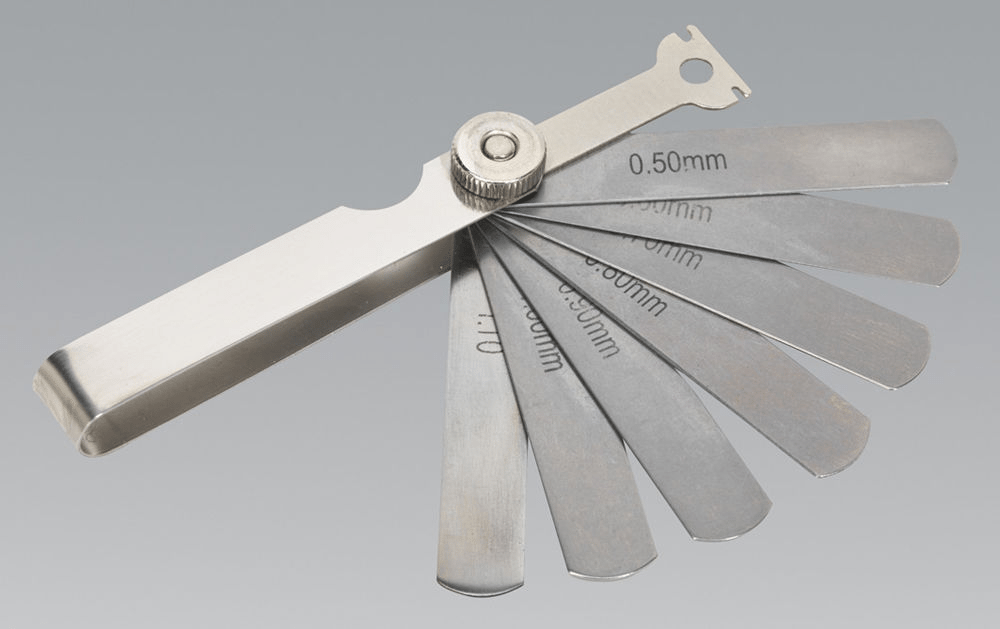
The gap between the center and ground electrodes is important and has a specification set out in your manual. For the most part, I find the plugs are already banged on right out of the box, but it’s worth taking a moment to verify it with a gapping tool.
I really like the one shown below as it will measure almost any size of the gap with the blade style feeler gauge and has the adjusting tool as well. It’s simple really. Just find the desired thickness blade and slide it carefully into the gap. If it goes in with just ever so slight resistance it’s perfect. If not, you need to adjust it a bit with the tool.
YouTuber Driving 4 Answers has a great video on exactly how to do this. His description is perfect along with his technique for adjusting the gap.
High-Temperature Anti Seize Lubricant
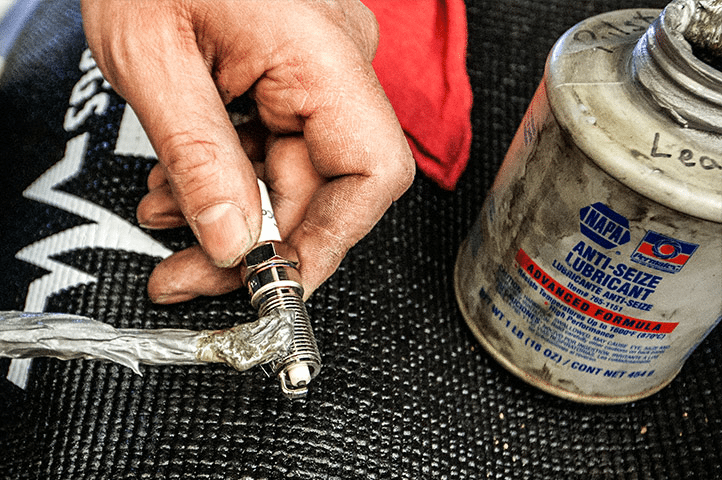
Before installing the new plug in the hole apply some high-temperature anti-seize to the threads.
This is insurance for the next time you pull the plug out.
The high temp lube is silver while the regular stuff is copper colored. Either will work, but the high temp stuff is what I use because well, spark plugs get very hot.
Tech Tip on Plug Installs: Don’t forcefully cross thread the plug in the hole. Thread it in gently by hand before putting a ratchet or torque wrench on the socket to tighten it down.
If you don’t have a plug socket you can cut a small length of fuel line and stick that on the terminal end of the plug to reach down into the hole and carefully thread the plug in place. It should spin smoothly and easily by hand if you’re doing it right. If it doesn’t, back it out and try again until it does go in easy.
Your manual will give you the correct procedure for the final torque. Many people just run the plug in by hand until the sealing washer touches and then give it an additional quarter turn. That used to be a foolproof method, but things have changed as they always do.
When I replaced the spark plug on my 2004 Honda CRF250X the manual instructed me to use a different method for a brand new spark plug install than the way to reinstall an old plug. If I recall correctly it said to thread the plug in until the sealing washer touches then give it a half turn in.
Next, back the plug out and run it back in until the sealing washer touches and give it a final quarter turn.
Make sure to do it right to avoid leakage or the plug loosening up and causing damage to the threads. In extreme cases, a loose plug can even come flying right out.
I like this video from YouTuber oldBRATTrider on changing the plugs on his Triumph Bonneville. He does a good job and moves almost painfully slow in doing it, but that’s good for new backyard mechanics to learn from. His calm, southern drawl and laid back manner help remind us that speed isn’t important when you’re meeting the needs of your two-wheeled mistress.
Incidentally, I looked up the torque spec on the Triumph’s plugs and found the same 20 nM he used, despite some of the comments about how that’s too much.
Finish your installation by clicking the boot back on the plug or plugs in the correct position and start the bike up to make sure it starts easy and runs smoothly.
Exhaust System
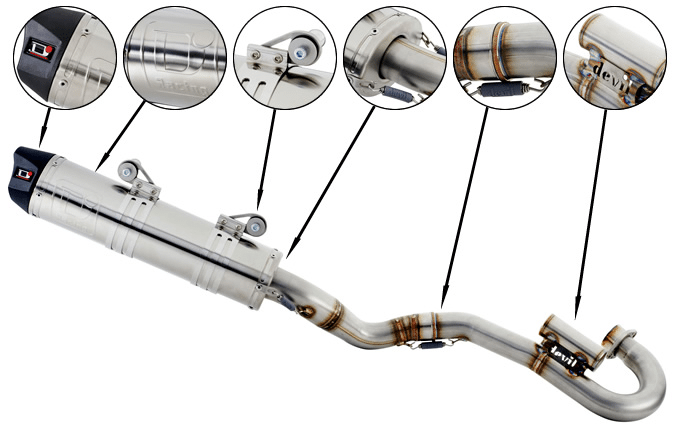
There isn’t a whole lot involved with exhaust system maintenance other than checking to see fasteners are all tight and there are no sooty deposits showing at joints indicating a leak.
Inspect the piping for cracks caused by heating and cooling repeatedly over time. You can have cracks welded by a good welder instead of replacing parts.
Typically on a dual sport or off road bike mufflers, there will be a serviceable spark arrestor that you can pull out and clean using a wire brush and compressed air. Obviously, don’t use any flammable liquids to clean it off.
BikerXGuy has a video on YouTube showing removal of the spark arrestor on his 2009 Yamaha YFZ450R quad you can reference if your manual doesn’t show it.
Cooling System
Finally comes some cooling system maintenance on a bike.
Typically you should drain and refill your coolant every two years or according to your bike manufacturer’s schedule. You may need to remove fairing or body panels to gain access to some parts of your cooling system for inspection before you get started.
If you’ve got an air-cooled engine count yourself lucky as this won’t apply to you. Carry on polishing chrome or get in some more riding time.
Drain the Coolant
Make sure the engine is cold and you have the following tools and supplies handy;
- A pan that will hold more than the amount of coolant in your engine.
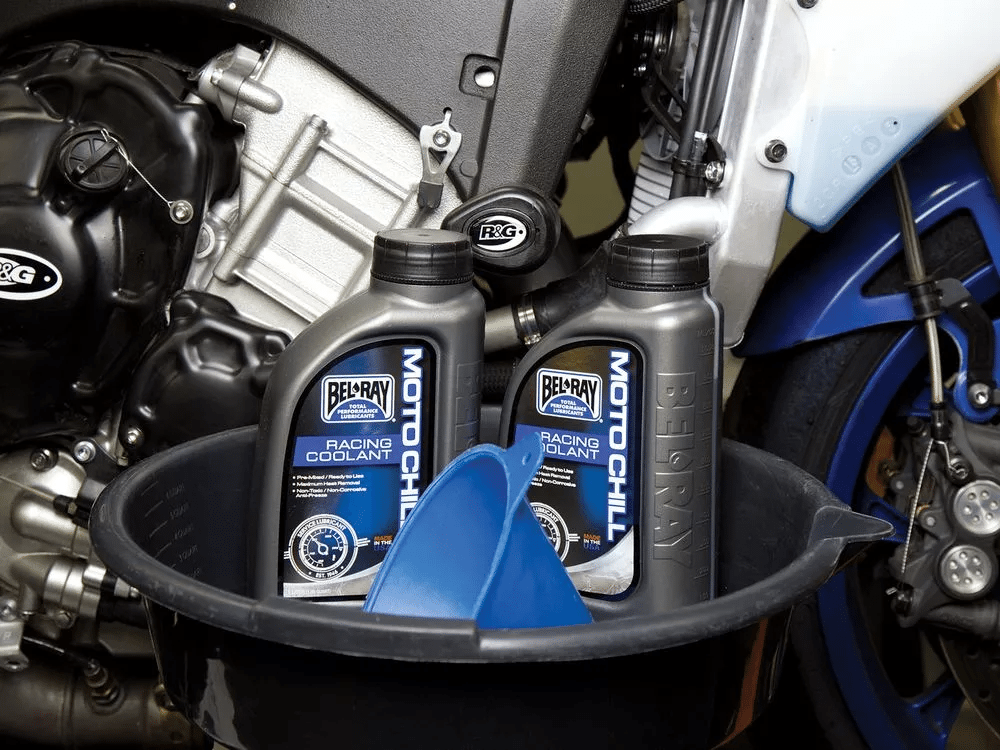
- Enough new coolant to fill your system to capacity
- The correct kind of coolant for your bike. There is Ethylene and Propylene Glycol to choose from. Check your manual to see what you need.
- Some coolant comes as a concentrate so it needs to be mixed with 50% distilled water before adding to your bike. I prefer to buy premixed to avoid this.
- Nitrile gloves to protect your hands. Some people’s skin reacts to coolant
- A new sealing washer or o ring for the drain plug
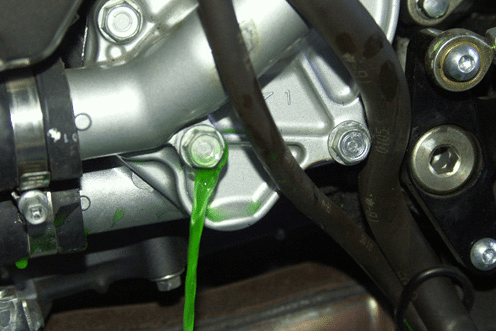
Locate the water pump on your bike. It’ll be at the lowest point of the cylinder typically with a hose going into it from the radiator. The drain plug for the engine coolant should be on there.

Loosen it until coolant starts to leak out, then remove your radiator cap and be ready for coolant to come rushing out and catch it in your pan.
Inspect The Old Coolant
If you change the coolant regularly it should never look very murky or dirty, but if you buy a used bike and it doesn’t look brightly colored it’s definitely time to drain and refill.
If it is contaminated with oil, you’ve got a serious problem inside the engine and need professional assistance.
Fix Leaks and Replace Worn Out Hoses Now
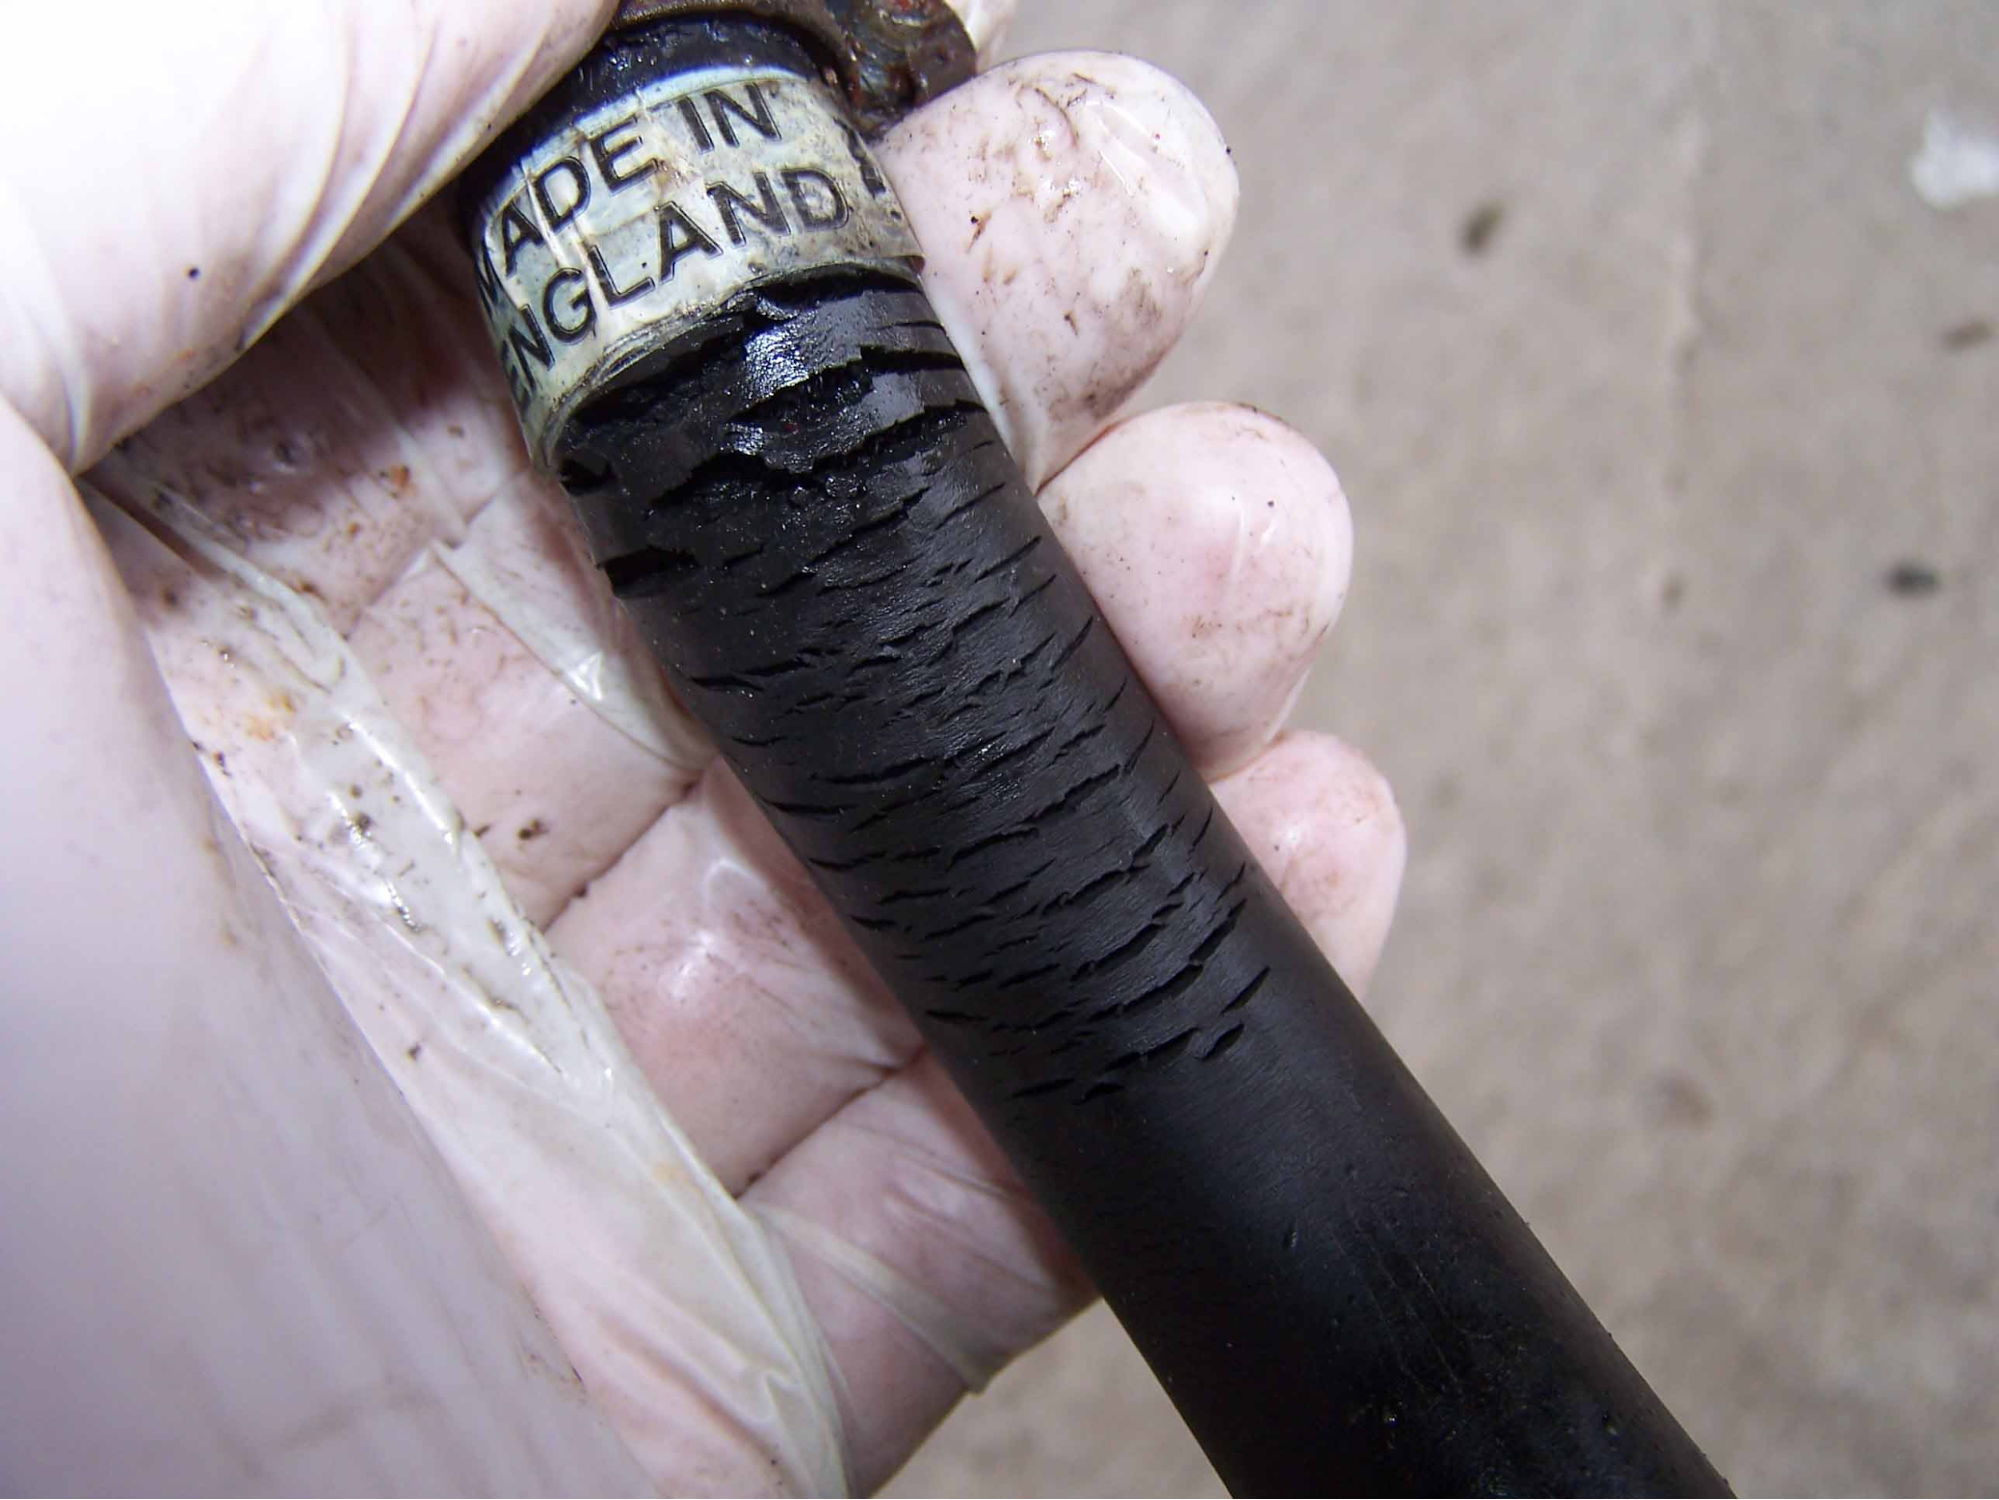
Take some time to inspect the rubber hoses in the cooling system and the clamps. If any of the hoses are hard instead of flexible or showing signs of cracking or rubbing now is the time to replace them with the system dry.
If anything else is leaking coolant externally now is the time to replace or repair it too. Like a water pump mounting gasket for example.
Radiator Fins
If your radiator fins are all bent over you can try and straighten them out to get airflow back how it should be again. If you have too many fins missing or lots of corrosion happening on your rad it may be time to bite the bullet and replace it. That can be a bigger job on some motorcycles but it can be done with some patience and time.
Refill the System and Bleed Air

Once the coolant has stopped draining, replace the sealing washer or o ring on the drain plug and tighten it according to what your manual advises. Easy there Hulk, it doesn’t need to be very tight.
Refill your coolant up to the top of the radiator just below the bottom of the filler neck and then fill the overflow tank up to the full mark.

Rock the bike back and forth to move any air in the system and squeeze the hoses a bit too. You might see bubbles in the rad cap opening while doing this indicating air coming out.
Start the engine and let it idle. You’ll probably see bubbles come up in the top of the rad. After it starts to warm up the coolant level will steadily rise up in the rad and threaten to overflow. At that point replace the cap and rev the engine for a bit to warm it up.
Shut off the bike and let it cool down completely before topping off the overflow tank.
Note: Some bikes have specific air bleeding procedures unique to them so be sure to read your manual beforehand as always.
To see the procedure done perfectly take a look at the YouTube video below from Motorcyclist Magazine. They go through all the steps clearly and make it look easy… because it is.
Wrap it Up!
There you go, a basic guide to engine maintenance for fuel injected specimens. There are many other things you can do to keep things running perfectly too, but master these simple jobs before you branch out into bigger and better things.
Safe riding out there my friends!
The post Motorcycle Maintenance Items for Fuel-Injected Bikes appeared first on Web Bike World.