Categories
Accessory Reviews Gear Reviews INNOVV Motorcycle Accessory & Parts Other Motorcycle Blogs review Web Bike World

INNOVV Power Hub 2: Early Release Review

Introduction

How time flies; it seems like it was only yesterday since we published our first look at the INNOVV Power Hub 1 product – I’ll blame it on cabin fever generated largely due to our lousy and continuing winter…

NNOVV Power Hub 2 - Smaller than Power Hub 1

But like the original Power Hub 1 reviewed in December 2016 to be exact, the newest iteration, now called the Power Hub 2 still provides five switched in-line fused outputs, but in a much smaller form factor – taking up about half the space needed for the original Power Hub 1.

And it is this ‘downsizing’ that is, at least for me, the biggest change to what is one of the most versatile and economical power output products on the market.

The INNOVV Power Hub 2

Welcome to 2019 and the INNOVV Power Hub 2. Unlike the Power Hub 1 that is a more 3-dimensional shape (think The Borg Cube), the Power Hub 2 is packaged in a smaller ‘brick’ form factor with identical dimensions to that of the INNOVV smart power supply module supplied with the C5 single and K2 dual channel camera systems.

NNOVV Power Hub 2 and K2 Power Supply

Comparatively, both Hub variants are totally sealed, including the flying lead cables used for input and outputs – features allowing the modules to be mounted and used externally or in a more protected or hidden unused spot on the host platform.

But the newer smaller Power Hub 2 is far more likely to fit into a wider variety of spaces, especially when footprint and clearance are paramount; the five output leads with ATM fuse modules occupy more space than the module itself…

NNOVV Power Hub 2 with coin for scale

wBW has tested, installed and used virtually everything power distribution and management system on the market over the years, be they large, small, switched or unswitched, wired or wireless managed; and, the INNOVV Power Hub products remain great representatives for their genre.

We truly are well served regarding power distribution products for motorcycles. However, in comparing many competitive products, the INNOVV pieces still stand out, not only for their simplicity and flexibility but also pricing.

Power Hub 2 Features

NNOVV Power Hub 2 layout, inputs left and outputs right
At almost half the size of the original, the down-sized Power Hub 2 still features three input leads and five output leads – all with individual in-line ATM fuse modules. The two LED display found on the Power Hub 1 is now represented by a single small Blue status LED on the Power Hub 2.

NNOVV Power Hub 2 features information on box

Power Hub Comparison Table


Feature Power Hub 1 Power Hub 2
Dimensions 64.2 x 39 x 40mm (2.5 x 1.5 x 1.6in) 46.2 x 31 x 18mm (1.8 x 1.2 x 0.7in)
Input Leads Pos (fused), Neg, Ignition trigger Pos (fused), Neg, Ignition trigger
Rated 40A maximum 20A maximum
Output Leads 5 x 5A fused flying leads (15A max) 5 x 3A fused flying leads (5A max)
Boot Delay 10 second On and Off 10 second On and Off
LEDs Red = Fault, Blue = Flashing on/off and Steady for power good Blue = Flashing on/off, Steady for power good

Power Hub 2 Leads & Lengths

  • Yellow = ignition (trigger) – connected to ignition switched power source, sends electrical signal to trigger the Power Hub to turn on and activate the five output circuits (115cm/45in)
  • Red = positive power lead input connected to positive terminal of battery, ATM fused (100cm/39in)
  • Black = ground lead input connected to negative terminal of battery (100cm/39in)
  • 5 x Red power output leads, with ATM in-line fuses (57cm/22in)
  • 1 x Black common ground for connected accessories (33cm/13in)

Installation

NNOVV Power Hub 2 installation instructions on box

As the Power Hub 2 is so small and totally sealed with input and output connections done using the flying leads the module is mountable almost anywhere, making it such a simple solution for virtually any powersports platform, especially motorcycles.

Since its release, I have installed many Power Hub 1 modules in a variety of motorcycles (sports, touring, adventure and scooters) with a suitable spot always found, although sometimes it took a bit of scoping and creative mounting to get it installed in the best location.

Not so for the Power Hub 2 – it is proving to be much easier to find a good spot or spots on the exterior or interior in which to mount it and with its long input and output leads routed, there aren’t a lot of limits to just where and how the system can be installed.

NNOVV Power Hub 2 output leads
NNOVV Power Hub 2 module on exterior
Being in the middle of cabin fever mitigation activities – otherwise known as winter period accessorizing, the arrival of the Power Hub 2 was timely as some additional unswitched power was needed for some additional USB outlets, handguard LEDs and rear-facing auxiliary lighting.

NNOVV Power Hub 2 installation

An initial outer side wall installation of the module was done on the 2019 F850GSAdv for assessment but was then moved over to the 2018 R1200GS Rallye where it had a temporary home and now a (permanent) location.

On both the F850GSA and the R1200GS, the module was initially mounted on the right outer sidewall of the under-seat housing before being moved to its permanent home under the back deck and just to the right of OE DWA (Alarm) module.

NNOVV Power Hub 2 installation, module closeup
All the locations work fine, although with different fastener material used for fixing the lightweight module in place. The external mountings use 3M VHB adhesive strips while the under-deck placement is more than adequate using low profile 3M Dual-Lock pieces, so the module can be lifted out of the way easily – the deck area is crowded…

NNOVV Power Hub 2 full deck view of installation
While the Red and Black power leads, housed in a length of Flexo F6, run up to or forward (depending on the motorcycle) to the battery box, the Yellow trigger wire has a couple of connection options.

NNOVV Power Hub 2 installation under deck

All the home fleet motorcycles see a lot of accessory ‘test mule’ activity, so extension leads via Posi-Tap pieces from the Brake, Left and Right Turn Signal and License Plate Light leads are installed and run to a six terminal common connection (barrier) strip to facilitate ongoing access and eliminate repeated access to the thin OE wiring.

The remaining two terminals are used for 12V switched power sources with a separately dedicated ground block mounted under the deck as well.

So, the ignition switched yellow trigger wire can go to the nearby Posi-Tap on the 7.5A 12V switched lead of the 10A/7.5A dual accessory circuit module located to the right under the rider’s seat section or to the terminal block hosting the license plate extension lead.

With the ‘input’ side of things taken care of, the one, it is time to utilize the five output leads with their ATM in-line fuse pieces to get things wired up. I typically mark the circuits one through five for documented use identification.

NNOVV Power Hub 2 installation, waterproof Posi-Locks

Two of the output leads run forward along the right wall, joining up to their respective accessory leads using waterproof Posi-Locks. A third output, also with a waterproof connector, routes behind the OE alarm module as 12V switched power to the Admore Lighting ADMSB Smart-Brake light bar (these are among the first accessories installed on all home fleet motorcycles).

The remaining two output circuits, with fuses removed (bagged, with spares and secured in an accessible spot) are sealed off, wrapped up and tucked away between the DWA and RDC modules – but fishable from the deck cutout.

Function & Performance

NNOVV Power Hub 2 Blue LED indicator light

Turn on the ignition and wait 10 seconds – when the (visible or not) Blue LED lights up the Power Hub 2 is up and running along with connected accessories. Turning the ignition off sees another 10-second delay (along with any onboard system delay), then the PH2 shuts down.

Performance, including reliability, is easy to assess…none of the (many) original Power Hub 1 units I have installed nor either of the two newer Power Hub 2 systems has ever shown any sign of weakness or failure.

Conclusion

NNOVV Power Hub 2 module installed with deck reinstalled

INNOVV has stayed the course regarding general features of both the original Power Hub 1 and now the new Power Hub 2; the biggest visual takeaway regards the difference in overall size between the two.

Capacity and output are downsized – from 40A to 20A, with the expected reduction in recommended individual circuit maximums, from 15A to 5A (Hub 1 and Hub 2 respectively).

This could raise concerns over limitations, but as (most) of the accessories in use between four different motorcycles typically draw 0.5A to 4A tops (another benefit of using LED lighting) this reduction isn’t a major concern, although it needs to be considered.

And multiple circuits could be ‘ganged’ together for heavier duty demands, like the previously mentioned heated gear.

A small nit – there is (still) no choice between switched and unswitched output as many other products offer; once the 10-second bootup step is completed, all the circuits, properly fused, are available for use.

An observation made in the Power Hub 1 review over the 10-second boot and shut down delay is possibly still applicable here, although it doesn’t seem to have arisen as a major issue for users.

But it would still be great to see a time-delay shutdown provided if the motor is not actually started within a specific time…

Our bottom line from the original Power Hub 1 review bears reuse, although updated to reflect the new product; “the INNOVV Power Hub 2 is cost-effective with a list price of $69.00 and is a near perfect small form factor solution for adding multiple accessories where a rugged hands-off operating environment is key.”

Pros

  • Very small simple module
  • Simple battery and trigger lead connections
  • Five fused switched output circuits (3A nominal, 5A maximum)
  • Totally sealed module and leads
  • Long leads facilitate installation
  • Installable almost anywhere desired
  • Price

Cons

  • Hard plastic ATM fuse modules are (very) hard to open
  • No switched/unswitched output option


Specs

  • Manufacturer: INNOVV
  • Price: $69.00 USD
  • Made In: China
  • Alternative Models: The original Power Hub 1
  • Sizes: Small, ~50% smaller than the Power Hub 1
  • Review Date: February 2019

INNOV Power Hub 2 Image Gallery

The post INNOVV Power Hub 2: Early Release Review appeared first on Web Bike World.

Categories
Gear Reviews Motorcycle Clothing Reviews Motorcycle Jeans Reviews Motorcycle Pants Reviews Other Motorcycle Blogs review Trilobite Web Bike World

Trilobite Go-Up Jeans Hands-On Review

Introduction

Trilobite Go-Up Jeans in 3 different poses

I really appreciate when a manufacturer engages with me in regards to a product that I reviewed. I’ll take the negative with the positive because the important thing is it shows they’re paying attention to independent and unbiased reviews like those we publish here at Web Bike World.

The story of this review you are about to read started with a phone call I received from Jason at Motonation. He informed me that Trilobite had seen my review of their Ton-Up jeans and that they wanted to send me a pair of new jeans designed around the comments in my review of the Ton-Up’s.

Trilobite Go-Up Jeans packaging

I asked Jason to clear this with our editor and told him if all checks out I’d be happy to do this and that honestly, I was a bit flattered that they did this based on my comments. I received a box a few weeks later with a new pair of riding jeans as well as a couple of other pieces from the Trilobite catalog (reviews coming).

In addition to the gear was a letter from the CEO at Trilobite describing how they appreciated the review and how the enclosed jeans are the result of that review. So now that my head is getting almost too big for my helmet, I better get started on the actual review.

The Trilobite Go-Up Jeans

The Go-Up jeans are a study in simplicity, at least on the surface. The appearance is pure and simple blue jeans – dark blue denim with yellow-orange stitching, five* pockets, a button fastener, and a metal zipper. Except for a small metal Trilobite logo riveted to the coin pocket and ”Trilobite” embossed on the button, these jeans are stealthily giving no indication they are protective riding gear.

The packaging has a style all it’s own just like the Go-Up jeans do. A cardboard box with shredded paper filling the interior around the jeans. There is also a single newspaper-style page with info and “stories” about the Dyneema material and other features about their jeans. This is all in Czech so I’m unable to read it but it’s a neat touch nonetheless.

Trilobite Go-Up Jeans package contents

There are also a series of heavy-duty card stock printed tags attached to the jeans which provide info about the features. One of the tags has a chart showing the abrasion resistance based on the ECE 13595-2 standard which as a reviewer I find helpful as I don’t have to hunt this info down.

Among the tags is a personalized tag from the individual who actually handcrafted this pair including a black and white photo, their signature, date, and serial number for this pair of Go-Up jeans.

Serial numbers on jeans? Yup!

That’s important as the jeans carry a five-year warranty so one should take a minute and register them (I need to do this!). It will help in case one needs to order replacement parts, not that there are many, and it does add a personal touch.

Trilobite Go-Up Jeans serial number and care instructions

Construction

The main body of these jeans is made from a special blend of cotton and Dyneema ®. Dyneema ® is a UHMWPE (Ultra High Molecular Weight Polyethylene) material that offers very high abrasion resistance, even in low concentrations as used here. For reference, this material is used for products such as industrial fishing nets, boat mooring ropes, and even snowboards. Tough stuff for sure.

In the case of the Go-Up jeans, the denim includes 14% Dyneema ®, 67% cotton, 10% nylon, 8% polyester, and 1% elastane. Despite the variety of yarns used in this denim it still feels much like traditional cotton denim albeit a bit stiff when compared side by side.

Stitching

Trilobite Go-Up Jeans logo and stitching

Holding all this material together is some very straight and even stitching with not a single stitch or thread out of place that I could find. Even the interior stitches are properly trimmed and neat giving the jeans a quality finish to the overall garment. The main outside seams on the legs are triple stitched for extra strength and something I think should be standard on any riding jeans.

Belt Loops

There are five belt loop points at the waist with two loops at five positions. Unlike the Ton-Up jeans, the rear loop is also doubled. In my review of those jeans, I called out that the rear should be doubled as well in case one has a jacket that fastens to a belt. It is nice to see that they agreed and implemented this.

Button Closure

Trilobite Go-Up Jeans button closure

The main fastening point at the waist uses a large metal button riveted to the material. Below that is a metal YKK zipper with very smooth action which leads me to believe it is brass. There is an additional zipper in the “hidden” pocket (see below) which is unbranded and not a smooth acting as this one.

Pockets

Trilobite Go-Up Jeans full view flat

Speaking of pockets, the Go-Up jeans have the standard five pocket arrangement and the pockets are all very large. Pretty much any mobile device should fit in these pockets with room to spare. The coin pocket is even large enough to fit the entire width of my hand. No worries about trying to retrieve a bike key from this pocket, even with gloves on.

The rear pockets are small by comparison to the front but I would call them about average in size to most jeans. They do sit a bit low compared to some of my non-riding jeans and I wonder if this is a European thing. The Bull-it SP120’s I recently reviewed had the rear pockets in a similarly low position.

Trilobite Go-Up Jeans rear view flat

Trilobite includes an additional “hidden” pocket on these jeans that open just ahead of the main seam on the outside of the left thigh. The Go-Up jeans had this pocket too but for some reason, it seems to blend in better here. I keep forgetting it is there and nearly missed it during my initial product photo session for the review.

This pocket is the right size for a wallet and even many mobile devices. My own Moto X4 (5.2” screen) fits in with a little room to spare for comparison. This zippered pocket makes a for a secure sport to store items like this during a ride.

Trilobite Go-Up Jeans pockets

The zipper for the opening has a pretty fine pitch and isn’t waterproof so keep this in mind in case the weather looks iffy. The sliding action of this zipper isn’t as smooth as the main zip and combined with the fine pitch require a bit of effort to move. At the same time, this could be by design to make sure the zip stays in place once closed.

Protective Features

The Go-Up jeans are essentially one big abrasion resistant protective shell. The Dyneema ® infused denim is the protective feature of the jeans and there is no armor included or pockets in which to install any.

This goes along with the minimalist design to keep these jeans light, comfortable, and also keeps the cost down. The material is rated for nearly two seconds of slide time according to ECE 13595-2 which is certainly better than cotton denim which can shred away almost immediately.

Trilobite Go-Up Jeans inside out

Of course one shouldn’t expect it to hold up to a long slide associated with high speeds and that’s not what these were designed for. These are more at home for the city/urban rider were speeds are much lower than those ones might reach on the highway.

The absence of armor might be a dealbreaker for some but Trilobite does recommend one wear strap on knee protectors like MX style protectors for best protection. This is something that I prefer and often do this when wearing most riding pants unless they fit very closely.

Trilobite Go-Up Jeans inside out rear view

The straight cut of the Go-Up jeans easily accommodates my Shift Racing and Fox Racing knee protectors that I wear under my jeans and other textile riding pants. As I understand it they designed them this way based on what I said about this in my Ton-Up jeans review. Trilobite might even have their own option in the works for this very situation but I can’t confirm it at this time.

Unless one has some sort of armored shorts to wear, which I don’t anymore, there is still not an easy way to add hip armor which is something I feel strongly about having. Having a patch of hook and loop fastener inside the waist at each side would make it easy for one to place armor in the right position if desired. Several manufacturers have hip armor with this type of fastener already in place that could be implemented.

Fit & Comfort

Trilobite sent me the same size in the Go-Up jeans that I had received in the Ton-Up jeans I reviewed last year. However, these size 36 jeans were a bit loose when trying them on. Measuring waist revealed they run about a size large at 38 inches.

A belt allowed me to wear them comfortably enough and I should point out that these could be from a very early production run as they are a new product. Potential buyers may want to check with the sellers before ordering.

Trilobite Go-Up Jeans inner waist labels

The denim contains a small amount (1%) elastane so it has a bit of stretch which works well for staying comfortable in the riding position. In fact, when wearing them I wouldn’t know I wasn’t wearing regular denim. They are a little stiff as they are still pretty new but I see them breaking in well over time.

Laundering

Like a lot of high abrasion fabrics, denim in the Go-Up jeans will last considerably longer if it is only washed when needed. While the material stands up well to “physical” attacks, chemicals in detergents can shorten the life of the jeans.

There is a label in the waistband that recommends going “as long as possible” before washing. There are also places on the label for one to record dates of laundering to help keep track.

Trilobite Go-Up Jeans wash cycle calendar

Conclusion

The Go-up jeans are an interesting take on the motorcycle riding jean. Perhaps I’m a bit biased since they did take some of my own comments to heart when designing these jeans. The simple and straightforward design makes them very light and flexible making for a comfy pair of jeans.

The lower amount of Dyneema ® (14%) compared to the previously reviewed Ton-up jeans (52%) does mean they will be less durable in a crash situation. The same goes for the lack of armor since they don’t offer any impact protection on their own. Of course, the price is lower compared to the Ton-Up jeans so it is reasonable to believe the Dyneema ® content is partly responsible for the premium cost.

At $249.00, the Go-up jeans are still a little pricey but part of the cost is due to fees and taxes importing them to the USA. In Europe, the Go-up jeans cost 165,25 Euros which currently exchanges to about $186.00 as of this writing. Our European readers will likely see that as a pretty reasonable price.

In the final analysis, the jeans are a simple and durable solution for city riders who don’t plan on reaching highway speeds. I appreciate the fact that Trilobite took the time to make changes based on our feedback. Whether it was us or another source, the point is they are listening and that’s a good way to keep their customers happy.

Pros

  • Lightweight
  • Dyneema / cotton blend denim
  • Durable construction
  • Minimalist design

Cons

  • Price a little high in the USA market
  • Runs a size large (in this example)

Specs

  • Manufacturer: Trilobite
  • Price (When Tested): $249.00 (USD) / 165,25 €
  • Made In: Czech Republic
  • Alternative models & colors: Blue
  • Sizes: 30 through 44
  • Review Date: March 2019

[/column]

[/row]

Trilobite Go-Up Jeans Image Gallery

The post Trilobite Go-Up Jeans Hands-On Review appeared first on Web Bike World.

Categories
Full-Face Helmet Reviews Gear Reviews Motorcycle Helmet Reviews Other Motorcycle Blogs review Shuberth Web Bike World

Shuberth R2 Enforcer Helmet Hands-On Review

Some First Impressions

I always wear a full face helmet just because I ride in an environment that has a lot of sand and rock and the full face protection is appreciated. Putting this helmet on for the first time, it was snug but still very comfortable. The fit is secure but not so tight that you dread the first few rides to break it in.

I read a few negative comments regarding the chinstrap and the double D-ring closure but found the strap to be perfect in length and easy to secure with the d rings and snap. And in fact, I really like that Schuberth uses two slightly different shapes for the d rings which makes them very easy to secure by touch only.

The only thing that I questioned from the first time that I handled the R2 were the two vents. The vent on the chin is very easy to open, almost too easy. The larger vent on the top of the helmet does not move quite a freely as the chin vent, but both are made of plastic and I am not sure of the durability. Just from the feel and sound tapping on the two vents, I feel like this might be the one weak point of the Schuberth R2 Enforcer.

The R2 Enforcer is offered in XS to 2XL and is finished in four color schemes. The red version also includes black and white as does the grey helmet. Both the yellow and the green versions include black and grey but no white.

I went with the red, black and white and love both the look and the function of this helmet. The helmet is an intermediate oval which is the most common shape for helmets in the North American market, and it weighs in at just 3.27 pounds. And in my case, the fit was just as I expected and the sizing is very true.

Shopping Now? We Recommend:

webBikeWorld has worked closely with RevZilla over the years to provide our testers with products to review. In addition to being a great site to shop from, they’re also a great partner.

RevZilla

Free shipping on orders over $40
30-day no-nonsense return policy
Excellent selection of all major brands
Awesome pricing

Buy This Helmet on RevZilla

Reasonable Pricing

The R2 Enforcer helmet sells for $569.00 which is a few hundred cheaper than many of the other Schuberth full face helmets. And the fact that this helmet is already set up for the addition of the Schuberth comm system makes the price even more reasonable. In addition, a unique process used to construct the shell of the R2 makes it very strong by also very lightweight for a helmet in this price range.

R2 Enforcer Design & Features

Fit & Comfort

Fit and comfort are important in a helmet because if it is not comfortable, riders will not wear it. In the United States, only 19 states have a universal motorcycle helmet law requiring all riders to wear an approved helmet. So in the remaining 31 states riders can choose to wear a helmet or take the chance and not wear a helmet. And a major complaint of those riders who don’t wear a helmet is their comfort. The Schuberth R2 is a truly affordable option that provides both comfort and protection.

Front view of Schuberth R2 cheek and face padding

The Schuberth R2 is a very easy helmet to put on and take off. The chin strap folds back nicely and it is easy to slip the helmet on. And once it is on your head, it fits snuggly but not so tight that you will have pressure points or a headache after a long ride. The comfort liner is made from a material called ShinyTex which is antimicrobial, washable and fast drying. An added benefit is that the liner is seamless so there will be no issues with abrasion.

One feature that was an awesome surprise to me was the integrated channel that is on each side of the helmet for those of us who wear glasses. This made it really easy to put my glasses on after securing the helmet.

I ordered an XS and it fit me perfectly. I was able to put it on without feeling like I was ripping off my ears, but once it was on, the pads were secure against my cheeks. I also felt the pads fitting snugly all the way around my head with no gaps or overly tight areas. I could easily secure the chin strap and snap the end in place without any overly large loop. I have had some helmets with the quick release strap in the past but have never really embraced them, so the double D-ring connection is perfect for me.

Schuberth double -D closure

I ride a sportbike and I tend to stay in a fairly aggressive tuck most of the time. Several other helmets that I have tested extended further down the back of my neck making it difficult to tuck and have my head in a comfortable position. The back of the helmet would rest on the back protector in my jacket and force my head forward.

The R2 is definitely shaped to accommodate an aggressive posture and head position very comfortably. Overall the fit and comfort are just what I hoped for and expected from a Schuberth.

Rear view of Schuberth R2 showing the contour along the back of the helmet to allow for an aggressive riding position

Outer Shell

The outer shell of the R2 Enforcer is made of DFP fiberglass, but it is the unique construction process that makes the R2 special.

Direct Fiber Processing uses a continuous strand of glass yarn that is precision cut by a robot and blown into the helmet shell mold. Then an exact amount of resin and heat are added under high pressure to create a shell that is superior in strength and durability to other fiberglass helmet shells, The process also ensures that the material is distributed exactly and the shell is uniform in thickness.

Shopping Now? We Recommend:

webBikeWorld has worked closely with RevZilla over the years to provide our testers with products to review. In addition to being a great site to shop from, they’re also a great partner.

RevZilla

Free shipping on orders over $40
30-day no-nonsense return policy
Excellent selection of all major brands
Awesome pricing

Buy This Helmet on RevZilla

Field Of Vision

One of my favorite features of the R2 is the huge field of vision. I never felt that my vision was restricted when I was riding as I glanced down at my gauges or when I was looking forward. In addition, the viewport extends further than most helmets that I have worn.

I never at any point felt that the helmet opening was limited my peripheral vision or my ability to look to the side when turning or changing lanes. I found that I was barely able to rotate my eyes to the side far enough to even see the edge of the helmet opening.

Schuberth R2 large viewport for unobstructed vision

Visor

The R2 Enforcer comes with a clear visor and there is no integrated sun visor. However, there is a tinted visor that can be purchased if you want to change out the clear visor that is shipped with the helmet. Large thumb tabs on each side of the visor make opening and closing simple and fast. I never had any issues with the visor not locking into one of the five positions, including fully closed.

The anti-fog system worked great when I was out for an early morning ride. But, if for some reason you are not a fan of the anti-fog screen, you can remove it by just snapping it out of the visor.

 Schuberth R2 visor 5 position locking mechanism

Ventilation

The airflow in the R2 Enforcer is very good. For a full face helmet, I found it to allow for a lot of air movement. My concern is with the actual construction of the vents themselves. The chin vent is very easy to open by pushing on the lower portion of the vent. In fact, I found that it actually was very easy to accidentally open the vent when I was reaching for the visor. When I was riding with the chin visor open, I also noticed that the wind would begin to close the vent at high speeds.

Schuberth R2 with chin and top vent open for airflow

The vent on the top of the helmet is about 2.75 inches across and allows for good airflow as well. Again, the vent is really easy to open and close, but that makes me wonder how well they will hold up with regular use. Both vents are plastic and feel inexpensive as compared to the rest of the helmet surface. Just tapping on the vents with my finger makes me think that one rock hit and they will shatter.

My Shoei has vents in similar locations and the vent covers are not just plain plastic. They have a hard coating on them much like the rest of the helmet which I believe adds a great deal of durability. Only time will tell, and if this becomes an issue, I will add an amendment to this post.

With the vents closed and the visor closed, this is one of the quietest helmets that I have ever worn. And even with the vents open, there was not annoying whistling sound or sound of rushing air. I do not have an SC1 communication system, so I did not test the sound quality of the comms or the pre-installed speaker and microphone.

SC1 System

Schuberth R2 integrated speaker for the SC1 comm system
The R2 helmets come equipped with a speaker and microphone that is designed to accommodate the SC1 system. This makes the pairing as simple as plug and play. There is also an integrated antenna that wraps around the inside of the helmet shell which allows for greater distance between users without an external antenna. The SC1 standard system is available for $229 while the advanced system is $349. Both can be purchased at Revzilla.

Schuberth R2 base showing port covers for the SC1 comms system

The Verdict?

I had high expectations for my first experience with a Schuberth helmet and the R2 Enforcer did not disappoint. I was surprised to find a pre-wired Schuberth for under $600. This means that even after purchasing the communication system, the total investment in this helmet would be just under $800 unless you go for the upgraded comms, then you are spending just over $900.

The Enforcer graphics and color schemes take this helmet a little closer to the wild side than most Schuberth helmets but you still get all of the safety and quality that Schuberth is known for throughout the industry. The Schuberth R2 Enforcer is a great helmet for the price due to the quality, comfort, and top of the line features.

The Schuberth R2 Enforcer is a great choice for a mid-range priced helmet that offers many top-of-the-line features. The ability to integrate the Schuberth SC1 communication system by simply dropping in the battery and the module into the outer shell of the helmet makes this a simple solution for anyone who wants an easy comm system and superior protection from a single helmet.

Clearly, Schuberth understands that not everyone can afford a $1,000 plus helmet, but every rider deserves the opportunity to wear a helmet that offers great safety, comfort and some high-end features. The R2 Enforcer is here to meet the needs of the riders who thought that the Schuberth quality was not possible within their budget.

Pros

  • Light Weight
  • DFP Fiberglass Shell
  • DOT Compliant
  • Aerodynamic
  • Extra wide viewport
  • Anti-fog system
  • Removable/ washable lining
  • True sizing
  • Quiet
  • Pre-wired for SC1 comm system with speakers, microphone, & integrated antennae
  • Affordable
  • DOT approved

Cons

  • Chin vent is unstable
  • Vent durability is questionable

Specs

  • Manufacturer: Schuberth
  • Price (When Tested): $569.00
  • Made In: Germany
  • Alternative models & colors: grey, red, yellow and green
  • Sizes: XS, S, M, L, XL, XXL
  • Review Date: February 2019

Shopping Now? We Recommend:

webBikeWorld has worked closely with RevZilla over the years to provide our testers with products to review. In addition to being a great site to shop from, they’re also a great partner.

RevZilla

Free shipping on orders over $40
30-day no-nonsense return policy
Excellent selection of all major brands
Awesome pricing

Buy This Helmet on RevZilla

Shuberth R2 Enforcer Helmet Image Gallery

The post Shuberth R2 Enforcer Helmet Hands-On Review appeared first on Web Bike World.

Categories
Aerostich Aerostich Cousin Jeremy Suit Gear Reviews Motorcycle Clothing Reviews Motorcycle Jacket Reviews Motorcycle Pants Reviews Other Motorcycle Blogs review Web Bike World

Aerostich Cousin Jeremy Suit Hands-On Review: Part One

Introduction

If one has been riding motorcycles for a while then the name Aerostich is likely a familiar name. Starting back in the early 1980s the company (called Aero Design & Mfg CO. Inc.) developed the original Roadcrafter riding suit. The Roadcrafter was a departure from the motorcycle gear of the day and employed Cordura and Gore-tex fabrics in the construction instead of leather.

These materials were assembled into a one-piece, coverall style, suit designed to offer protection from crashes as well as the elements. Convenience was an important factor as well and was achieved by using a unique full-length zipper running from neck to ankle. In combination with a leg length zipper on the other leg, this arrangement made it easy to step into and out of the suit easily and quickly.

Aerostich Cousin Jeremy Suit Inner Tags

Over the following decades, Aerostich would expand their offerings to include jackets and pants like the Darien and Falstaff lines as well as a multitude of accessories for the motorcycle rider. The Roadcrafter has been updated to the current R3, the latest version of their Cordura one-piece suit while at the same time still offering the Roadcrafter in multiple versions including the Classic, Stealth, and Tactical versions.

Trying to describe the entire current lineup of suits would be enough for an entire article in itself so I’ll just point our readers to the Aerostich website for the descriptions. The point is that the company offers something for just about everybody.

Aerostich Cousin Jeremy Suit logo

Recently WebBikeWorld was given the opportunity to take a close look at Aerostich products and a couple of us were asked to choose what we’d like to review. Seeing as our last review of their gear was back in 2004 with a review of the Darien Jacket, we all felt it was long overdue.

Kathy Koewler chose to review an R-3 one-piece suit which is third-generation of the venerable Roadcrafter and you can read her review here. For my part, I wanted to look at something that I wasn’t that familiar with.

Before we get rolling I want to set expectations for this review. As one might have guessed by the “Part One” in the title, what you are reading is the first of what will be multiple installments evaluating the Cousin Jeremy suit.

A suit like this has a lot of details and will break in over time, and I want to present a complete picture for our readers. This installment will go over the appearance and construction details.

More details will come in future installments regarding fit, comfort, protective features, and more as I get additional seat time with the Cousin Jeremy suit.

The Cousin Jeremy Two Piece Suit

Haven’t heard of the Cousin Jeremy suit? Neither had I until I looked through the current Aerostich catalog. The best way I can describe the Cousin Jeremy is that it’s a vintage twist on a classic design. Ok, so that may have made it clear as mud so let me see if I can draw a more clear picture.

Aerostich Cousin Jeremy Suit from 3 Poses/Angles

The Cousin Jeremy suit, released in 2017, takes the Roadcrafter Classic shape and wraps it in a 10 oz waxed cotton shell. The Roadcrafter classic was ahead of its time back in the early ’80s and, as the name suggests, is considered a classic today. So what should it be called it when one takes a “classic” riding suit and constructs it from what is considered a “vintage” material?

It looks like a new term needs to be coined here but whatever it ends up being called, I was intrigued by the idea. I admit I’ve never been that taken with the look of Aerostich’s suits with the exception of the (sadly) discontinued Transit suit. The aesthetic just never grew on me.

The Cousin Jeremy changed my mind. I really like the way the brown and black worked together and the texture of the material all work together to create something very different in my eyes. Words like classic and vintage come to mind but so does utilitarian.

Construction

Heavy. If I had only one word to describe the jacket and pants heavy would be it. The shell is made from a 10 oz waxed cotton fabric with double layers (visible in black) in the impact areas such as the seat, shoulders, and elbows. The stitching appears single stitched for most areas but there are some double stitched areas on the pants. The work on the seams here is very neatly done and very strong from what I can discern.

The cut of the various panels is excellent as the garments lay nice and flat with little to no wave or buckling. I asked Carmen to examine them and she backed up my thoughts here. She has some education in textile manufacturing and agrees that these are very well put together.

Aerostich Cousin Jeremy Suit Front Pockets

This is not something to be considered lightly as there are a lot of panels that make up the jacket and pants. These are not simple garments by any stretch and it takes a lot of time to construct something like this in a way that it looks good and will last.

I want to point out that the quality of construction shown here is a large portion of why Aerostich gear has what is often considered a “premium” price associated with it. The materials have a cost but the time and skill required to produce these garments are what the buyer is paying for. Having an appreciation for this kind of quality work makes for a balanced equation for me when comparing cost versus value. One gets what they pay for as the saying goes.

The Jacket

The waxed cotton exterior of the jacket gives way to a smooth, dense weave, black nylon called Supernyl. For those who decide to “Google” Supernyl (I did), I don’t believe Aerostich is referring to the trademarked SUPERNYL™ polyamide film. The nylon used in the suit will actually allow air to pass through where the polyamide film of the same name is intended for use as a gas barrier and would be quite stuffy if used to line a garment.

The lining makes it nice and easy to slide the jacket on and off. The lining also contains pockets for the shoulder and elbow armor. These pockets use overlapping flaps as closures making it easy to install and remove the armor as needed.

Aerostich Cousin Jeremy Suit Front Pockets Open

Speaking of armor, there are several patches of hook and loop fastening points placed for connecting a back protector. There are also two locations for attaching optional hip armor when the jacket and pants are zipped together.

On the subject of zips, there is a 280 deg zipper in place for attaching the jacket and pants. This zipper is placed in a way that cuts across an Aerostich back protector if installed. As such the protector should be installed after zipping the pants and jacket together if that is the intended use.

Moving to the exterior of the jacket the main closure uses a heavy duty dual zipper which is covered by a flap of the shell. The flap can be secured over the zipper using several strips of hook and loop.

Aerostich Cousin Jeremy Suit Collar Velcro Closure

The collar has a small strap of hook and loop to adjust and secure it closed. There is also a small loop of fabric that can hold the strap out of the way if one wants the collar open for more ventilation. The collar also has three sets of plastic snaps allowing it to be folded down for more comfort in hotter weather.

At the back near the waist is a section of elasticized fabric with two large adjustment straps for adjusting the fit. Each sleeve has a gusseted section with a zipper closure as well as a hook and loop strap for cinching down the sleeve opening.

Vents

Up between the shoulder blades is a wide vent with a waterproof zipper. Two zippers are used for airflow adjustment. Behind the vent is a large mesh section that opens to the interior between the shell and liner. This prevents some air from moving through but it should provide enough to reduce “ballooning” when the front is open.

Aerostich Cousin Jeremy Suit Side Pocket

Two smaller waterproof zips are located below the underarms to provide venting and these are completely open to the interior of the jacket. There are no front vents so in order to get more air in the front one simply open the main zipper.

Pockets

Being based on the Roadcrafter, there are plenty of storage options on the Cousin Jeremy jacket. There are two pockets at the waist with fold over flaps for water resistance and these close with hook and loop material. Each of these pockets has a side opening for handwarmer pockets within a separate space behind the main pocket shell.

The chest has two pockets with the right pocket having a 10 inch (25cm) vertical opening and a waterproof zip for closure. This pocket also has an internal dividing pocket to organize items inside.

Aerostich Cousin Jeremy Suit Pocket

The left chest pocket has an angled top flap with a small section of hook and loop closing it. Inside the pocket opening is a small D-ring clip sewn onto a small fabric strap. This can be used to clip a helmet strap so that one can carry their helmet hands-free if needed. That’s quite a lot of bulk to hand on one’s chest in my opinion but it could work in a pinch. For my part, I’d probably just clip my bike key there.

There’s a little trick that I missed and ended up finding out by reading the description later. The left chest pocket is not attached on the sides to the shell creating space behind the pocket. This is designed for temporary stashing of gloves like when gassing up your ride. Neat idea.

Aerostich Cousin Jeremy Suit Pocket with Vertical Zipper

Finally, there is an interior pocket in the left side just under the Aerostich label that would be a good place to store a wallet or mobile device in case of inclement weather. For easier access to small items, there is a pocket on the right forearm. This pocket should easily hold smaller items like a mobile phone, wallet, or keys easily and it has a waterproof zip for closure.

That’s eight pockets in all in the jacket but that’s not the end of storage options. The left sleeve has strips of hook and loop for attaching accessory pockets if desired.

Pants

The pants are constructed of the same 10 oz waxed cotton as the jacket with double layers in the seat and knees with the knees and shin outer layer being black, while the seat is the same brown color as the rest of the shell.

Being part of a two-piece suit, there is a 280 deg zipper running around the top of the waist with dual zippers. One of the zippers has a reversible pull allowing it to be pulled from inside or outside the track. This makes it easier to pull when wearing it.

Aerostich Cousin Jeremy Suit Pants Inside Out

At the waist is a single snap closure and below that is a large dual zipper that runs from the waist down to the inside of the left ankle. The right leg has a large single zipper running from the upper right thigh down to the ankle. Together, these two zippers make it easy to step into and out of the pants without the need to remove boots.

Making ingress and egress even easier is the same Supernyl lining found in the jacket. This slick and tough material makes sliding shoes or boots through the right leg a breeze.

Aerostich Cousin Jeremy Suit Interiors

At the bottom of each leg, zipper run is a single snap at the opening. Using these allows one to raise the leg zipper for extra ventilation while keeping the leg opening secured in place. The leg openings can be adjusted using hook and loop fasteners to allow for more or less air to flow up.

At the waist, there are eight belt loops to make it easy to keep the pants in place when not attached to the pants. There is also an adjustable shock cord running around the waist that can be used in lieu of a belt to keep one’s pants properly positioned.

Aerostich Cousin Jeremy Suit Interior Legs Unzipped

Inside the waist are two hook and loop connection points to hold the optional hip armor. I want to point out these are very well placed and when I attached the hip armor pockets it fell in just the right place over my hip bones.

At the back, there are two large pieces of hook and loop for attaching the bottom of one of Aerostich’s back protectors. These really only come into play if the pants and jacket are zipped together.

Pockets

While the pants have a significantly smaller pocket count than the jacket, their storage is still more than enough for me. At the waist are two large pockets covered by a hook and loop fastened flap. These pockets are very large and inside each pocket is a waterproof zipper that opens to the interior of the pants.

These are designed to allow access to the pockets of pants one might be wearing underneath the Cousin Jeremy pants. This pass-through is a great feature for those who have left a phone or key in their jeans pocket and needed to get to it after putting on the overpants. Ask me how I know.

Aerostich Cousin Jeremy Suit Pant Pocket

On the top of the right thigh is another large cargo pocket with, you guessed it, a waterproof zippered closure. If I need to use pants pockets during a ride I’d rather place stuff here than in the waist pockets as it will likely be more comfortable.

Rounding out the pocket options is pair of hook and loop strips on the left thigh. Aerostich offers a clear panel map pocket that fits here that can be used for maps but could hold other small items as well.

Conclusion

To wrap up this initial look at the Cousin Jeremy suit, I have to say I’m very impressed with the quality and attention to detail that goes into the construction of these suits. This is doubly impressive considering the complexity of these pieces of apparel.

Pricing for a suit like this starts at $1,154.00 and includes Aerostich’s TF3 armor in the knees, elbows, and shoulders. In my case, I asked for a back protector to round out the protection which adds extra $87.00 on top of the cost of the suit.

Aerostich Cousin Jeremy Suit Zipper Closeup

Over $1,200.00 is no small investment. The quality of the apparel certainly makes for a good value but that’s only part of the equation. In the next installment, I will detail my experience in working with the team at Aerostich to get my Cousin Jeremy suit properly sized and fitted. We’ll also look at the TF series armor that I received with the suit along with some additional details. Until then keep the shiny side up.

Pros

  • High-quality construction
  • Tons of storage
  • Sharp looking waxed cotton shell

Cons

  • Price can be a barrier
  • Sleeve zippers work their way open
  • Cotton is not very abrasion resistant

Specs

  • Manufacturer: Aerostich
  • Price (When Tested): $1,241.00 including back protector
  • Made In: USA
  • Color: Brown and Black
  • Sizes: 34 to 54 plus various lengths
  • Review Date: March 2019

Aerostich Cousin Jeremy Suit Image Gallery

The post Aerostich Cousin Jeremy Suit Hands-On Review: Part One appeared first on Web Bike World.

Categories
Bull-it Gear Reviews Motorcycle Clothing Reviews Motorcycle Jeans Reviews Motorcycle Pants Reviews Other Motorcycle Blogs review Web Bike World

Bull-it SP120 LITE Jeans Review: A Slim Fit for the Ride

Introduction

It appears I have become the “riding jeans” guys over the past several years here at WebBikeWorld.com. I’m not certain how this happened but I’m here today with yet another review of, you guessed it, motorcycle riding jeans.

I do worry sometimes that I could suffer from “denim fatigue” with the volume of jeans that land on my desk. However, I was excited to see this latest pair of riding pants from Bull-It Jeans. I can’t believe it has been about 4 years now since Carmen and I reviewed a batch of riding pants (and  jackets) from Bull-it.  I guess a review of their current offerings is overdue.

One of the reasons I was looking forward to getting a look at some new Bull-it jeans is the fact they employ a unique abrasion and heat resistant material from Covec in their products. This partnership with Covec includes not only their fabric but their impact armor as well.

Shopping Now? We Recommend:

webBikeWorld has worked closely with RevZilla over the years to provide our testers with products to review. In addition to being a great site to shop from, they’re also a great partner.

RevZilla

Free shipping on orders over $40
30-day no-nonsense return policy
Excellent selection of all major brands
Awesome pricing

Buy This Jeans on RevZilla

Amazon

Free shipping (with Amazon Prime)
30-day return policy
Excellent selection
Competitive pricing

Buy This Jeans on Amazon

Bull-it SP120 Lite Heritage Slim Fit Jeans flat view

Covec fabric has some very interesting properties compared to other durable fabrics like Kevlar® and other aramids. I covered a lot of details about Covec in my review from 2015 so rather than reinvent the wheel here, I would suggest checking out that review for the low down on Covec.

Now let’s have a look at the specific jeans in question.

Overview

The SP120 Lite jeans appear to be your typical denim jeans at first glance. There’s not much that is outwardly visible to give away that these jeans have some very technical stuff going on under their shell.

The SP120 Lite jeans are available in two colors, Basalt and Heritage. Basalt, which I have for this review, are black while the Heritage is the type of blue most would associate with “blue jeans”. The Basalt color is quite stealthy with the use of black thread for the stitching as well as the black denim used for the body of the jeans. Those looking for some visibility might look at the Heritage color.

Bull-it SP120 Lite Heritage Slim Fit Jeans main front pockets

The design is a five pocket layout with two rear pockets and two main front pockets with a coin pocket inset in the front right pocket. The coin pocket is a bit “dodgy”  in actual use as it is deep and very narrow. Just be aware that any coins placed in this pocket might be inaccessible until one removes the pants.

Although the material of the jeans is black, there are areas at the knees which have a moderate “weathered” look giving them a subtle dark gray shade rather than pure black. A small COVEC label is located on the coin pocket in white thread. This and the logo embossed leather patch over the right hip along the waist is the only branding visible on the jeans.

Now let’s dig into the details of the construction.

Construction

The main closure on the SP120 Lite jeans is via a metal button and zipper. Metal buttons on motorcycle riding jeans can be a danger to the paint on the tank but at least there is only one. Other riding jeans I’ve seen have metal rivets on the front pockets but these aren’t present here.

Bull-it SP120 Lite Heritage Slim Fit Jeans front zipper and metal button

There are multiple layers to the jeans starting with the main body being made from a 98% cotton, 2% elastane denim. This small amount of elastane is enough to provide moderate stretch to the fabric.

Inside the jeans, there is a polyester mesh liner covering the Covec fabric in the seat area. The front portion of the legs have more lining coverage and there are pockets in the lining for hip and knee protectors.

Bull-it SP120 Lite Heritage Slim Fit Jeans interior

Covec abrasion resistant material is present between the denim and the mesh lining in the knee and seat areas. It’s not easy to get a good look at the actual Covec fabric but one can see it looks corrugated, not unlike the inside of cardboard or certain potato chips.

The main seams are of the triple stitched variety for durability in the event of a crash. The seams on the outside of the jeans are straight and neat and, in the case of the Basalt color, the thread is really hard to see in the first place with the black on black color. The inside is a different story.

Bull-it SP120 Lite Heritage Slim Fit Jeans inner fabric tag

The stitching used to attach the liner material to the denim seems heavy enough but I can’t say it is neat. Frankly, it looks messy in some places and you can see some of these loose white threads in the photos here. This is similar to what we saw in the Bull-it jeans review back in 2015. I can’t say that this weakens the strength of the overall garment but the finish here doesn’t inspire confidence in quality control.

Protective Features

The name Covec has been tossed around a lot during this review and it is  Covec materials that are at the heart of the protection offered in the SP120 Lite’s. This material is highly abrasion and cut resistant as well as having very low friction heat transfer.

In the zones where Covec is used in these jeans, they receive a AAA rating according to the draft version of the EN17092 standard. This rating translates into the material standing up to a slide that starts at 120kph (74.5 mph). During a slide, heat buildup shouldn’t be an issue thanks to the low thermal transfer properties.

You can see a pretty convincing video of this thermal transfer resistance below.


In addition to the above video, Bull-it has a lot of technical information about Covec materials on their website including other videos of testing. As a reviewer and rider, I appreciate all this information for my writings as well as peace of mind when riding in their apparel.

Bull-it SP120 Lite Heritage Slim Fit Jeans inside-out view

The SP120 Lite’s get the “Lite” designation due to the fact they only have Covec fabric in seat and knees versus lining the entire pants. It also means that no impact armor comes with the jeans but there are pockets provided for both knees and hips.

Covec makes impact armor in addition to the abrasion resistant fabric and they have CE level 1 and 2 level options. They even have a new product called Phantom that is very thin and light for a CE level 2 protector.  Of course, the sizes of the armor pockets are pretty standard so one should be able to use other brand protectors as well if desired.

Shopping Now? We Recommend:

webBikeWorld has worked closely with RevZilla over the years to provide our testers with products to review. In addition to being a great site to shop from, they’re also a great partner.

RevZilla

Free shipping on orders over $40
30-day no-nonsense return policy
Excellent selection of all major brands
Awesome pricing

Buy This Jeans on RevZilla

Amazon

Free shipping (with Amazon Prime)
30-day return policy
Excellent selection
Competitive pricing

Buy This Jeans on Amazon

Fit & Comfort

The SP120 Lite jeans are available in waist sizes from 30 to 44 covering quite a bit of ground. Sizes listed denote the “unstretched” fit so the size 30 will stretch up to 32 inches and the 44 should actually fit up to 46 inches. I have a 36-inch waist and ordered a 36 but in retrospect, I might have tried the 34’s to provide a closer fit. Either way, the jeans are true to their listed size so one can rely on the sizing chart.

Bull-it SP120 Lite Heritage Slim Fit Jeans reverse inside-out view

Bull-it offers three fit variants on the SP-120 Lite jeans which include Slim, Straight, and Easy. Easy being a loose or “relaxed” fit and Slim closer to the “skinny jeans” cut. I went right to the middle with the straight cut which is a nice balance. There is enough room in the legs for me to use MX style knee guards if I want to instead of using armor in the knee pockets.

In addition to the variations in cut, all sizes are available in four different leg lengths from S (short) to XL (extra long). The actual measurements being the same across all waist sizes at 30, 32, 34, and 36. The length on the 36S that I received was about half an inch long at 30.5 inches which for jeans designed for being worn in the riding position, I’m fine with.

Bull-it Logo on back of SP120 Lite Heritage Slim Fit Jeans

At this point, I want to point out that I don’t recall ever seeing a wider variety of sizes and cuts available in a pair of riding jeans. I appreciate that, not only are there various permutations of size and fit available but, Bull-it provides a chart for each different cut variant that details several dimensions such as thigh width, knee width, and even rise both front and rear. I would love to see more manufacturers take this detailed approach to inform buyers of sizing.

Comfort

Sizing and fit are very good but comfort is a bit of a mixed bag. Bull-it claims the SP120 Lite’s are breathable but they don’t seem to breathe all that well for me. I‘m not really surprised considering the extra material inside the denim.

3-angled view of Bull-it SP120 Lite Heritage Slim Fit Jeans

During these colder winter days, this fact is an asset but I’m afraid they might get stuffy during the summer months. I’m willing to make that leap based on my experience with the Bull-it jeans a reviewed back in 2015. I’ve also found some other comments about the SP120 Lite’s that back up this idea.

Also, the polyester mesh is not the softest material around. It can be itchy in places where it is in close contact with skin. The knee and thigh areas, in particular, suffer from this as these places are typically pulled up against the skin.

Washing

Most reinforced riding jeans require special care when washing. It’s funny to me that these materials that are highly abrasion resistant can deteriorate quickly when pitted against the chemical and folding torture that the typical washing machine can apply to riding gear.

Fortunately, Covec’s material is highly resistant to chemical attack from acids, alcohols, oils, and more. It also handles flex fatigue pretty well compared to some durable fabrics and much better than aramid based materials such as Kevlar®.  Covec’s website has details on how their material compares against a variety of other fabrics.

One should still not tumble dry these jeans and they should be left to hang dry and it is also recommended that they are turned inside out. This isn’t uncommon for most jeans anyway if one wants to reduce fading.

Bull-it SP120 Lite Heritage Slim Fit Jeans care instructions

Conclusion

Overall I really like what Bull-it has done to evolve their offerings. The SP120 Lite makes the cost of admission a very reasonable at $189.95. That price gets you a pair of jeans with some very tough protection, albeit strategically placed protection instead of the entire garment.

Provisions for armor in hips and knees is welcome and although I would like to see the armor included, its absence isn’t surprising at this price point. Since the armor pockets are pretty standard sized one can find plenty of options to fit their desired budget/protection level.

I would like to see the interior construction neatened up a bit and, while at it, maybe find a more comfortable material for the mesh lining. Most riders likely will find these to be relatively minor issues but they are there nonetheless.

Finally, I’m blown away by the incredibly wide variety of size and cut combinations. Bull-it has really gone above and beyond what most manufacturers provide not just in the variations of size and fit but also the great details about how each variant measures in several areas.

An overall score of 4 out of 5 stars seems appropriate with the overall jeans being very good but being let down on the neatness of the interior lining stitching and the somewhat scratchy polyester lining.

Pros

  • Good protection in key impact zones
  • 3 available fit “types”
  • Provisions for knee and hip armor
  • Reasonable price

Cons

  • Armor not included
  • Liner can be “scratchy”
  • Internal construction not well finished

Specs

  • Manufacturer: Bull-it Jeans
  • Price (When Tested): $189.95
  • Made In: Bangladesh
  • Alternative models & colors: Slim, Straight, and Easy Cuts
  • Sizes: 30 through 44
  • Review Date: February 2019

Shopping Now? We Recommend:

webBikeWorld has worked closely with RevZilla over the years to provide our testers with products to review. In addition to being a great site to shop from, they’re also a great partner.

RevZilla

Free shipping on orders over $40
30-day no-nonsense return policy
Excellent selection of all major brands
Awesome pricing

Buy This Jeans on RevZilla

Amazon

Free shipping (with Amazon Prime)
30-day return policy
Excellent selection
Competitive pricing

Buy This Jeans on Amazon

Bull-it SP120 LITE Jeans Gallery

The post Bull-it SP120 LITE Jeans Review: A Slim Fit for the Ride appeared first on Web Bike World.

Categories
Full-Face Helmet Reviews Gear Reviews Matrix Motorcycle Helmet Reviews Other Motorcycle Blogs review Web Bike World

Matrix Alpha Streetfighter Helmet Hands-On Review

Some Less Than Pleasant Surprises

I was really looking forward to testing this helmet due to the lightness. I am religious about wearing a full face helmet and the lighter the better. I also was very interested in the airflow thinking that the Matrix Alpha Streetfighter had the potential to be my go-to helmet for the hot summers here in Phoenix.

The Alpha Streetfighter offers a large chin bar with two large vent openings on each side of the helmet. Most helmets offer a single vent in the center of the chin bar and the Alpha Streetfighter looked like it would provide far more airflow even at lowers speeds on city streets.

The Alpha Streetfighter, as well as the Street FX Streetfighter the other fiberglass helmet offered by Matrix, are both offered in a high gloss white or a matte black finish. The sizes range from XS to XXL. And the standard visor on the Streetfighter is a 3mm adjustable dark race style visor. A quick release micrometric buckle secures the helmet.

Reasonable Pricing

The helmet sells for just under $250.00 USD. But this is subject to change due to the exchange rate as the matrix produces are sold from the UK. When I entered my shipping address, the website estimated my shipping to be an additional $32.00 roughly bringing the total cost of the helmet to around $280. This price range puts the Alpha Streetfighter in the mid-range for helmets in the United States and a relatively reasonable cost for a quality helmet.

Fit, Comfort, & Sizing

Fit and comfort are important qualities of any piece of riding gear but size is possibly the most critical for a motorcycle helmet. And because riders need to order this helmet without having any way to try on a sample before the purchase, I feel that accurate sizing and sizing information on the website is critical.

When I put on the Alpha Streetfighter for the first time I was relatively disheartened as I knew immediately that this helmet was not a good fit for me as it felt very loose across my cheeks. I was able to grab the chin bar and slide the helmet up and down several inches.

My hope was that once I secured the chin strap, the helmet would feel more secure and that I would begin to get more comfortable with the fit. This was my first experience with the quick release chin strap fastener and I was thinking that I would really like this simple but useful feature.

As it turned out, muscle memory for the old standard double D ring closure is fairly ingrained in me and the quick release was not really much quicker, but it felt odd. Knowing that I would need to really snug the helmet down with the chin strap, I shortened the strap as much as possible before buckling it. To my dismay, the strap hung a good two finger widths below my chin.

The cheek pads in the Alpha Streetfighter are a good 1.5 inches thick and are removable but the rest of the helmet has only a thin poly liner which appears to be held in place with a matte adhesive or possibly double-sided tape. From what I could tell the liner is not removable which means that it is also not washable or replaceable.

MATRIX ALPHA STREETFIGHTER INSIDE VIEW OF PADDING AND FOAM

Overall, I was very disappointed with the fit and sizing of the helmet. I have worn assorted  Icon, Schuberth, Scorpion helmets and never had an issue with the sizing. I did double back to the website to see if I had misinterpreted the Matrix sizing but the XS is listed as 53-54 cm which is pretty standard.

I also doubled back to look at the helmet, the box and the documentation included in my order to verify that I was shipped the correct size. The box was labeled XS but I was unable to find a size listed inside the helmet or on the packing slip enclosed in the order. My assumption is that I did receive an XS but that the product runs large.

Field of Vision

As I mentioned earlier, I am a die hard full face helmet rider. As such, I am willing to accept a little reduction in my field of vision to get the added protection. I understand that I need to turn my head further to see to the sides and also behind me. But I have never worn a helmet that was so restrictive when looking straight ahead.

MATRIX ALPHA STREETFIGHTER FRONT VIEW OF FIELD OF VISION
The opening at the bridge of the nose is only 1.75 inches and the largest portion of the opening is 2.25 inches which are located about mid cheek.

MATRIX ALPHA STREETFIGHTER FRONT VIEW OF FIELD OF VISION

Peripheral vision is limited to about 1.5 inches at the far left and right of the opening. I found the vision very limited and felt the need to really crank my head around to get a good look when making a turn or changing lanes. There was no way to quickly glance back. Instead, I needed to shift my entire body and rotate at the waist to get a decent view of what was around me.

Chinbar Concerns

This limited field of vision also brought up another concern. The chin bar on this helmet is huge. Normally, I have a very difficult time getting my hand inside my helmet to scratch my nose or touch my lips, but in the Alpha Streetfighter, I can slide my entire hand in front of my face and reach my forehead. In some instances that could be considered a benefit, but it can also create an issue.

MATRIX ALPHA STREETFIGHTER SIDE VIEW LARGE CHIN BAR AND HELMET BASE
When turning my head, the front of the chin bar was hitting and catching on the shoulder armor on my jacket. My only solution was to look up as I turned my head and then let the bottom of the chin bar rest on my shoulder which caused the helmet to move on my head. As I turned back to a forward facing position I then had to readjust the helmet to look forward and not be looking into the arched nose portion of the chin bar.

MATRIX ALPHA STREETFIGHTER CHIN BAR OBSTRUCTED BY SHOULDER ON SIDE VIEW LIMITING RANGE OF MOTION

When looking forward, the large chin bar becomes a big obstacle. In a normal riding position, I was able to look forward and see the road clearly but could not shift my eyes down to see even the top of my windscreen.

Vision Obstacle

To look at any gauges on my bike I needed to tilt my head down enough that I was no longer looking at the road in front of me. With any other helmet I have ever worn, I might have needed to move my head slightly, but I could still glance down to the gauges while still seeing some of the road.

Overall, I was very uncomfortable with the limited vision that this helmet offers. I had a feeling of tunnel vision that reminded me of when I first learned to ride. It took some time to learn the skills needed to be a safe rider and to look around and take in all of my surroundings to know what was coming and what my alternatives were in a worst-case scenario.

I feel that wearing this helmet took away my ability to really be looking at the big picture to be the safest rider that I could possibly be.

Visor

The Alpha Streetfighter visor is tinted and 3mm thick. There are three positions that the locking mechanism offers.

Riders can have the visor completely open, lowered so that there is about an inch gap between the bottom of the visor and the top of the chin bar or the visor can be fully closed. I rode most of the time with the visor fully closed as I was wearing clear prescription glasses, not sunglasses, and I did notice that there was a thin line of sunlight coming in under the visor.

MATRIX ALPHA STREETFIGHTER SURE LOCK VISOR SYSTEM OPEN MATRIX ALPHA STREETFIGHTER SURE LOCK VISOR SYSTEM CLOSED

Sure-Lock Visor System Open & Closed

The Sure-Lock system on the visor is basically a pin on the helmet and a hole in the visor. There is an angle to the edge of the visor that is designed to be a tab to move the visor.

I found it virtually impossible to secure the visor with one hand when I was riding and equally as difficult to open the visor when it was secured with one hand. Part of the issue with opening the visor was related to the fact that the helmet was very loose and would move when I tried to unlatch the Sure-Lock pin system.

A Little Discovery

It wasn’t until I got home and looked more closely at the front of the Alpha Streetfighter that I discovered that the visor does not fit the helmet correctly and sits offset to one side. That could account for some of the light getting past the visor as well as the difficulty in trying to align the pin and hole in the visor to get it locked and unlocked.

MATRIX ALPHA STREETFIGHTER FRONT VIEW OF MISS ALIGNED VISOR OFFSET TO THE RIGHT

Airflow

As expected, the air flow in this helmet is very good in the face area of the helmet. The extended chin bar and the large vent openings allow for a ton of air to enter the front of the helmet. Unfortunately, there is no way to control the amount of air. Also, the lack of vents in the top of the helmet will result in a pretty sweaty head in the summertime.

The gap between the visor and the front of the helmet also created a whistle at higher speeds. I was able to eliminate the whistle by opening the visor to the setting of about an inch open but that created some additional light and glare. The large opening at the bottom of the helmet did make this helmet overall more loud than most others that I have worn.

The Verdict?

I had high expectations for the Matrix Alpha Streetfighter as soon as I picked it up. I was hoping for a great lightweight summer helmet with great airflow. In fact, the helmet is very lightweight and does offer a lot of airflow due to the very large opening at the base of the helmet to accommodate the very large chin bar.

But I could not get past the poor sizing of the helmet and the fact that it created the feeling of tunnel vision. In addition, the ill-fitting visor made me wonder about the quality of the parts and construction that was not visible.

To be fair to the Alpha Streetfighter and the manufacturer, I hope that a properly fitting helmet would eliminate some of the comfort issues that I experienced as well as aiding in the used of the Sure-Lock visor system. But the field of vision will always be too tight for my comfort.

The Matrix website clearly states that the Alpha Streetfighter helmet as suitable to, “Test the limits of your sport bike, sprint car, or go-kart in this commanding composite helmet!” And while I disagree with the helmet’s function as in the motorcycle use case, it could be the perfect protection for a sprint car or a go-kart where you keep your head fairly stationary. But in my opinion, the Alpha Streetfighter is not a great choice for motorcycle riders.

Pros

  • Light Weight
  • Fiberglass Shell
  • DOT Compliant
  • Considerable

Cons

  • Poor Sizing-VERY large extra small
  • Extremely limited field of vision
  • Visor Is Difficult to adjust with one hand
  • Chin strap is too long and does not secure the helmet
  • Visor does not close completely to block out light

Specs

  • Manufacturer: Matrix
  • Price (When Tested): ~$250 USD (depending on exchange rate plus shipping)
  • Made In: China and Vietnam
  • Alternative models & colors: black matte and gloss white
  • Sizes: XS, S, M, L, XL, XXL
  • Review Date: January 2019

Matrix Alpha Streetfighter Helmet Image Gallery

The post Matrix Alpha Streetfighter Helmet Hands-On Review appeared first on Web Bike World.

Categories
AGV AGV Helmet AGV K5 S Helmet Full-Face Helmet Reviews Gear Reviews Motorcycle Helmet Reviews Other Motorcycle Blogs review Web Bike World

AGV K5 S Helmet Hands-On Review

Introduction

I have handled a good variety of motorcycle helmets since I started riding in the early ’90s. I’m therefore a bit surprised to realize I’d never owned or tested a helmet from AGV. As part of my review process, I always read up on the manufacturer, even if I’m pretty familiar with them, in case there is some interesting fact I can bring to light.

Checking out the story behind AGV had me realizing how little I actually knew about this company. For instance, AGV founded in 1947 and the company made some very notable contributions to the motorcycle helmet world. They were the first put into production the fiberglass shell crash helmet in 1954 and they were the manufacturer of the first full face helmet worn at the Italian Grand Prix in 1969.

Flash forward to 2019 and I have in my hands one of the results of 72 years of being in the crash helmet business. I liked a lot about the helmet even before I learned of its history. Now I find I’m looking at it with the extra dose of respect that comes from an appreciation of the long road that leads to this helmet’s existence.

Shopping Now? We Recommend:

webBikeWorld has recently partnered with 2Wheel.com. When you purchase an item via our affiliate link, we receive a small commission. These commissions are how we run our site. Thank you for supporting us.

2WHEEL

Buy This Helmet on 2Wheel

AGV K5s Helmet full side view

So the AGV K5 S has the legacy and passion of 70 plus years poured into its Italian design and that’s great. But, you may ask, is it a good helmet?

Spoiler alert! – Yes.

Is it perfect? Not quite. Let’s take a look and see what got this helmet so close to getting a five-star rating, and what kept that final star out of reach.

The AGV K5 S

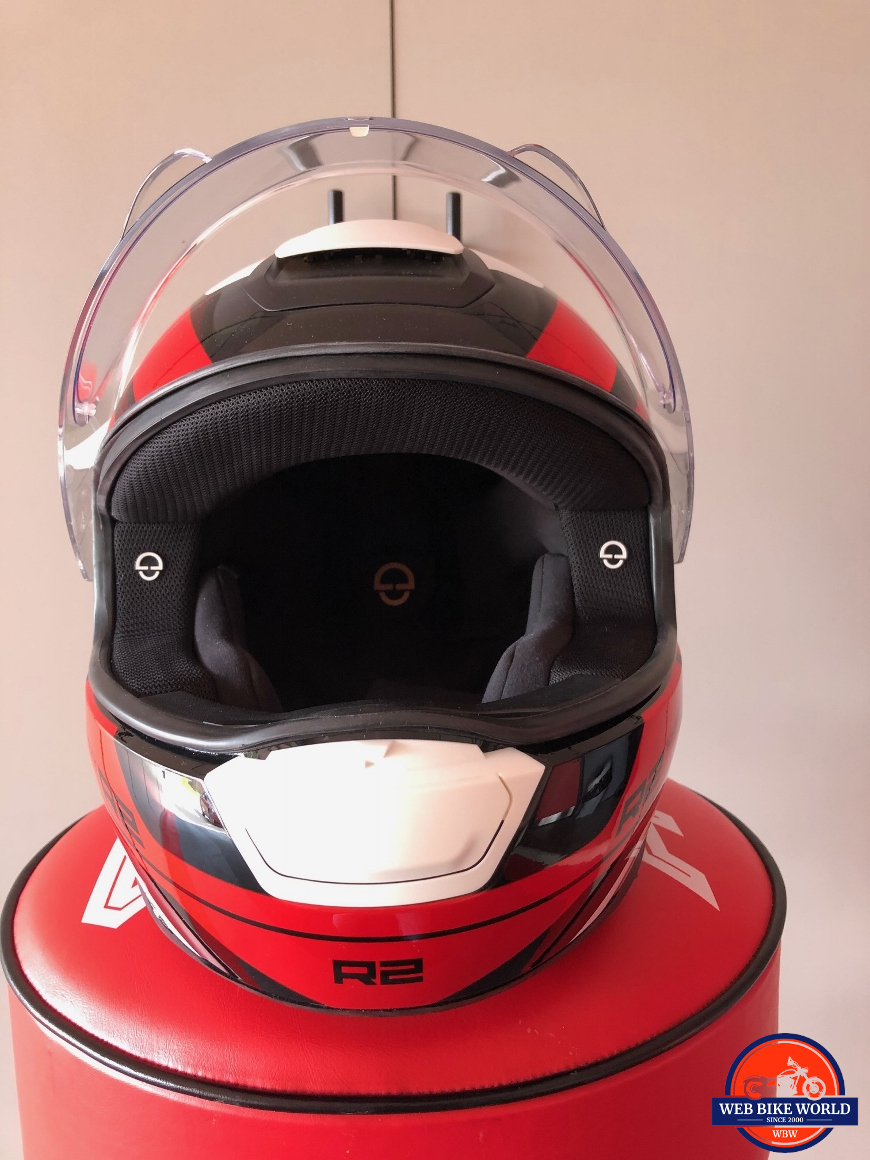
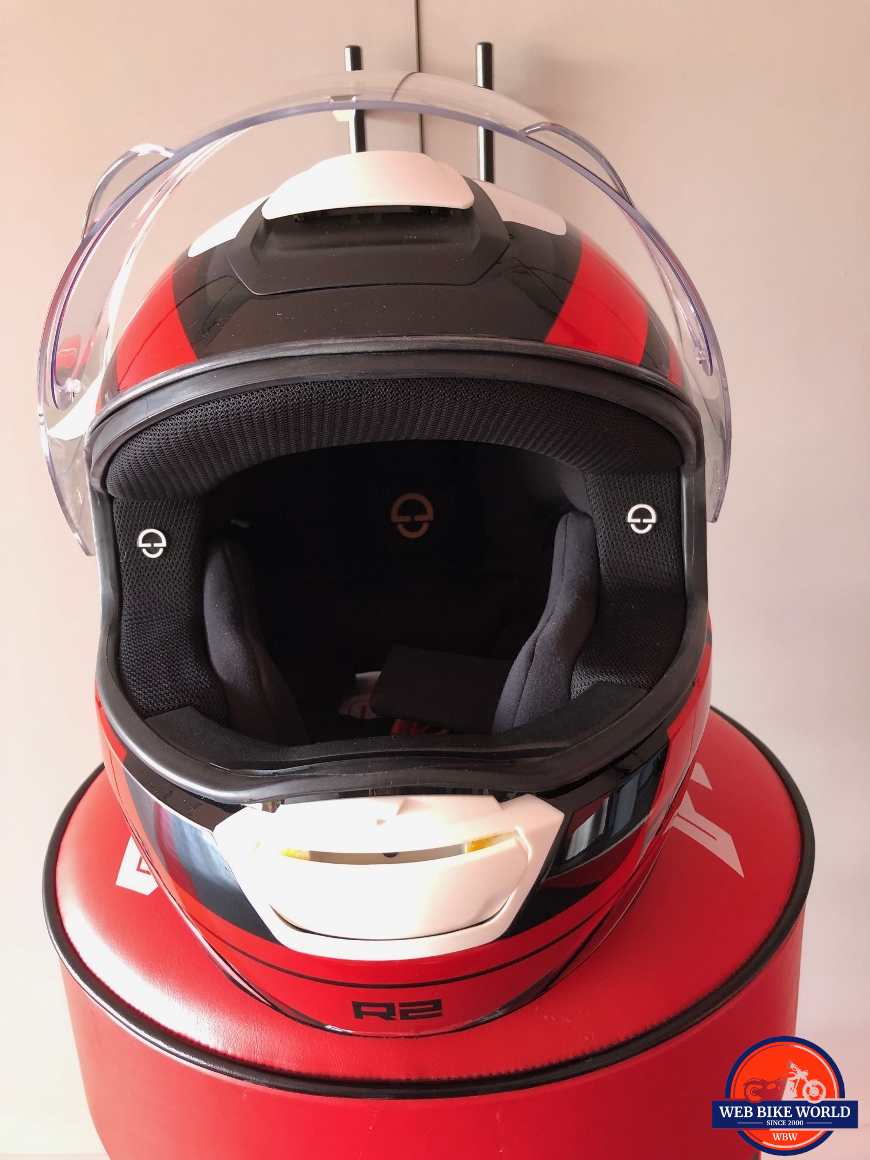
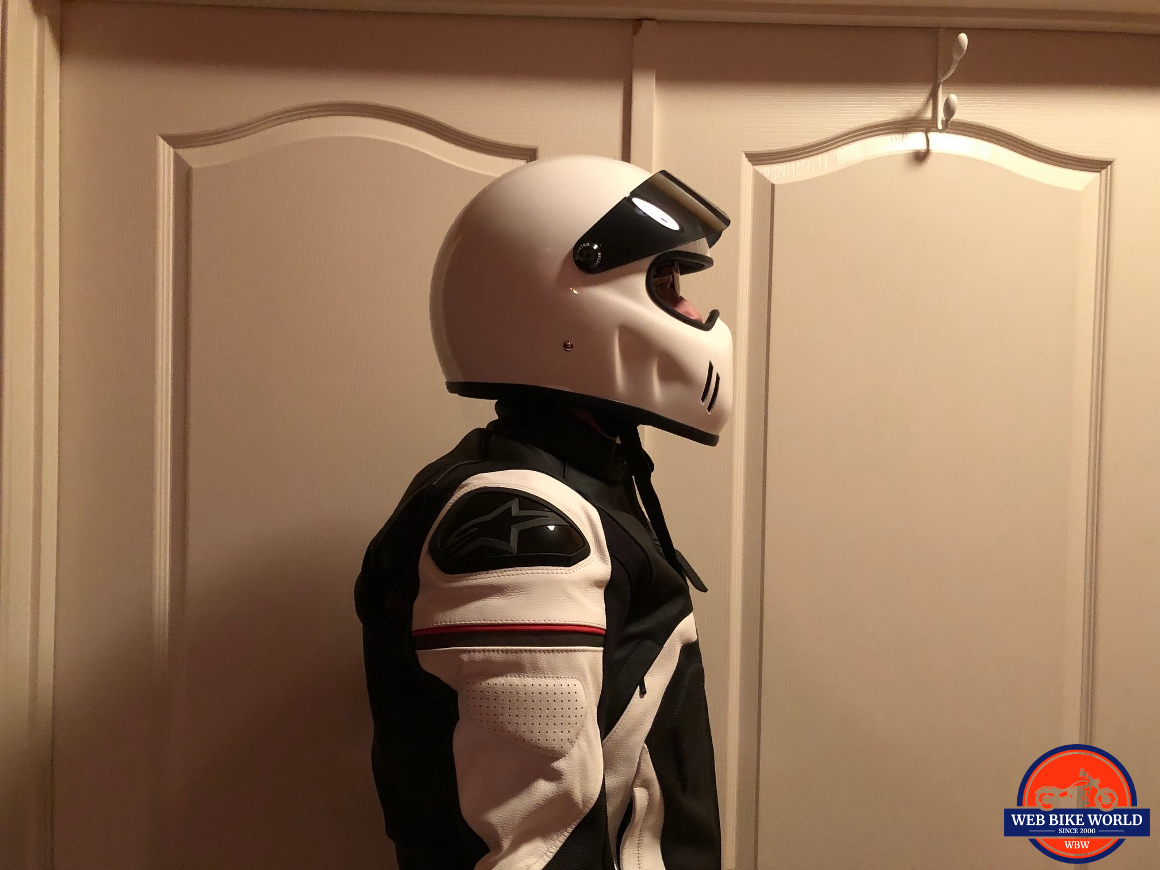
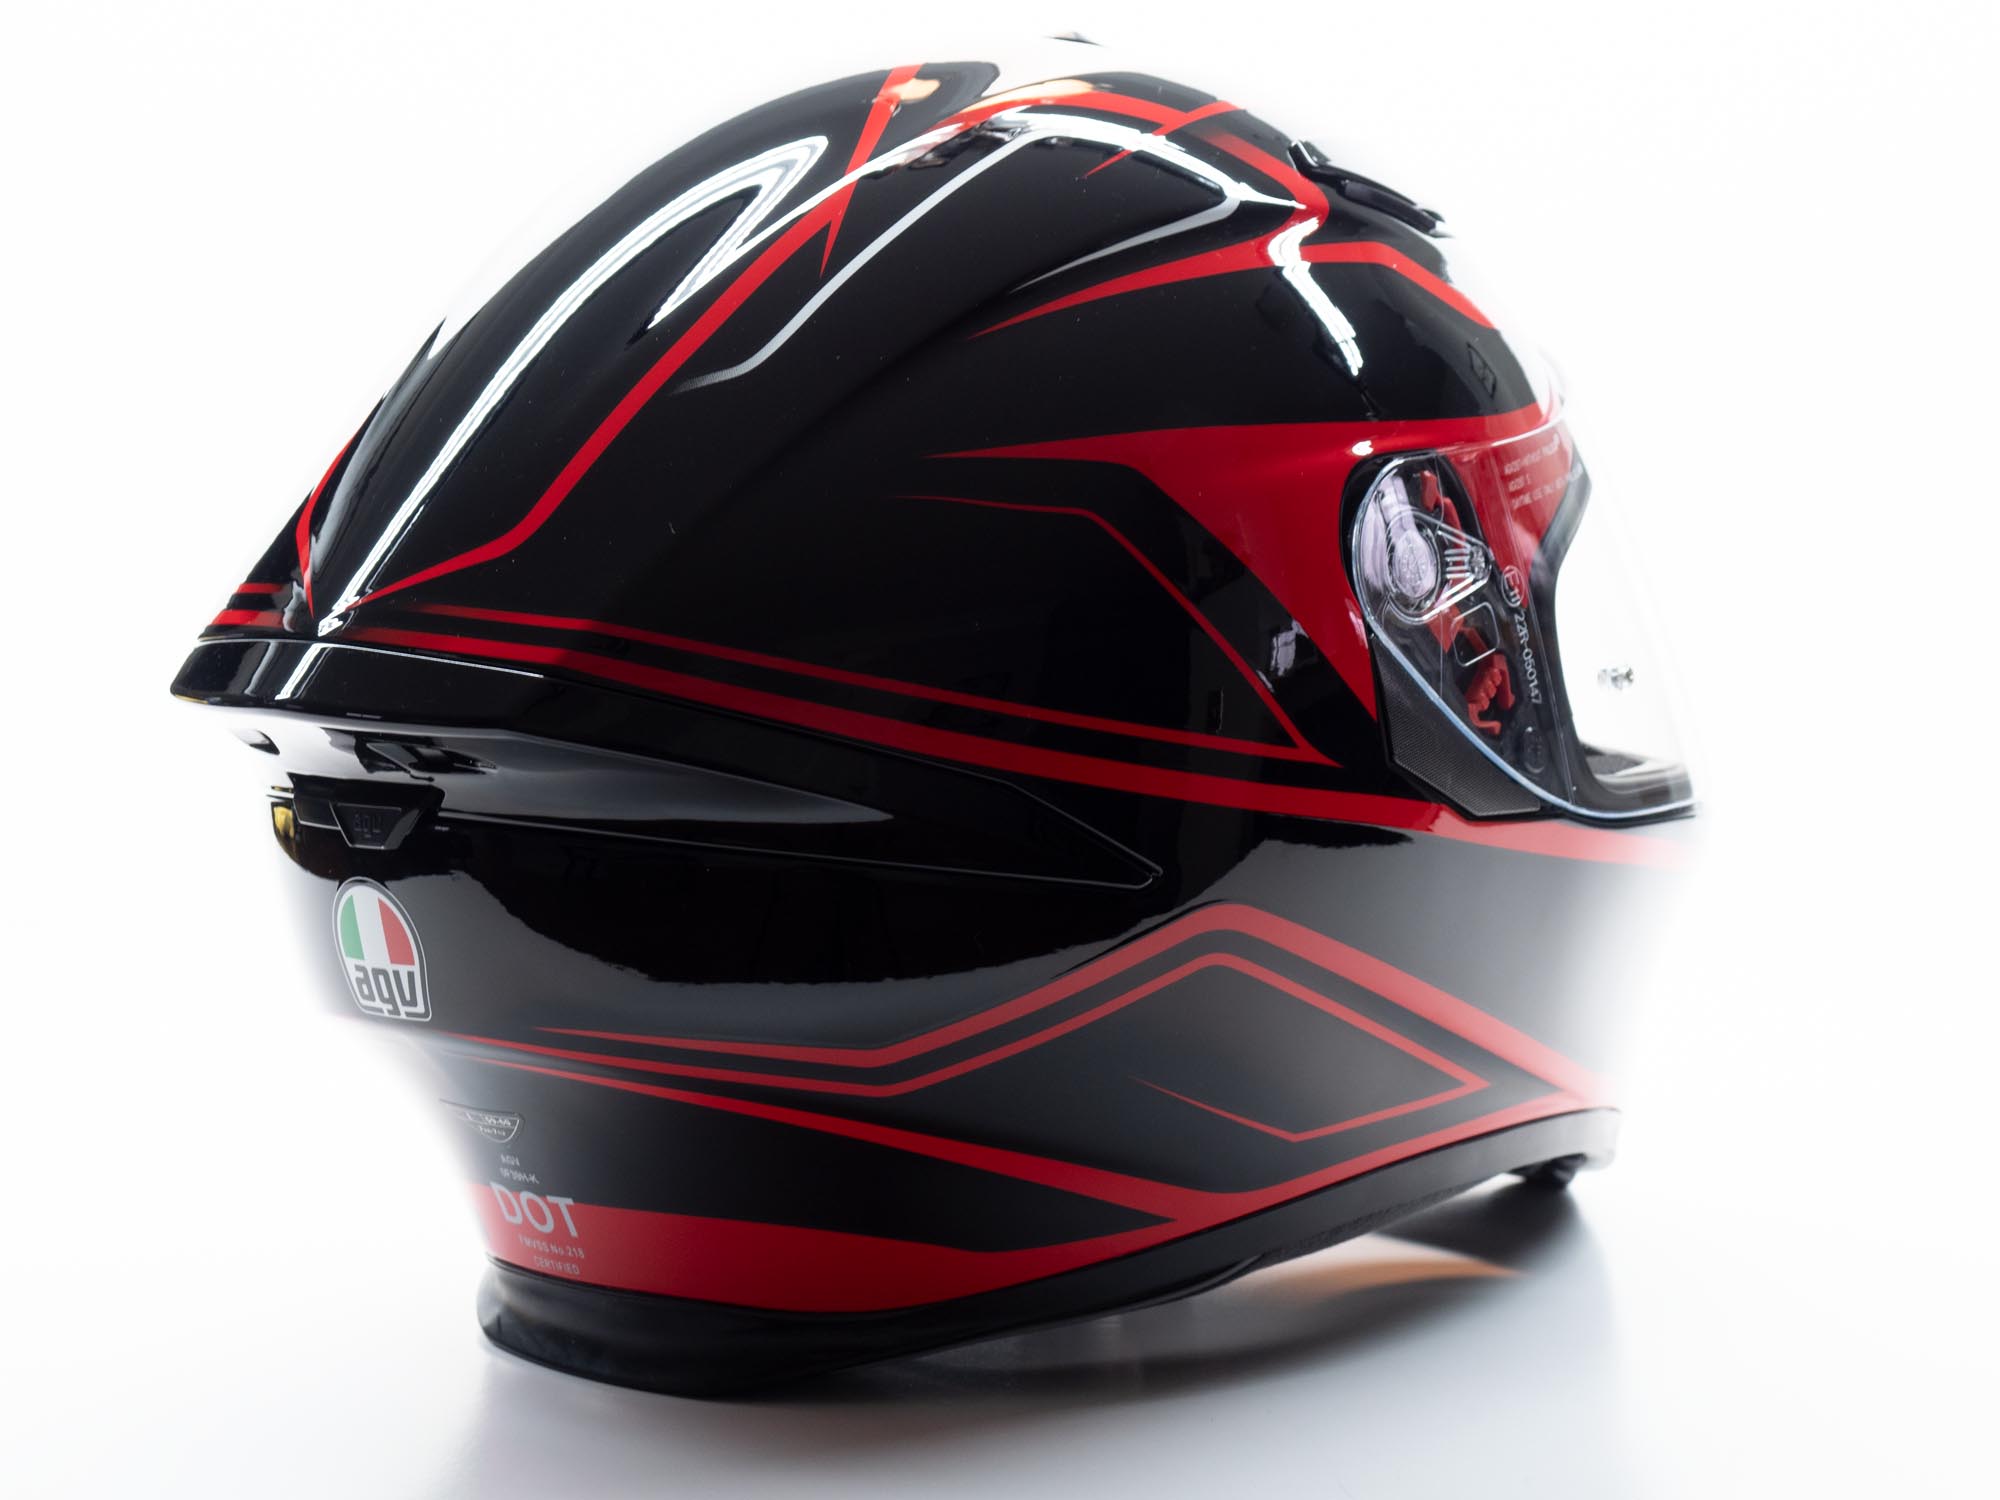
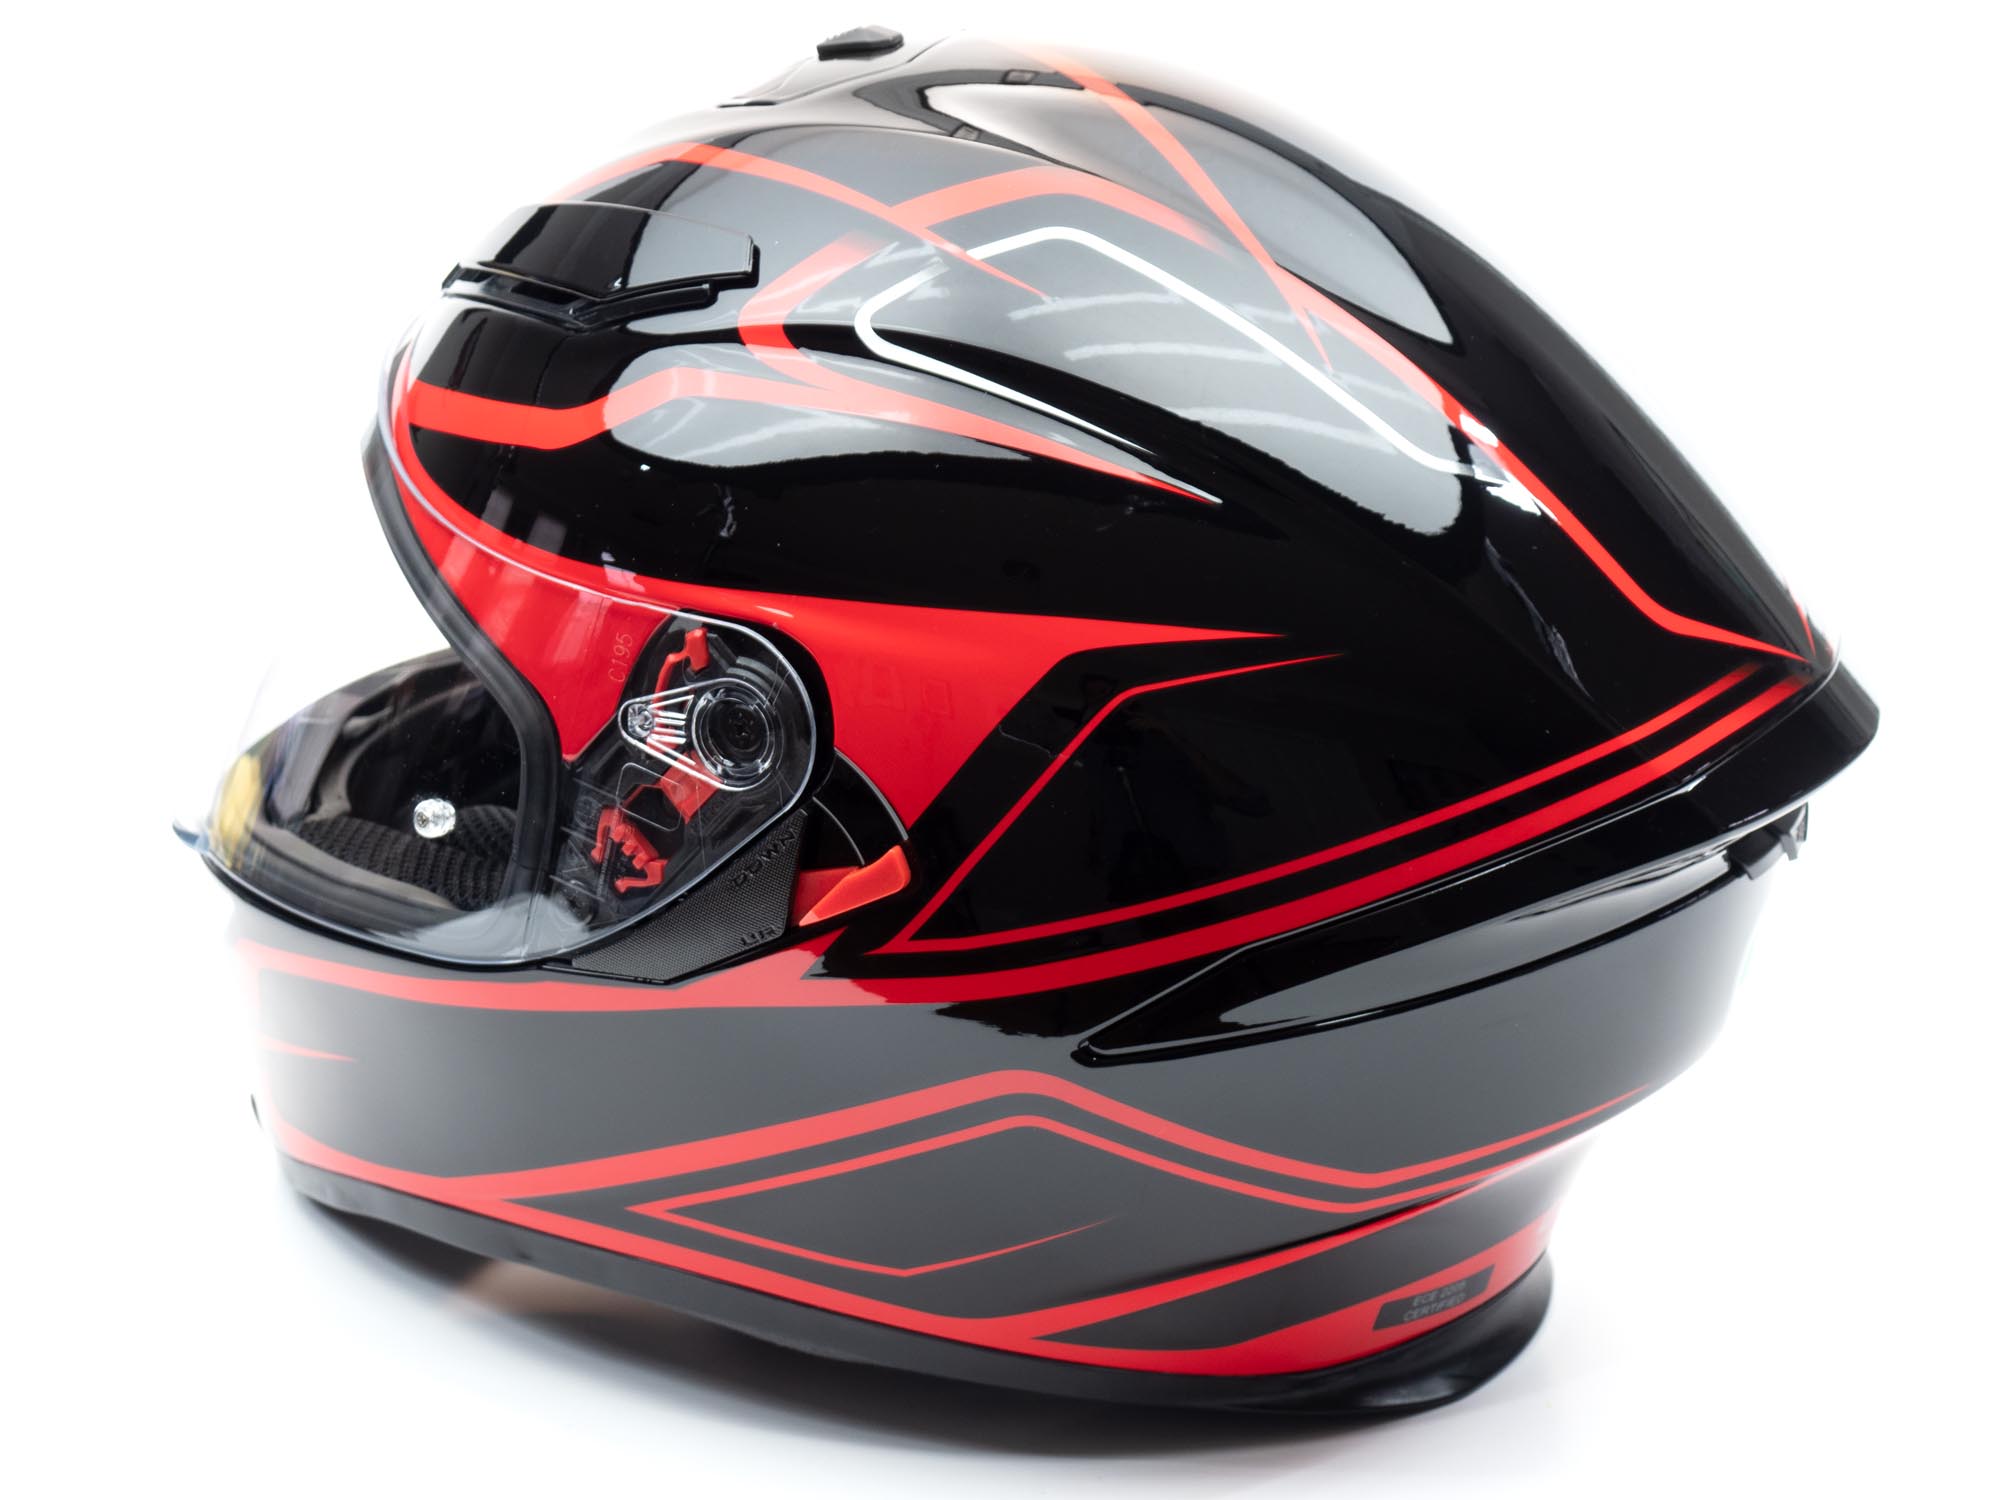
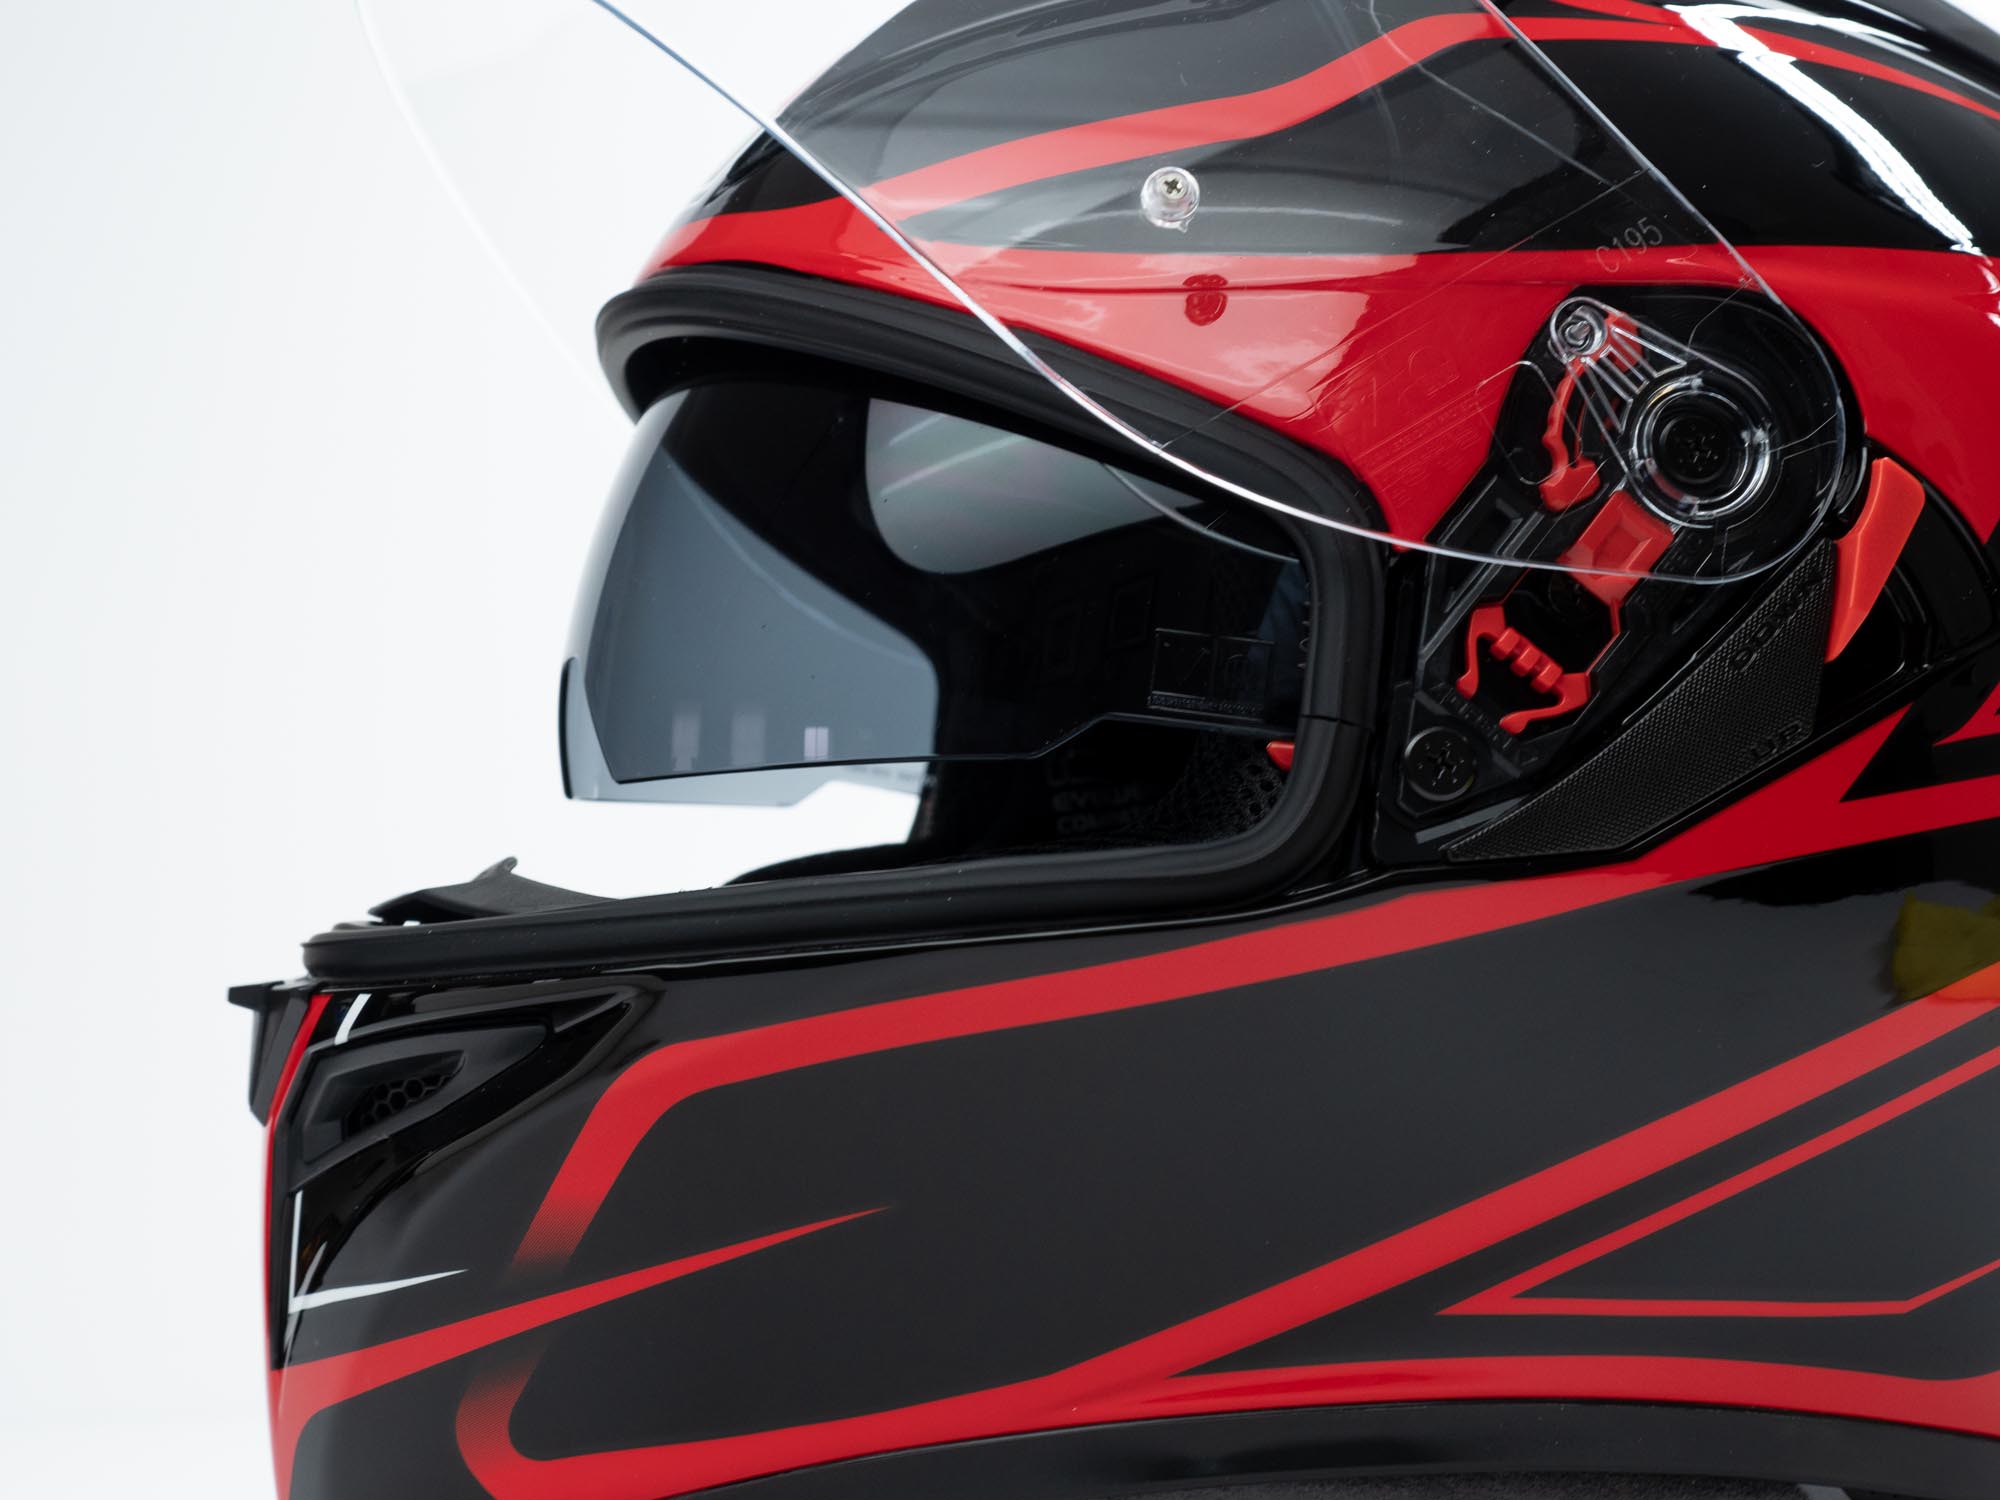
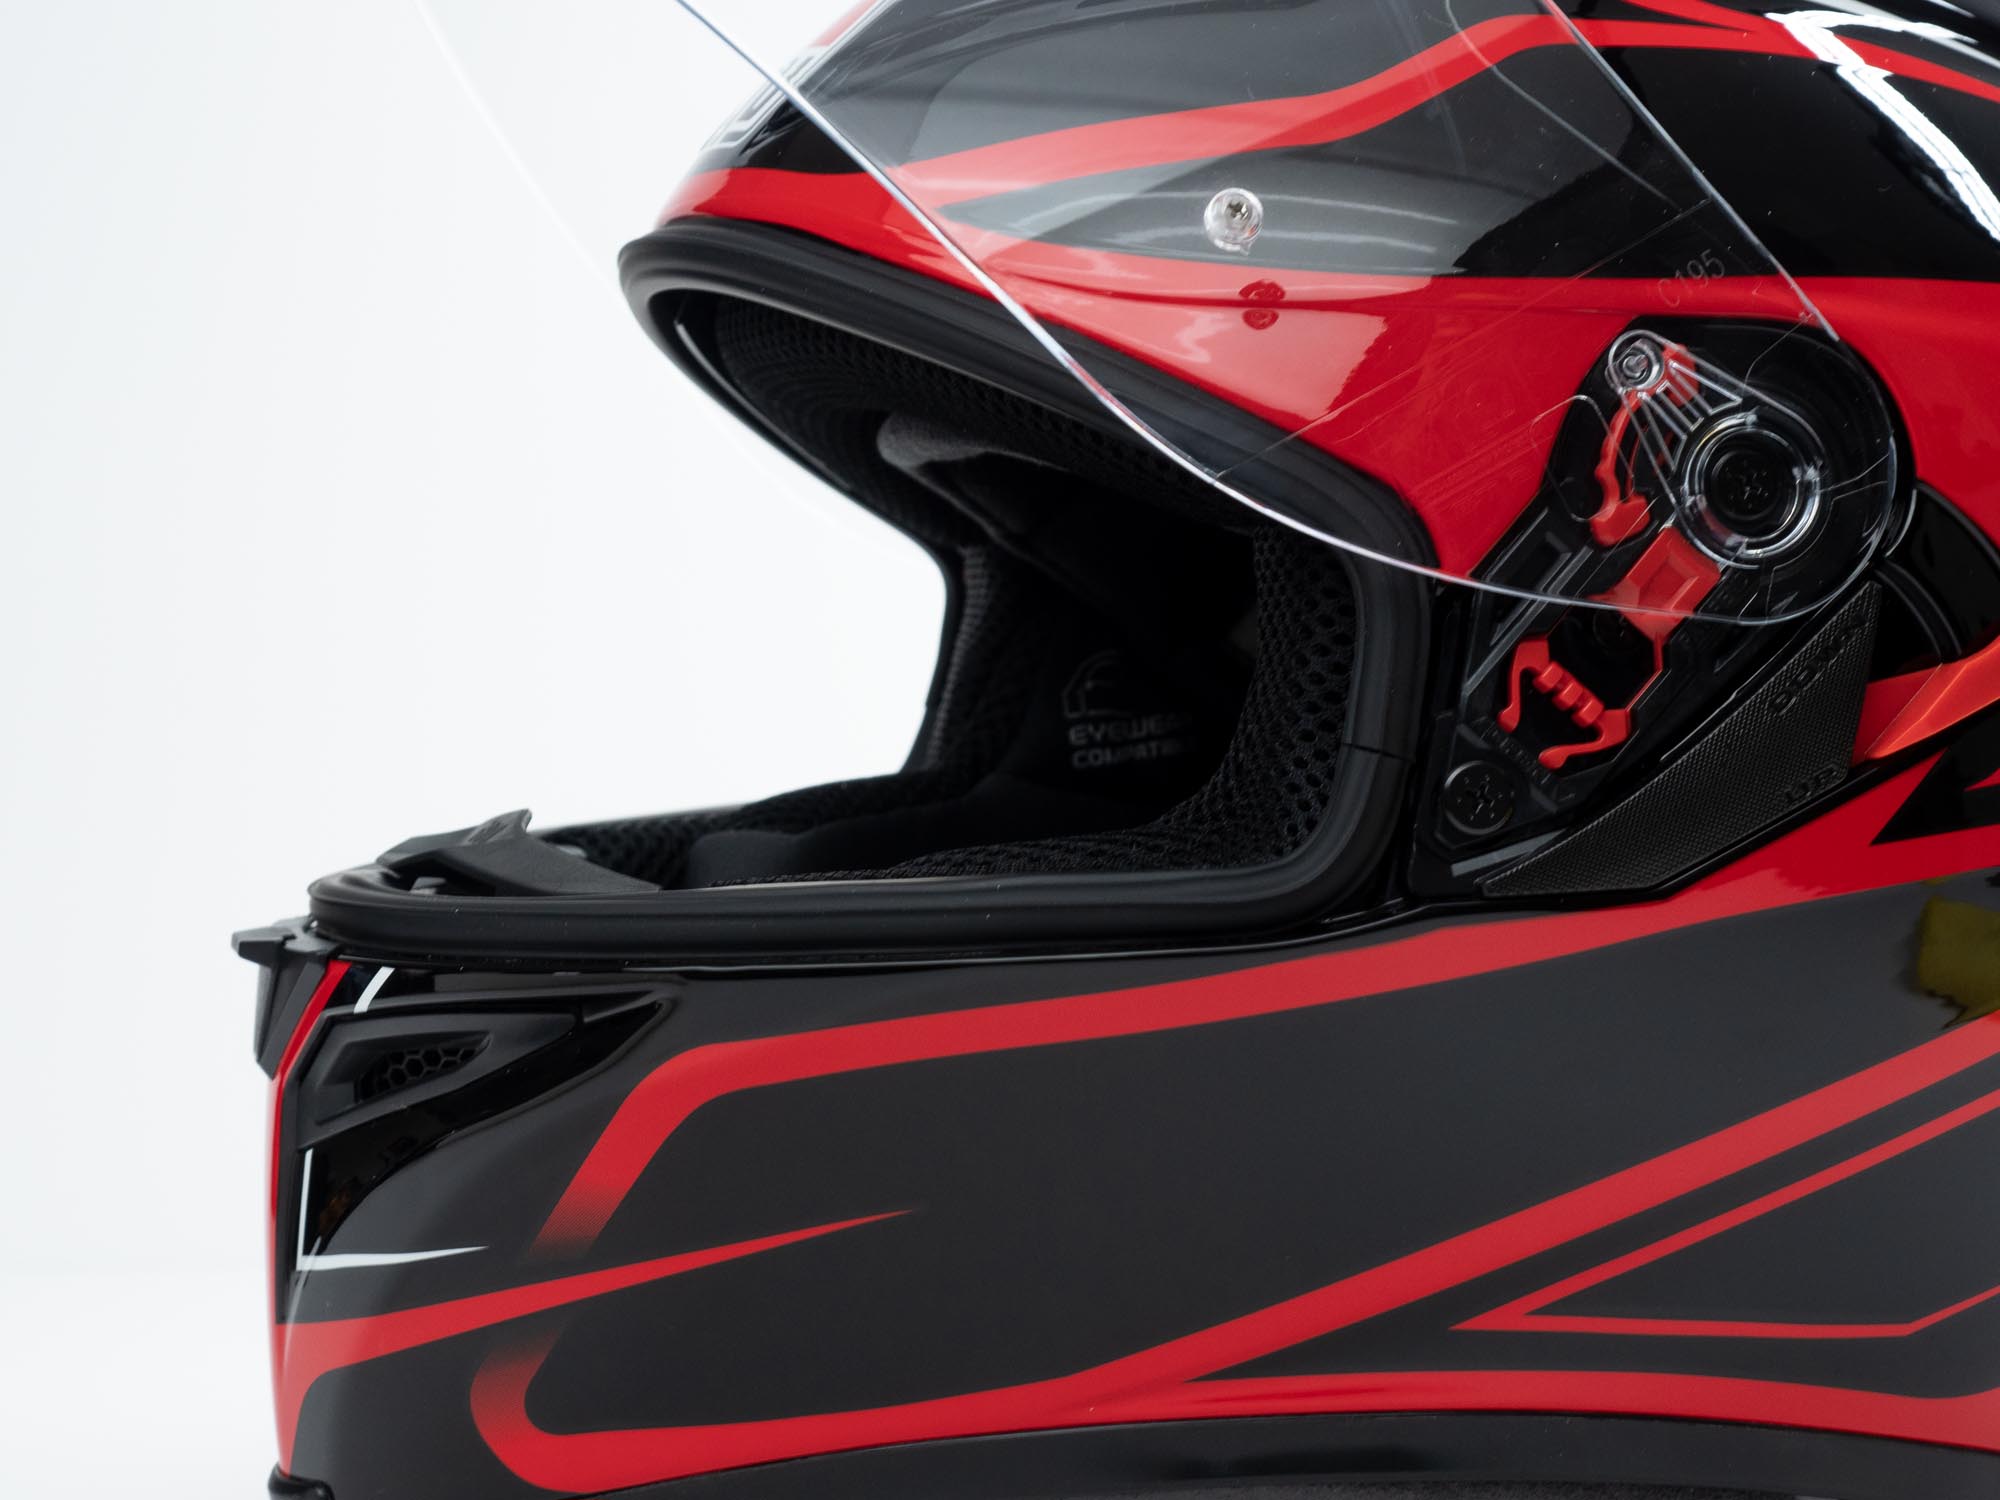
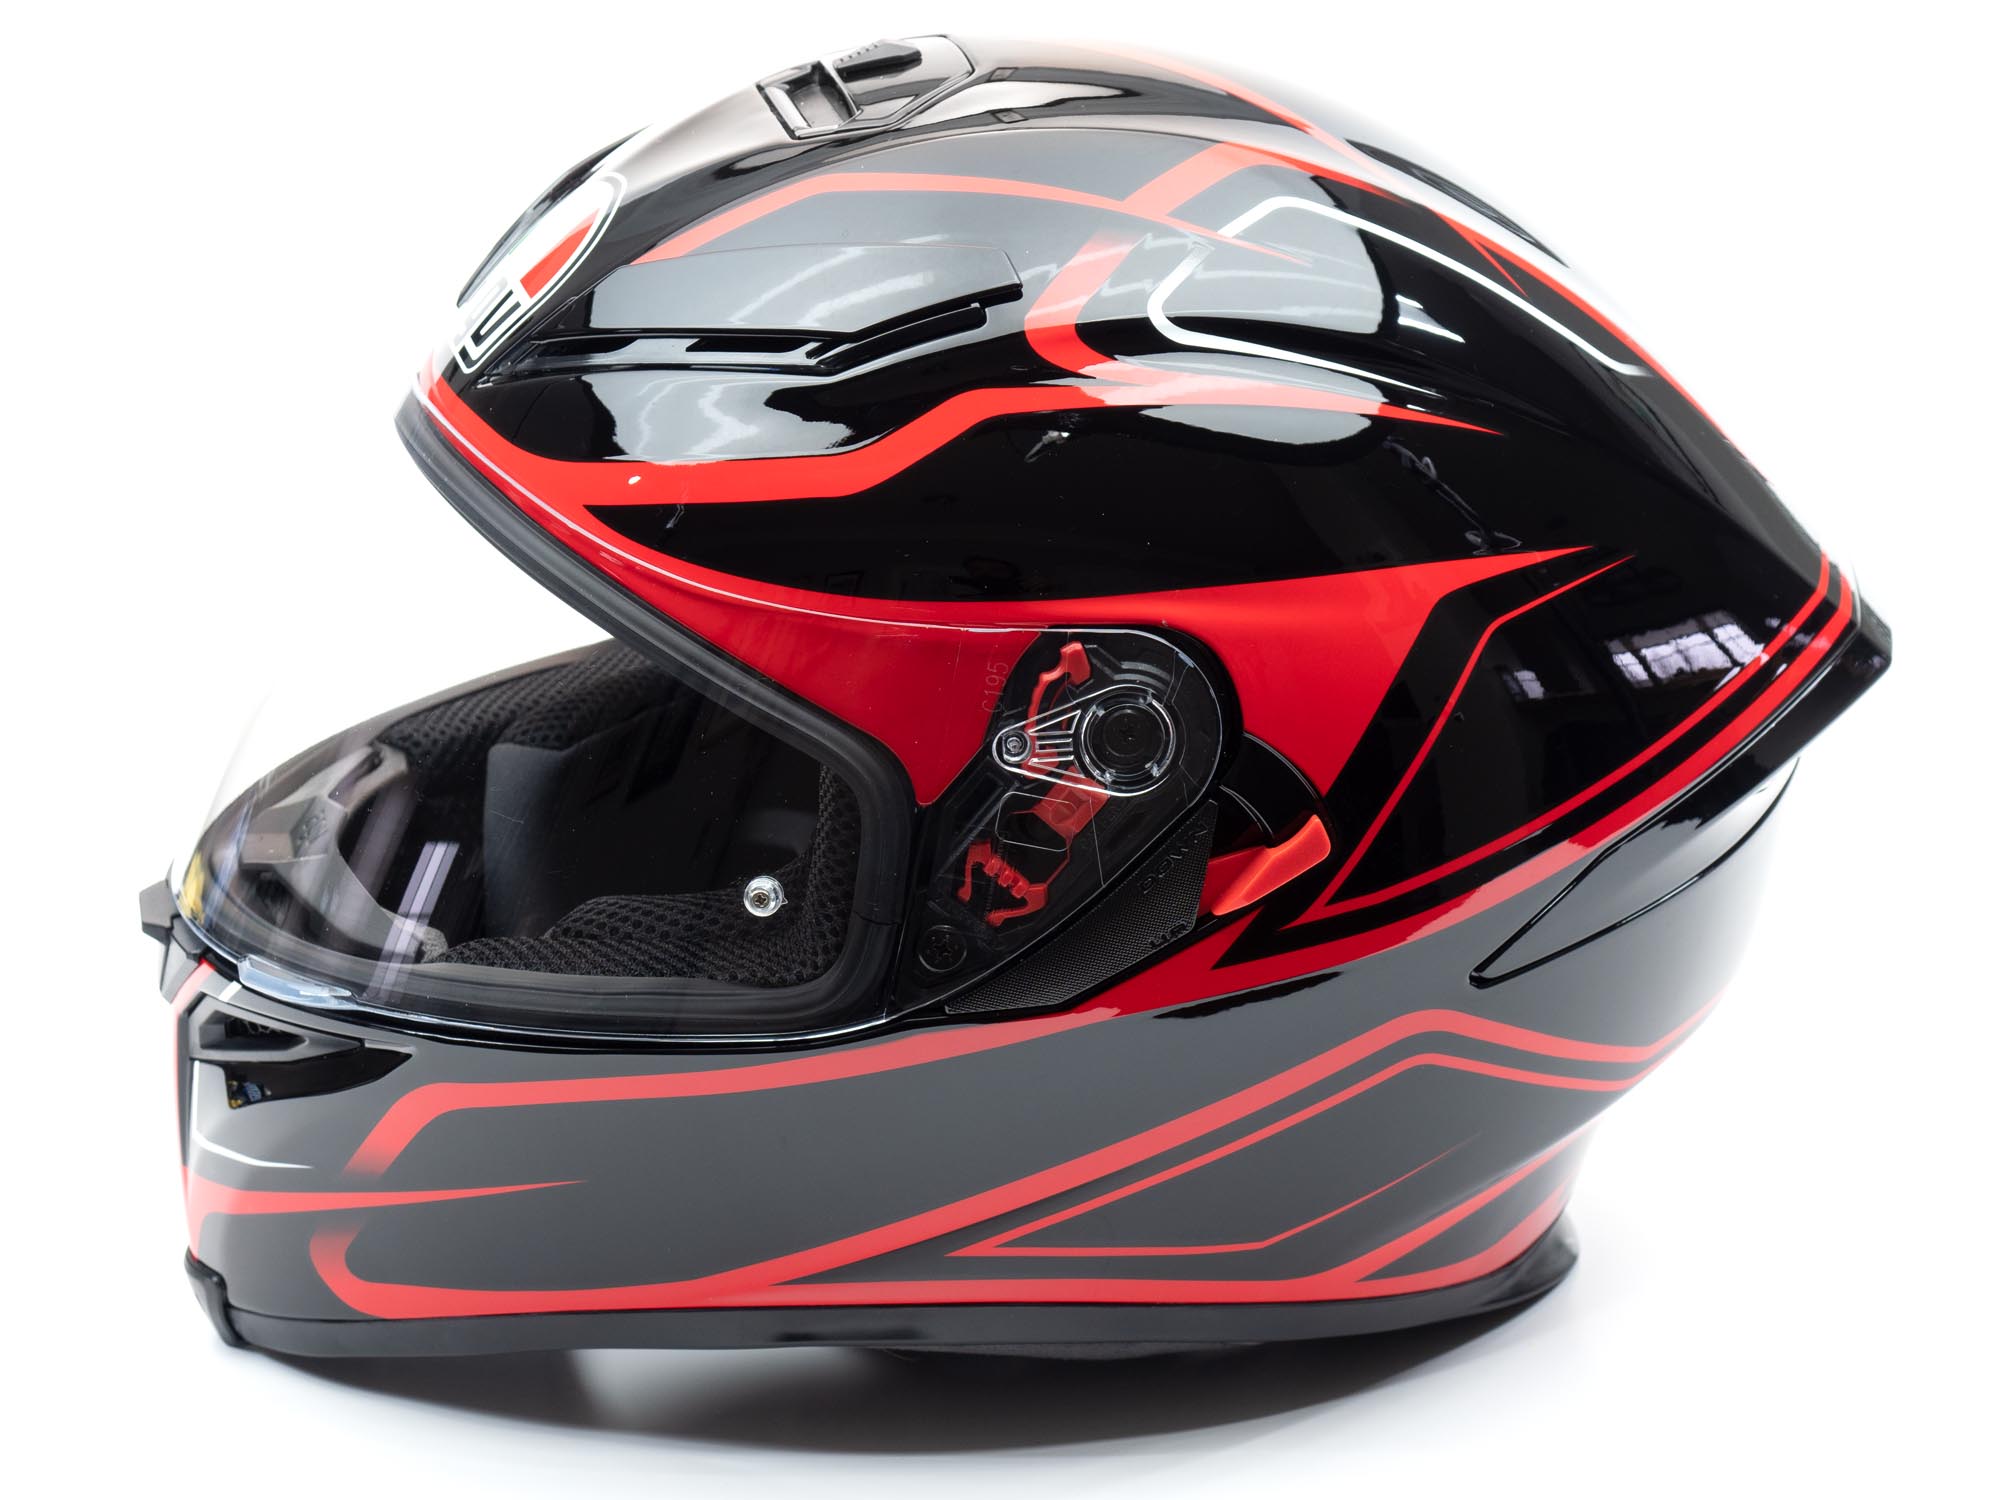
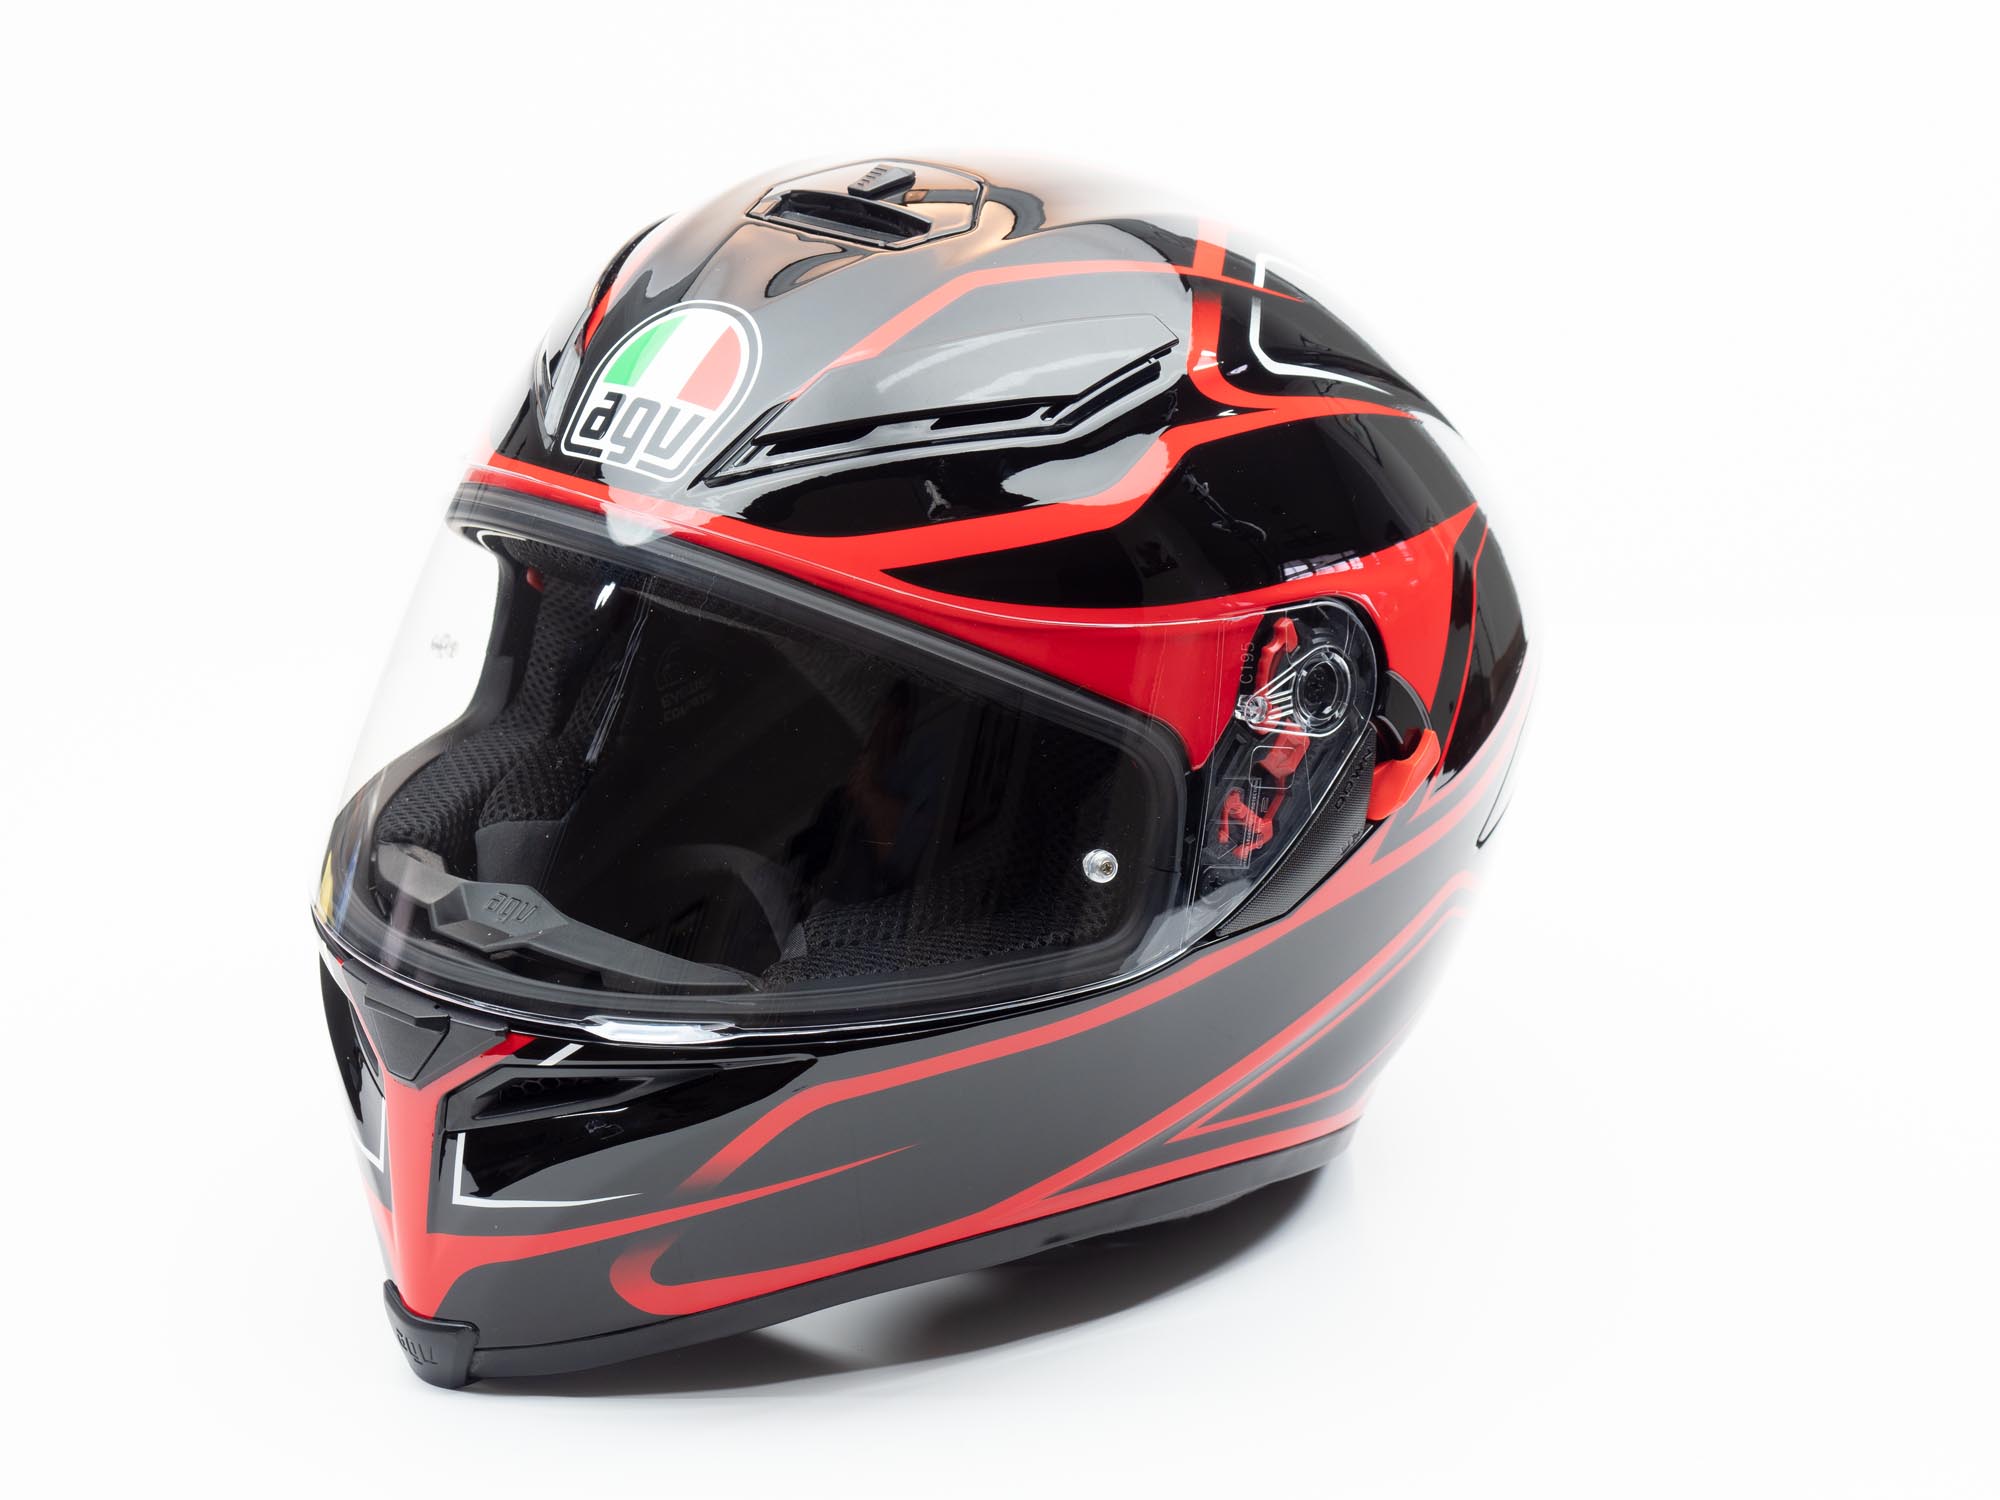
The K5 S represents the top end of AGV’s sport/sport-touring helmets with a moderately aggressive shape. The curves downward providing extra coverage up front. This particular example is mostly black with slim, angular graphics that make up the “Magnitude” colorway.

Being designed for sport touring, the K5 S has an internal drop down sun visor and the main visor is “pinned” for pinlock inserts. A clear Pinlock 70 insert is included so one can jump right into the fog-free goodness right out of the box.

AGV K5s Helmet pinlock

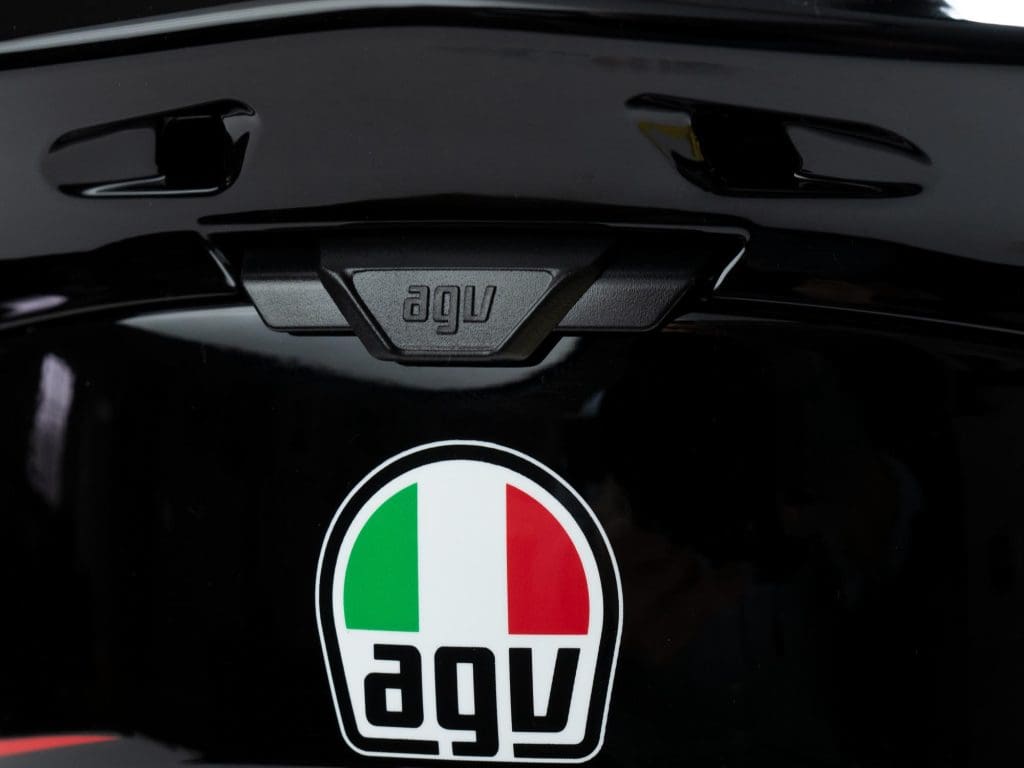
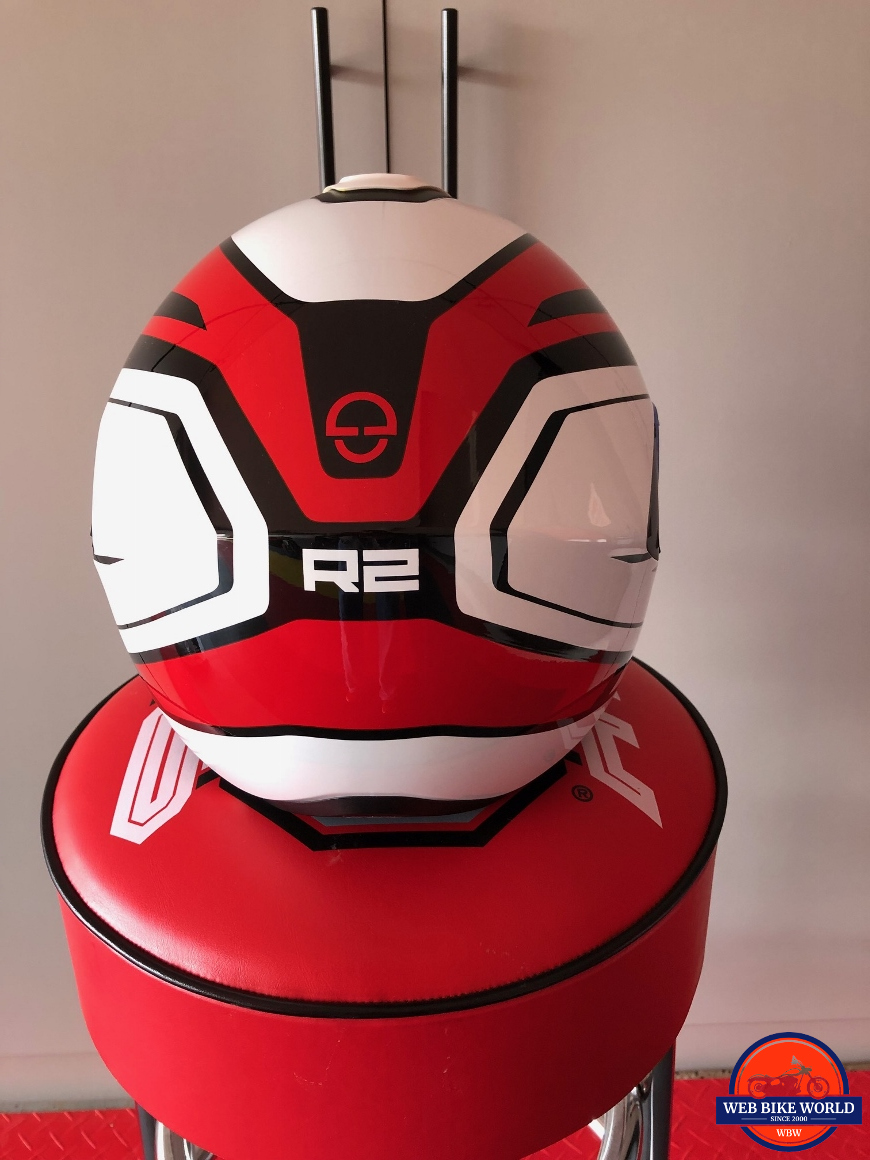
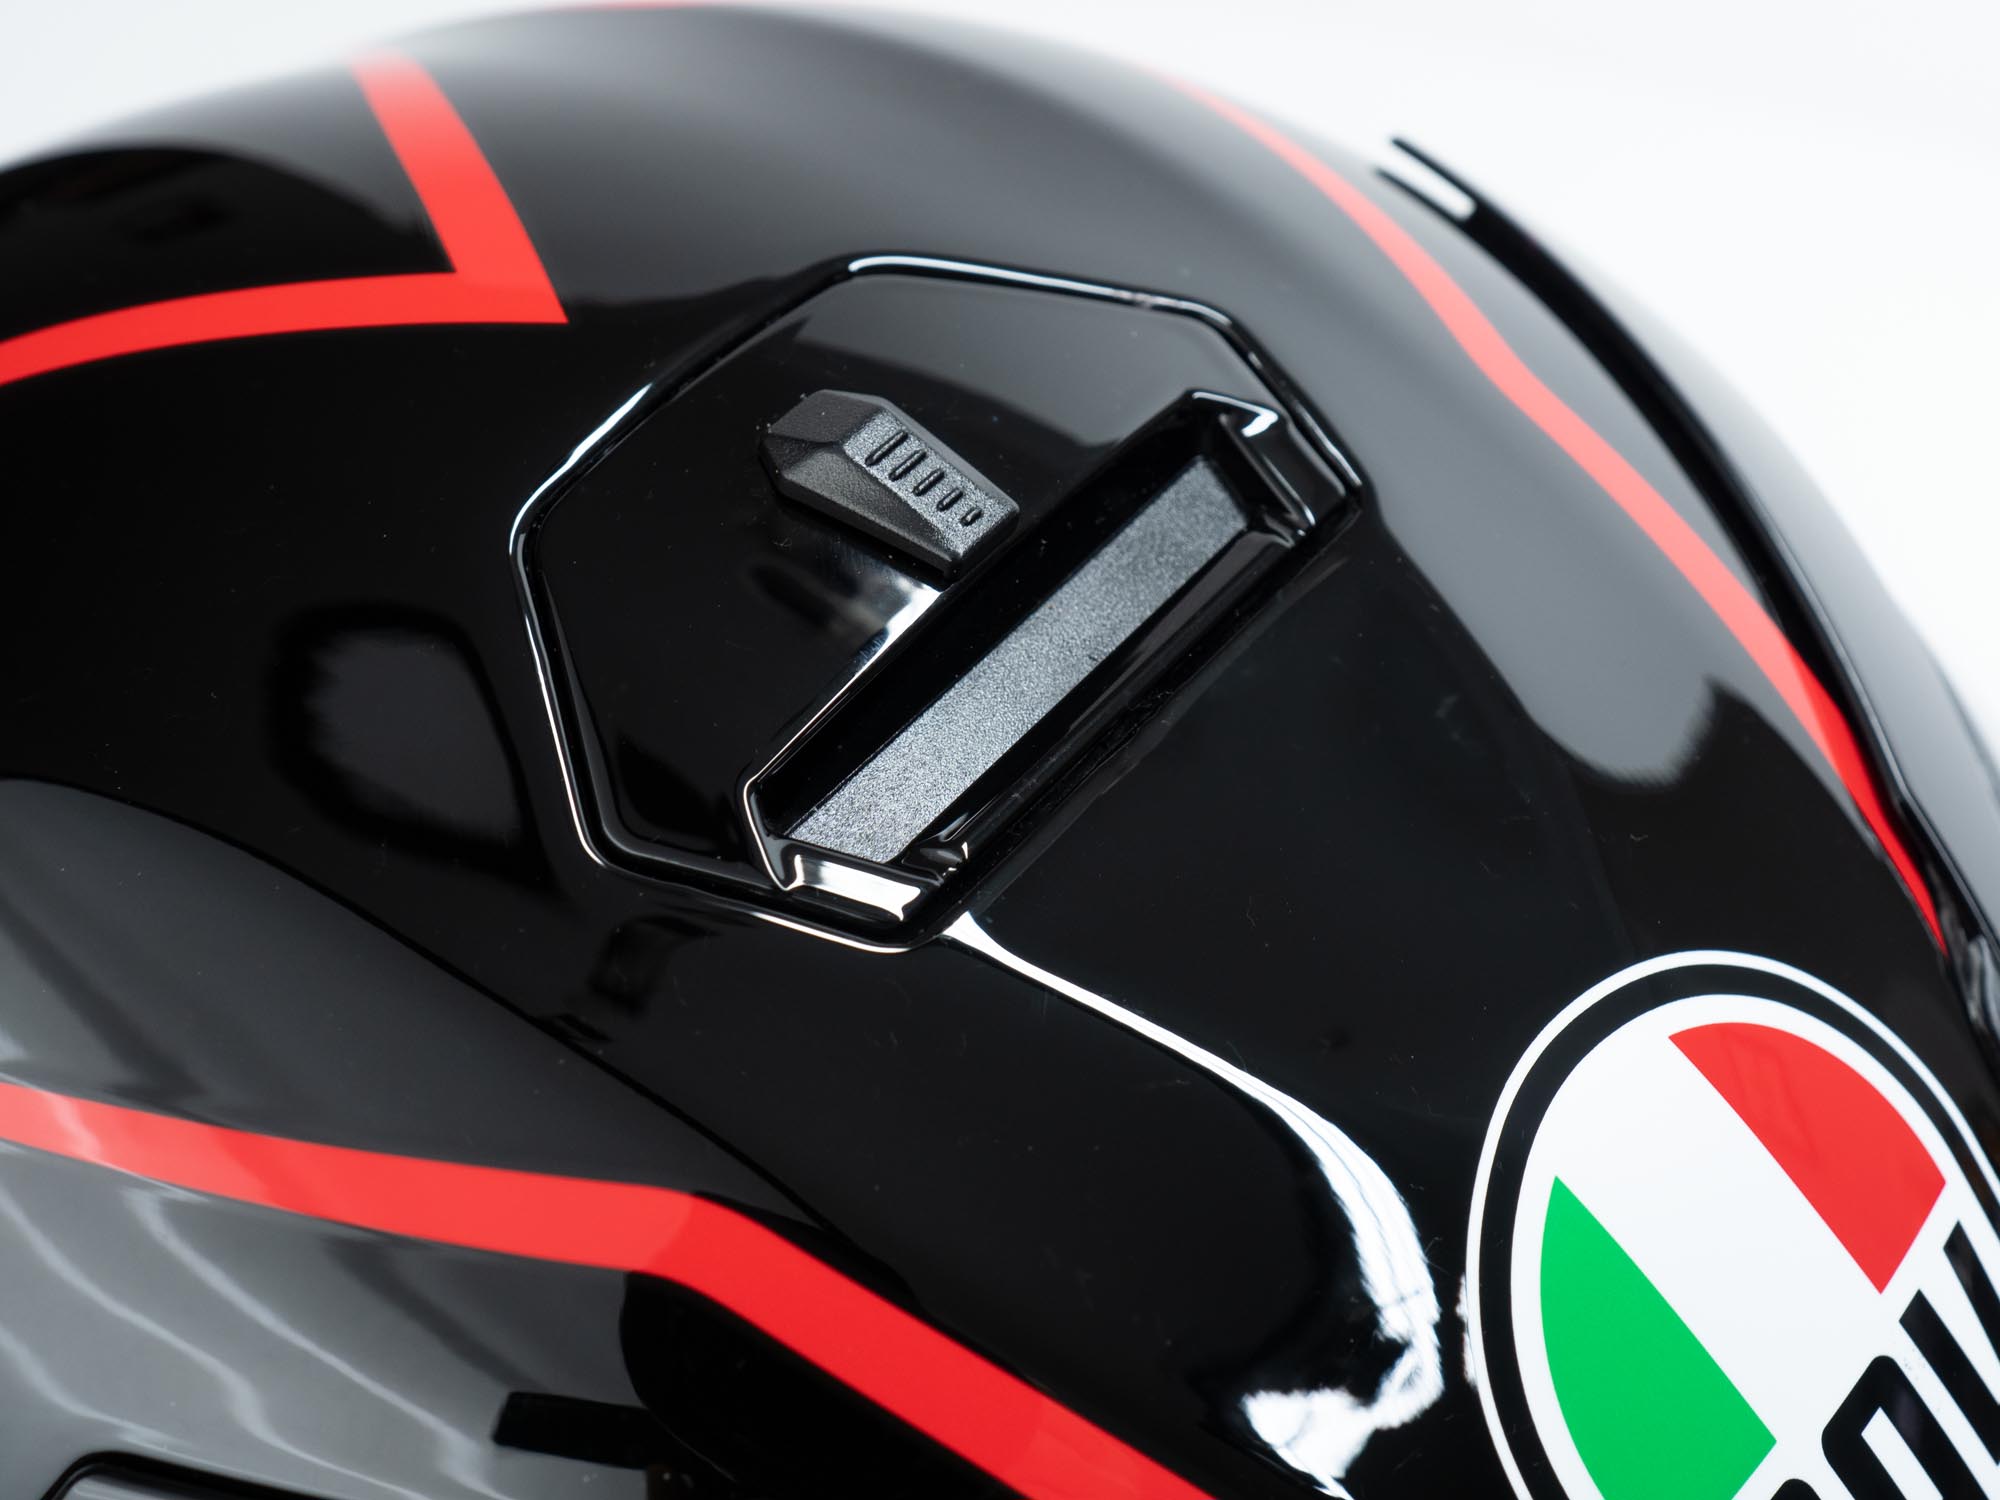
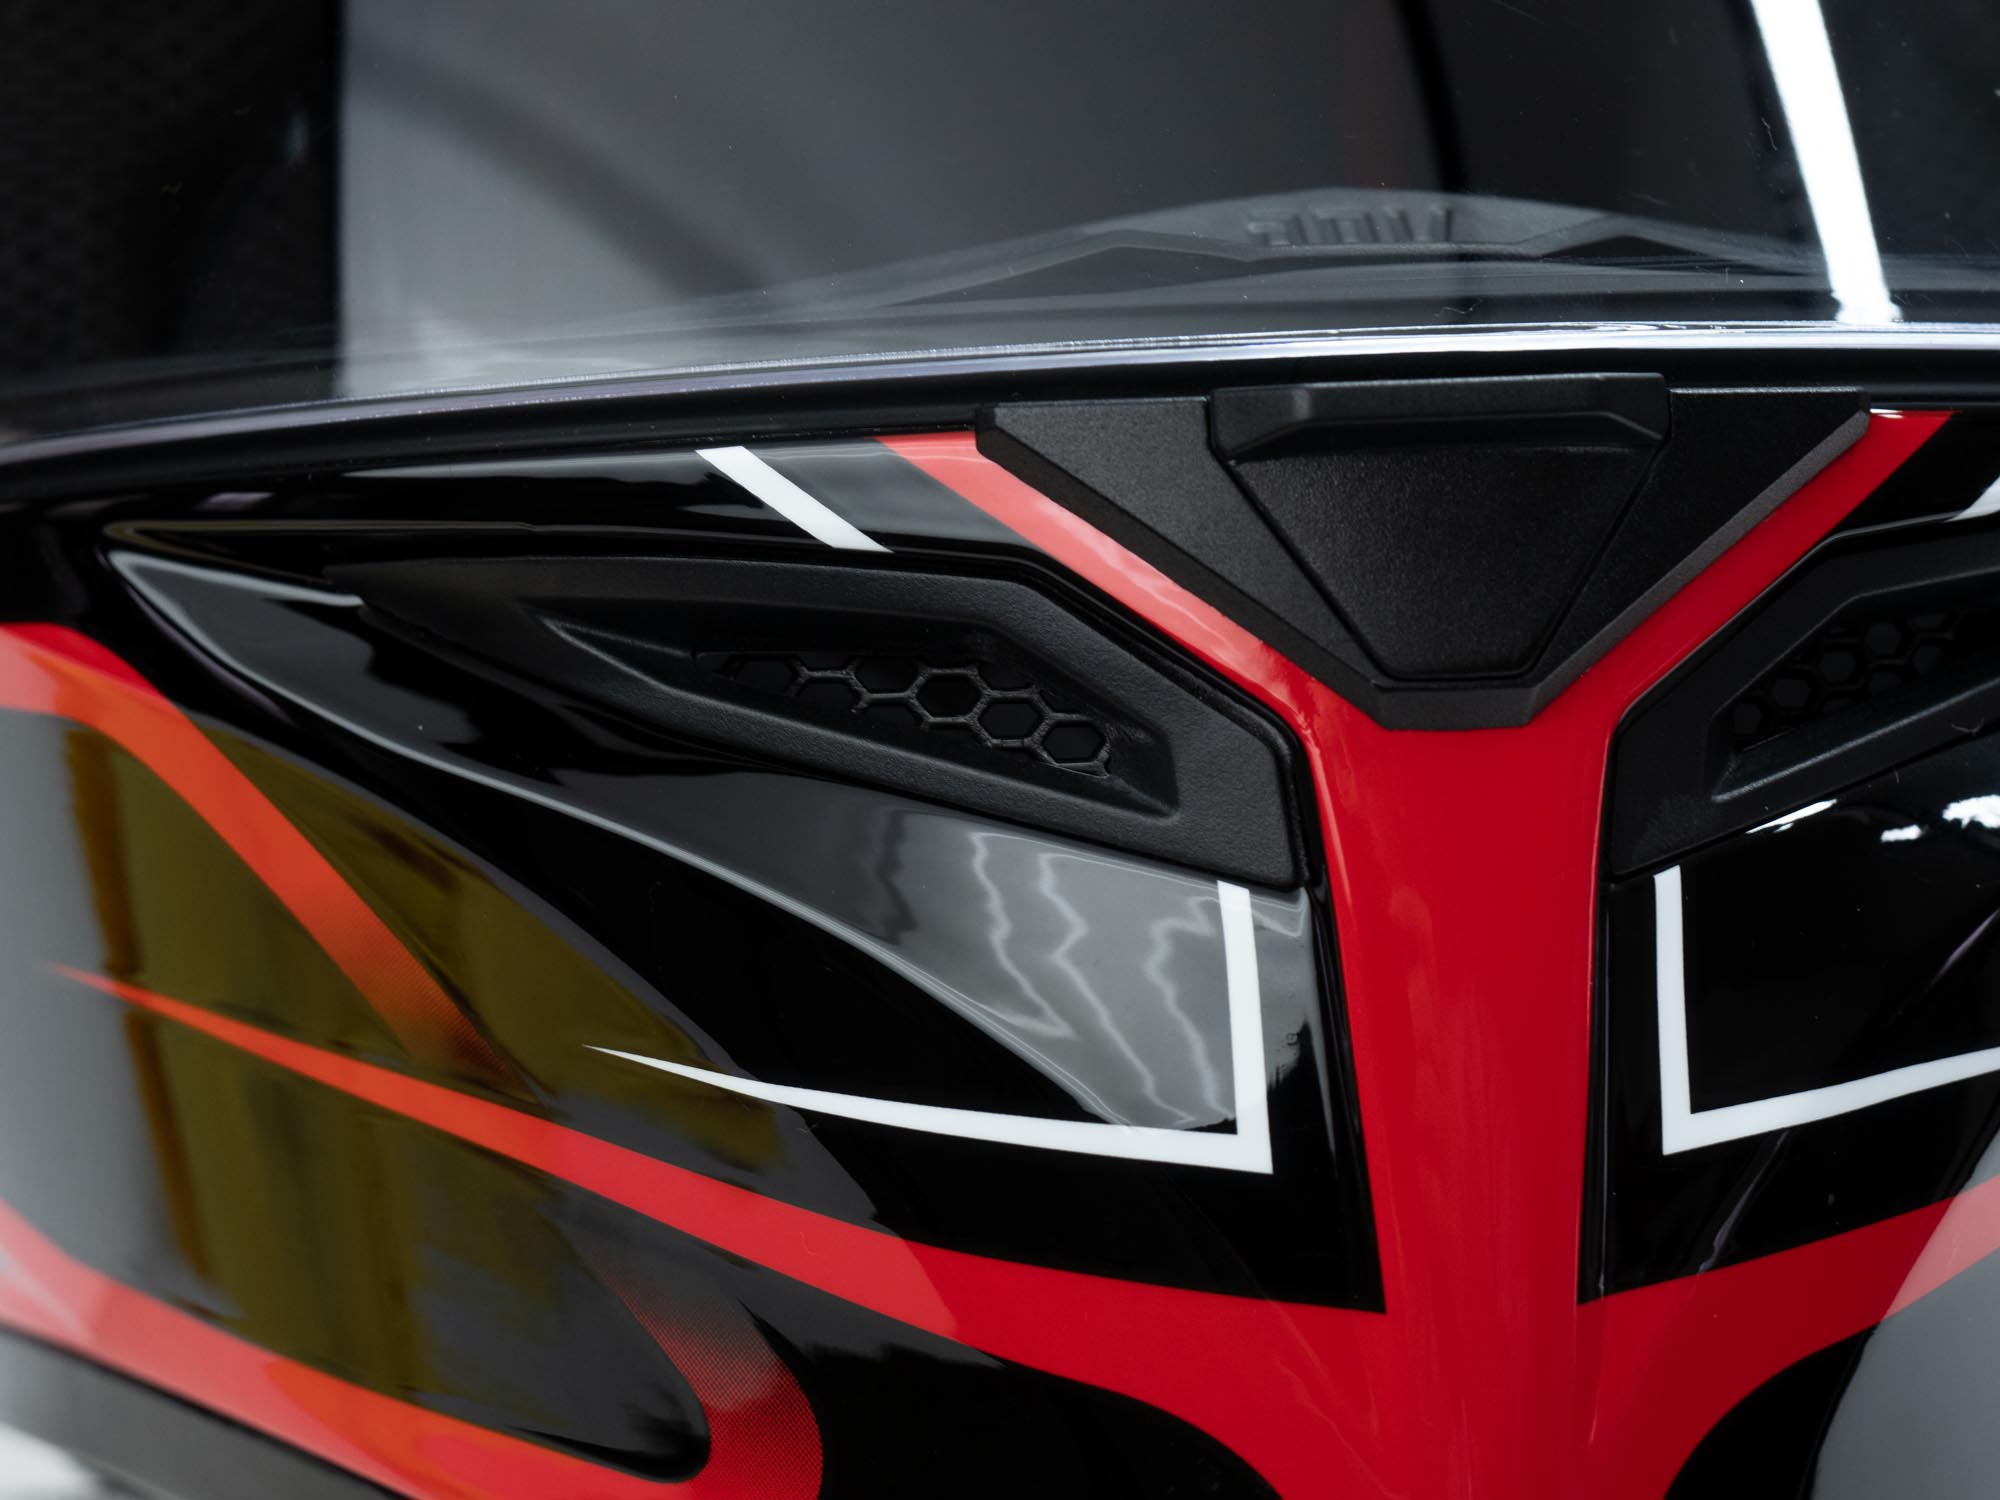
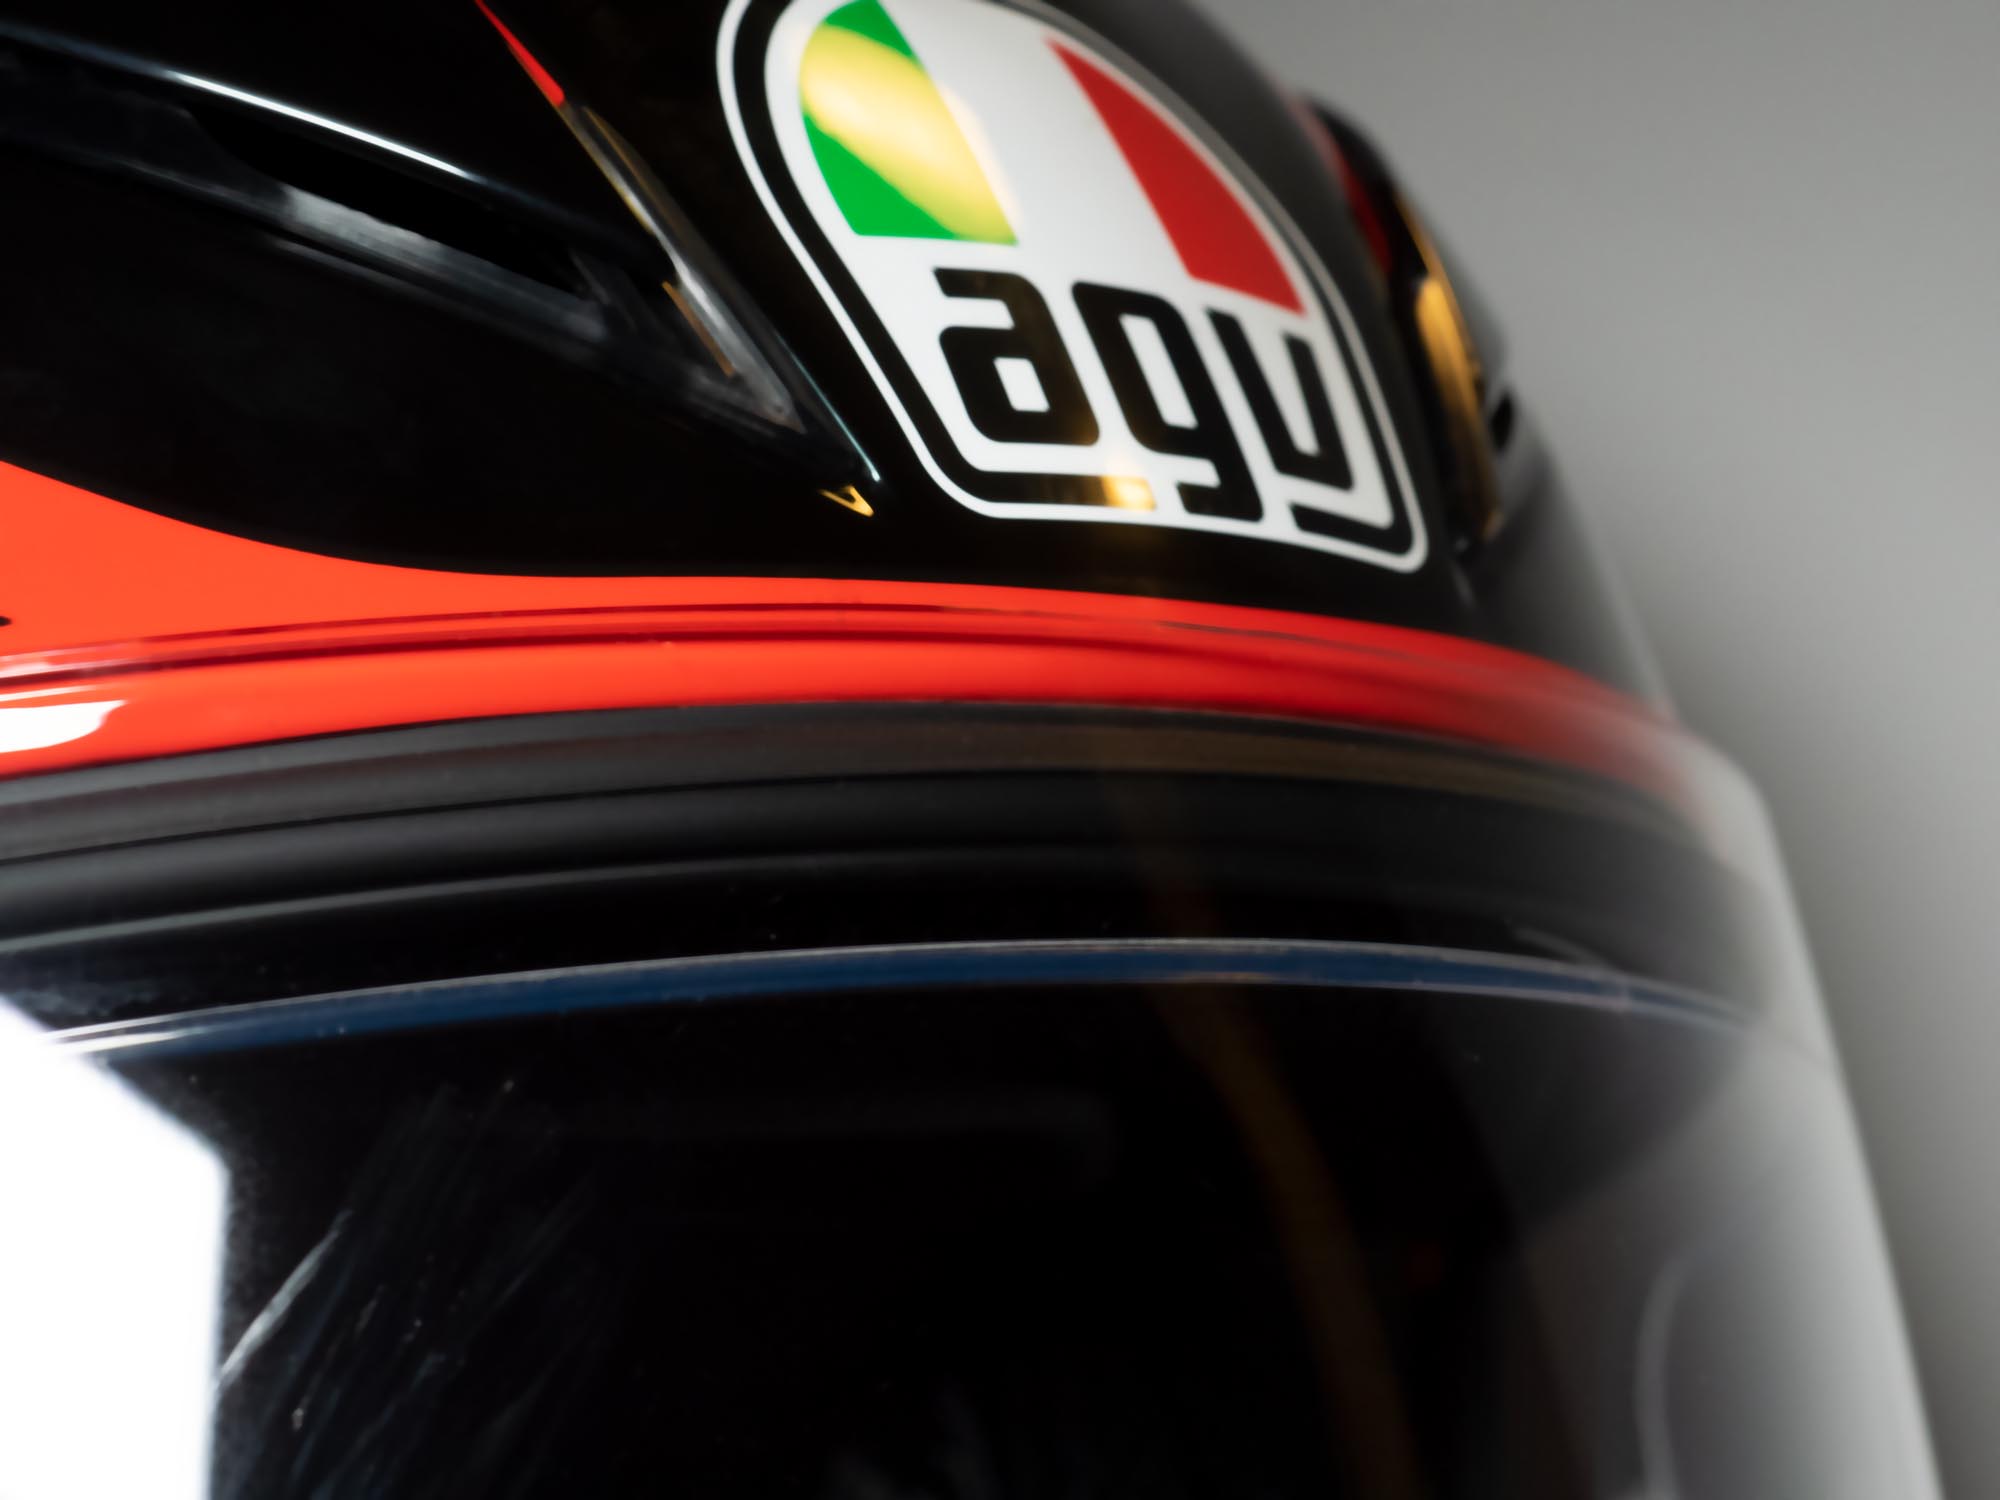
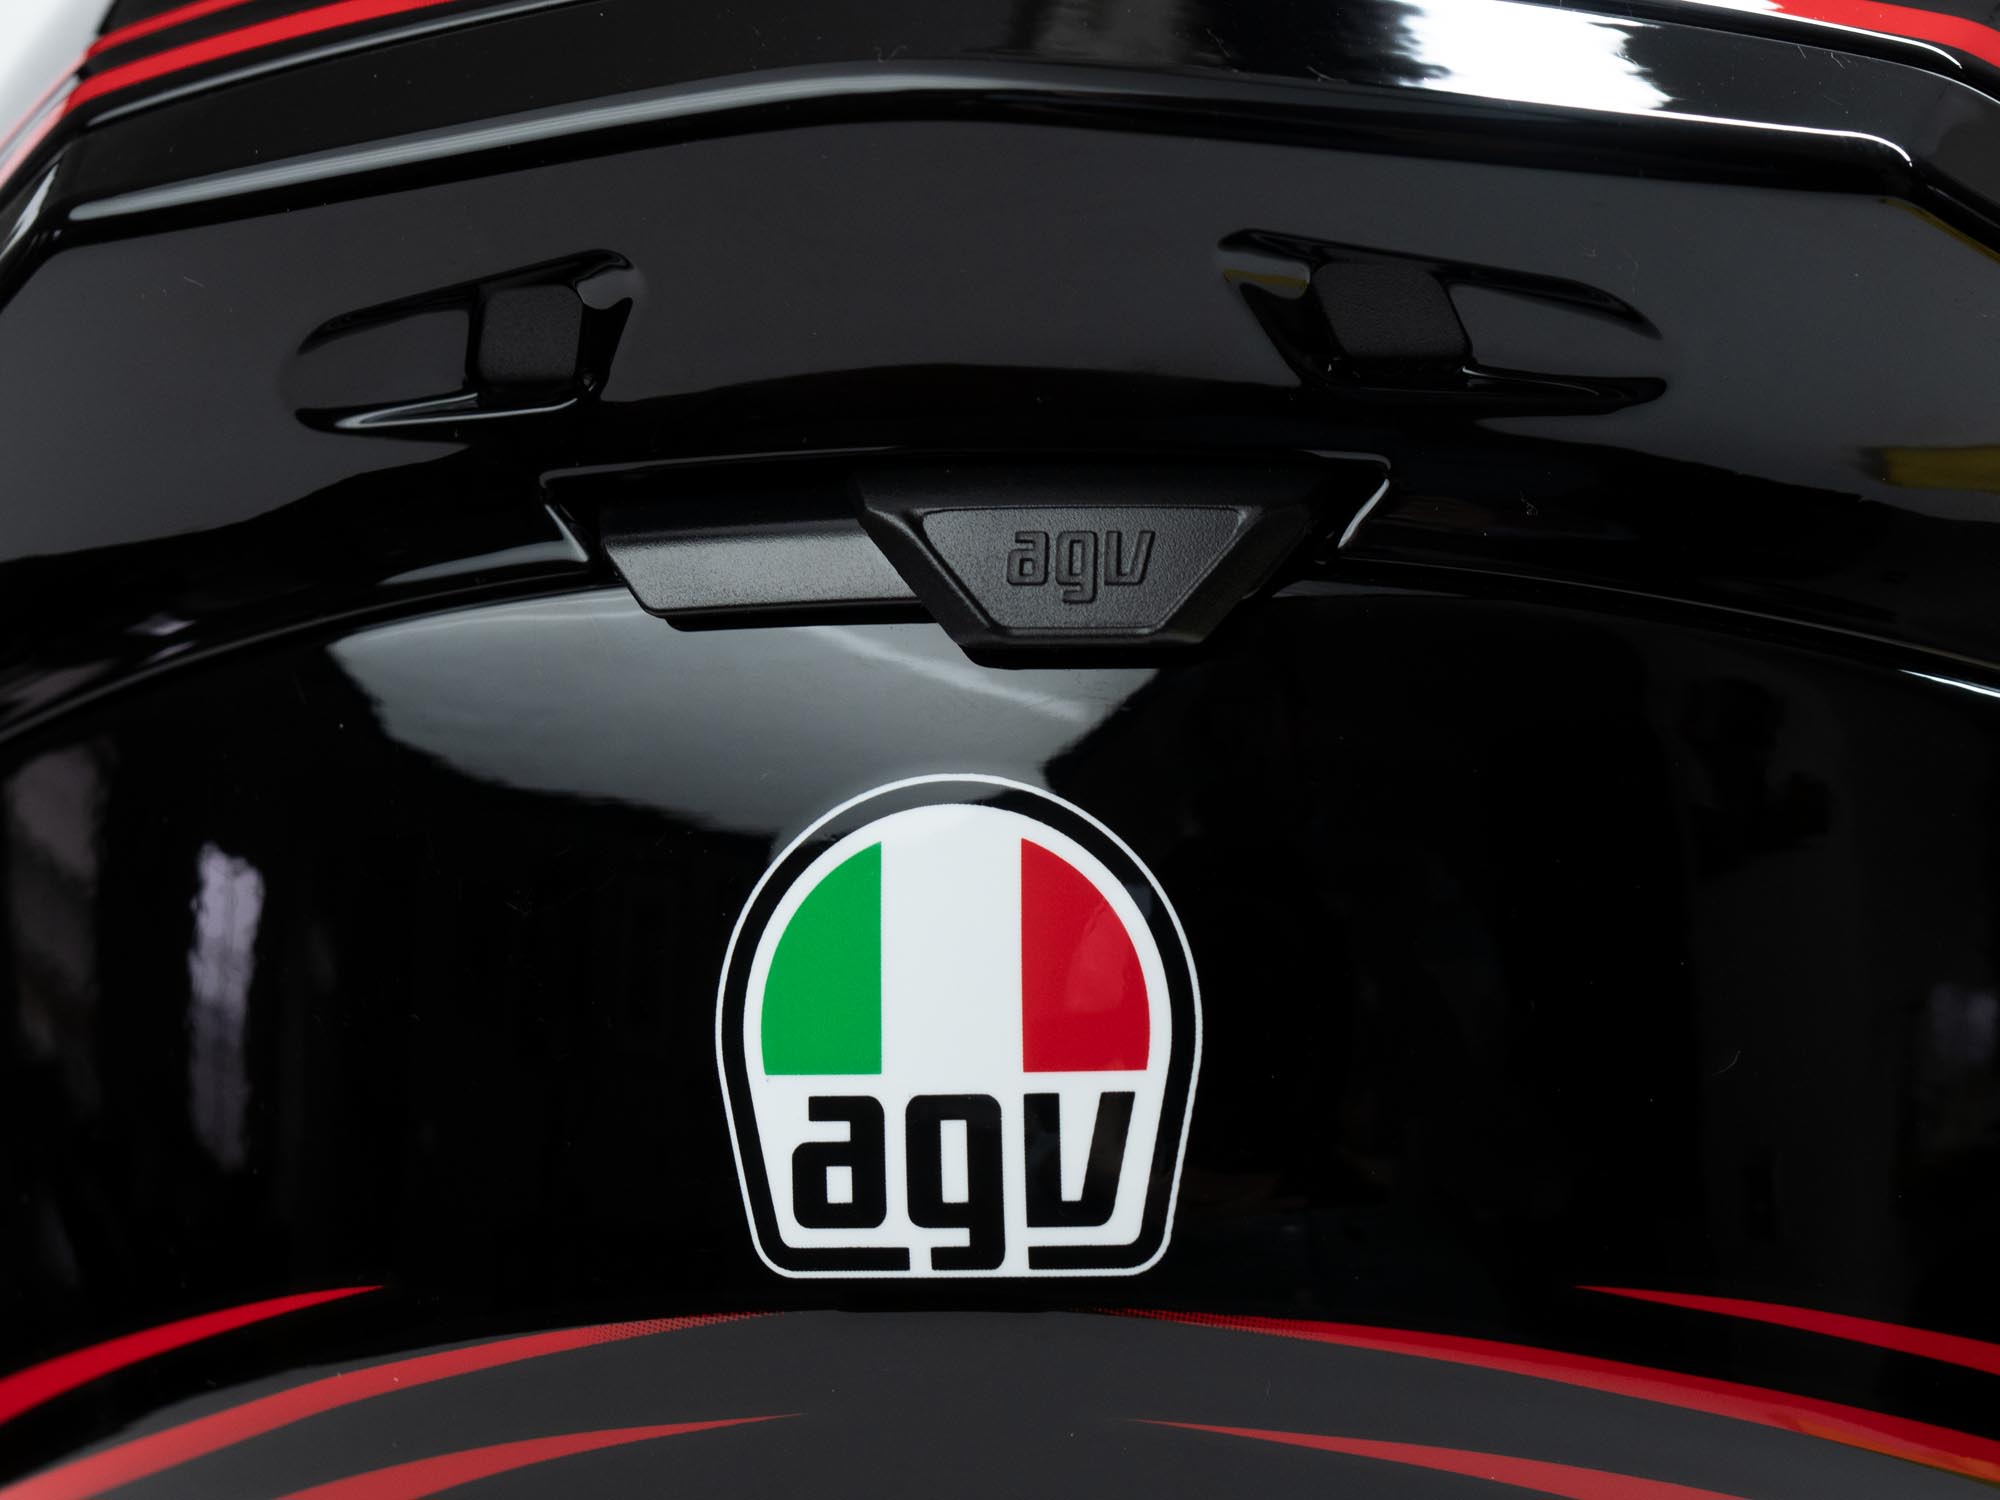
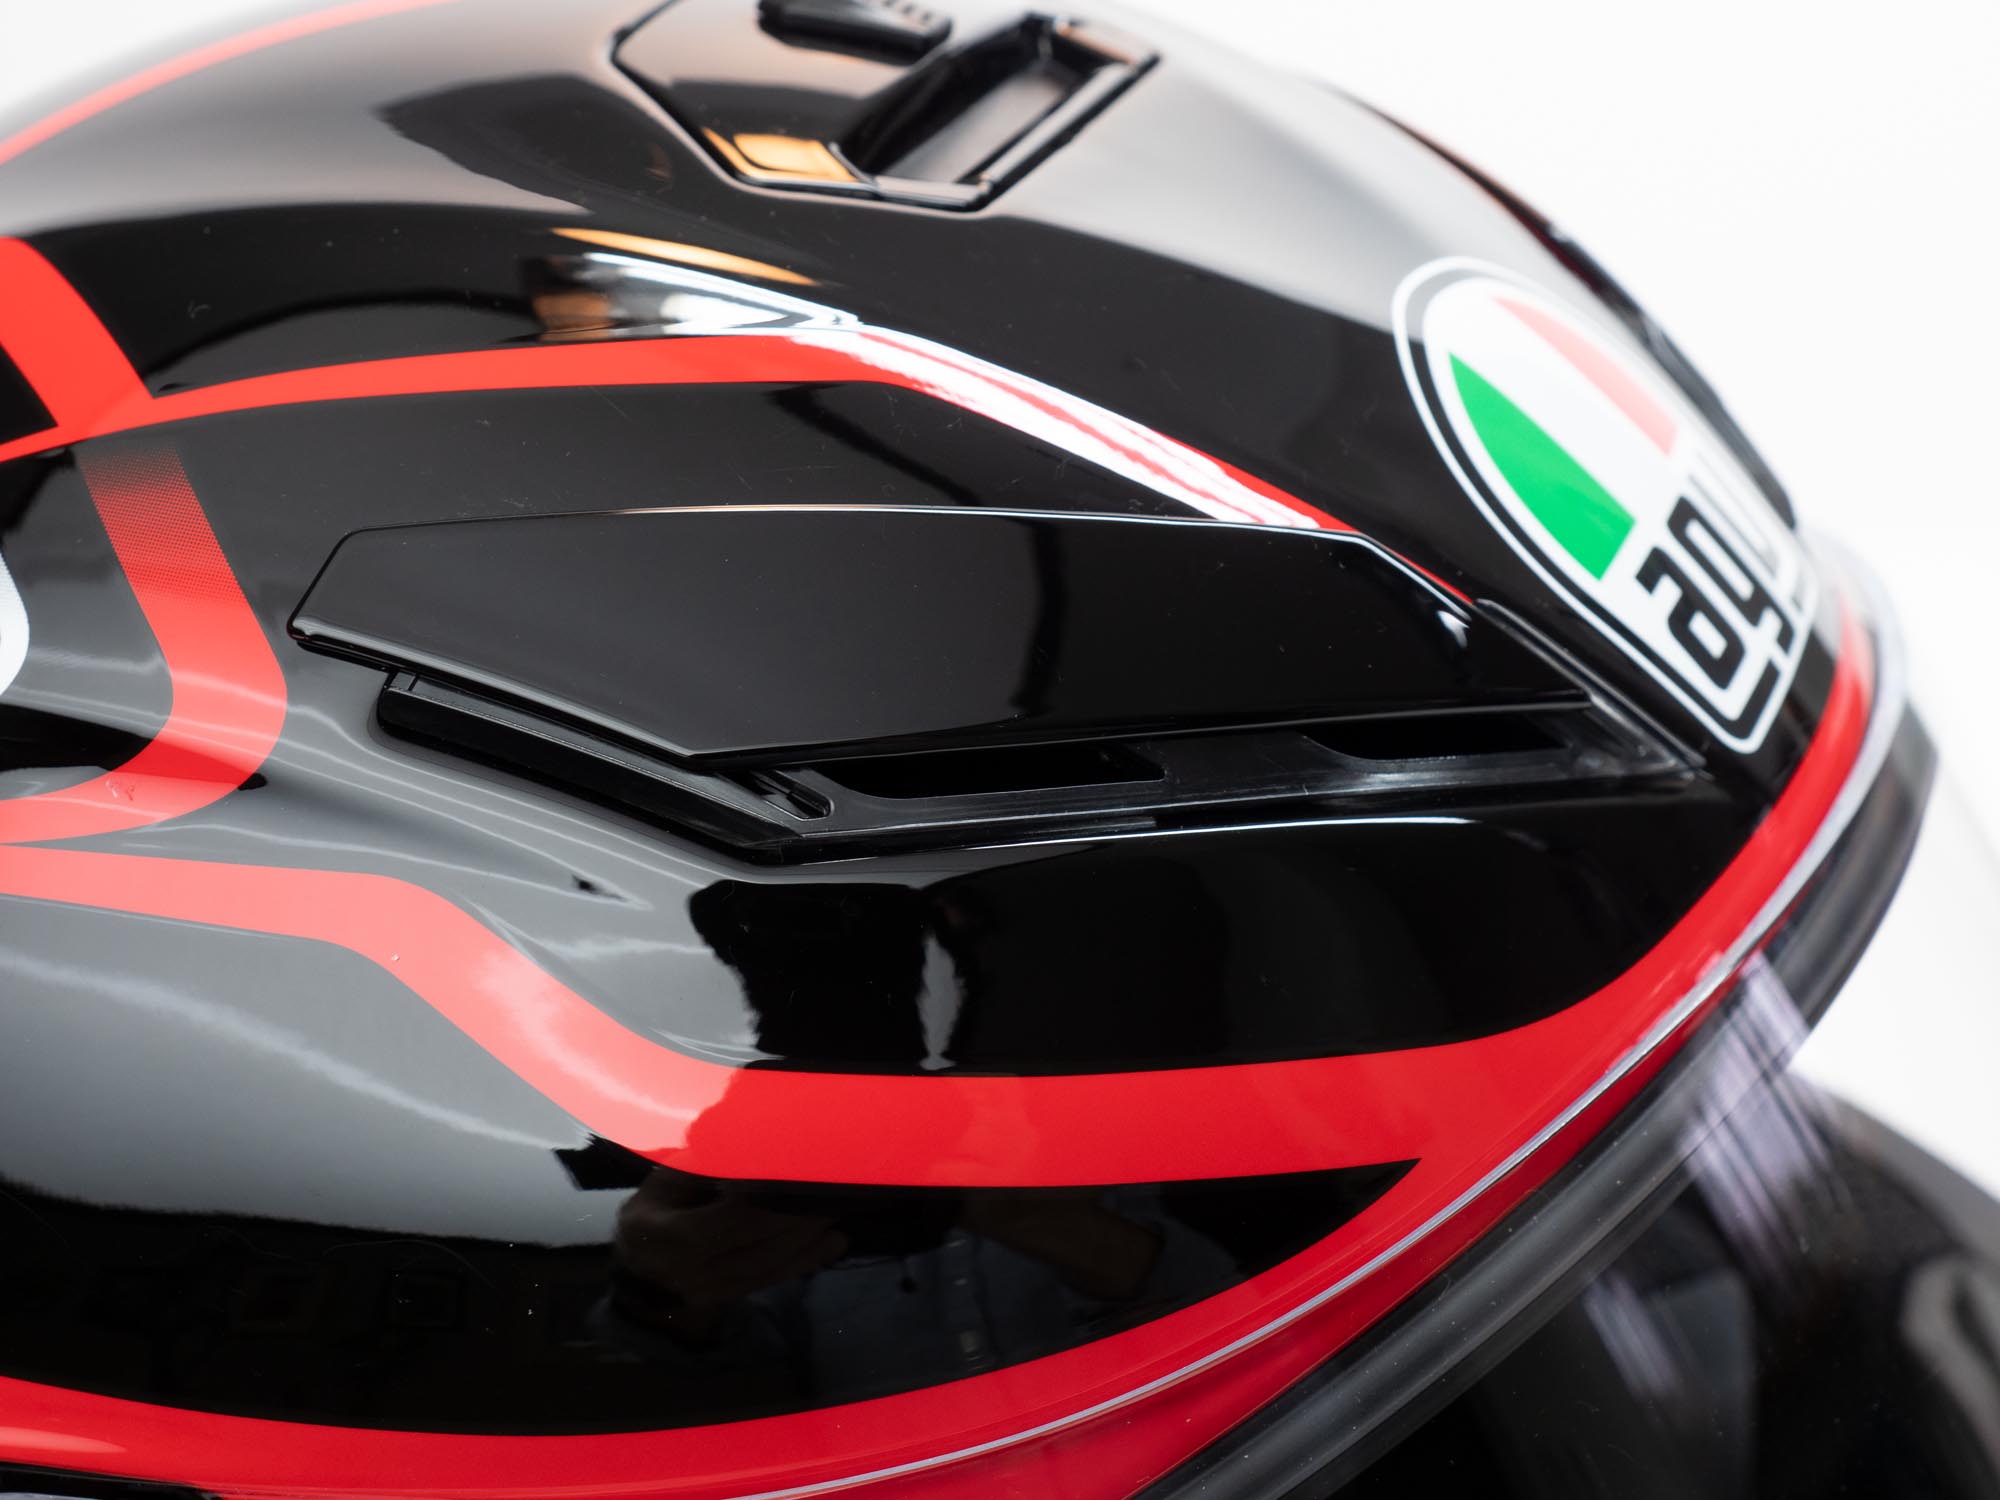
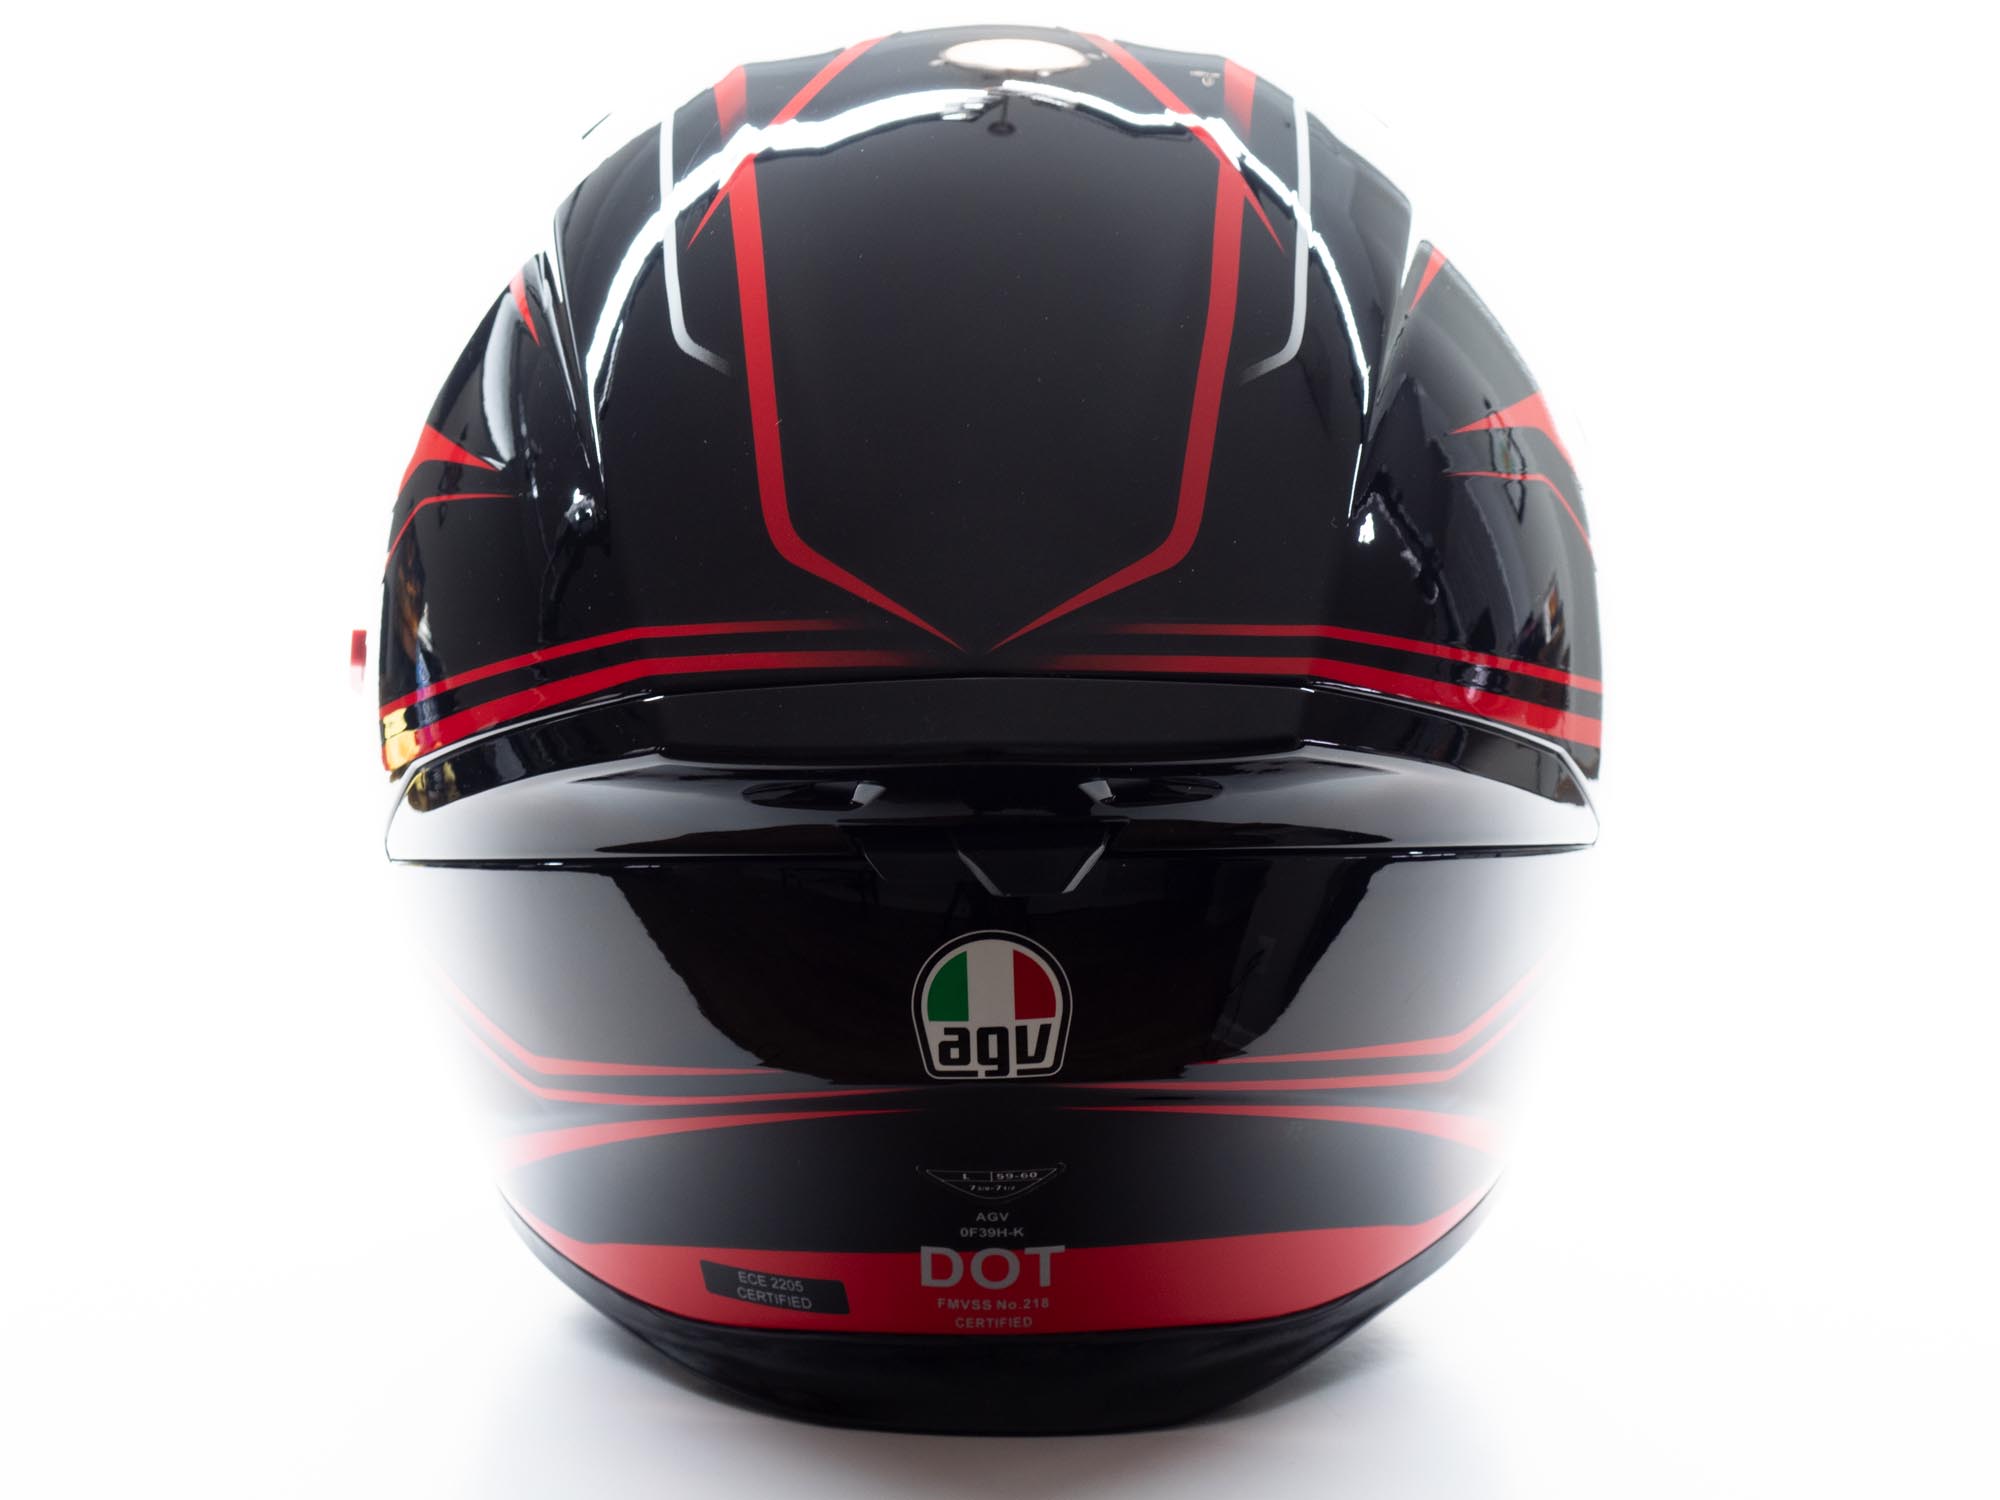
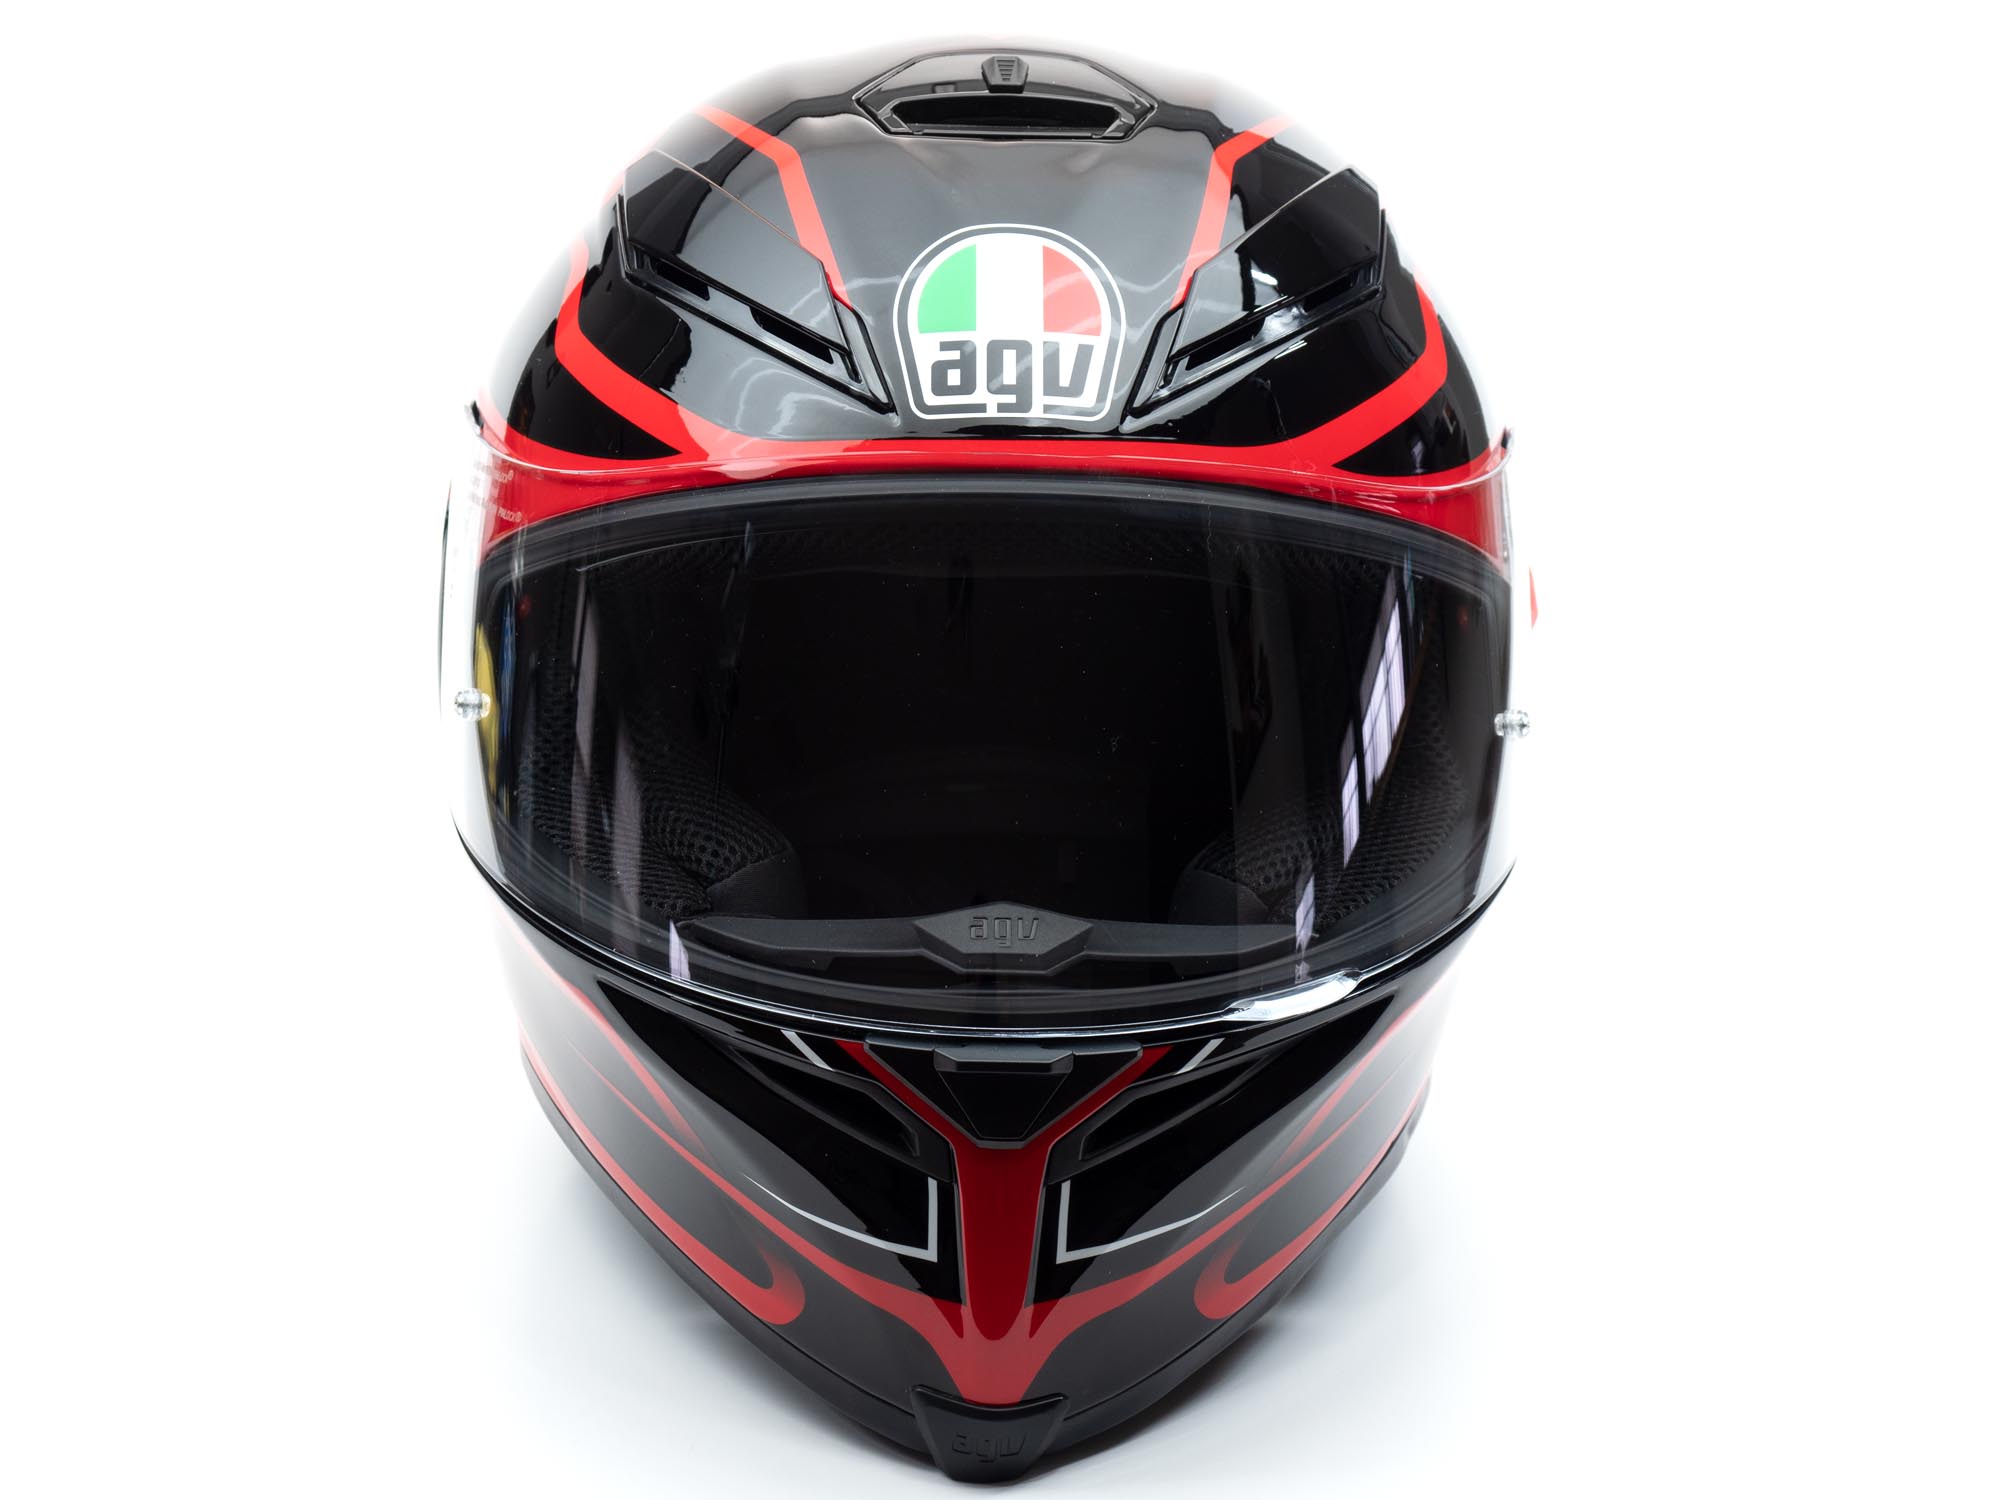
Over the visor, in the center of the forehead space, is the green, white, and red AGV logo/graphic and a smaller version of it appears on the rear under the spoiler. A pair of closable exhaust vents are there under that spoiler and join the chin, forehead, and top vents providing a lot of options for ventilation.

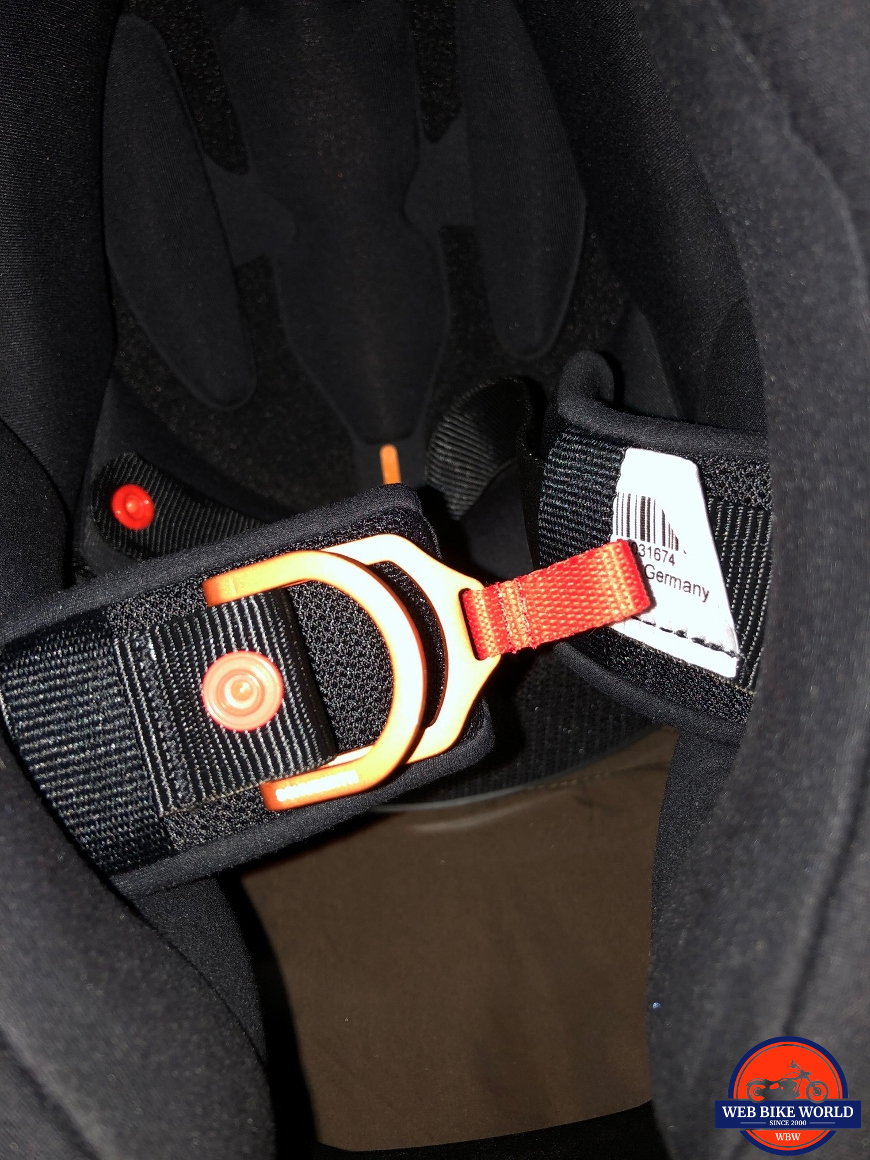
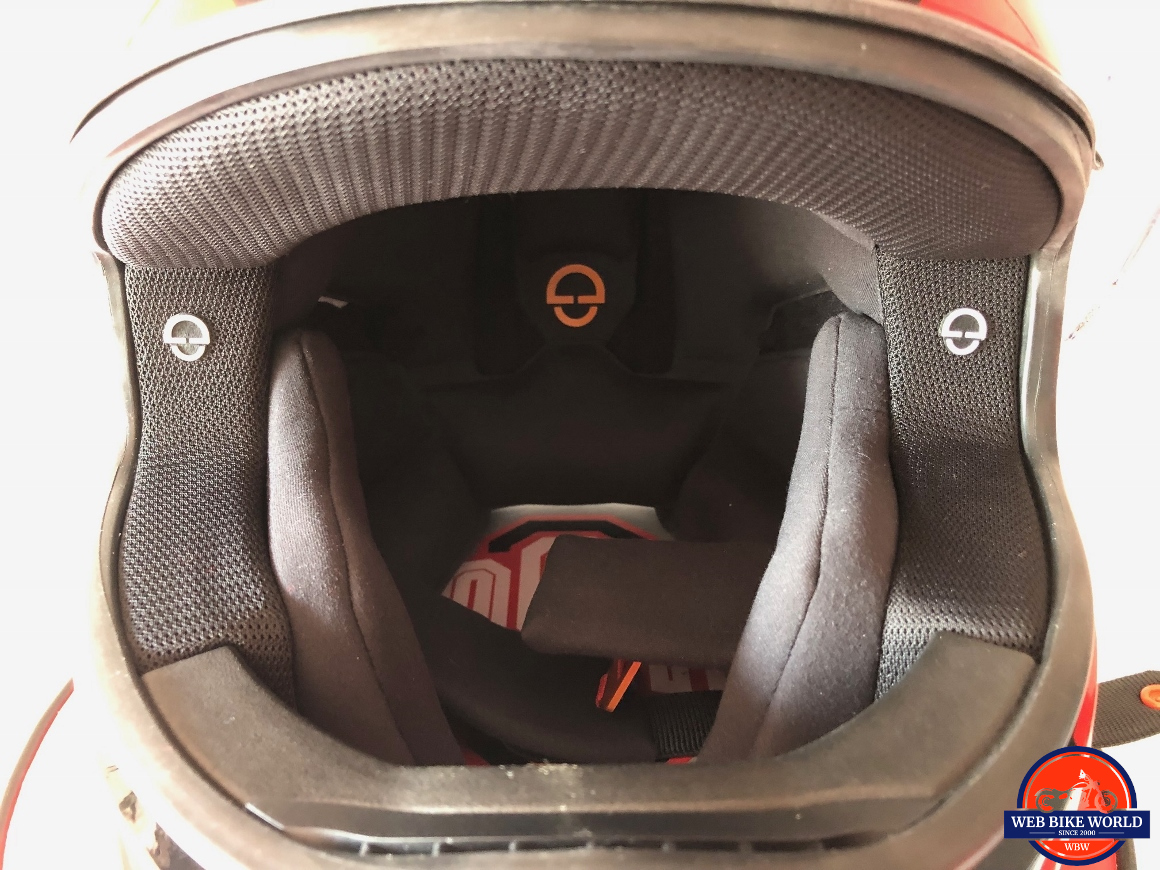
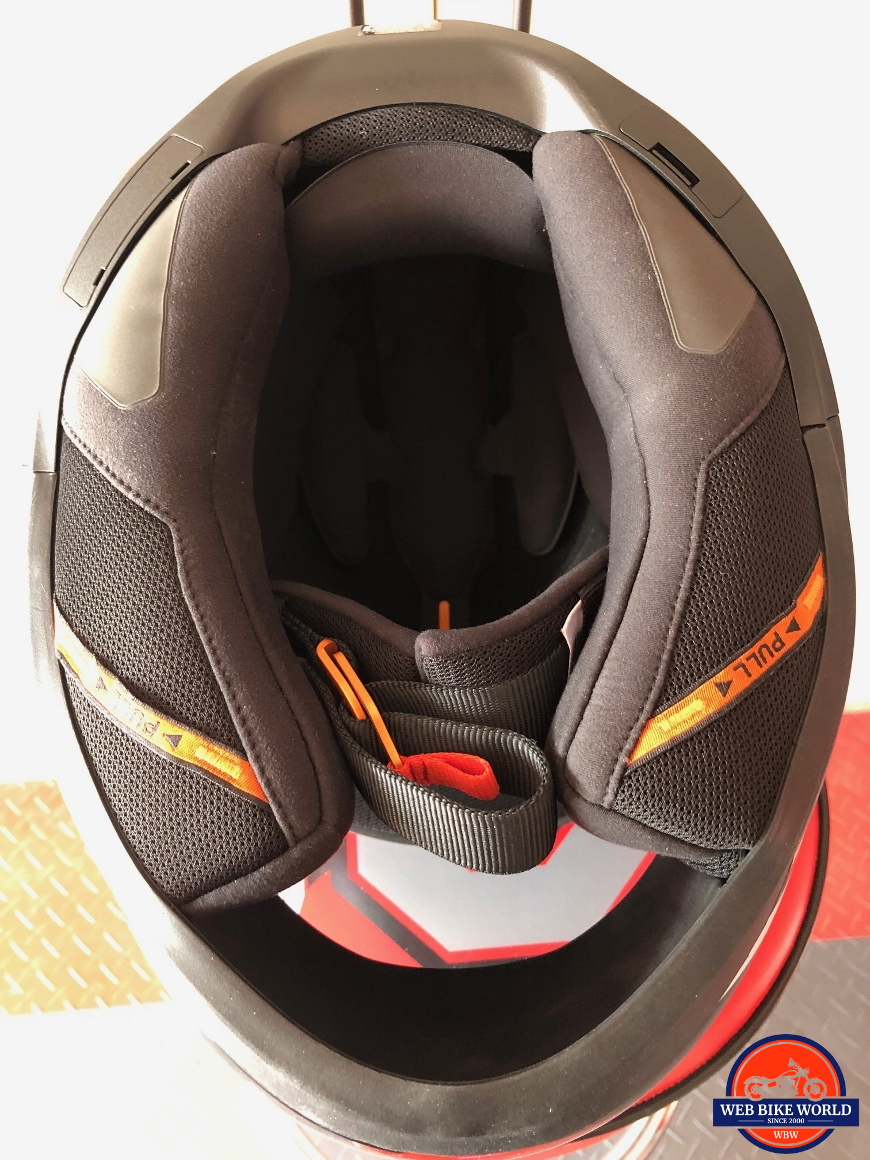
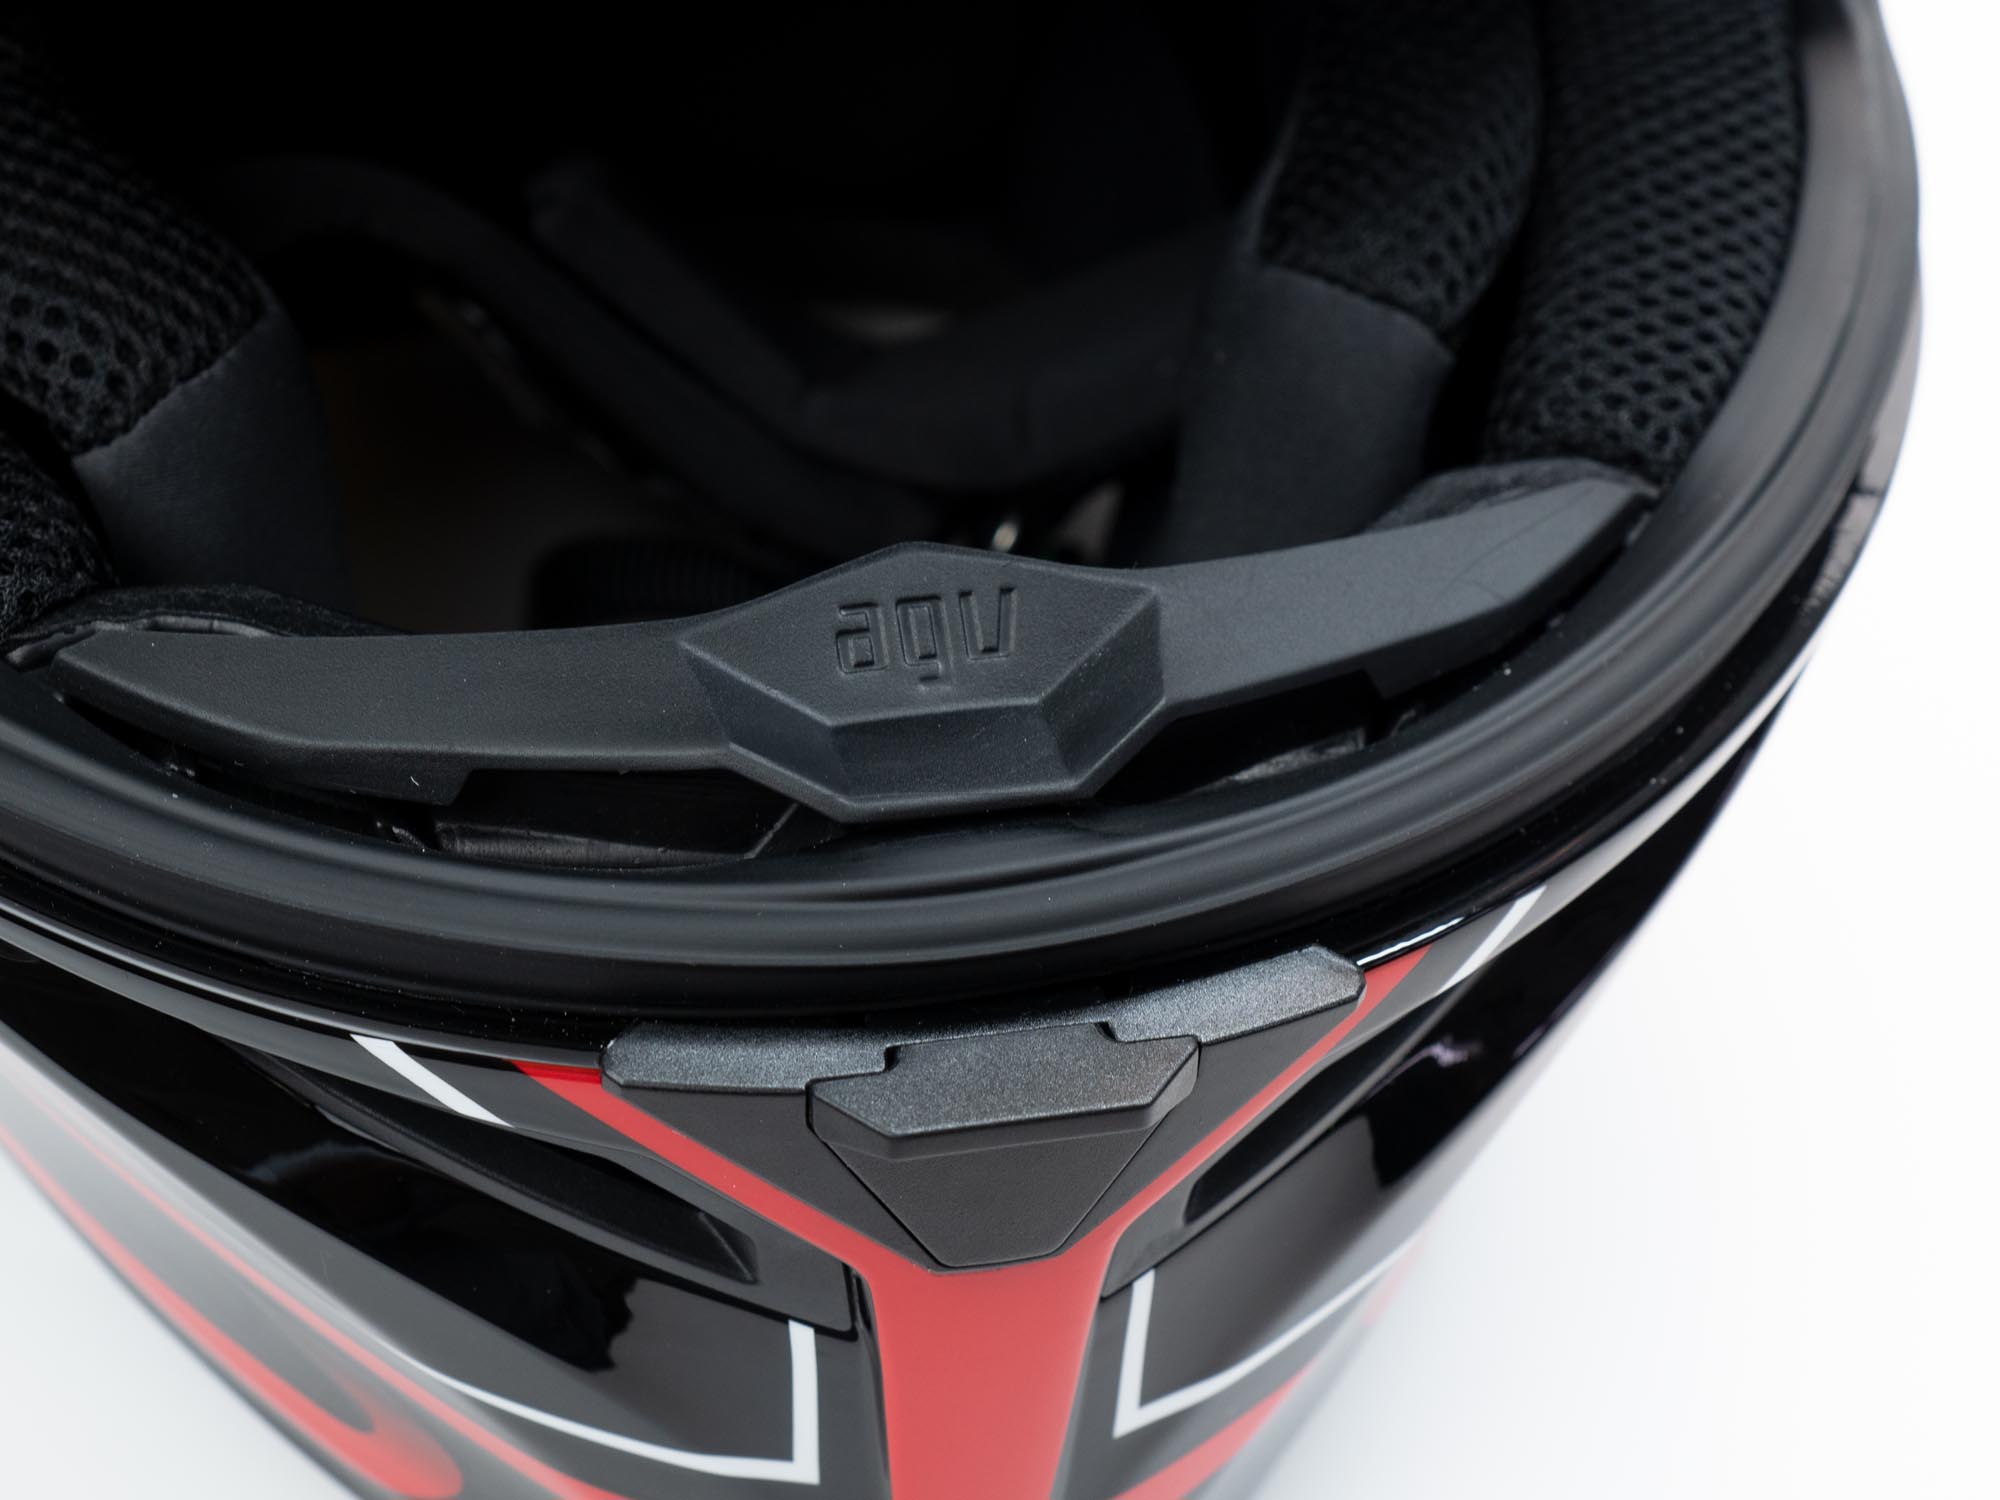
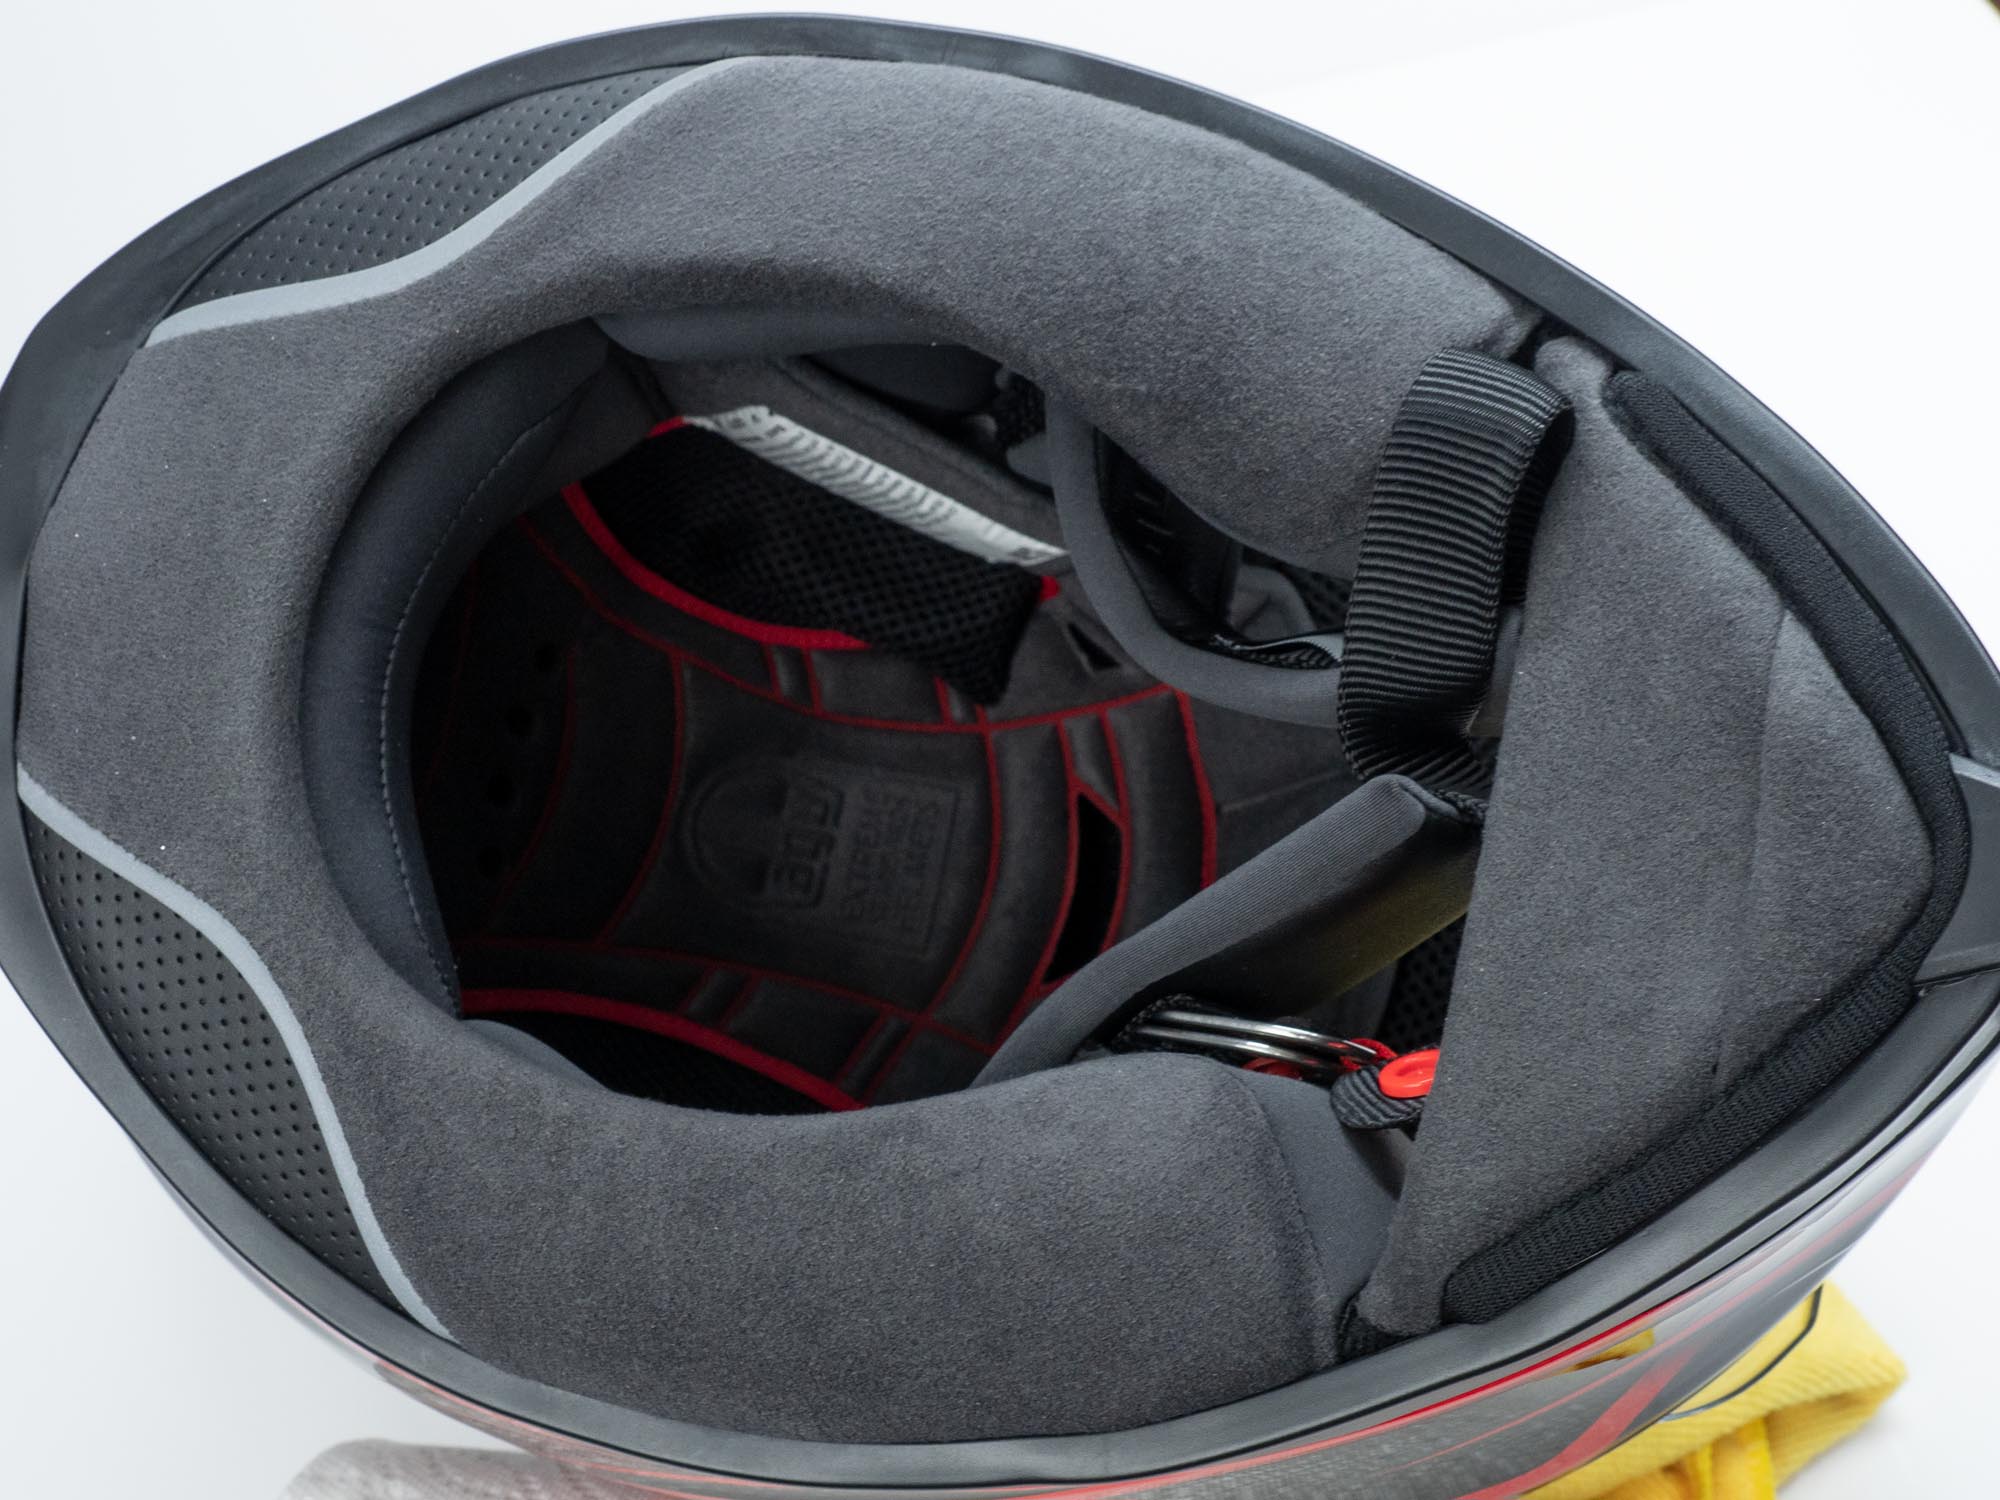
A double D-Ring fastener is used to fasten the chin strap. It may be considered an “old” style but it’s simple and lightweight and I’ve never found anything wrong them. The interior lining is removable, but there’s a bit of twist, as the cheek pads and neckroll are one piece, making for a solid ring around the back of neck from one side of the jaw to the other.

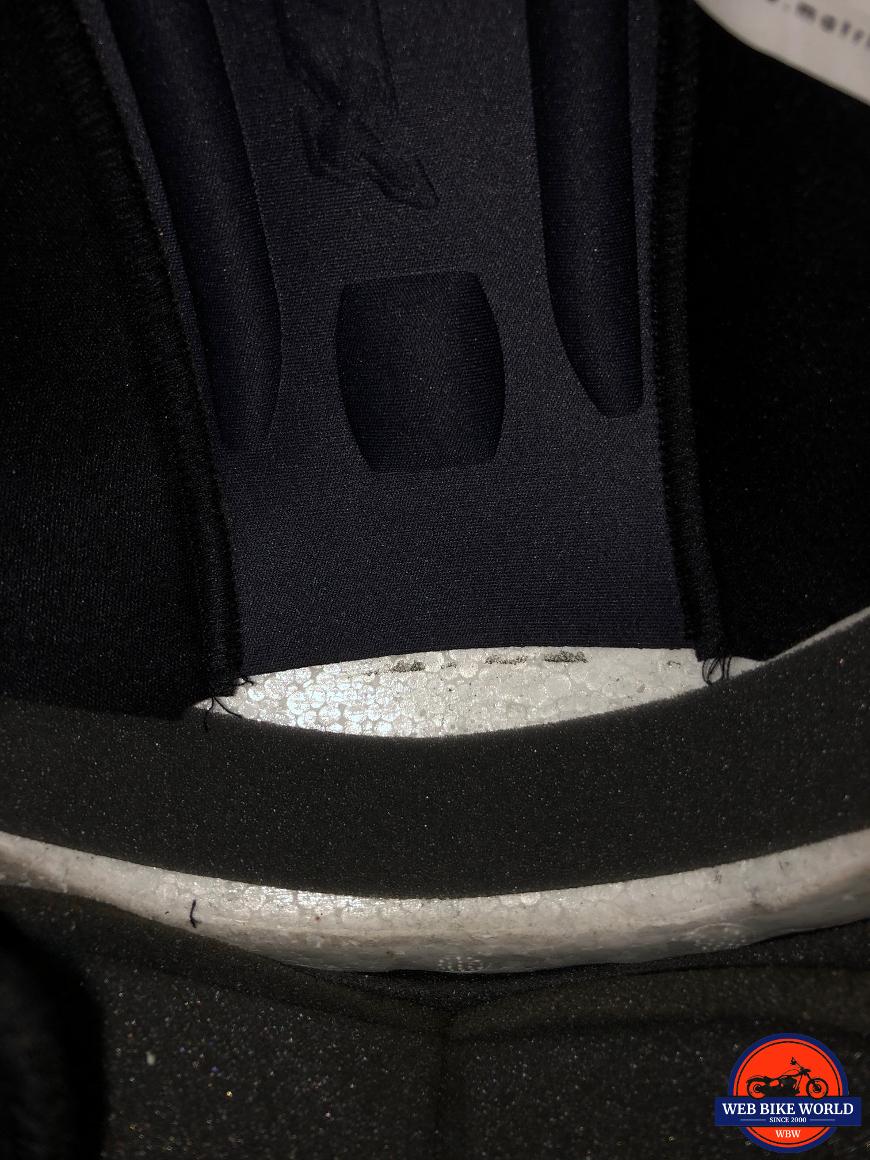
That single piece neck roll/cheek pads gave me some concern about installing my Sena 3s headset, but its installation went along just fine. Speaking of headsets, ear pockets, and wiring cutouts are present in the interior. The spaces made for speakers are covered in removable padding to help reduce noise if no speakers are installed.

AGV K5s Helmet DOT certified

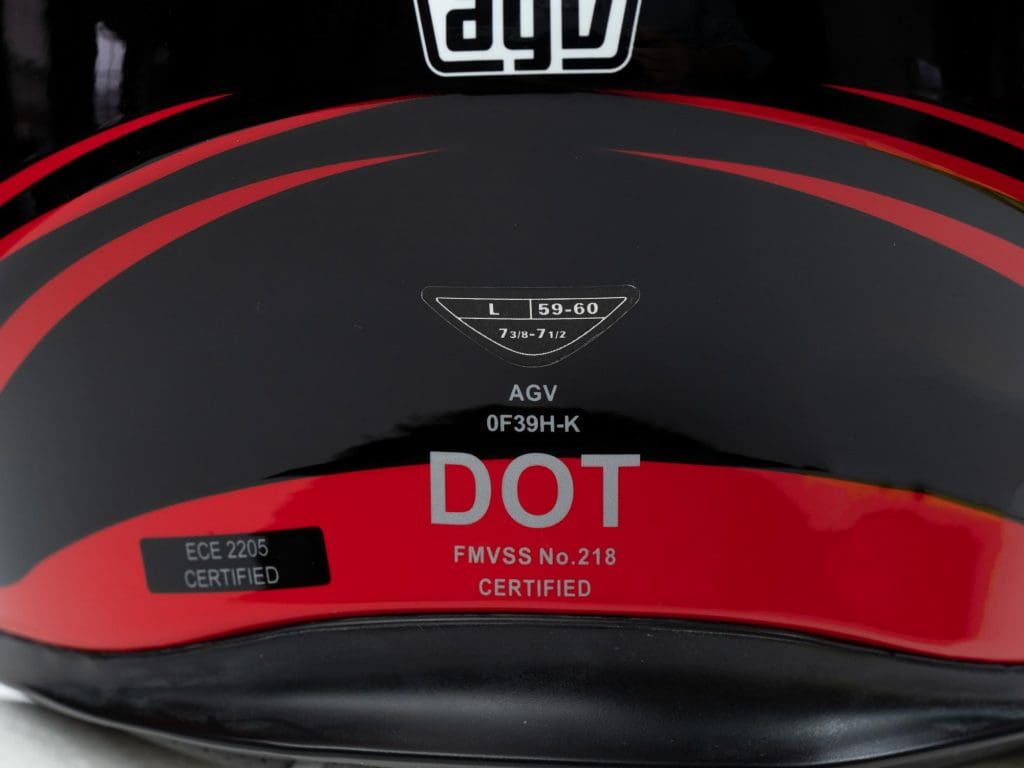
Certifications from both DOT and ECE are met by the K5 S but no Snell cert here. Like most helmets with internal visors, this one was likely never tested for the Snell rating. On the plus side, the K5 S does get a 4 out 5 star rating on the SHARP rating system which is a very good showing.

With the overall view behind us, let’s take a closer look at this helmet.

Paint & Graphics

The graphics are applied very well but there are a couple of spots a noticed a little misalignment. Most notably, the “point” behind the top vent isn’t quite centered, but these would not normally be noticed without looking for them.

The clear coat is smooth with very little “wave” present. I couldn’t find any defects in the finish and there appeared to be no dust caught between the surface and the finish. Modern finishing techniques and better “clean” painting facilities seem to have made those sort of blemishes a thing of the past.

AGV K5s Helmet rear view

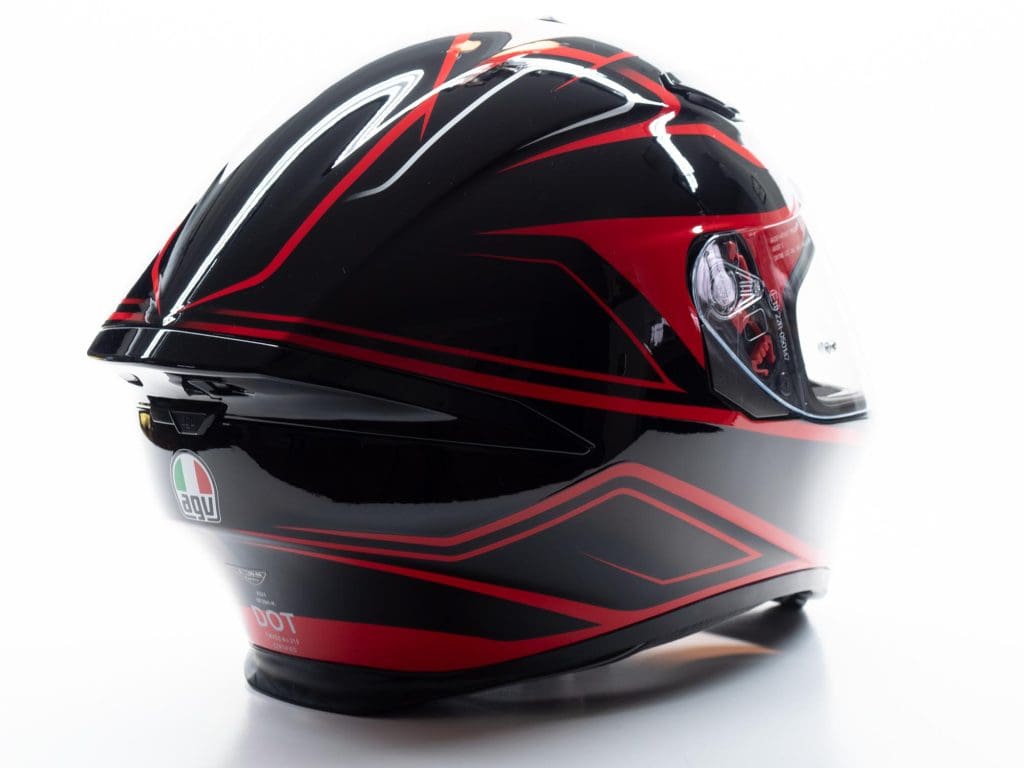
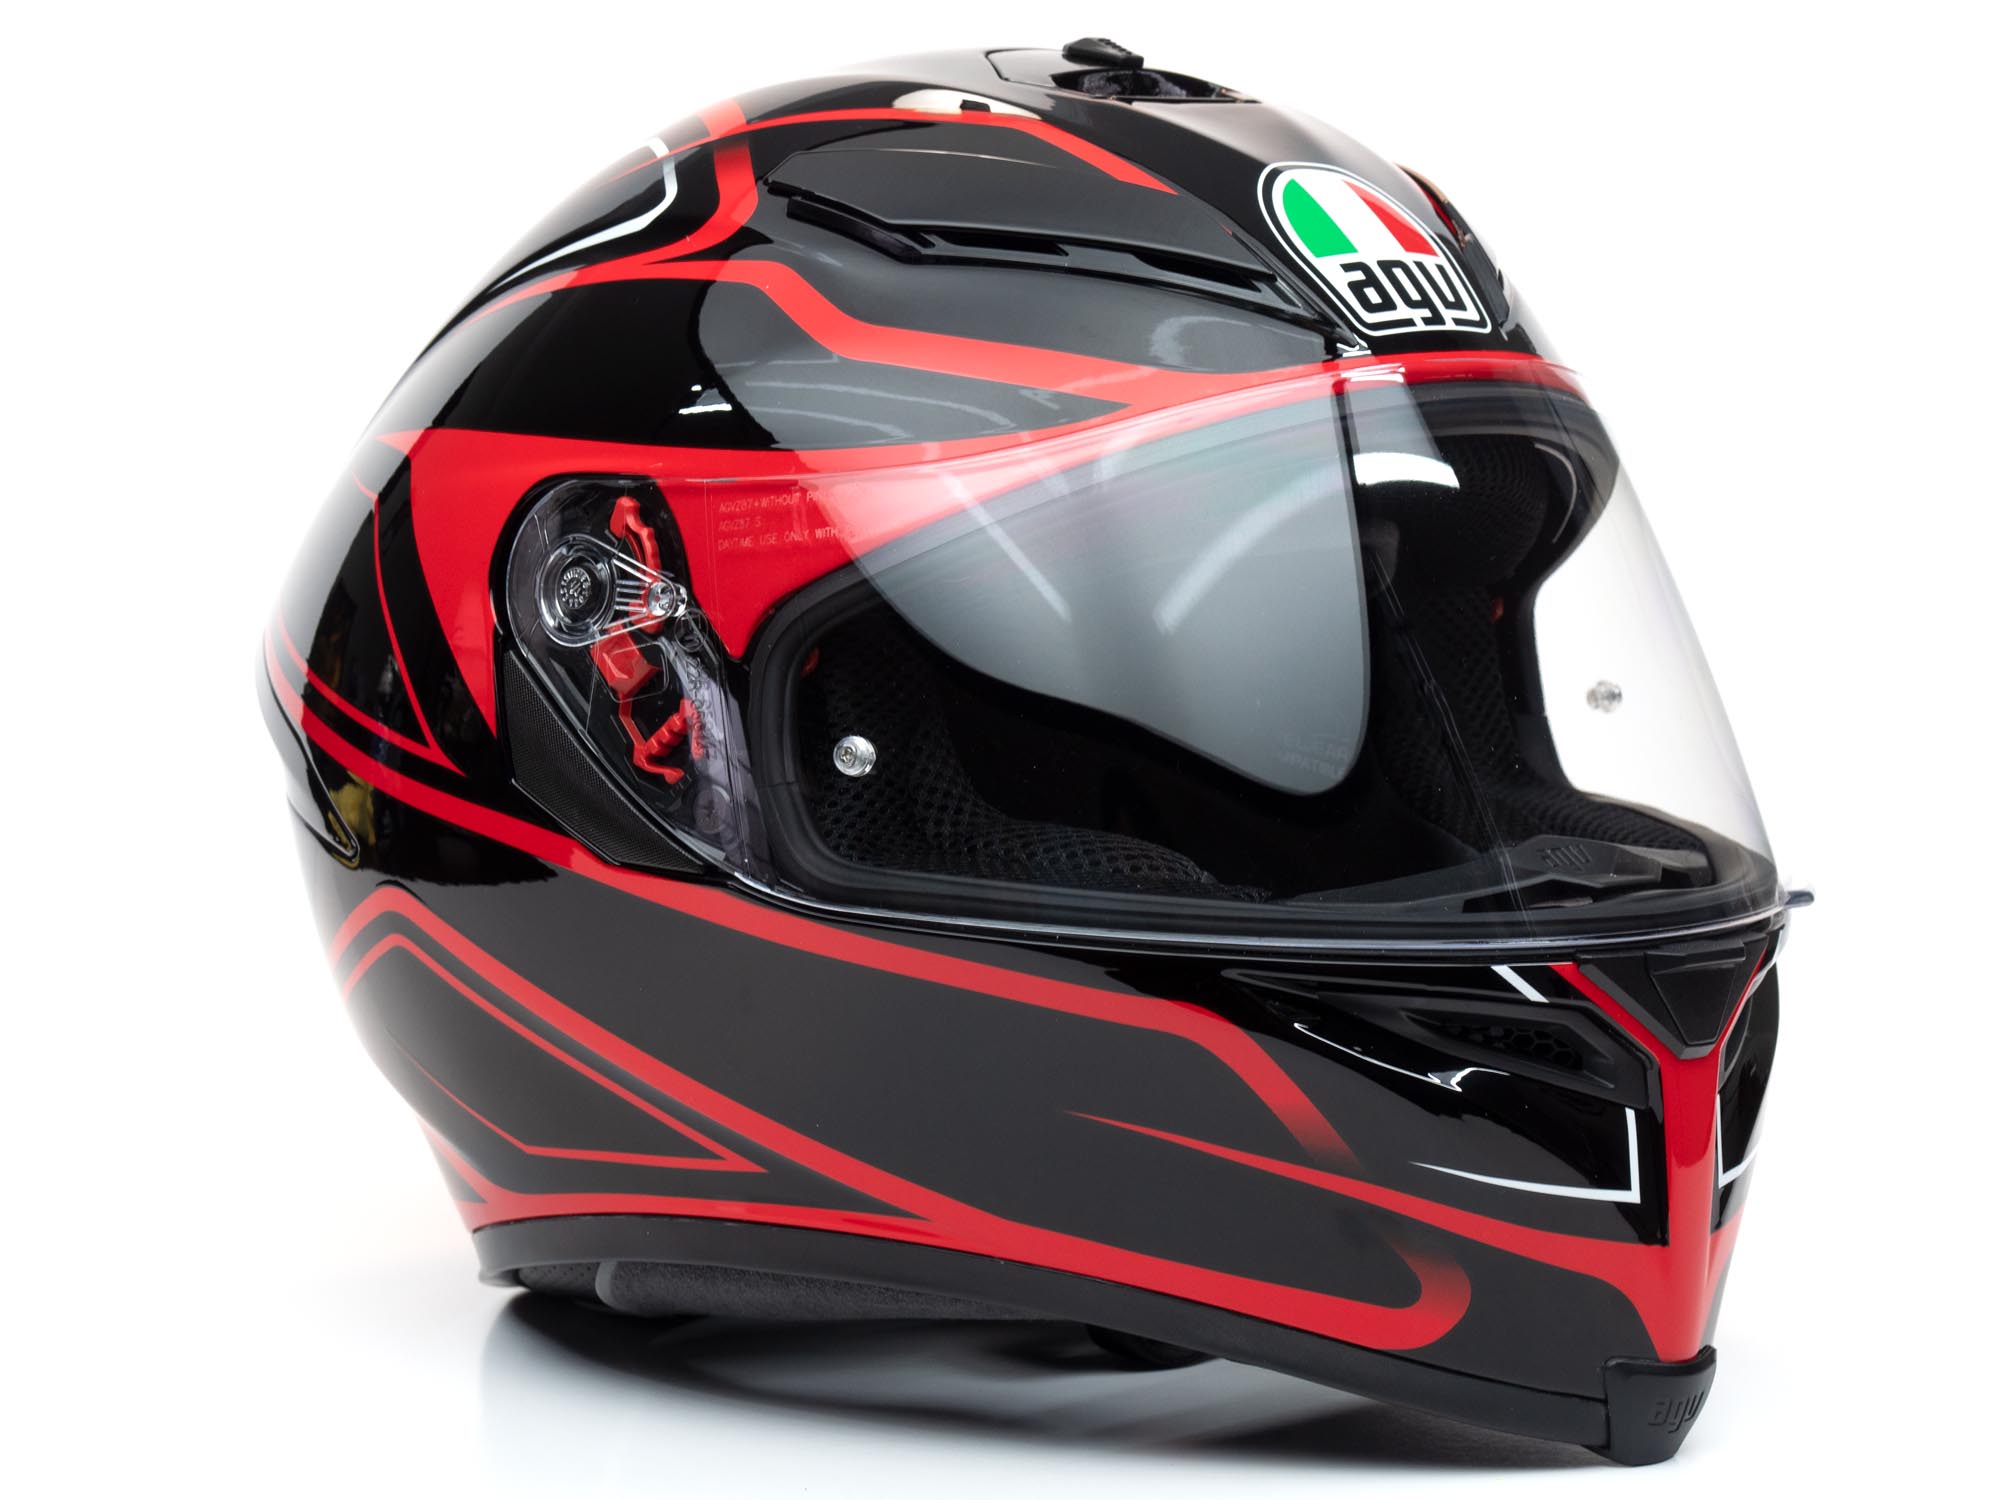
The pattern of the “Magnitude” graphic breaks up the black paint nicely and the slender lines follow the contours of the helmet well. The red color is nice and rich making for a sharp looking pattern but the deep color and black paint don’t really make this helmet stand out. Fans of high visibility lids might want to look for a different color option.

Construction

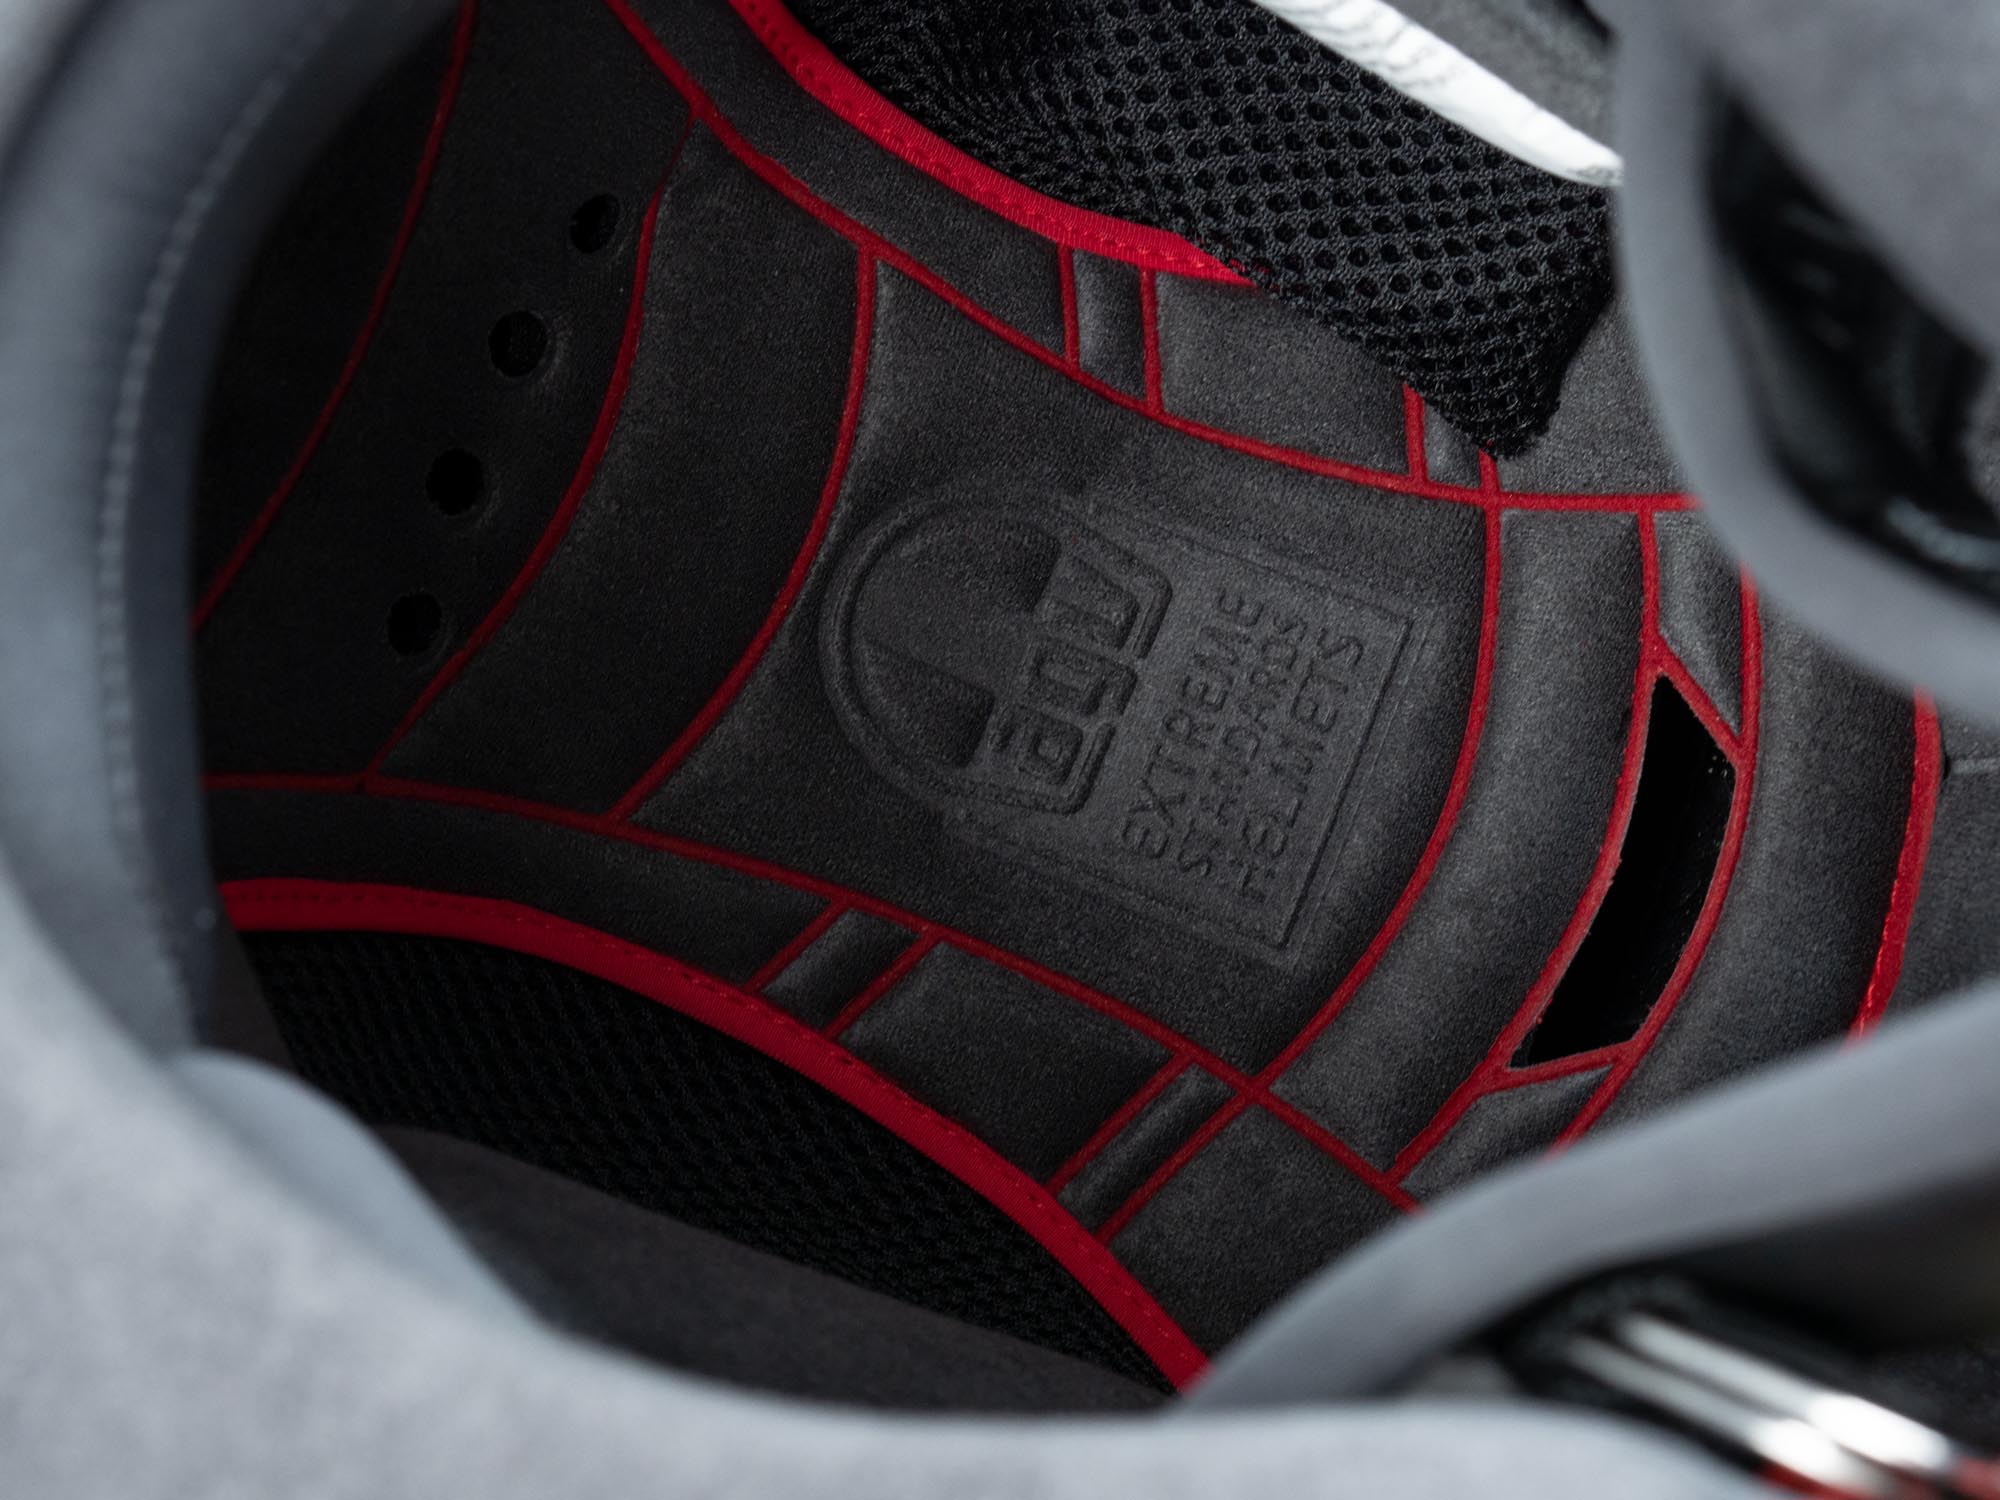
The shell of the K5 S is a fiberglass/carbon composite which accounts for the light weight and solid feel. Coming in at 1499 grams (3lb 4.9oz), the helmet feels very light in the hand (and on the head) which is quite a feat considering the internal visor system. The neckroll is covered in a material AGV calls “Shalimar” which has a water-resistant treatment meant to keep the bottom of the helmet from wicking moisture up into the helmet in the rain. The upper liner, including the brow padding, is also covered with this soft Shalimar material.

The cheek pads use a microfiber “Ritmo” fabric which is very smooth and moisture wicking as well as possessing antimicrobial properties. The liner and cheekpads/neck roll are all easily removed for cleaning.

AGV K5s Helmet interior underside

Inside the lower portion of the visor, the port is a low-profile nose/breath guard which is removable (with some effort) and is something I usually remove. However, the guard sits so low I didn’t mind its presence, it went back in place after I finished tugging it out of its spot.

A chin curtain is in place and covered in the same Shalimar fabric as the neck roll and it doesn’t appear to be removable. I tried to pull it only so hard before I gave up. I like chin curtains so it was fine with me. The curtain is split to allow easy access to the chin vent slider located inside the chinbar. This is the second helmet I’ve had with one of these sliders inside the chinbar and I’m still not sure I like it. It can be fiddly to deal with when wearing gloves.

The EPS layer includes four density variations throughout the material which should provide a great deal of force absorption across a wide range of impacts. Seeing that the K5 S reached a 4-star rating on the Sharp Rating scheme, this might be part of the reason for the high rating.

Shopping Now? We Recommend:

webBikeWorld has recently partnered with 2Wheel.com. When you purchase an item via our affiliate link, we receive a small commission. These commissions are how we run our site. Thank you for supporting us.

2WHEEL

Buy This Helmet on 2Wheel

Helmet Weight

The K5 S weighs in at 1499 grams (3lb 4.9oz) placing it very high in the list of over 270 lids as far as “lightweight” for full-face helmets we’ve reviewed. It ties with the Nolan N94 for the number 31 spot, both being a carbon composite helmet. Considering the N94 is more of a racing helmet and the K5 S has the addition of an internal visor, that’s a very good showing.

Keep in mind that I measured the weight of the K5 S without the Pinlock insert installed so a few extra grams might be present after installing it.

AGV K5s Helmet full off-axis view

The helmet feels very light in the hands, and when wearing it, but even that lightweight all but disappears after a few minutes riding. Just yesterday I was out for about four hours wearing this helmet and I had to keep reminding myself to “take note” of how it felt during the ride. Any time a piece of gear “melts into the background”, the more attention can go to your surroundings and for me, this makes for a more enjoyable ride.

Fit & Comfort

I typically wear a size Large in most full-face helmets and the K5 S fits just as expected. The intermediate oval shape works well for me and unlike the Shark Spartan I recently reviewed, the top area fit is spot on rather than leaving a little extra room.

The smooth lining material feels great to the point that you don’t notice after a while. That’s a good sign of comfort. The overall feel isn’t as plush as some other helmets like Arai or even the aforementioned Spartan, but it’s still comfortable. The padding is firm enough to provide a snug, not tight, feel.

AGV uses 2 different shell sizes that cover the range from XS to 2XL but I’m not certain where exactly one shell takes over from the other. I’m going to guess the size Large reviewed here might use the smaller shell since I weighed in at 1499 grams. AGV lists the weight about 40 grams more so maybe that’s based on the heaviest option with the larger shell…

AGV K5s Helmet full off-axis view from rear

Medium Small / Medium Large

A different approach was taken to sizing than what I’m used to for helmets. The K5 S has two Medium sizes available, MS and ML. The MS size is designed for a 57cm circumference while the size ML fits a 58cm.

This extra size between Small and Large does help riders get a more precise fit in the medium range. It’s a nice extra step AGV has taken to make sure one gets the best fit they can.

Ventilation & Noise

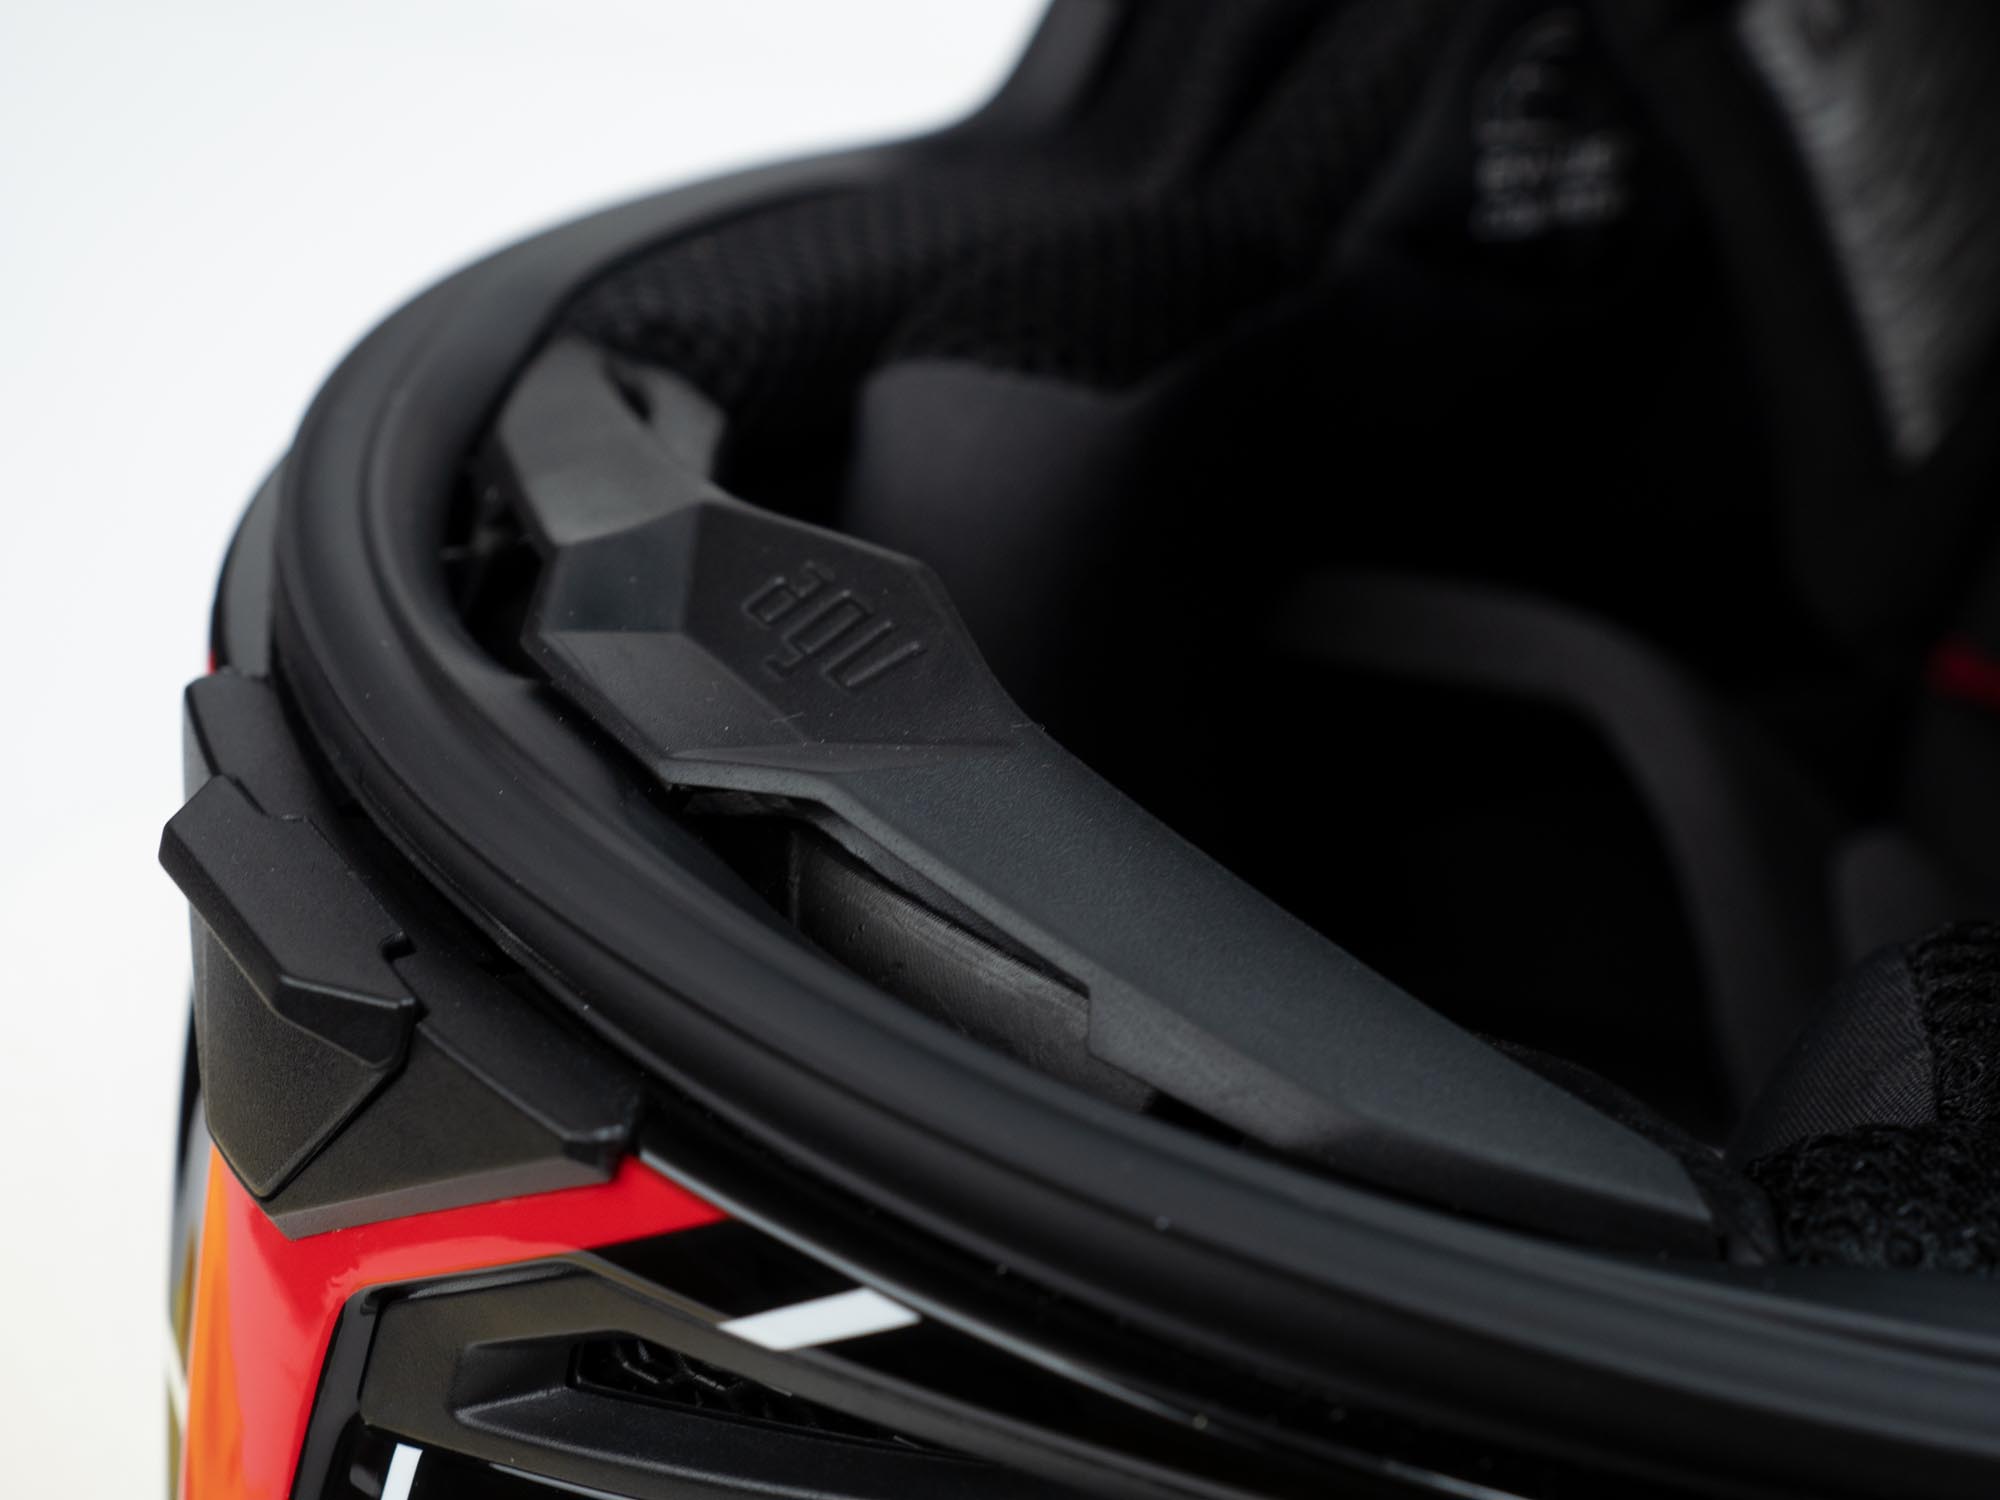
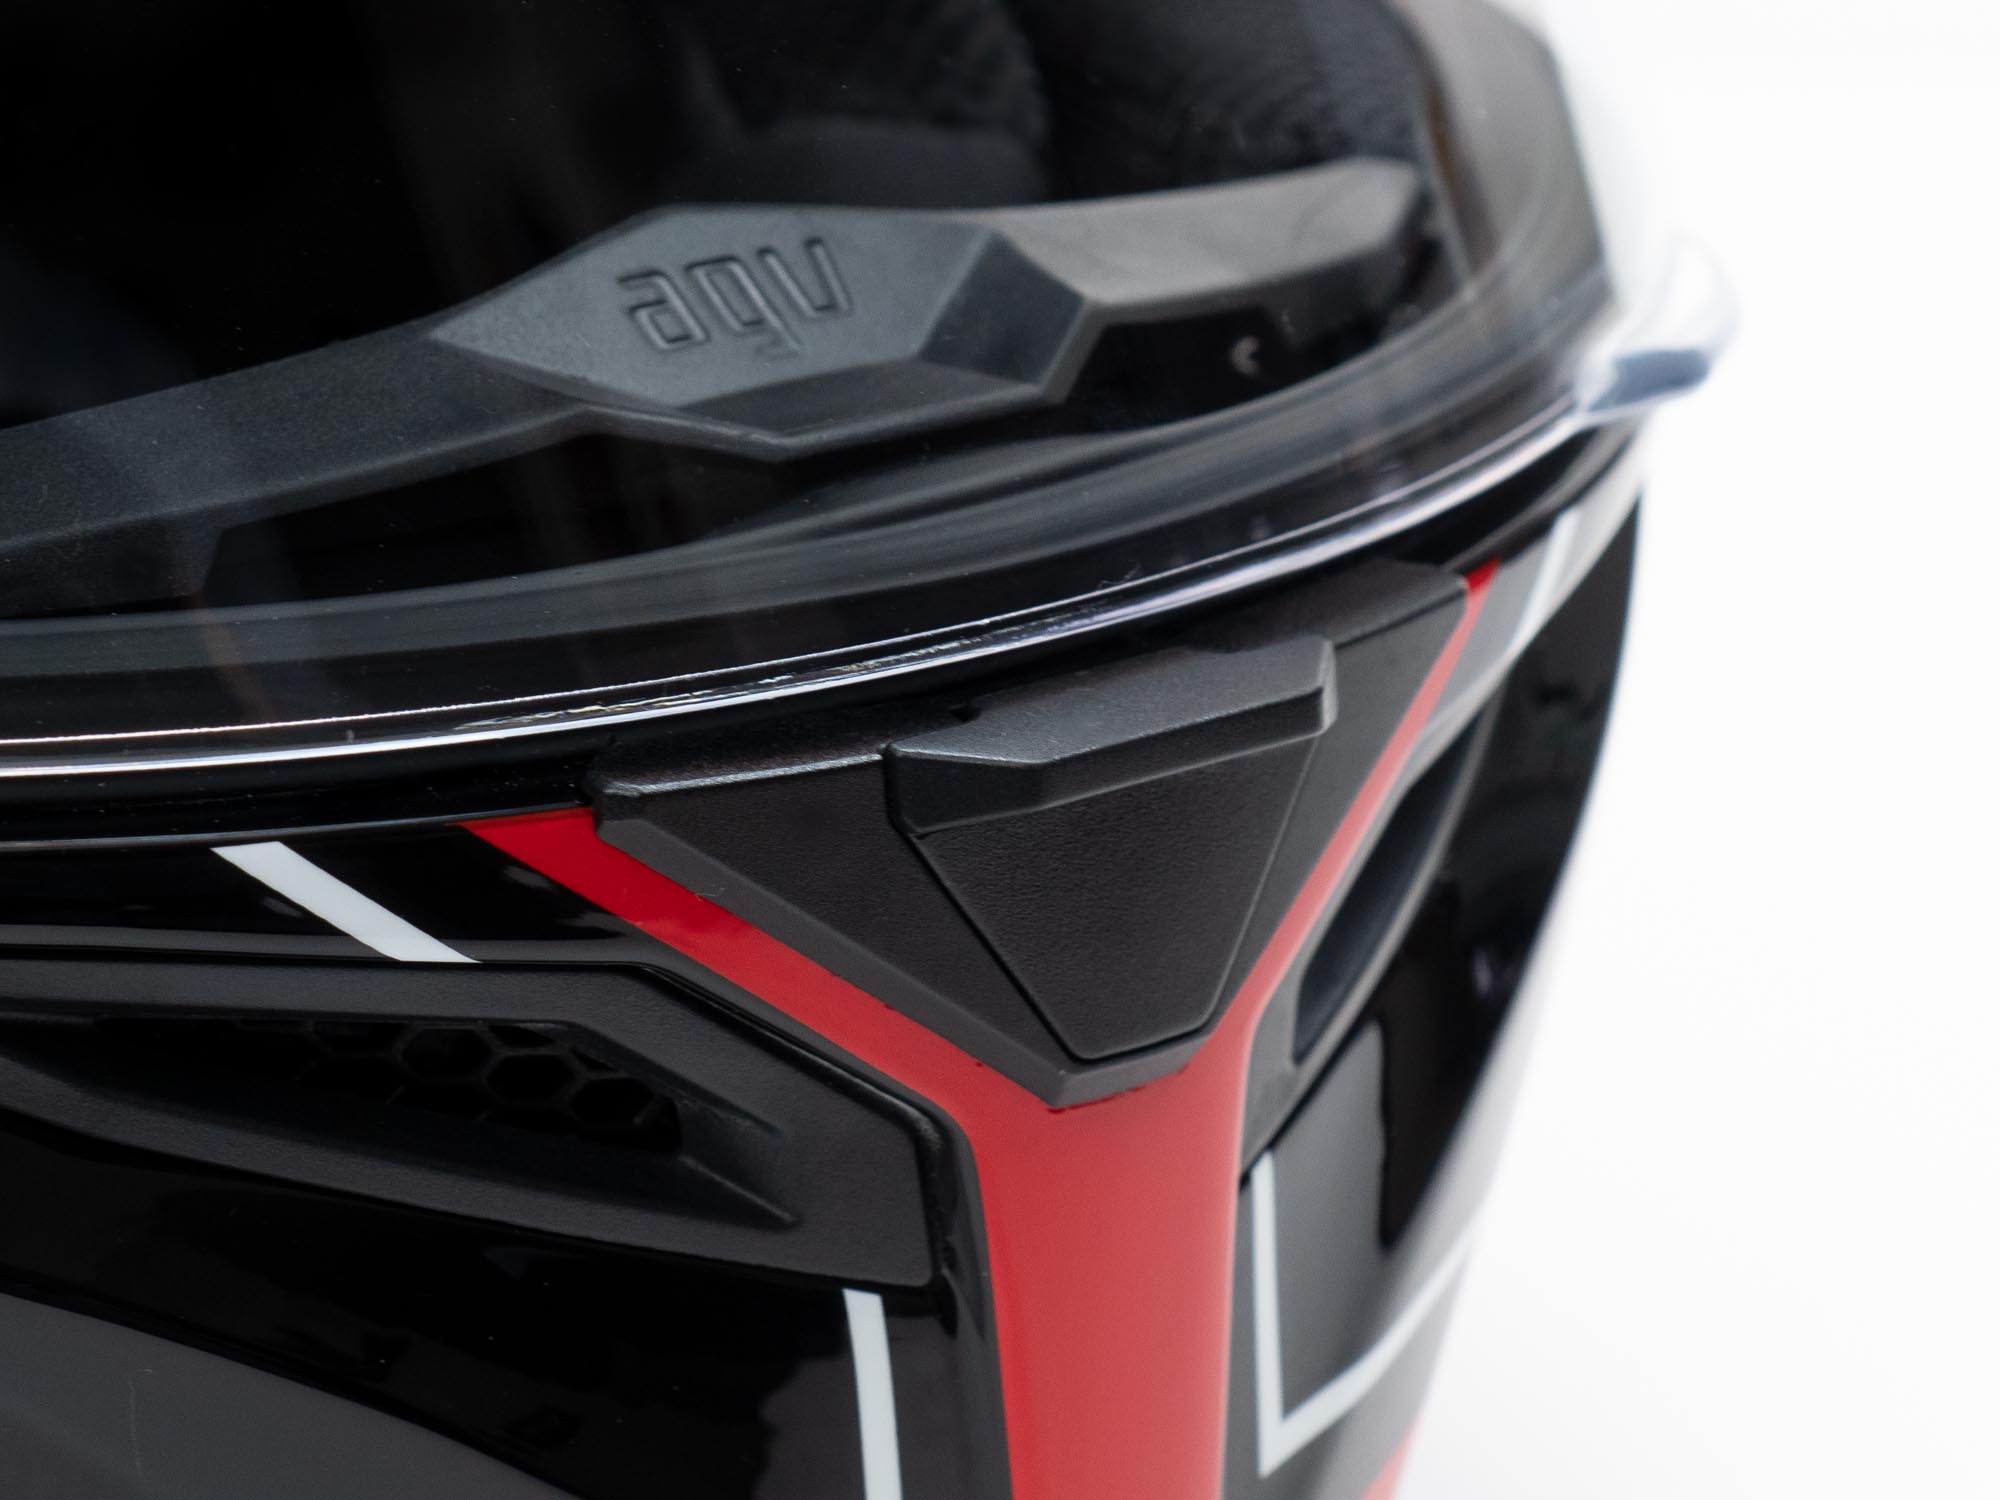
Ventilation on the K5 S is excellent and in some cases, it’s a little too much, at least during the winter. Starting at the front, there are two vents flanking the center of the chinbar. Inside is a small portion of honeycomb grid which will filter out most bugs. Gnats and other smaller insects might make it through so it’ll be interesting to see what happens in the summer.

AGV K5s Helmet top-side vents

The screening is relevant here as the vents go straight through the chinbar which in turn means a LOT of air will come through and onto the rider’s face. This will be great for the warmer days of spring and summer but during the current colder days of February, I’ve had to keep it closed.

Some of the air is passed up to the visor for demisting but it’s hard to feel much air going in that direction with the visor completely closed. To make it more effective, the K5 S has a sliding switch that will lift the visor open about 3 to 4mm. This helps to let some additional air in and helps draw some air up through the chinbar passage.

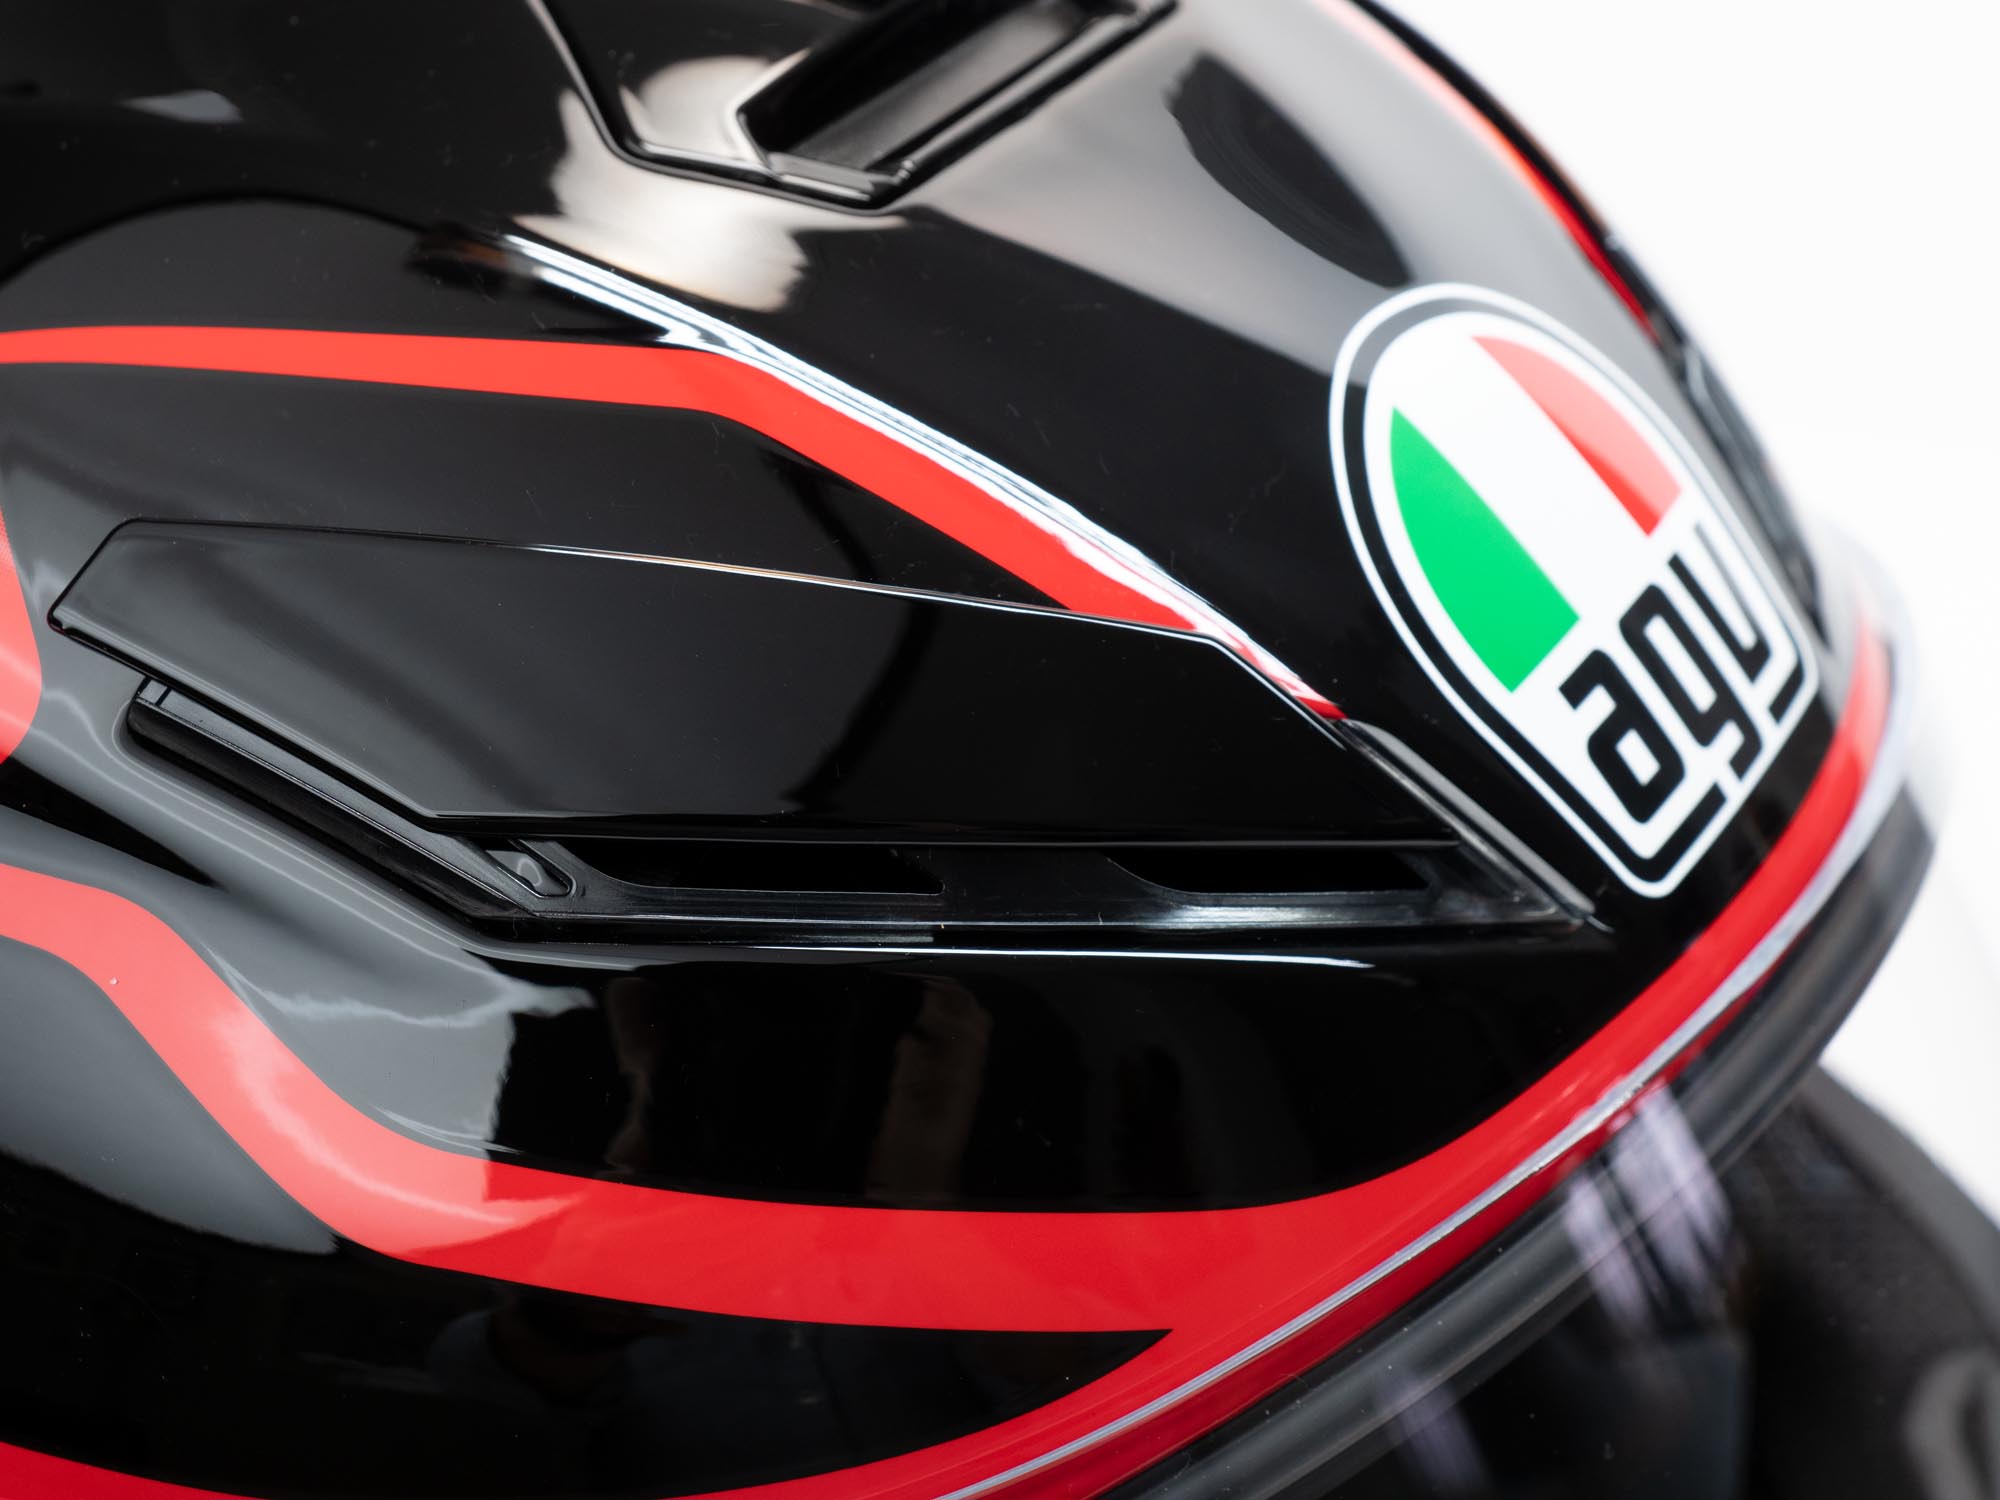
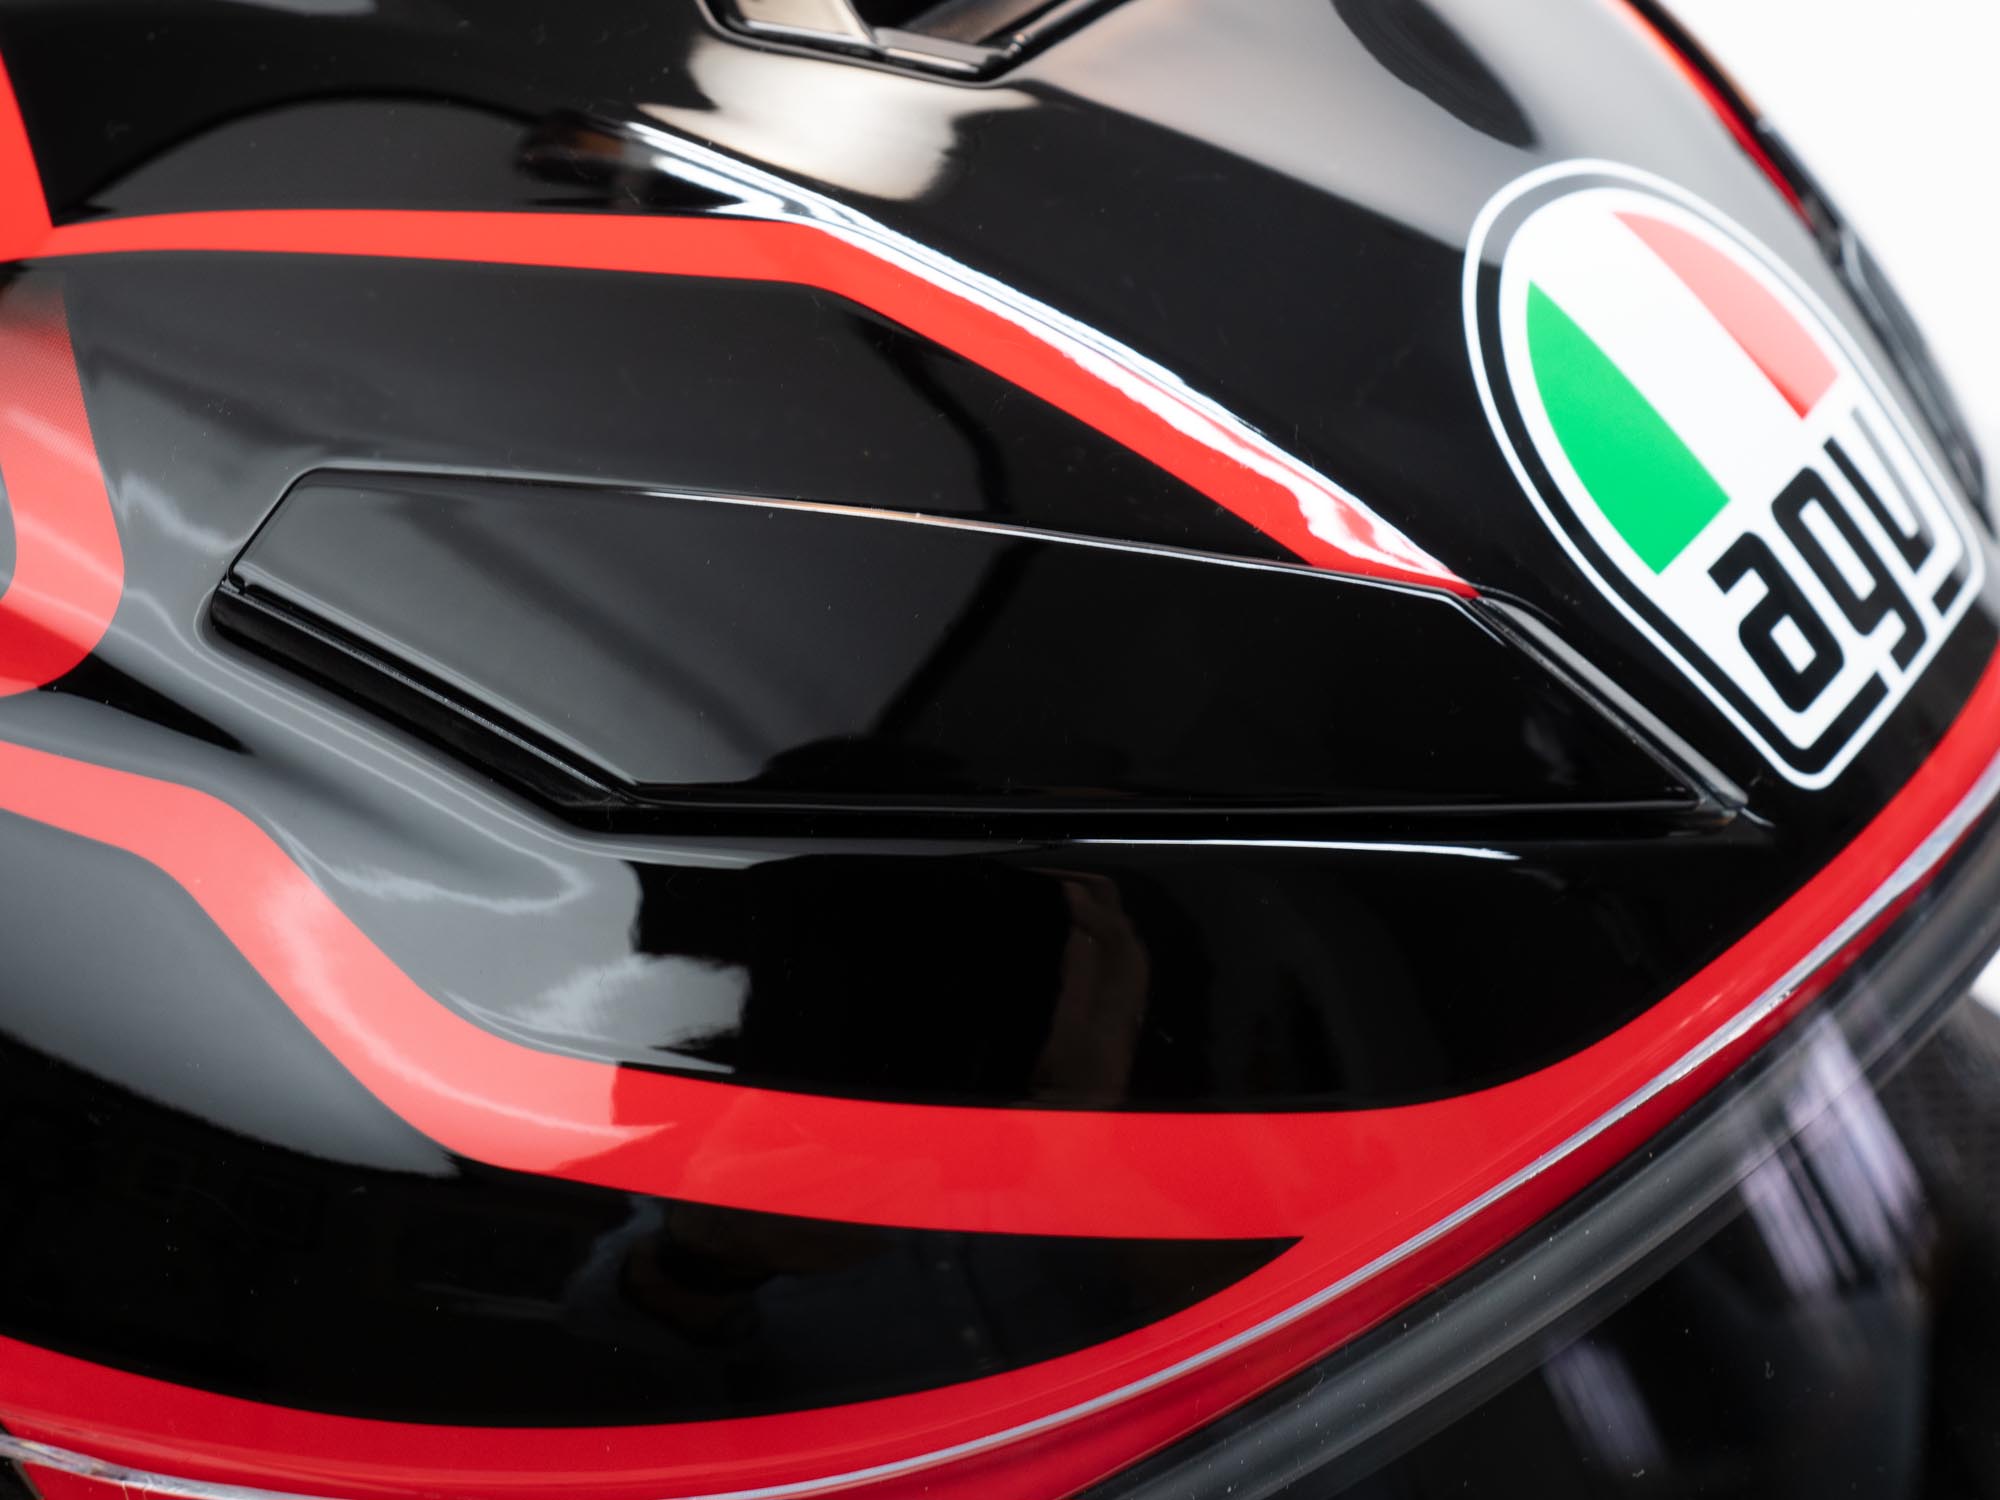
Over the forehead space, they’re two vents with two ports on each that vent air on the forehead over the temples. These don’t flow a lot of air but they can be felt. The closure on these vents can be a bit of a bother though as the large sliding covers are very smooth on top and can be difficult to get purchase on them with your gloves. It gets a bit better once one gets a feel for the proper direction to slide them but some ridges or some other texture would be welcome.

AGV K5s Helmet rear vents

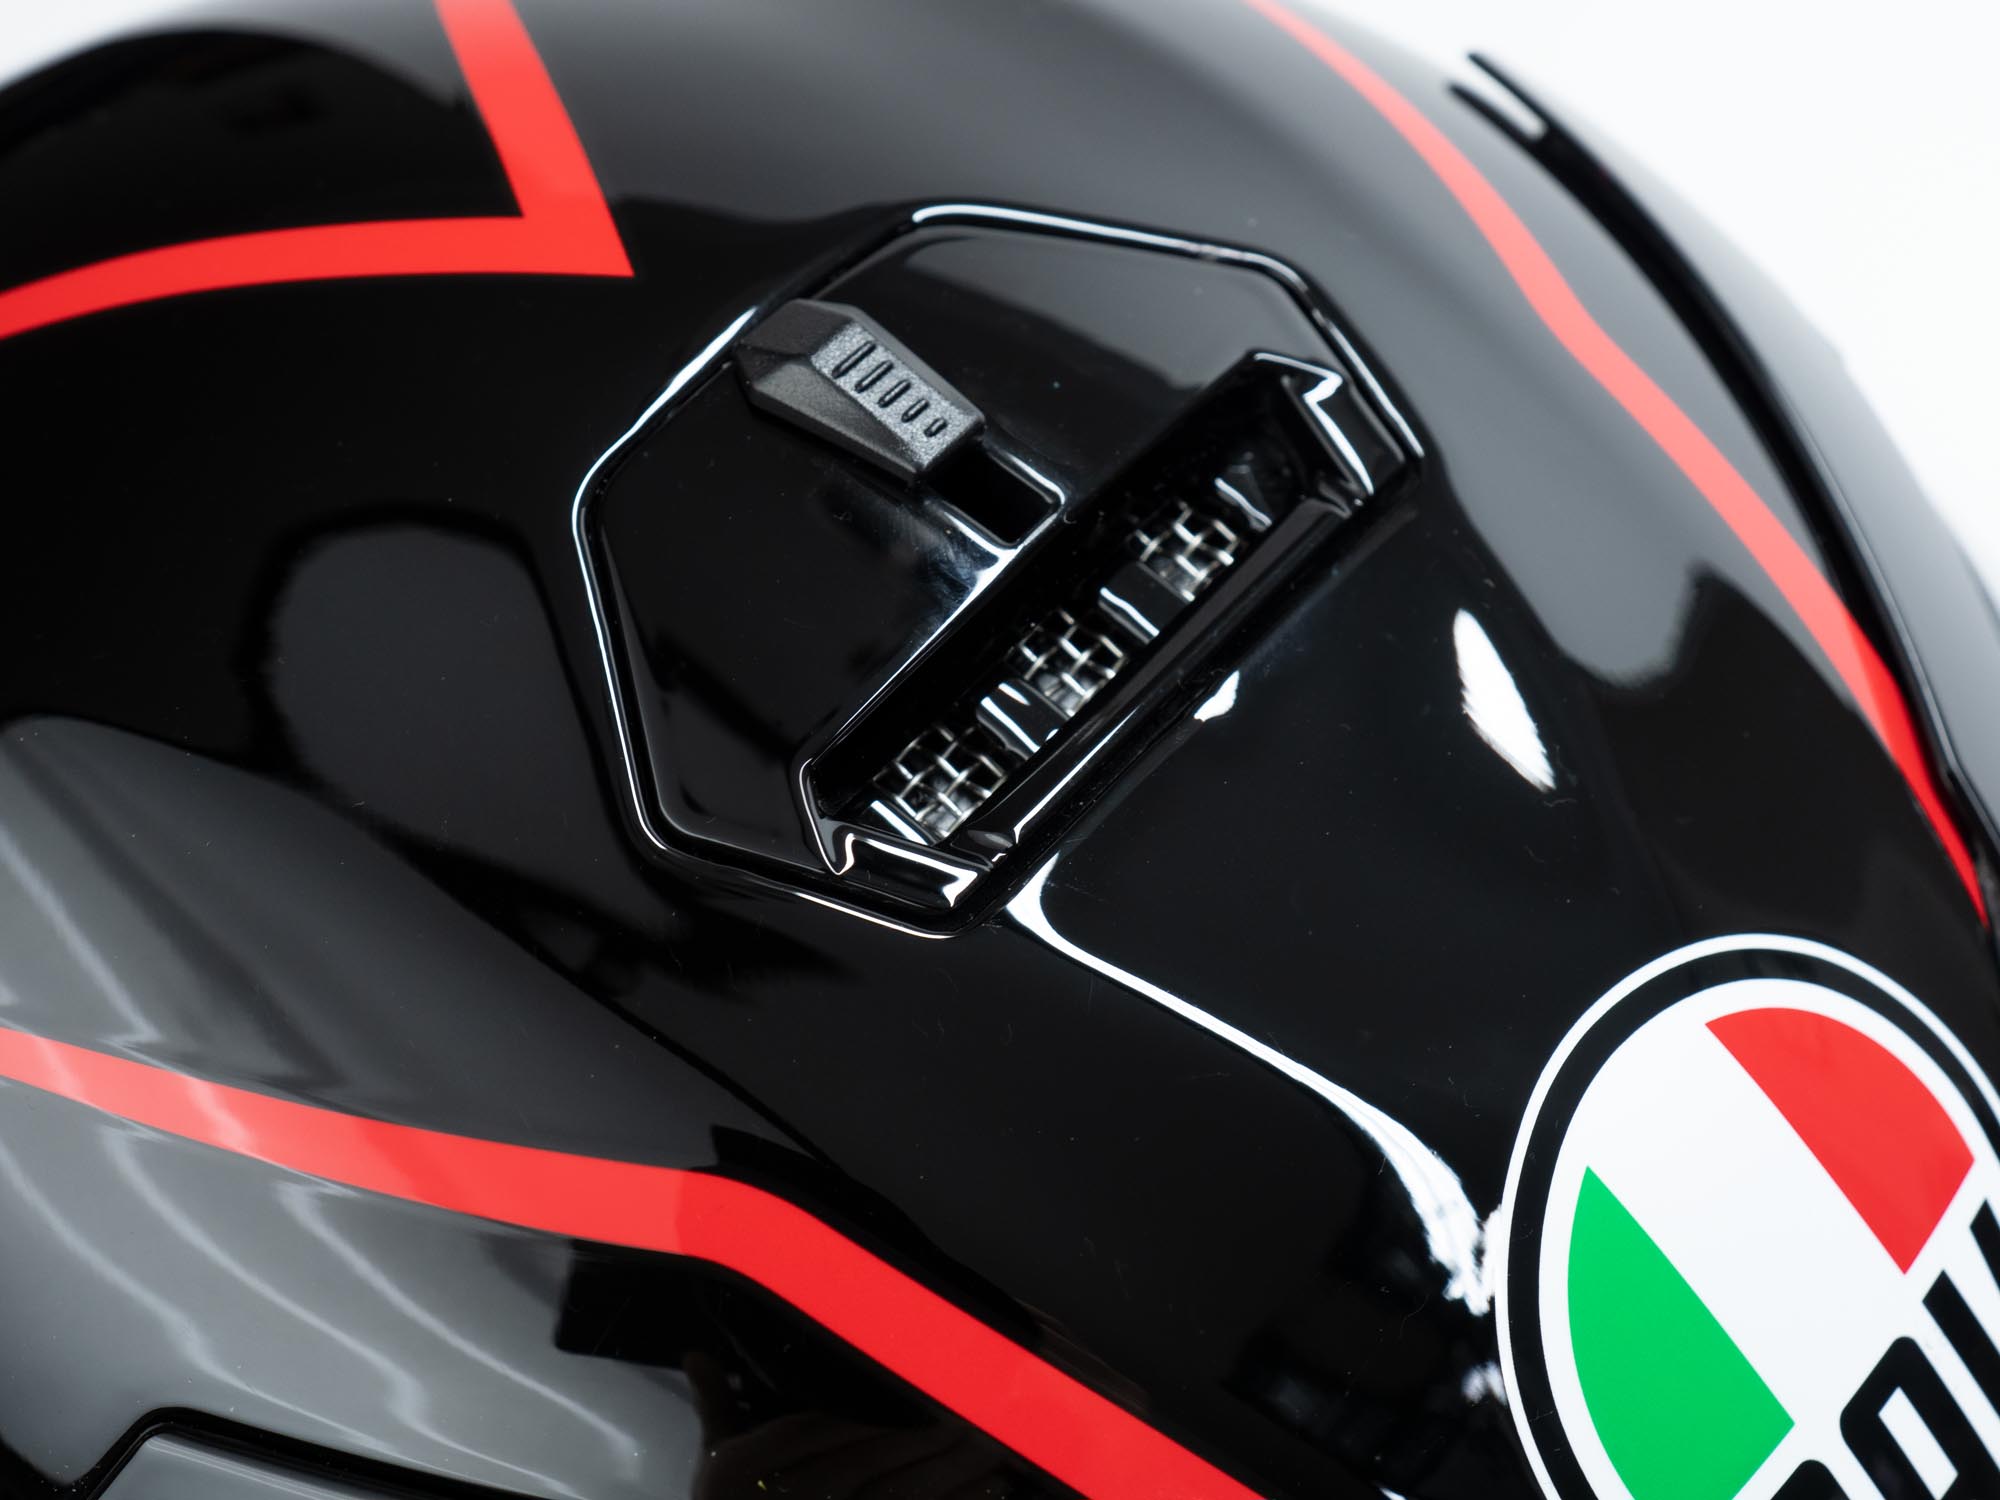
On the top of the helmet is a centrally located vent that opens and closes with a two-step sliding switch. This switch is much easier to find and actuate with gloves. It has a midway point which one can set the vent, but I found it much easier to set it halfway from the open position. Trying to open it halfway from the fully closed position is not easy as the sliding switch isn’t the smoothest in operation.

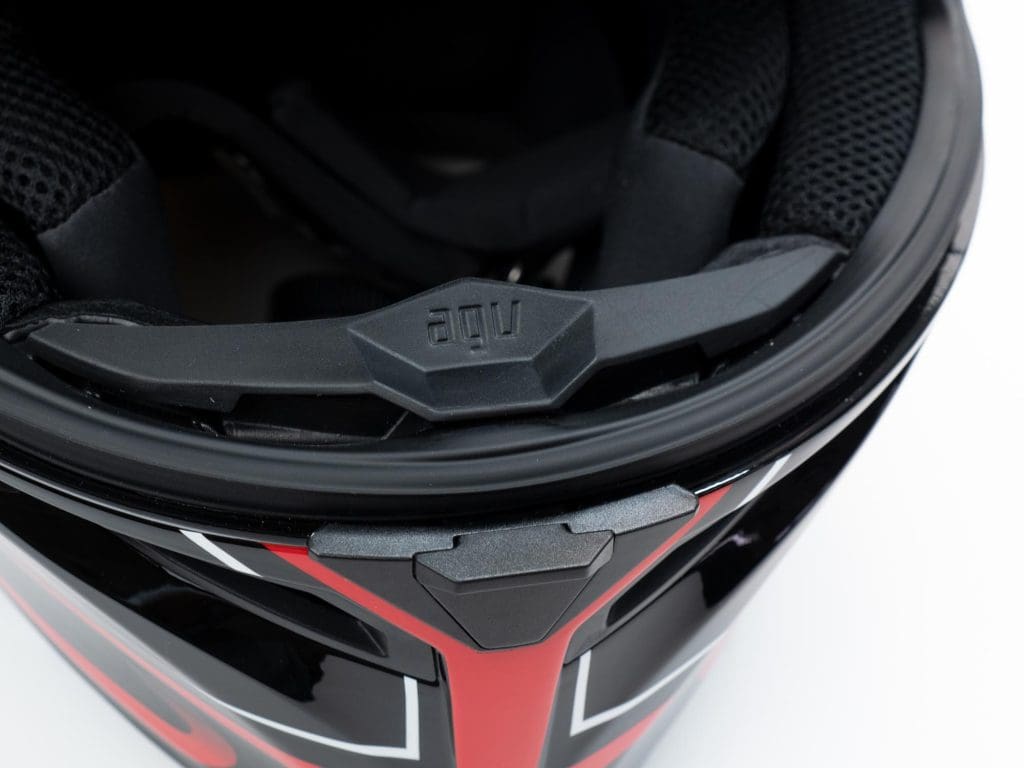
In the rear, under the spoiler, are a pair of exhaust vents that open and close with one centrally located switch. The switch in this position opens and closes very positively with an audible “click” which is helpful since one has no hope of viewing these ports when wearing the helmet. This switch has raised edges making it easy slide once one is done reaching around the back of their head to find it.

Overall the venting is very good with only the twin forehead vents providing just average venting.

Noise Levels

Noise levels on this AGV helmet are about average. Booming is present but fairly well subdued while mid-range wind rushing noise is about average. During testing, I rode mostly with my Ninja 1000’s windscreen in the lowest position. As expected, raising the screen increased wind noise. For reference, I’m 5’ 10” in height and rider height can affect noise levels.

AGV K5s Helmet vents

With all the vents available I was expecting some whistling but it was absent in most cases. If one moves their head around some faint whistling can be heard but when in the normal riding position it wasn’t present. Opening the vents can make it easier to induce whistling but I still never had an issue with high pitched noise when in the normal riding position.

I always wear custom-fitted earplugs when I ride including when testing helmets. Also, rider height and motorcycle specifics such as fairing, non-faired, etc can affect noise levels.

Shopping Now? We Recommend:

webBikeWorld has recently partnered with 2Wheel.com. When you purchase an item via our affiliate link, we receive a small commission. These commissions are how we run our site. Thank you for supporting us.

2WHEEL

Buy This Helmet on 2Wheel

Visor & Outward Vision

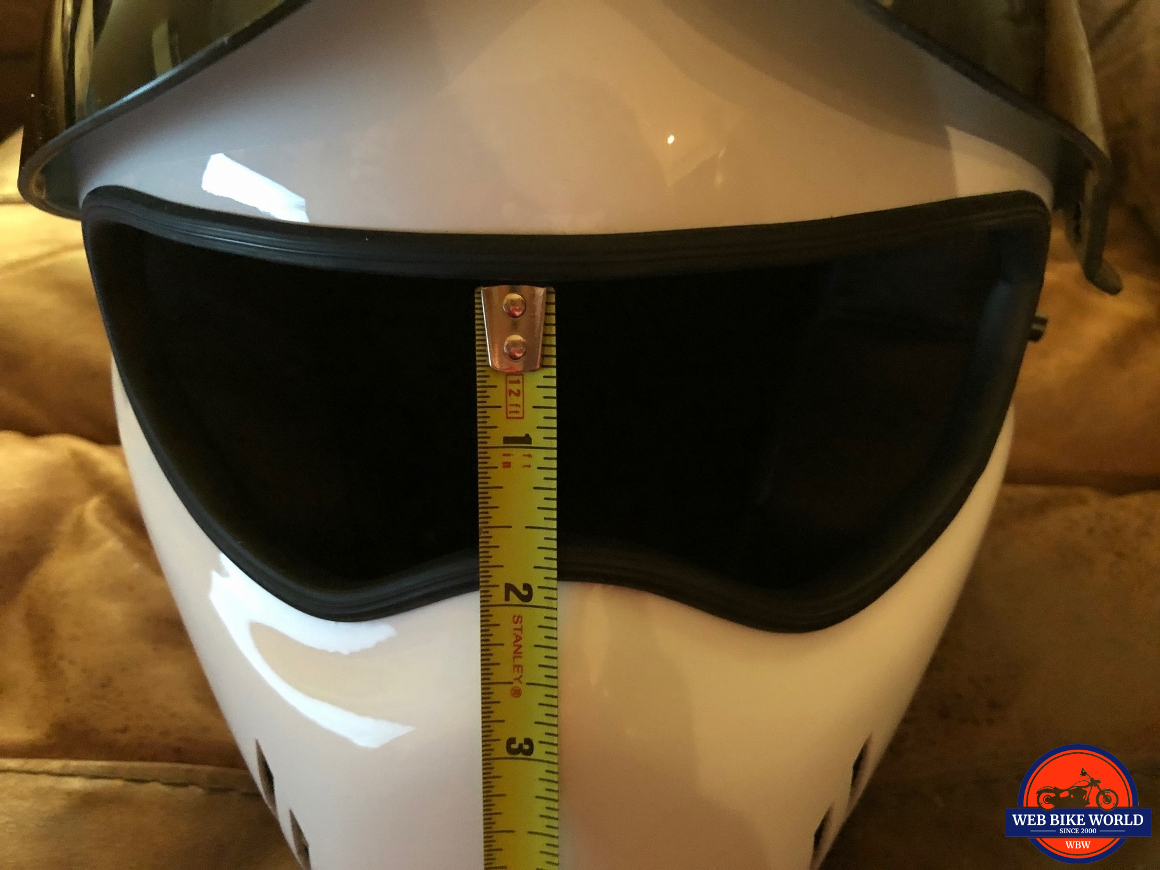
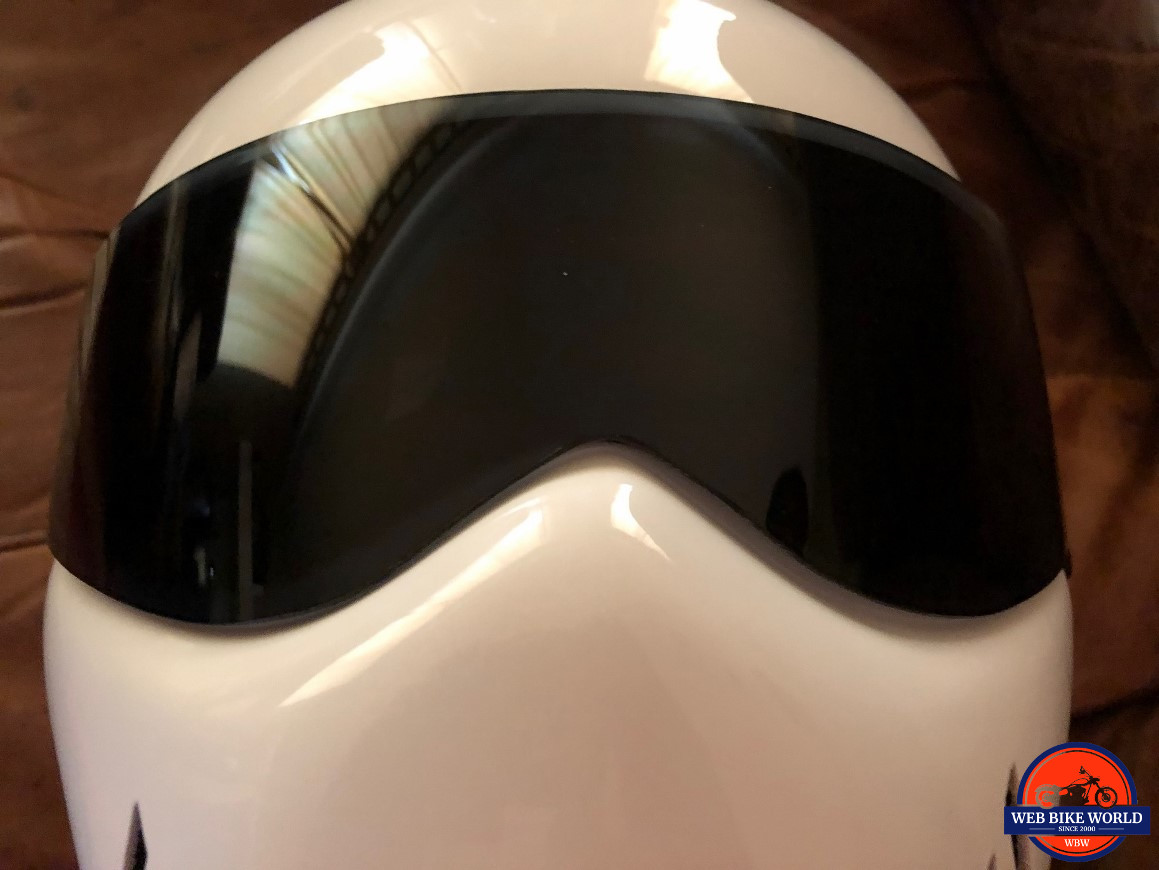
View out of the eyeport is very good from top to bottom and the side to side peripheral view is outstanding. I can’t imagine seeing much more side to side in a full face helmet. The top to bottom view is the perfect balance of tall, but not so tall the top of the eyeport can’t be used to block the sun during certain parts of the day.

AGV K5s Helmet visor system

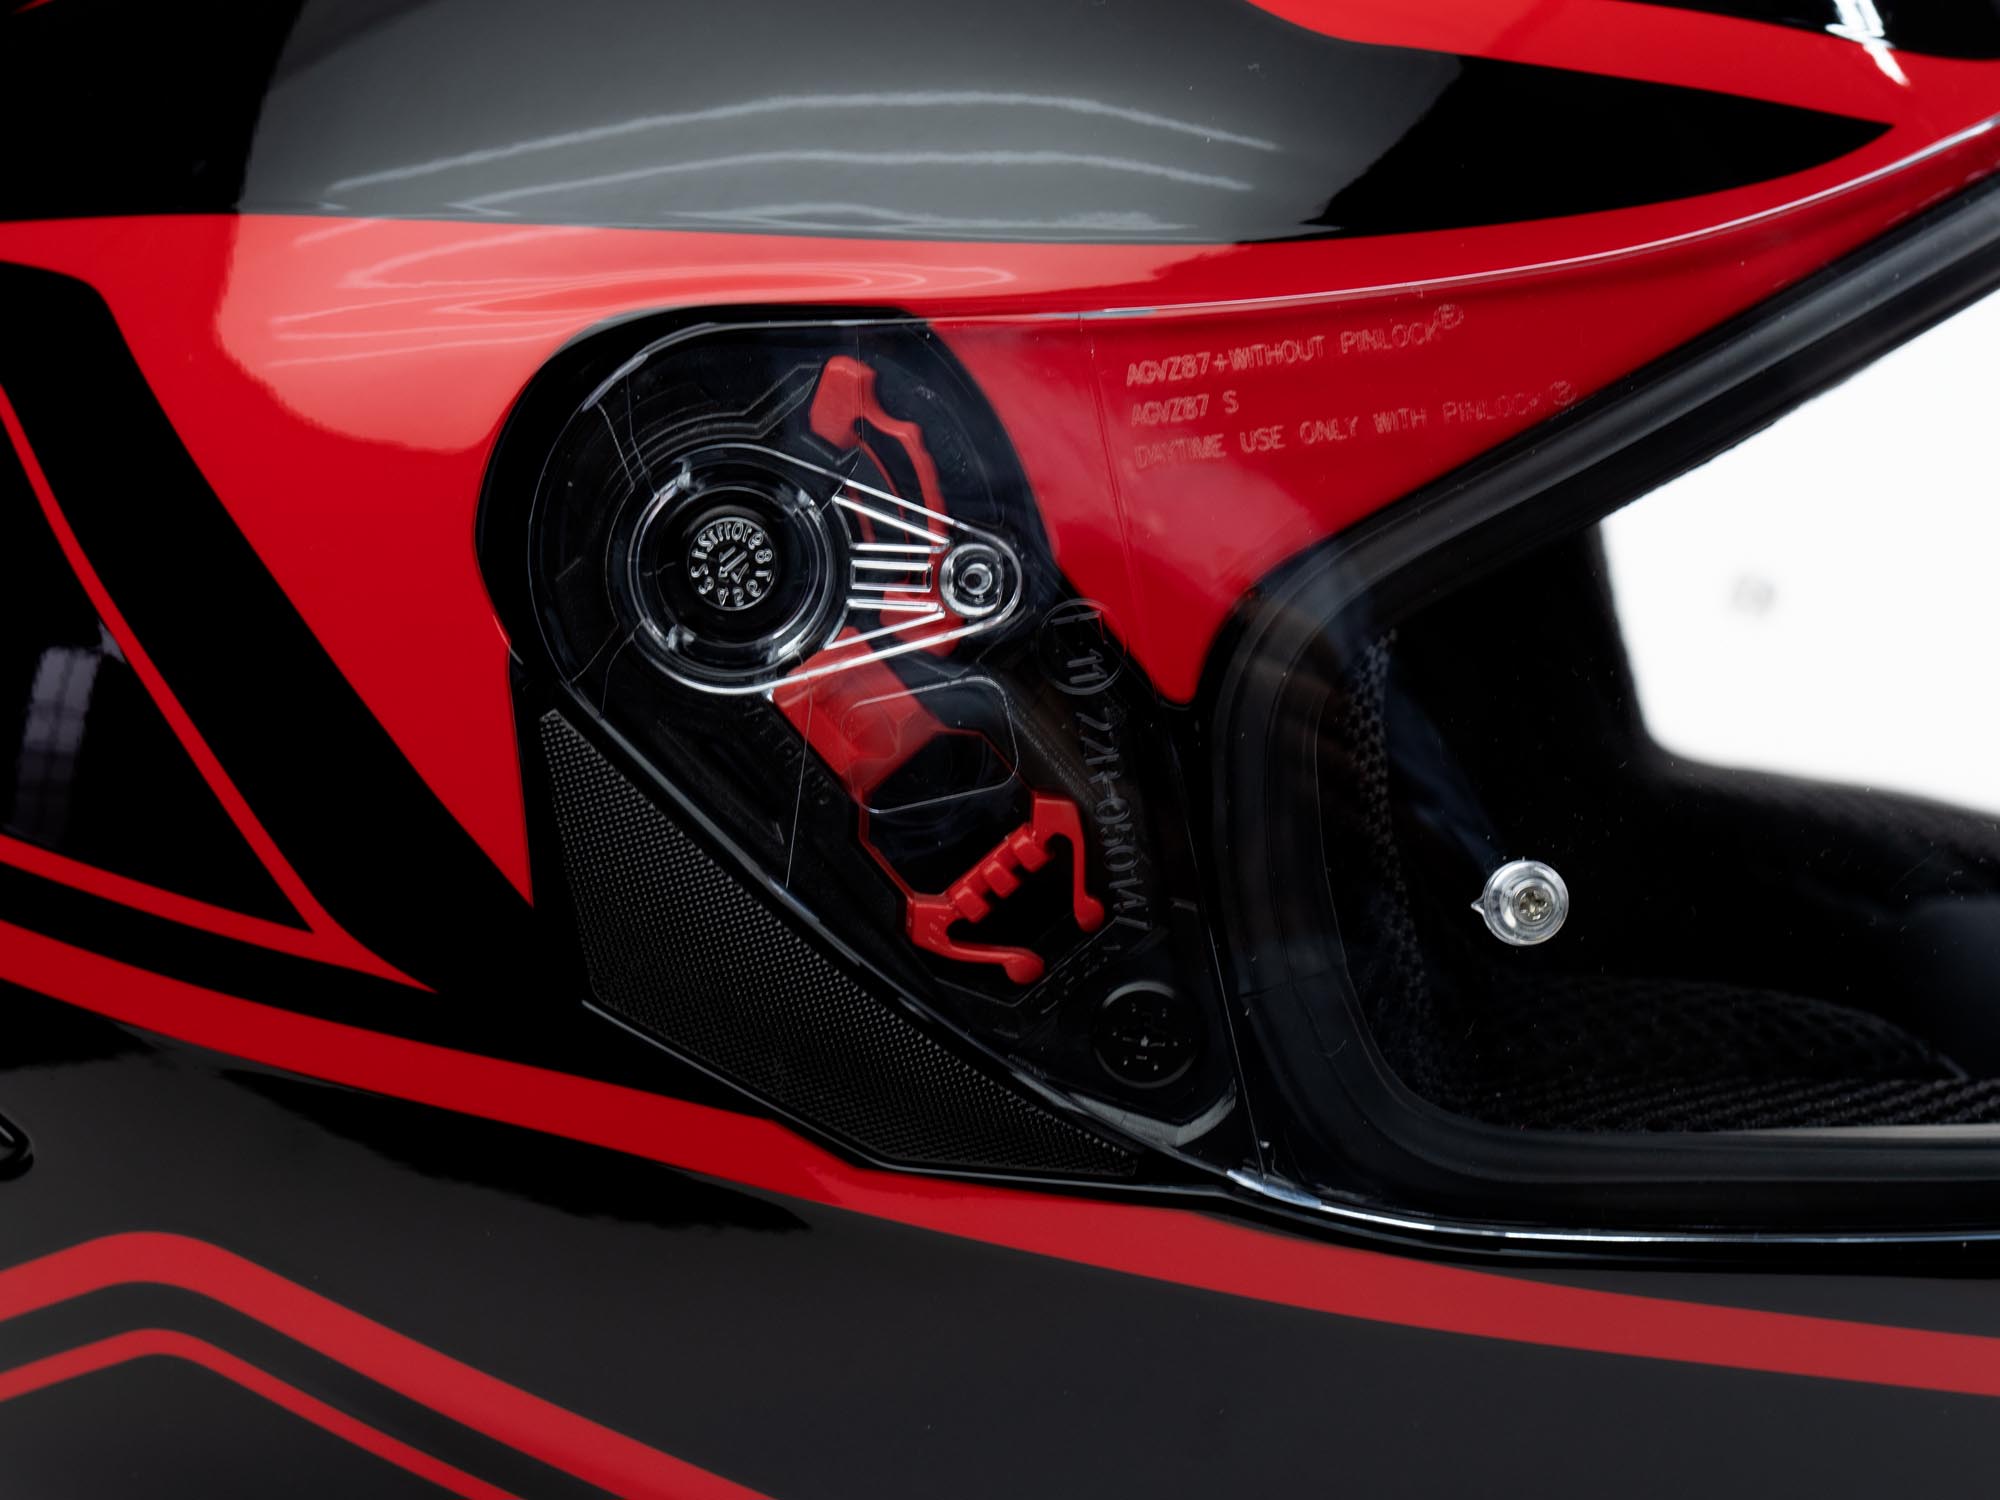
The visor is “pinned” to accept Pinlock inserts and a clear insert is included. I’m a huge fan of these inserts and it’s very effective at preventing fogging in the cool winter air. The actual placement of the insert, in this case, leaves something to be desired. The top of the insert is plainly visible at the top of one’s vision and is a bit distracting when leaning in towards the tank.

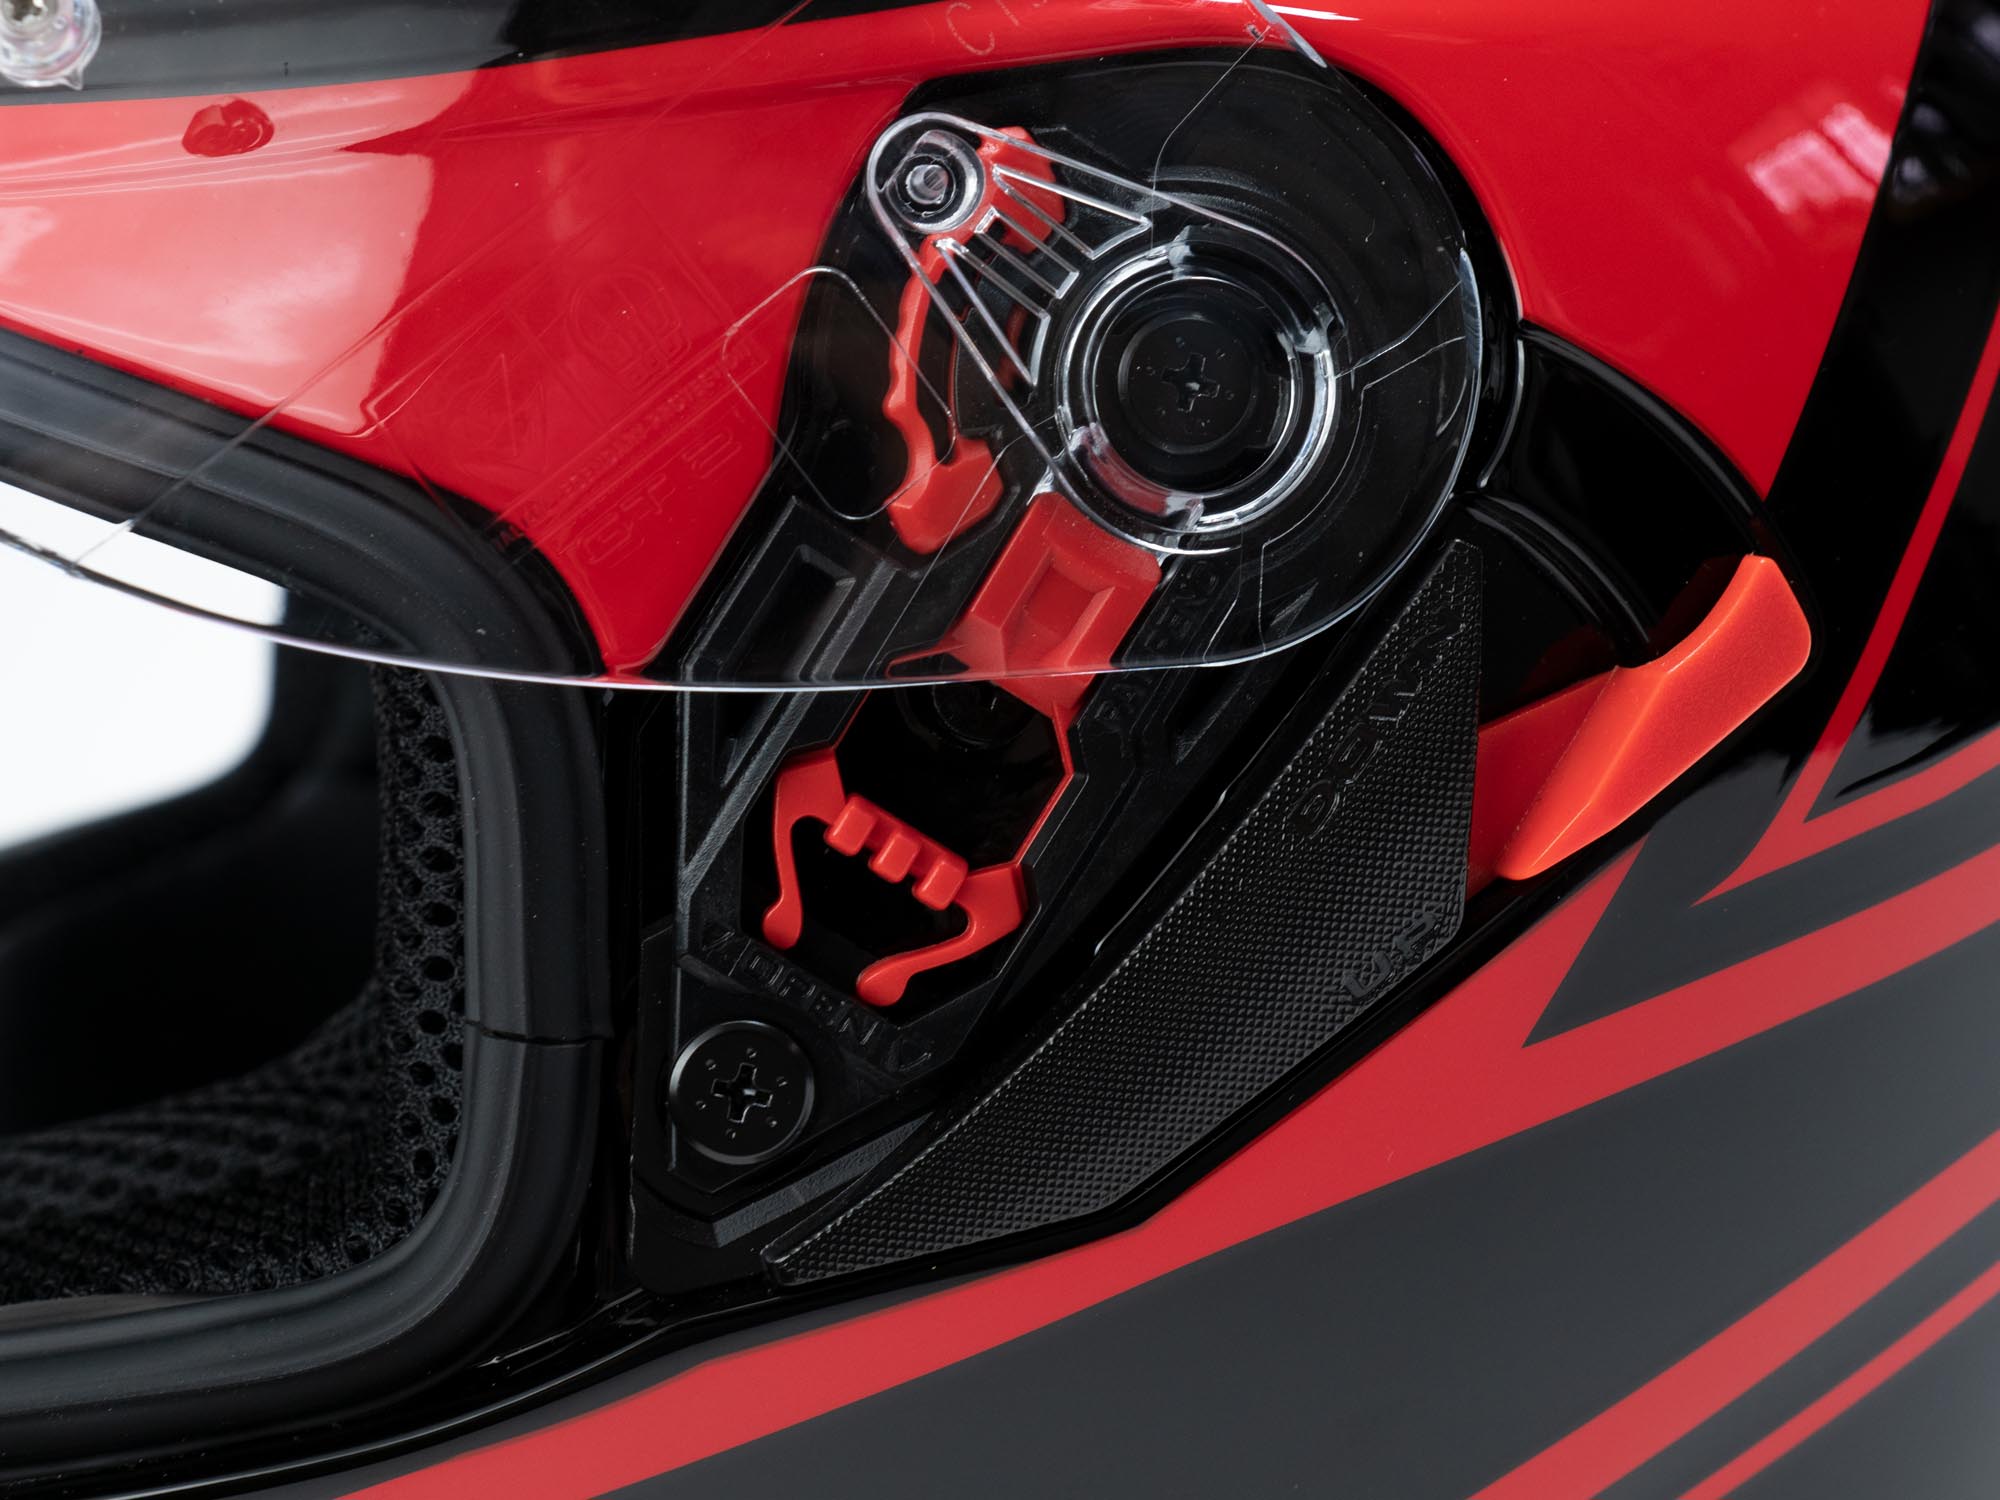
The main visor moves up and down smoothly with strong detents and has a nice quality feel to it. One can even customize the detents with the included parts which we’ll look at in a second.

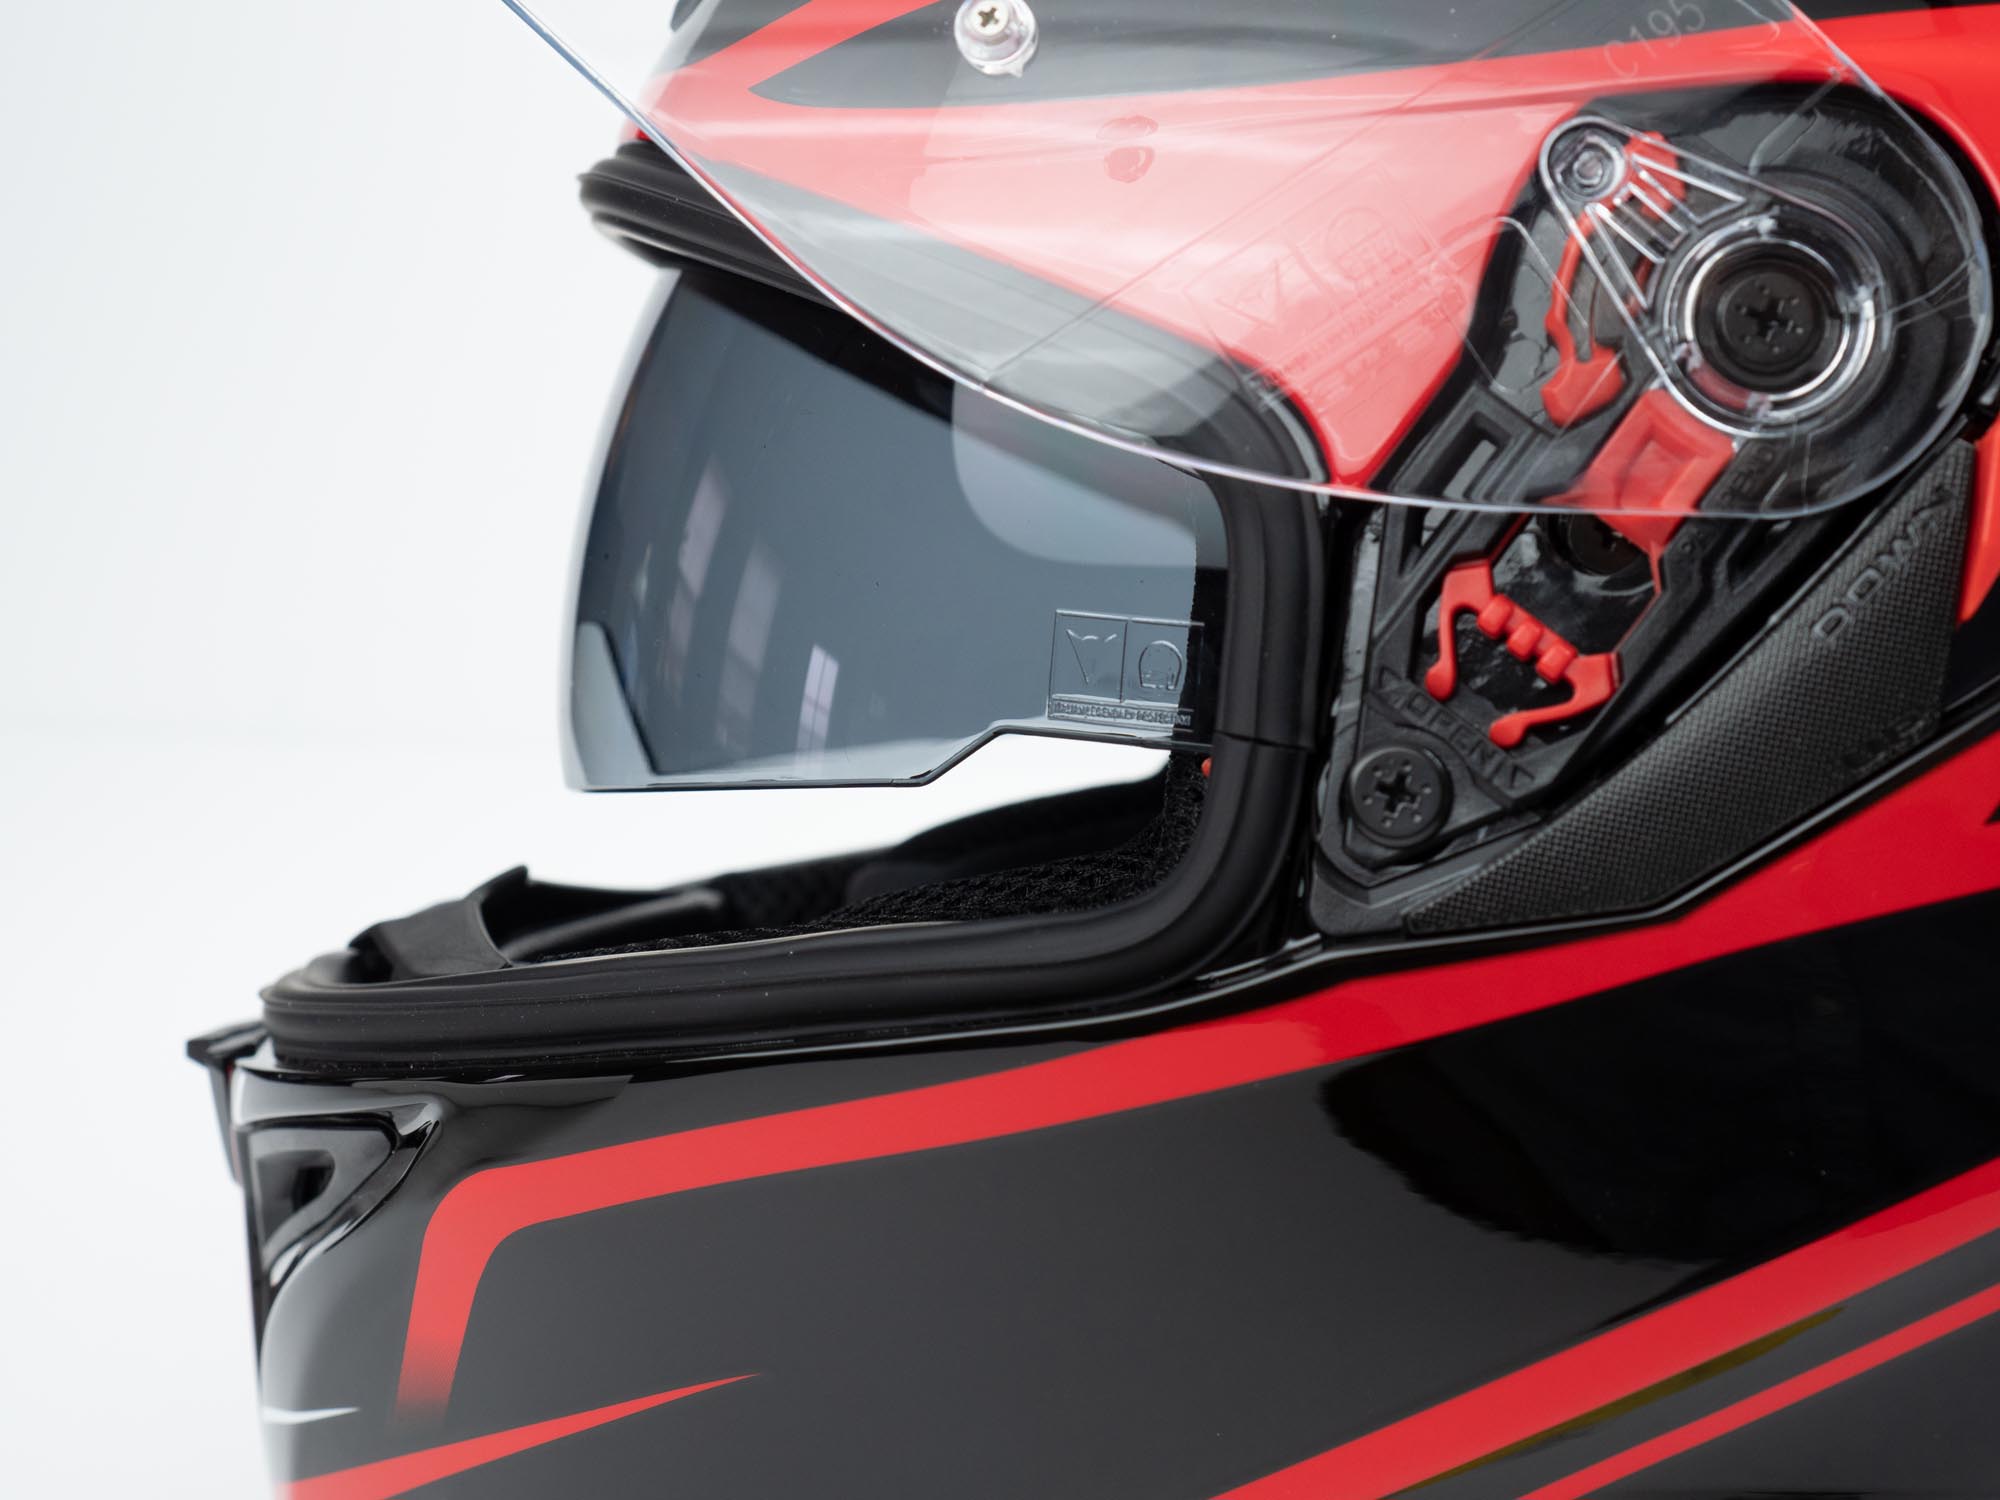
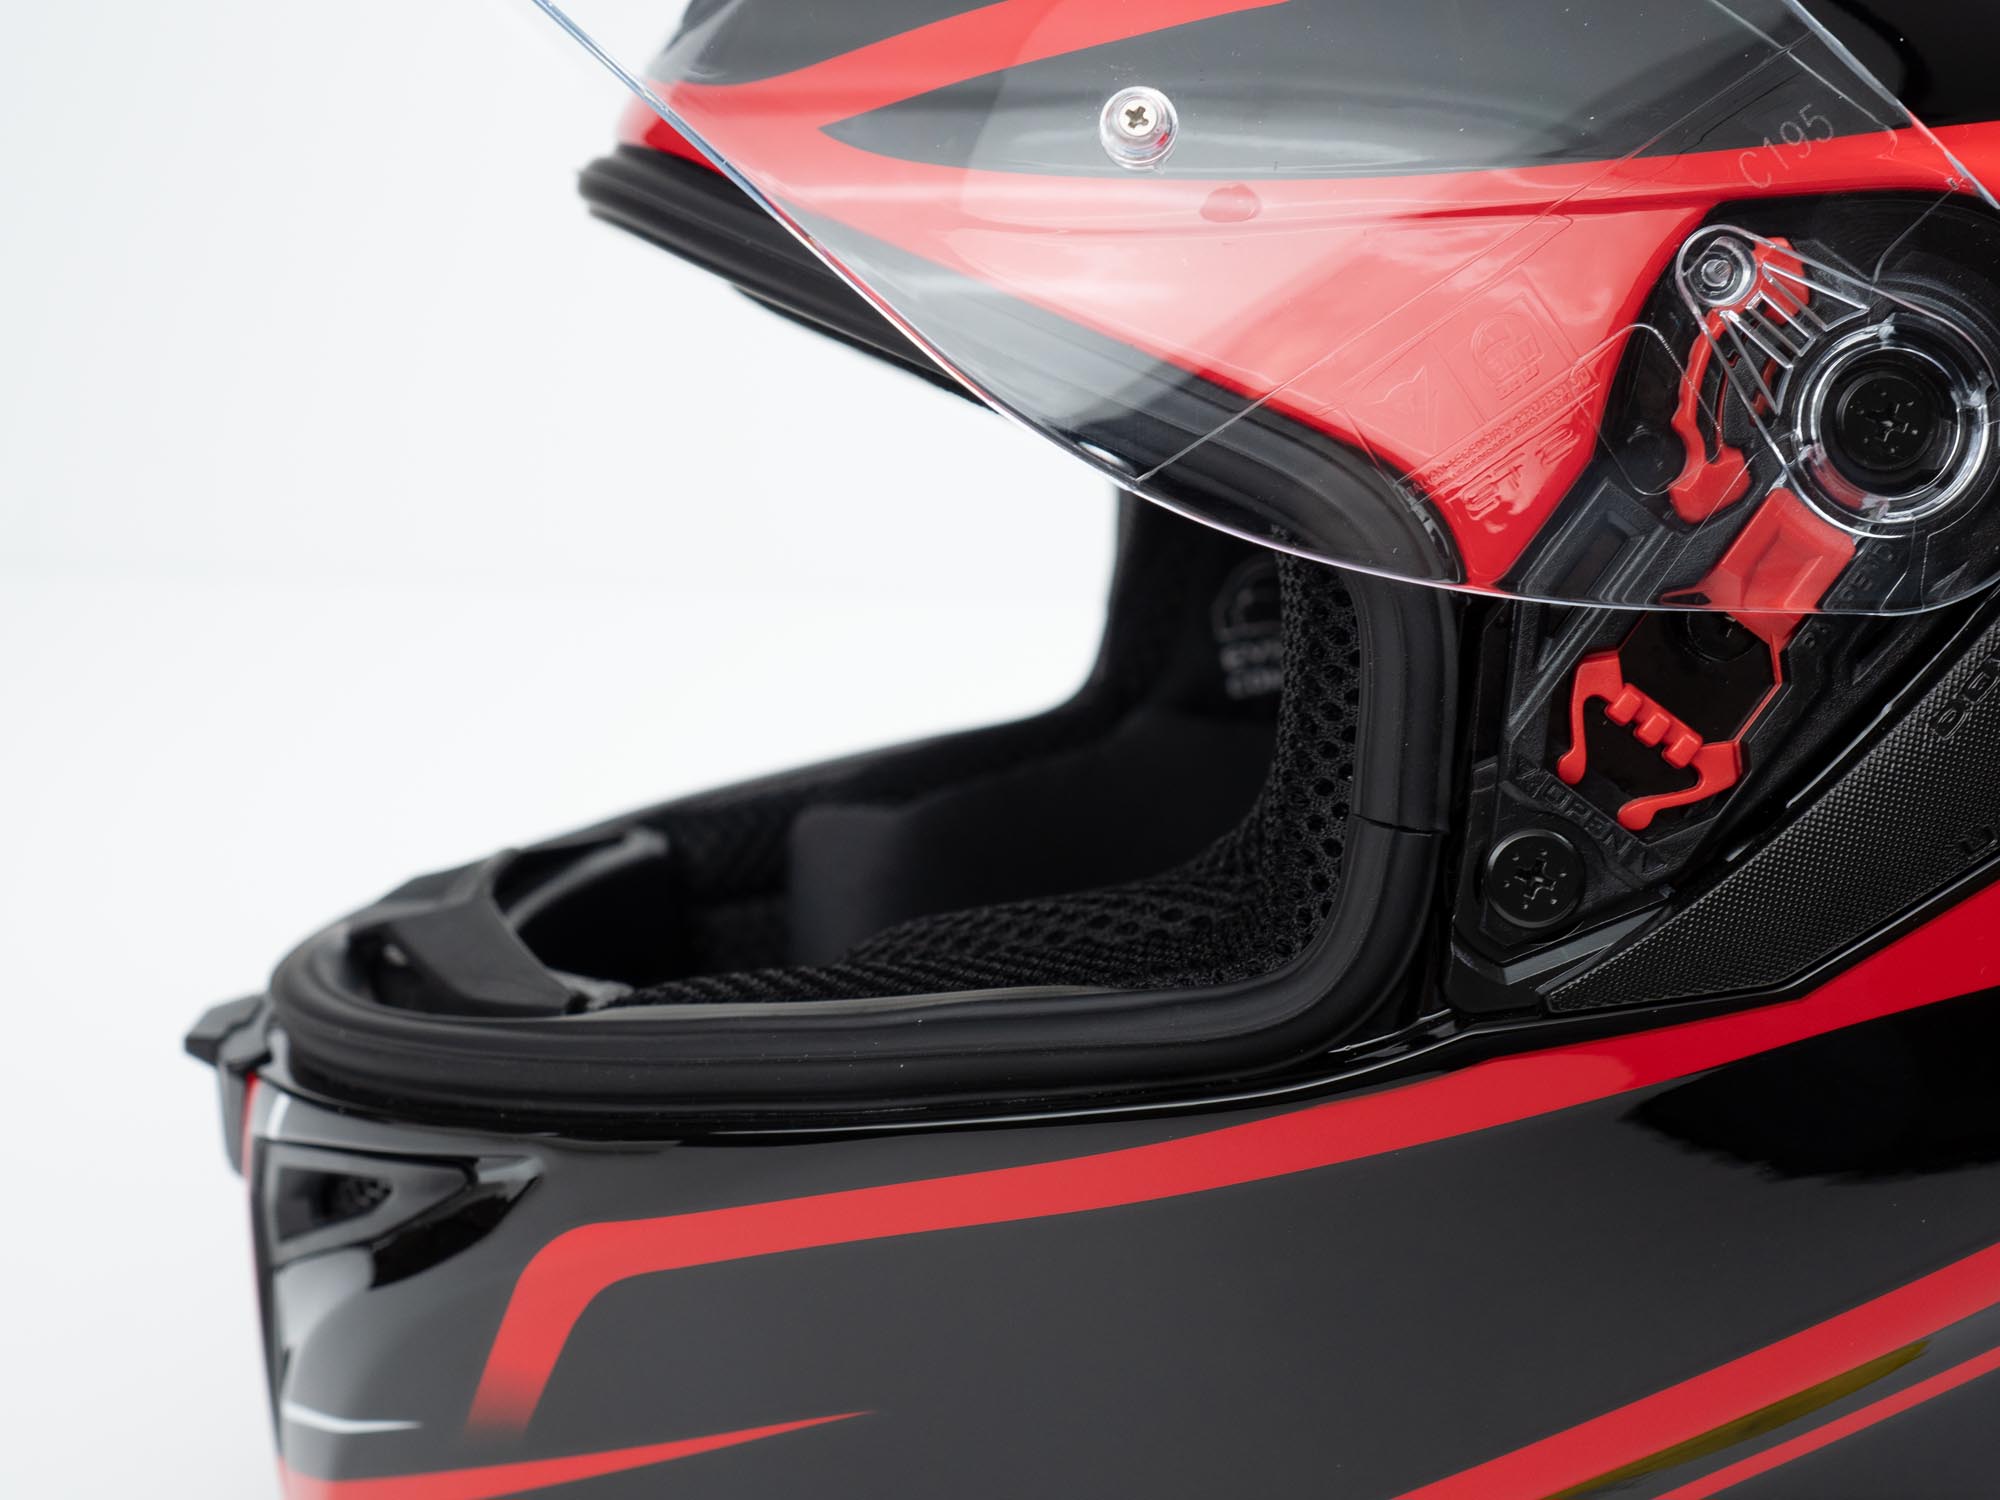
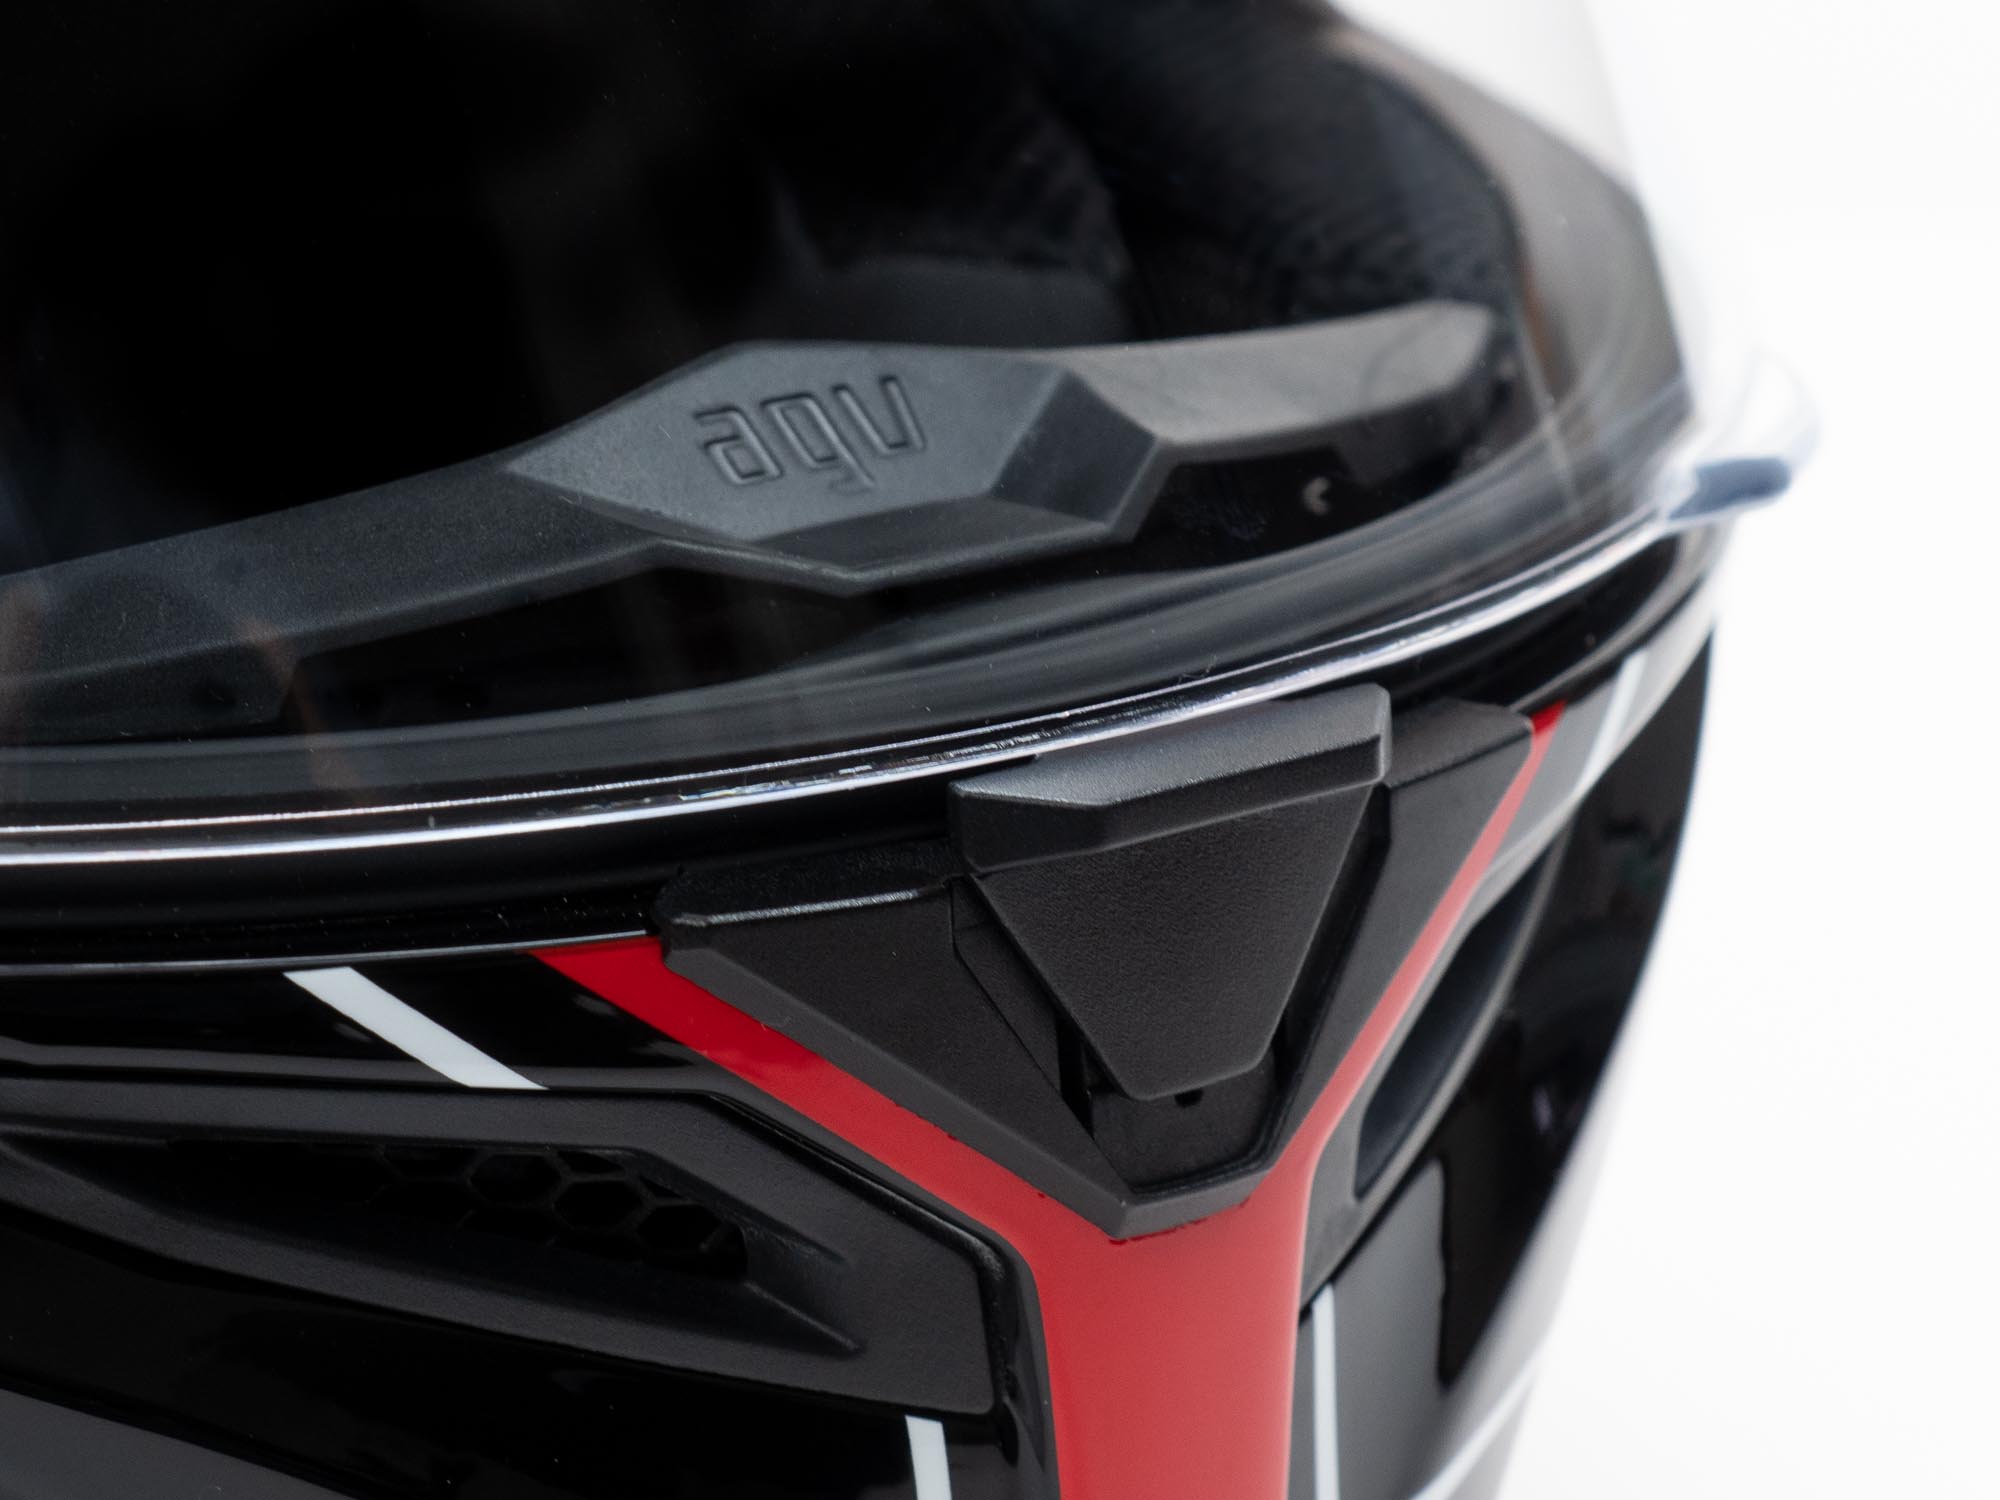
The drop down visor is employed via a lever located in the left side pod behind the main visor pivot point. The lever takes some effort to move as it is very short so some extra torque is required to move it up and down.

AGV K5s Helmet visor lever and locking system

The drop down visor itself is a little light for my tastes. While many of these sun shades are often not as dark as we would like, this one seems a little lighter than others I’ve used. Also, I would prefer the visor drop down farther than it does. It is still effective but the gap between the chinbar and the lower portion of the sunshade is larger than I’m used to seeing.
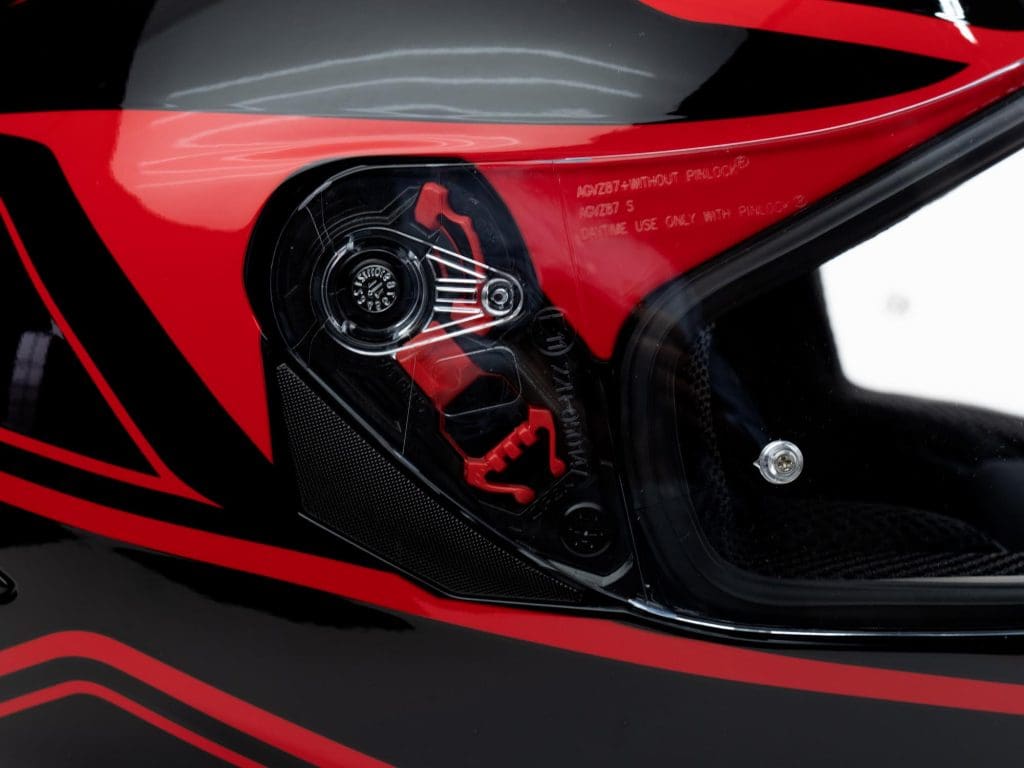
Visor Sealing

Initially, I wasn’t impressed with the way the visor sealed, or rather, didn’t seal. The top edge stood out just slightly away from the eyeport gasket when the visor was fully closed. This induced some whistling noise and I could feel some air bleeding in from the top of the visor.

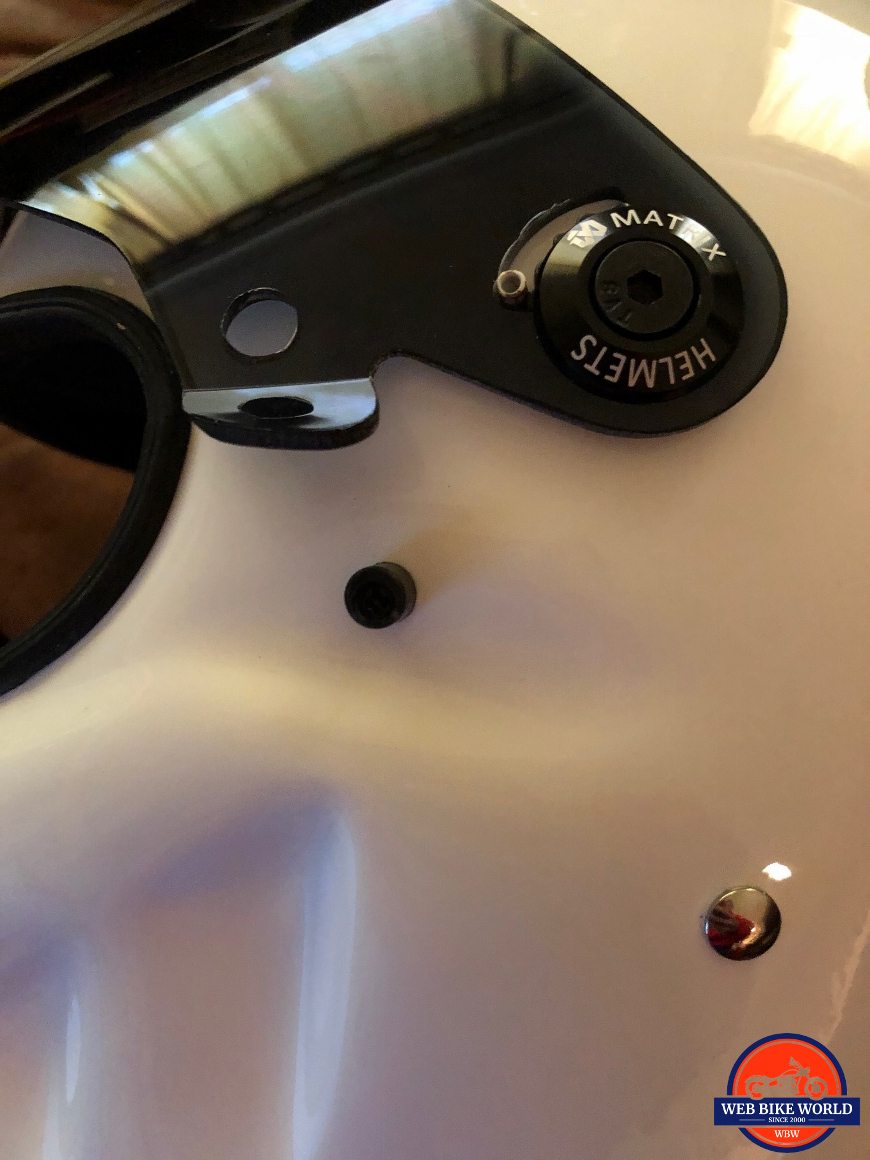
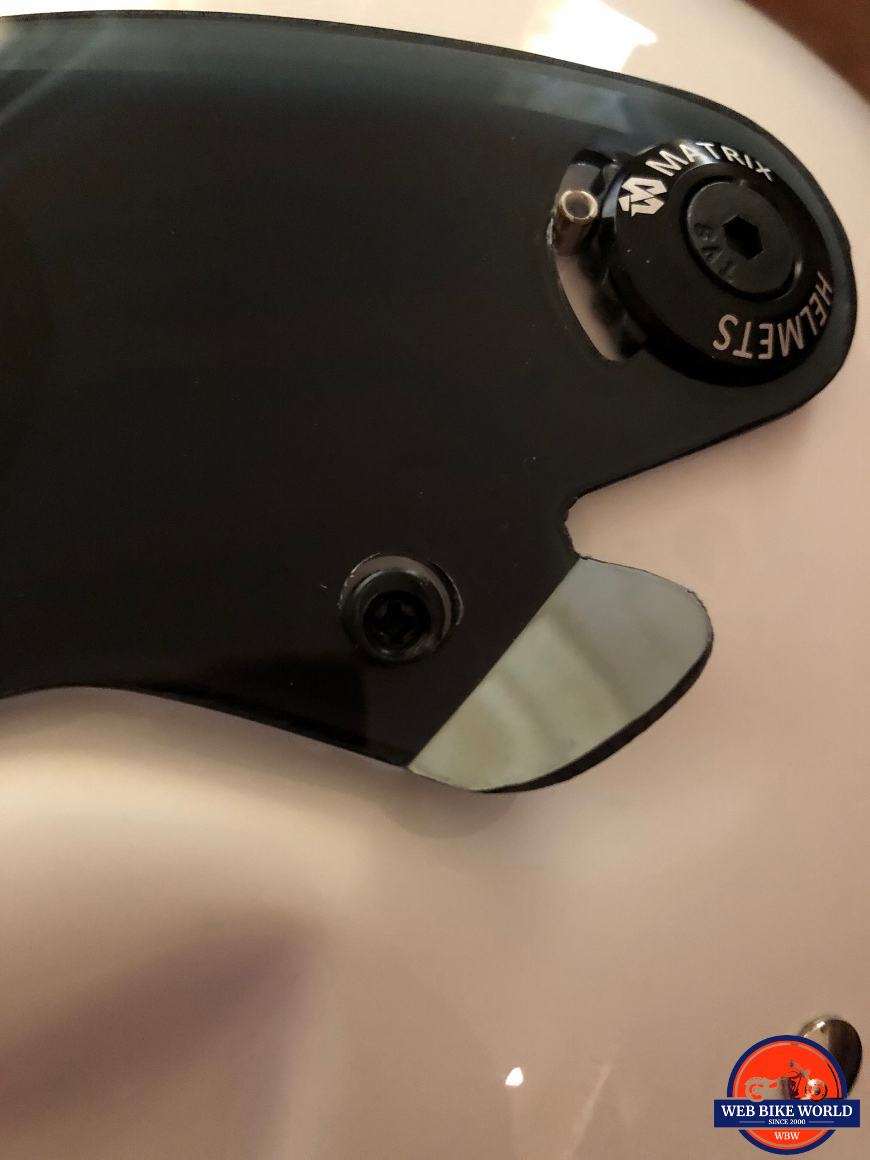
Fortunately, AGV uses sidepods that can be adjusted. With the visor removed, the screws that attach the side pods can be accessed and they have enough play to allow one to slide the pod around little. This was more than enough for me to get the visor to stay against the gasket when closed.

A few minutes of adjustment was certainly worth the result as it is sealed tightly. I want to be clear that I don’t know that AGV recommends doing this (perform this adjustment at your own risk).
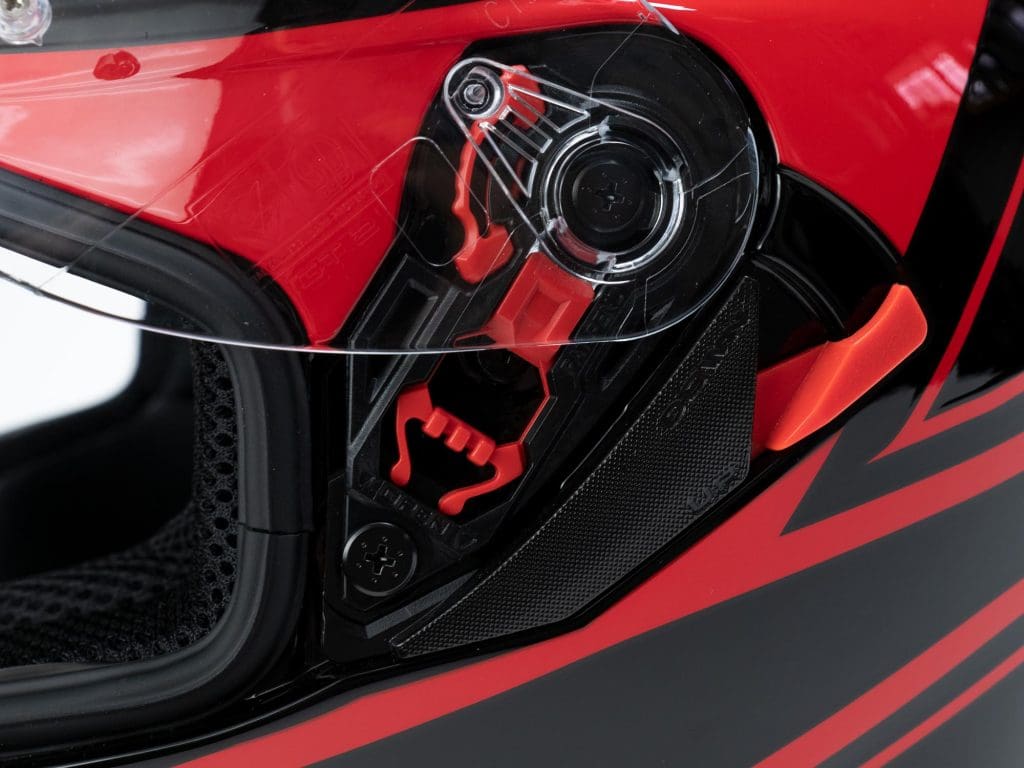
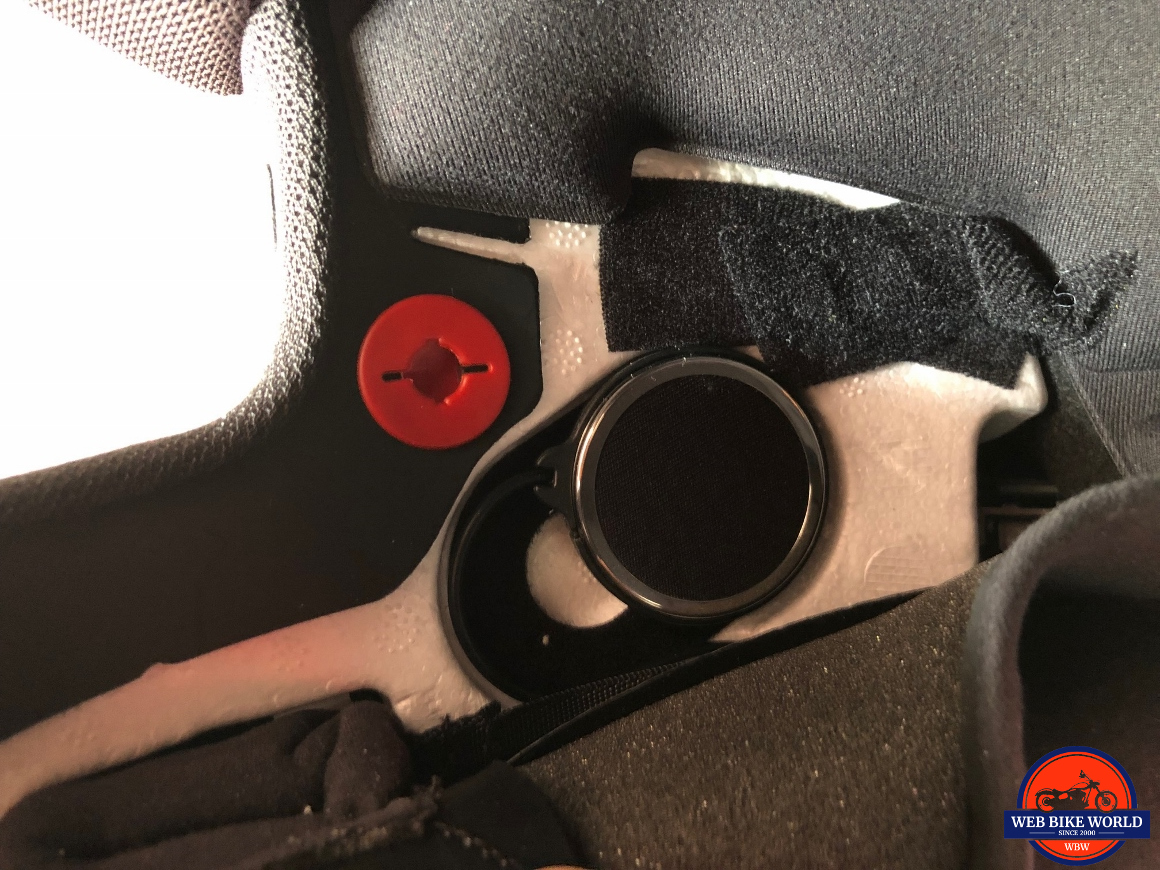
Custom Detents

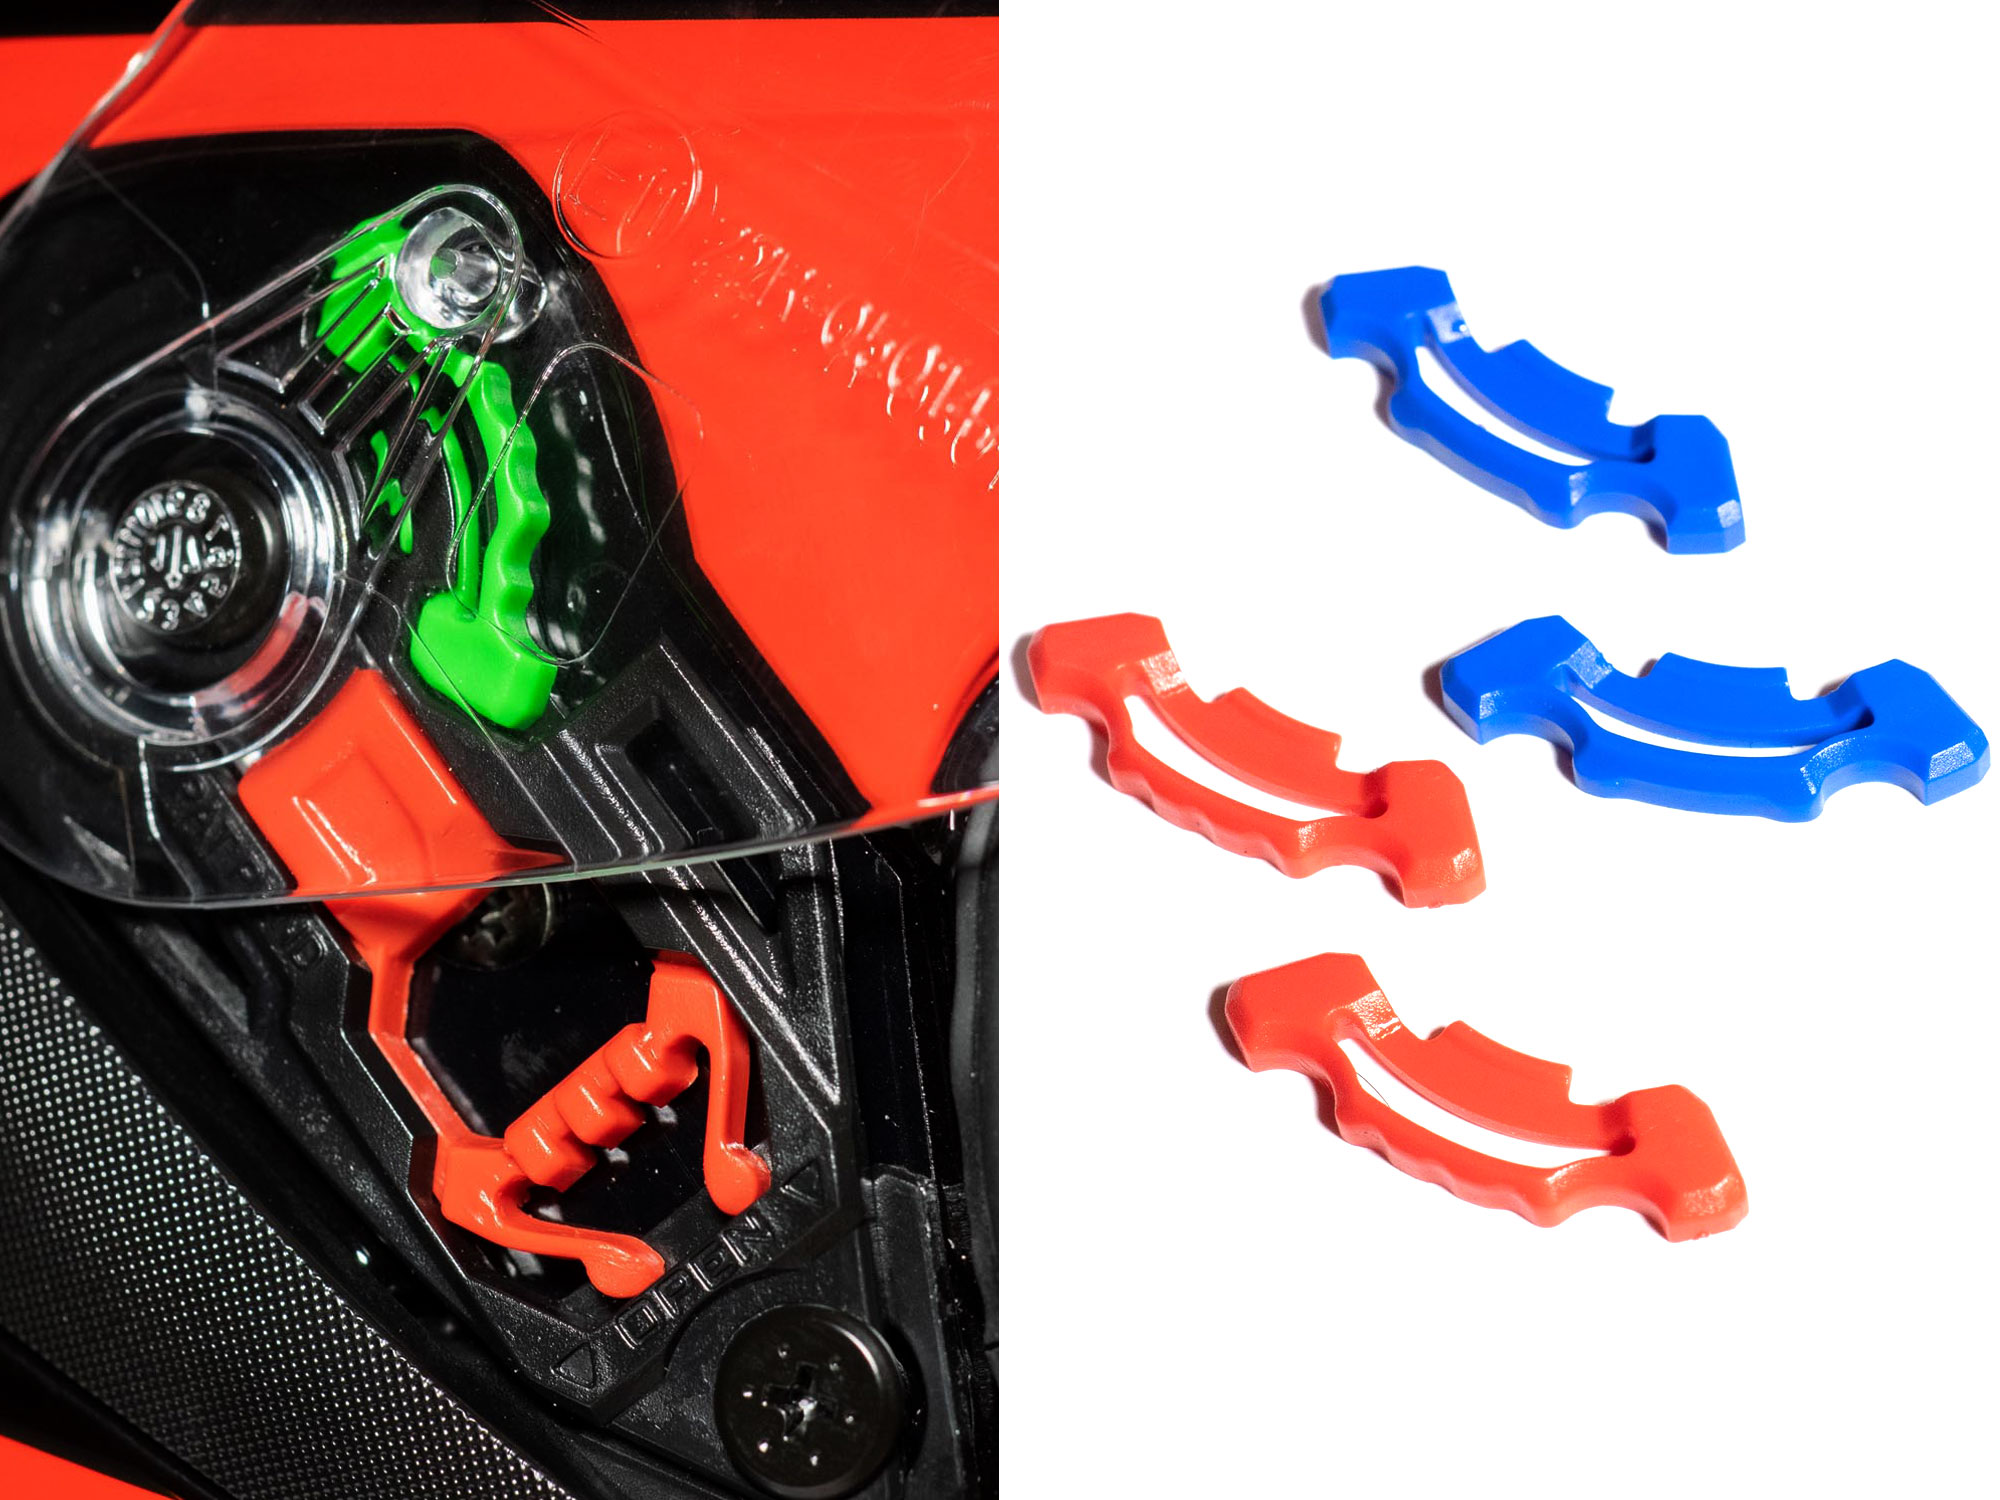
AGV includes an interesting custom adjustment for visor positioning on the K5 S. Included in the box with the helmet are two extra sets of “detents” that can be installed in the side pods. The installed one (in red) provides four positions of opening including open and closed. The initial opening is pretty large at about two inches (about 50mm) making the demisting slider necessary to have a tiny opening.

The green detent set provides five positions with the first being a small 12mm opening to let in a bit of extra venting. This one might be nice for hot weather to get some extra ventilation. The blue set of detents simply has a fully opened, closed, and middle position. I like this inclusion of custom pieces so riders can adjust the visor to their own tastes. The pieces are easy to install and I don’t see it costing AGV that much to include them. It’s a nice touch.
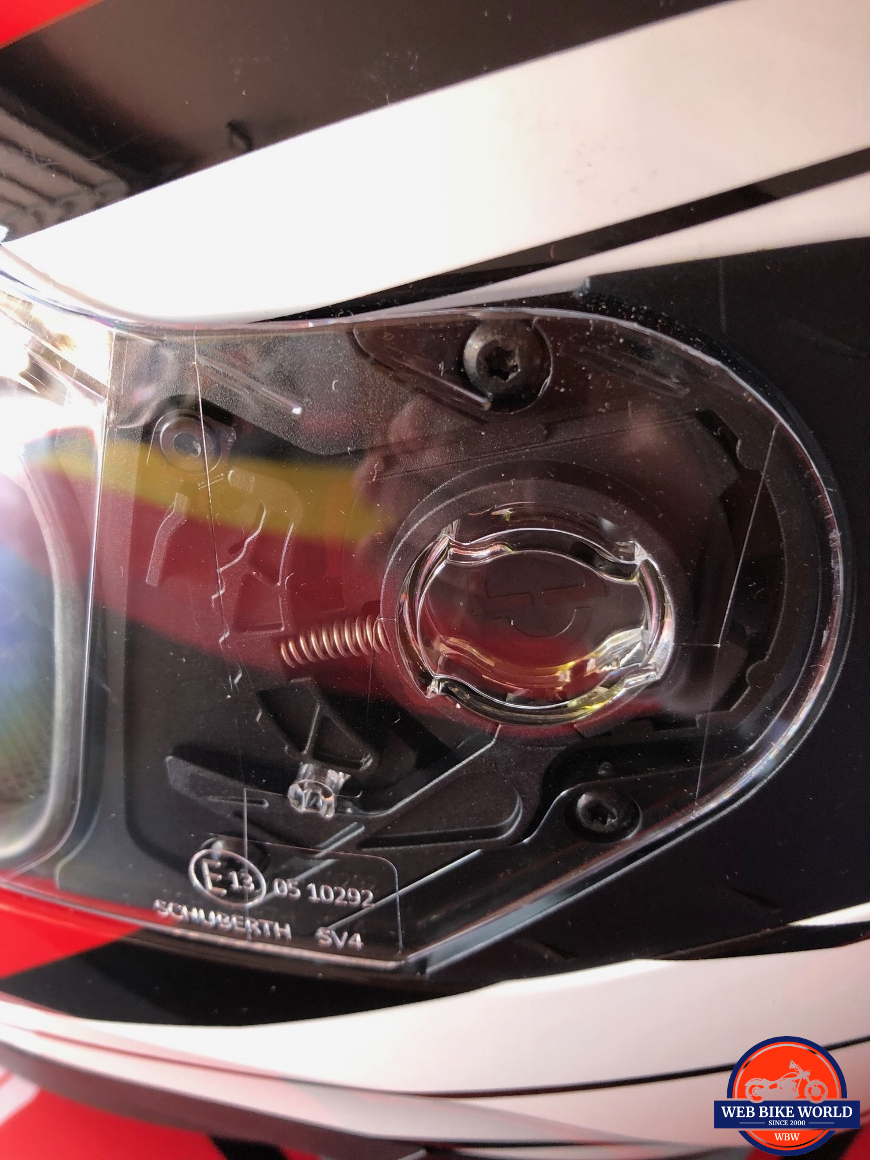
AGV K5s Helmet custom detents

Visor Removal

To get at those detents to change them, one must remove the visor. The visor removal system on the K5 S is pretty easy and it removes and installs positively. Simply open the visor to the largest opening, pull down on the red plastic “spring” and the pivot point on the visor should remove from the pod (sometimes it will pop out on its own).

Installing requires hooking one edge of the pivot point into the pod and then slide down the red spring again to put in the other edge of the pivot point. This sounds more difficult reading about it than actually performing the process.

AGV K5s Helmet visor

Optical Quality

The main visor is what I would characterize as average quality for a modern helmet. Much of the field of view is good with only some visible distortion. The upper ½ inch (12mm) or so shows more noticeable distortion characteristics. Not an issue for those rigging more upright to moderate lean. Tighter riding positions can place this portion of the visor into the necessary space one needs to see through.

The drop down visor doesn’t improve on the main visor with some minor, but more widespread distortion showing throughout the field of view. I would say it is average compared to most sun visors as these typically seem to get less quality control/attention from a lot of manufacturers.

To be clear (yes, pun intended) I am picking at optical quality issues that many riders might never notice. Being a photographer and rather detail-oriented in this area I want to be sure I’m calling this out. Bear in mind my recent review of the Shark Spartan where I raved about the optical quality in both visors might have spoiled me due to their excellent optical characteristics.

Conclusion

There’s a lot to like about the K5 S and I found it to be one of the better overall helmets I’ve had the chance to wear. The very comfortable liner, the great fit, and the lightweight add up to a very good helmet for a long day in the saddle.

The ability to customize the visor opening detents and the excellent ventilation also make the K5 S one of the best lids in the price range in my opinion. The list price of $449.95 is expected for the feature set and composite shell. This particular colorway was available for the closeout price of $231.13 at 2Wheel.com which made this lid a steal.

As much as I like the K5 S, there are a few points that let it down keeping it from getting that fifth star in our rating. The optical quality of the visors could be better and the sunshade could come down further. Also, despite the overall finish being very good, the graphics have some minor alignment issues.

These issues are relatively minor to me and aren’t enough to keep me from making this my current everyday helmet. After getting the chance to spend the last two days riding in this helmet thanks to some favorable weather I highly recommend taking a look if you’re looking for a helmet with this feature set and in this price range.

AGV K5s Helmet interior closeup

Pros

  • Very lightweight composite shell
  • Outstanding ventilation
  • Clear Pinlock insert included

Cons

  • Drop down visor could drop more
  • Visor optical characteristics could be better
  • Forehead vents covers could use some texture

Specs

  • Manufacturer: AGV
  • Price (When Tested): $399.95 solids / $449.95 graphics (Model tested $231.13 on closeout)
  • Made In: China (Designed in Italy)
  • Alternative models & colors: Black, White, Black Matte, Various Graphics
  • Sizes: XS, S, MS, ML, L, XL, XXL
  • Review Date: February 2019

Shopping Now? We Recommend:

webBikeWorld has recently partnered with 2Wheel.com. When you purchase an item via our affiliate link, we receive a small commission. These commissions are how we run our site. Thank you for supporting us.

2WHEEL

Buy This Helmet on 2Wheel

AGV K5 S Helmet Image Gallery

The post AGV K5 S Helmet Hands-On Review appeared first on Web Bike World.

Categories
Gear Reviews Motorcycle Clothing Reviews Other Motorcycle Blogs review Web Bike World

Aerostich Women’s R-3 One Piece Suit Review

A Pleasant Suitprise

Looking for the Right One

I love trying out new gear and this was the first taste of riding suits for me with a long term hands-on test, so I will admit to being pretty excited. But as I looked at the website, my excitement began to wain as I discovered that I was a bit confused about what to order.

There is always a level of uncertainty when placing an order for an item without trying it on or having a great frame of reference, and with a price tag of over a grand, I wanted to make the right choice to ensure a fair test of their gear but also my continued fun and enjoyment of putting the R-3 to the test.

So this is my one ding on Aerostich and as you noted above, it accounted for .01% of my overall impression of the company. The online sizing guides are all for the Roadcrafter (the R-3 in my case) is all in men’s sizes even though they offer ladies suits. In their defense, they do have a note in big red letters saying to call the listed 800 number for assistance with ladies sizing. And I hate to admit it but I was reluctant, due to my stubborn streak. But in fairness to the product, I made the mature choice and made the call.

Working With the Aerostich Team

In my opinion, every company and every person makes mistakes. That’s just what happens from time to time as humans. But what really defines a person or a company in my mind is how they handle those mistakes. Granted, I would have loved a ladies size chart and the ability to click a button, order my suit and go on with my day but had that occurred I would have missed out on an awesome experience.

My call was answered by Jill, an awesome member of the Aerostich team. She was able to talk me through the initial sizing process as well as the overall ordering process. I must also add here that I was very happy to speak to about the sizing issues and questions that I had about their products. I didn’t expect to speak to a woman and was dreading trying to explain certain aspects of fit to a guy. Somehow I always feel like my concerns about pinching and tightness in the thigh and seat area don’t compare to a guys concern with pinching in the crotch area.

Fortunately, I avoided that debate by speaking to Jill. And after we came to an agreement on the size that I needed, she asked to place me on a brief hold to double check out the selection with another lady on the team who has a great deal of experience in ladies sizing. It was a true team effort but we agreed and I was ready to check out the sample suit that was being sent to me.

Aerostich is really all about providing a custom fit for their apparel which is great for riders who are investing in these top quality pieces of gear. The first step was the sizing but the item that was being shipped to me was only a sample in a generic size that I was to test fit. When it arrived I tried it on, sat on my bike and tried to decide exactly what I liked and didn’t like about the fit. Again, Jill was a wealth of information in determining what I needed as opposed to what I thought I wanted.

She suggested that I send her pictures of me wearing the suit in a riding position as well as just standing so that her team could evaluate the fit. From those pictures and my comments about bunching and bulk in some areas, they were able to explain to me exactly what I needed.

Wearing the sample suit standing up and in a riding position

Custom Alterations for the Perfect Fit

As it turned out I needed the size that they recommended but with the following custom alterations:

  • Additional forward rotated sleeves
  • Custom sleeve length by adding .5 inches above and below the elbow
  • Custom leg length by adding .5 inches above and below the knee

When MY suit arrived just a short time later, I was blown away with the fit from the alterations that I thought were minor by truly created a customized suit for me. I have never had another gear experience that even came close to working with Jill and the entire Aerostich team.

The closest that I can come to comparing the experience is buying a Mercedes vs. a Maybach. Both are reputable products, but the level of customization and customer service provided with a Maybach is just in a class by itself. There are features and added extras that no one else offers and that is how I look at the R-3 from Aerostich.

Reasonable Pricing

The R-3 sells for $1,197.00 which sounds somewhat steep until you look at other riding suites from Klim or FXR that can range from $675 to $1,299.99 and you are buying an off the rack suit that will fit, um, ok I guess if you are lucky. And as you read on you will learn that the size is not all that you can customize on your R-3 suit. But what it really comes down to is that for just under $1,200, you are getting a quality product for your money, and one that is made in the United States.

Aerostich R-3 One Piece Suit Features

AEROSTICH R3 ONE PIECE SUIT BACK VIEW

The R-3 is a 100% waterproof riding suit that is designed to be worn over street clothes. This model is unlined for added comfort without sacrificing durability and waterproof quality.

The fabric is Aerostich’s exclusive mil-spec 500d Cordura GORE-TEX which is highly abrasion resistant. There is also a double layer of this fabric across the seat for added protection. The elbow, should and knee areas are covered with an additional layer of 1000d to reduce the potential for injuries in the event of a slide.

Fit & Comfort

Fit and comfort are not going to get any better than with a custom-tailored riding suit. This feature eliminates a lot of the issues that many riders, especially the ladies encounter when buying gear. Most ladies find it challenging enough to find separate pants and a jacket that fit so the thought of a full riding suit is a bit unrealistic. The challenge is normally large enough hips and bust area without sleeves and pant legs that need to be cut off or rolled up. But the Aerostich process provides a great alternative.

What I will add is that the fabric is thick and somewhat rigid when the suit is new. It’s similar to wearing new blue jeans or a new leather jacket that needs to be broken in. But with more wear, the suit becomes more and more comfortable and customized to the shape of your body and its motions. Invest the time in breaking in this suit and barring an accident, you will have a great riding suit for life.

Starting At the Top

The R-3 offers a fold-down dual height collar that will tuck inside the back of a helmet on cold wet days and secure at the front with a velcro strap or it can be folded down in nice weather.

But you don’t need to worry about that extra large collar becoming an annoyance in the wind thanks to the removable rare earth magnets that are in the collar and the chest of the suit. The collar tips lock in place and remain there even when you are enjoying a nice pace on the open road. Three additional snaps secure the rest of the collar when it is folded down.

The shoulders are the first place you will encounter the TF3 viscoelastic impact armor. This unique material provides more resistance to the harder and faster it is struck. This allows the armor to remain soft and pliable when riding but instantly become far more resistant on impact to provide you with maximum protection and comfort. The same TF3 armor is inserted in the elbows as well.

The cuffs offer zipper closures and ample velcro for adjusting to fit over any size or configuration on gloves that you might choose to wear.

Not Only Custom But Modular

As you might expect in a custom riding suit, the armor is also pretty easily customized as far as the locations of the shoulder, elbow and knee pads. A huge amount of velcro is offered in the suit to allow riders to relocate and refit the armor as needed. This not only adds to the comfort of the suit while riding but also the safety benefit in the event of an accident. This is just one more feature that is not offered in most off the rack suits but is a part of what you get for your money with the R-3.

Ending on the Bottom

Due to the customized sizing, the seat area of this suit is amazingly comfortable when riding. Space is ample for a relaxed riding position as well as a more sporty racing tuck is you are intent on making up some time. There is also a panel of velcro for riders who would like to purchase the optional hip protection which is also a TF3 material. At the back of the waist, there are large velcro adjustable straps for customization above and beyond the level of the elastic.

The knee protection mimics the elbow and shoulder protection in that it is TF3 and very adjustable to meet the needs of different riding positions on different bikes or even different street clothes worn under the suit. The pant leg cuffs offer a snap closure as well as velcro for a fully customized fit.

Easy Access

A big factor in the level of satisfaction with a riding suit is how easy it is to put on and take off. Aerostich did not miss this important bit of news. The R-3 offers a full zipper that runs from the collar to the cuff of the left leg. The right leg offers a zipper from the cuff to the top of the thigh. The recommended “entry’ into the suit is far less complicated than you might imagine. With both the full zipper and the right leg zipper fully open, simply step into the right leg and lift the suit up to put it on your upper body like a jacket.

The full-length zipper is actually a double pull zipper so that you can have an opening at the bottom of the leg if you wish as well as being able to zip down a bit from the collar. An unexpected bonus is that the zipper starts at the collar rather than the leg cuff so you are not trying to bend over and “start” the zipper down by your feet once you have the suit on. Aerostich includes a page of tips with the suit and one of them advises to suit up a few times in front of a mirror so that you can develop muscle memory for starting the zipper.

Pockets & Storage

The R-3 is a little like one of those pictures where you have to find the hidden items only here you are discovering the amazing amount of storage and cargo space that are worked into this riding suit. The pockets begin with an exterior chest pocket on the left that is secured by a reflective flap with velcro. This pocket also conceals a mini-carabiner helmet holder. The right chest area offers a large zipper pocket that offers a pocket within a pocket to keep your phone secure.

The two front cargo pockets offer velcro secured top flap closures and conceal side access pockets as well. And the final flap on each hip is a cover for the water-resistant zipper openings which allow access to pants pockets but block out any moisture. There is also an additional outside pocket on the right leg just above the knee which is secured with a zipper. The final pocket is located on the right forearm and has a zipper closure.

In addition to the myriads of external storage, Aerostich offers a set of three optional inner pockets which attach to the velcro panels inside the R-3. These pockets can be purchased individually or as a set of three. All of these pocket offer velcro closures.

Ventilation

On the back of the R3, between the shoulder inset is a large reflective flap which doubles as the cover for the area air vent zipper (below). This zipper opens from both sides toward the center to allow for balanced airflow and to eliminate billowing in the back of the suit. The rear air vent along with the waterproof zippers under each arm allows for a huge amount of air flow to your upper body in hot weather.

AEROSTICH R3 BACK VENTILATION PANEL

In cooler weather, all three vents can be closed for warmth and will remain waterproof until they are opened. The dual pull main zipper also allows you to open both the neck area and the lower left leg for added airflow. The right leg zipper can also be opened at the cuff to allow for more airflow.

The zippers at the sleeve cuffs allow you to have a custom tight fit in cooler weather using both the zipper and hook and loop closure tab. But in warmer weather, the zipper can allow the cuffs to open a bit for added air through the sleeves.

Additional Items

Aerostich has thought of pretty much every possible scenario and has you covered with optional armor and pads that you can purchase to add even more customization to your R3. Additional armor pads for the hips, chest, and back are offered as well as replacement armor for the elbows, knees, and shoulders.

Even more, there are a few weather specific features that can be added such as a chest insulation pad for cold weather and boot covers that can be stowed in pockets at the cuff of each leg for relief from wet weather.

When you look at the R3 you will notice that there is an abundance of hook and loop on the outside of the suit. These strips are to mount the extra pouches offered by Aerostich such as the sleeve window pocket and the thigh window pocket. Adventure riders will love the sleeve pocket for a compass or even a watch. The thigh window pocket is perfect for a map or other notes that you want to be able to glance at while riding.

Below are the internal hook and loop strips for optional armor.

AEROSTICH R3 INTERNAL HOOK AND LOOP FOR OPTIONAL ARMOR

Possible Alterations

Aerostich offers a wide variety of alterations if you are interested in a truly custom fit. In my case, the sleeves and legs were where I required some help, but there are many more options to meet the needs of any and all riders.

  • The sleeves and legs can be altered both above and below the elbow and knee respectively up to 3 inches.
  • The sleeves can also be rotated forward for a more sport bike friendly riding position.
  • The upper body gusset can also be altered. The triangle from the waist to the sleeves and up to 2 inches can be added on each side.
  • A built-in ellipse can be added at the lower back to allow for a more forward lean for sport bike riders.
  • Finally, a jacket hem flair can be added to provide a looser fit at the hips.

While all of this information makes very little sense to most of us riders, it is helpful to know when you are trying on a standard size suit to know the areas which Aerostich can increase or decrease the size to accommodate your body size and shape. It is also important to remember that a few quick pictures and the team at Aerostich will most likely know what you need in the way of alterations even if you are unsure.

Pre-Alterations

AEROSTICH R3 ONE PIECE SUIT FRONT VIEW SAMPLE FIT AEROSTICH R3 ONE PIECE SUIT RIDING POSITION SAMPLE SUIT

Post-Alterations

The Verdict?

Overall, my impression of Aerostich and the ladies R-3 one-piece suit is that I am very impressed with both. The company goes a step above when it comes to customer service which is what should be expected of a manufacturer of high-quality products.

Due to the required protection and durability of this suit, there is a bit of a breaking period with the material, not unlike any thick jacket or other types of suit. But as the suit is worn more, the fit and comfort level gets even better.

The Aerostich Women’s R3 one-piece suit is definitely a product that is meant to be purchased and used for many, many years. There is a certain level of investment, but the cost buys a very high quality, American-made product, as well as a company that stands behind their gear. I am very than impressed by the level of service and attention to detail from the entire staff of Aerostich and that attention to detail definitely shows in their products.

Pros

  • Excellent coverage/protection
  • Good abrasion protection
  • Full custom sizing
  • Adjustable armor mounting
  • Great airflow
  • Quality construction and materials
  • Ample storage/pockets
  • Waterproof
  • Full-length zipper access
  • Optional extra armor
  • Optional extra inner pockets


Cons

  • Requires some time – but worth the investment of the time
  • Above some rider’s budget
  • Lead time can vary so order before you plan a road trip

Specs

  • Manufacturer: Aerostich
  • Price (When Tested): $1,197.00
  • Made In: United States
  • Alternative models & colors: Black, Grey, Orange, Tan, Hi-Viz with Black, Blue, Grey, Pink, Red, and Hi-Viz Ballistic Color Choices
  • Sizes: Ladies 2-20 in Short, Regular and Long Lengths
  • Review Date: February 2019

Aerostich R-3 Pre & Post Alteration Pictures

Pre-Alteration with Sample Suit

The post Aerostich Women’s R-3 One Piece Suit Review appeared first on Web Bike World.

Categories
Gear Reviews Motorcycle Jacket Reviews Other Motorcycle Blogs review Web Bike World Women's Motorcycle Jackets

Icon Women’s Overlord SB2 Wild Child Jacket

I’m not one to shy away from that which is bold, so when Icon introduced the Overlord SB2 Wild Child, a full textile sport-specific jacket featuring turquoise/purple/magenta ombre with a zebra/ tiger stripe overlay… I was all in.

Icon Women's Overlord SB2 Wild Child

For reference, I’m wearing an XL in the photos and am a US women’s size 10/12 dress. I originally tested the jacket at 6000 ft elevation in the throes of winter.

Look, Fit, & Feel

Aesthetic

Clearly living up to its name, the Wild Child makes an extremely bold statement in both color and pattern. The colors are so vivid, they help make the jacket look and feel high-quality (think high-end motocross jerseys). If nothing else, it does the hi-viz thing better than hi-viz.

These colors do not blend into the surroundings, no matter what type of road you are on, and that makes all the difference when it comes to being seen. In other words, pink is safer (in the daytime)!

Icon Motosports Women's Overlord SB2 Wild Child purple motorycycle jacket

Fit

Icon calls the cut and style an “attack fit”, which means more streamlined and tight-fitting to the body. I found this classification to be 100% spot-on. Ballistic nylon, both smooth and accordion style (as often found in race-level apparel and one-piece suits) is strategically placed above, behind and underneath the shoulders and elbows to increase mobility.

There wasn’t an inch of room to spare in the torso or arms, but even so, it did not feel binding or constricting. Rather, it felt almost custom-tailored, especially if asked to stay put in a crash.

Feel

Appearances aside, I won’t ever be attempting any championship dance moves in the Wild Child. The jacket felt best while sitting in an aggressive riding position, which is exactly what Icon’s “attack fit” is all about.

Two features the Overlord SB2 Wild Child will never have are flapping arms and blimp-back effect, even at high speeds. With the vest liner installed, this jacket will hug you tightly and give you just enough flexibility to move around on the bike.

Fastenings, Storage, & a Fun Surprise

Main Zipper

The main zipper up the center of the jacket is Icon’s standard super-tough YKK. The teeth are rugged and the zipper pull is large enough to use even when wearing gloves. Because of the super-snug attack fit, getting the initial “connection” at the base of the jacket is a bit tricky but becomes second nature after a few fumbles, if any.

Wrist Double Zipper System

Dual YKK zippers are featured in the cuffs, allowing you to ride with the wrist completely closed, or back-zipped to expose the mesh for lower arm ventilation without compromising the snug fit around the wrist.

Icon did-away with snap closures at the wrist with the first reintroduction of the Overlord several years ago and the no-frills/no-issues theme rings true even today. Without snaps at the wrist, the cuff stays flush and snug, reducing the chances of failure under pressure and leaving more options for riders to choose from various glove styles.

Icon Motosports Women's Overlord SB2 Wild Child purple motorycycle jacket double wrist zipper.
 Icon Motosports Women's Overlord SB2 Wild Child purple motorycycle jacket double wrist zipper.

Pockets

Smaller YKK zippers are used to secure both waist pockets. The internal lapel pocket features an easy snap closure, which makes earbuds a possibility without fishing the cord through a separate port. There are two more internal mesh pockets (in the waist area) without zippers or snaps so you can get your items easily.

This isn’t the type of jacket you’d wear if you wanted to carry a ton of stuff along on your ride, but it does give you enough room for the necessities: a cell phone, a fat wad of cash and a lipstick.

Oh, and don’t forget to look for the Saint Christopher (patron Saint of the traveler) medallion, which comes standard – and cleverly hidden within a tiny pocket – in every Icon jacket and vest ever made.

Lining & Ventilation

Liner

The Overlord SB2 comes with a silky-smooth zip-in/out vest liner which might help with keeping your core slightly warmer on a cool evening, especially because there’s not much room for a hoodie underneath the tailored fit. The liner does not keep you warm in true winter weather.

 Icon Motosports Women's Overlord SB2 Wild Child purple motorycycle jacket

Ventilation

The core and arms of the jacket feature pinpoint laser perforation so small you might doubt it produces any airflow at all. Surprisingly, the perforation helps air easily move through the textile chassis, leaving you with a cooling effect as opposed to a blast of wind. As with anything else that has thousands of tiny holes in it, the Icon Overlord SB2 Wild Child is not weatherproof in any capacity. Wear in the winter at your own risk!

Protection

Icon Motosports Women's Overlord SB2 Wild Child purple motorycycle jacket.

Impact Protection

Always impressive is the full gamut of CE level 1 rated D3O armor that comes stock in every Icon jacket. Shoulders, elbows and even your back are protected by a flexible and energy-absorbing armor that is both comfortable to wear and strong in case of a crash (upgrading to level 2 can be done for $80). The armor is also easily removed, thanks in part to its flexibility.

Abrasion Resistance

The Overlord SB2 has a 100% textile chassis. It boasts the thickest/strongest material in initial impact zones (shoulders, elbows), a more “slippery” nylon over slide zones (trunk, back), and stretchy ballistic nylon in the areas least likely to incur an impact or extended slide (armpit, underarm, waist). I would categorize this as moderate abrasion resistance for the modern street rider. This material, combined with the attack fit profile, should hold up to a decent tumble or slide at surface street speeds.

Care

With the armor removed, just throw the SB2 in the washing machine on cold for a quick refresh (no dryer, though, so plan ahead). The jacket is sublimation printed (aka infused) so there’s no need to worry about graphics “peeling off” in the wash.

I didn’t get to wear the jacket long enough to test UV longevity, but I would assume that sun exposure will probably cause fading over time. I already rue the day.

Taming the Wild Child

Icon Motosports Women's Overlord SB2 Wild Child purple motorycycle jacket

I am looking forward to wearing and testing this jacket more often and for much longer rides in warmer weather. I can’t help but feel like a superhero in this ensemble. Plus, watching drivers stare is entertaining (hey, at least they see me!).

Overall

Such a bold aesthetic won’t appeal to everyone. Don’t like magenta? The good news is, if the other features appeal to you, this exact model comes in 5 different and unique color combos to appease almost anyone. The stealth rendition (all black, ghost logos) along with four bold-and-bright versions in various colors and graphic themes all retail for $195USD.

With an industry-leading armor package included and more attitude than any other aggressive sport-style jacket, the Overlord SB2 is surely worth its weight in gold… er… tiger’s blood.

Pros

  • More hi-viz (and much cooler) than hi-viz
  • No frills/no fuss styling
  • Most comfortable in the riding position
  • Sub $200
  • Full suite of CE level 1 armor
  • Superhero-inducing emotional response

Cons

  • Not for winter weather
  • Not for wet weather
  • Aggressively fitted, might need to size up

Specs

Manufacturer: Icon Motosports
Price (When Tested): $195USD
Designed and Developed In: Portland, Oregon
Alternative models & colors: SB2 Wild Child – Orange, SB2 – Red, SB2 – Hi-Viz, SB2 Stealth (All $195USD)
Sizes: XS – 3XL
Review Date: 1/21/2019

Women’s Overlord SB2 Wild Child Image Gallery

The post Icon Women’s Overlord SB2 Wild Child Jacket appeared first on Web Bike World.

Categories
Gear Reviews Motorcycle Jeans Reviews Motorcycle Pants Reviews Other Motorcycle Blogs review Web Bike World

Alpinestars Copper Out Denim Pants Hands-On Review

For most riders, Alpinestars is a well-known name in the area of motorcycle gear. Starting back in 1963 producing footwear for off-road riding, the company has blossomed into a powerhouse in the technical apparel field. Today they offer products not only for motorcyclists but auto racers and cyclists have products to choose from Alpinestars lineup of gear.

Alpinestars Copper Out Denim Pants inner logo tag
The company didn’t get where they are today by resting on their laurels. They continue to innovate and develop new products such as their Tech-Air® system of airbag protection which is one of the most advanced airbag systems available to street (and racing) riders.

Alpinestars Copper Out Denim Pants sizing tag

With that in mind, I’m going to take a bit of a left turn and take a look at one of their “lower tech” solutions for motorcycle riders. In this review, I’ll be examining the Copper Out denim pants which look (mostly) like a pair of regular denim jeans but offer protection for motorcycle rider through the use of aramid fabrics and armor bits in the knees.

Along the way, I’ll also be pointing out features/difference of the Copper Denim riding pants on which the Copper Out model is based. These two products are very similar and I was accidentally sent a pair of the regular Copper, not the “Out” version when I was first asked to do the review. So why not add a little extra value while I’m at it, right?

Shopping Now? We Recommend:

webBikeWorld has worked closely with RevZilla over the years to provide our testers with products to review. In addition to being a great site to shop from, they’re also a great partner.

RevZilla

Free shipping on orders over $40
30-day no-nonsense return policy
Excellent selection of all major brands
Awesome pricing

Buy This Denim Pant on RevZilla

Amazon

Free shipping (with Amazon Prime)
30-day return policy
Excellent selection
Competitive pricing

Buy This Denim Pant on Amazon

Overview

The goal of most riding jeans is to provide reasonable protection for the rider while not looking like protective riding gear. They should be comfortable enough to not be in the way of participating in activities once off the bike at the destination. They also should keep one from not looking like one just stepped off a race track, a ski slope, or just finished fighting a fire.

The Copper Out denim riding pants are a straight leg-cut pair of jeans available in a variety of colors, if by variety ones mean dark indigo only. Like many jeans, I’m sure they’ll fade a bit as they age but no stonewashed or faded blue options are available new, at least here in the USA.

Looking at the Alpinestars website they show a photo of a light blue option but I cannot find a listing for this color at the dealers I’ve searched. The non-“Out” version is available in additional colors which I’ll point out shortly.

The style is the typical five pocket design with the four traditional pockets plus a coin pocket inset in the front right pocket. Coin pockets, by the way, are fine for normal off the bike use but good luck ever getting a gloved digit in one of these.

Above each knee is a diagonal cut zippered opening into which one places the knee armor. This is what the “Out” portion of the name refers in Copper Out. This is really the only obvious tip-off that these are riding jeans. The non-“Out” versions are more “stealth” with no external clues as to their protective features

Alpinestars Copper Out Denim Pants knee armor pocket zipper
The knee armor pocket zipper

Features that typical jeans have that I feel Alpinestars could have left behind are the rivets and metal button waist fastener. While these look good and are sort of a denim jeans “staple”, they can be a hazard to the paint on a motorcycle tank. It isn’t only Alpinestars that puts these on their riding jeans but it would nice to see manufacturers be more mindful in this area. I’ve seen other implementations where items like these are rubber coated to prevent paint damage.

Besides the zippers, all the other motorcycle specific features are happening on the inside. An Aramid fiber material is used to reinforce the seat and knees. The knees have pockets for armor and inside the waistband are two hook and loop patches designed to attach hip armor (not included).

With the highlights out of the way, let’s see what these jeans are made of.

Construction

The main shell of the Copper Out Denim riding pants is made from a 13oz “comfort” denim. The comfort comes from a 2% elastane mix in the otherwise cotton fabric. This provides a little stretch to the denim and I do mean “little”. There is a very mild stretch in just one direction to the denim but it is better than none.

While the description of this denim claims it offers “excellent abrasion resistance and tear resistance” it’s just cotton denim. Even at a 13oz weight, it can still shred swiftly when sliding on asphalt.

Alpinestars Copper Out Denim Pants inside out
Inside and out of the Copper Out jeans

Thankfully, the Aramid material inside is there to help mitigate this. Placed on the inside of the seat and in the knee armor pockets, this yellow-ish fabric has a smoother and softer texture compared to some other similar style reinforcements I’ve encountered in other riding jeans.

The stitching and cut of the jeans are consistent and neat giving the jeans a well finished and quality look. I would like to have seen triple stitching in the main seams for increased crash durability but I don’t believe that ultimate protection is the goal for these jeans.

Looking at the protective features along with Alpinestars own description of the product will help explain why I say that.

Shopping Now? We Recommend:

webBikeWorld has worked closely with RevZilla over the years to provide our testers with products to review. In addition to being a great site to shop from, they’re also a great partner.

RevZilla

Free shipping on orders over $40
30-day no-nonsense return policy
Excellent selection of all major brands
Awesome pricing

Buy This Denim Pant on RevZilla

Amazon

Free shipping (with Amazon Prime)
30-day return policy
Excellent selection
Competitive pricing

Buy This Denim Pant on Amazon

Protective Features

The product description page at the Alpinestars website describes the Copper Out Denim riding pants as “an urban commuting jean that fuses class-leading protection and advanced material construction with a uniquely stylish and customized design”. I feel they are at least half correct here. Let’s see why.

Aramid material is used in just the seat and knee armor pockets. In my opinion, something that is called class leading might offer more comprehensive coverage. I would also expect to see more robust stitching as I mentioned earlier in the main seams and impact areas. Then there is the aramid reinforcement.

Alpinestars Copper Out Denim Pants knee armor
Knee armor pocket showing both positions

The term aramid covers a lot of ground and refers to a variety of high strength fibers. As such it’s hard to say exactly how protective this particular variant is. I can say that the material is a 60/40 mix of polyester and aramid yarns according to the labels. This explains why this material has such a nice soft and smooth feel but it does deepen the mystery of how protective the fabric may be.

The included knee armor is of the CE level 1 variety and is accordingly thin and light. The top panel of the armor pocket is where the aramid material is placed so that it sits on top of the armor. The actual protectors are made from a viscoelastic material and should work well in a wide variety of temperatures. The pockets include two positions into which the armor can be placed for the optimal position depending on the rider.

Alpinestars Copper Out Denim Pants hook and loop fastener
Hook and loop fastener for hip armor

The straight cut of the legs will help keep the knee armor in place during a crash. I prefer the closer fit as otherwise, the knee armor could move around in a crash. Of course, everyone is different so where a straight-leg cut works well on me, others might have a different experience.

Alpinestars Copper Out Denim Pants custom fastener button
Alpinestars custom fastener button

Provisions for hip armor are present in the form of two hook patches (as in hook and loop fastener) where Alpinestars’ Nucleon hip armor can be attached. These hip protectors are not included with the jeans so be aware when ordering that these need to be purchased separately. I point this out as it can be inferred from the description on their website that the protectors might come with the jeans.

Urban commuting is a good description and it is exactly where I feel these jeans would be most at home. The part about class-leading protection gives me a bit of pause. They certainly offer more protection than non-motorcycling denim jeans but while the protection offered in the Copper Out Denim riding pants may be good it doesn’t strike me as something I would call a class-leader.

Fit and Comfort

The fit of the Alpinestars Copper Out Denim riding pants is exactly as expected. The 36” waist is spot on and the straight fit is just right between slim and relaxed fit. The inseam is just over 35 inches so for my 30” inseam I would need to have them hemmed or roll them up (as shown in the earlier photo). There are no “short” or “long” variants here but as there are no special features (zippers, liners, etc) at the bottom of the leg it should be easy to have these jeans hemmed to fit.

For the purposes of photographs for this review, I rolled them up but for the test riding, I had a basting stitch temporary hem in place that could easily be removed after.

The jeans are very comfortable and are only moderately stiff when first out of the package. They break in easily and quickly and feel great in most areas. The only thing that confronts the overall comfort is the knee armor.

Alpinestars Copper Out Denim Pants front and back
Copper Out jeans from and back

The included knee armor has a flat shape and although it is flexible and cut in a way to make it bend to the bent knee position, it isn’t very supple. As such the knees can feel a little crowded with the armor is inserted.

This could be by design to make the armor easier to remove from the pocket. Armor that is curved to fit closer to the knee might be bulkier when walking around and make it a little more difficult to remove.

On the other hand, since the armor is accessible from the outside via a zipper the armor could still be removed if it got in the way of walking around which I believe is the point of having the external access.

Alpinestars Copper Out Denim Pants armor Alpinestars Copper Out Denim Pants armor

CE Level 1 knee armor included with the Copper Out jeans (also the same as the Copper Jeans)

Garment Care

Unlike regular denim jeans, the Copper Out Denim riding pants do require a little extra care when washing. This is likely for the sake of extending the effective life of the Aramid materials. For instance, they can be machine washed but it is recommended to not tumble dry bat rather let them dry flat and in the shade.

Alpinestars also recommends turning the jeans inside out when washing so as to help reduce fading of the denim color. They can be ironed at lower temperatures if desired but, c’mon, these are jeans, dude. 🙂

Alpinestars Copper Out Denim Pants care instructions tag

Shopping Now? We Recommend:

webBikeWorld has worked closely with RevZilla over the years to provide our testers with products to review. In addition to being a great site to shop from, they’re also a great partner.

RevZilla

Free shipping on orders over $40
30-day no-nonsense return policy
Excellent selection of all major brands
Awesome pricing

Buy This Denim Pant on RevZilla

Amazon

Free shipping (with Amazon Prime)
30-day return policy
Excellent selection
Competitive pricing

Buy This Denim Pant on Amazon

Compared to the Copper Denim Pants

When I was first asked to do this review I was sent a pair of the Copper Denim pants (non-”Out”) by mistake. When I followed up I was sent the Copper Out version and was told to hang on to the first pair. This worked out well since I could now compare versions.

At first glance, there’s not too much to tell them apart except for the knee armor zipper, but there are a couple of important things to point out. First, though, let’s look at what is the same.

The cut and fit are nearly identical with sizing in the waist and legs being identical in most areas. The only notable difference is the inseam is about .75 inches (19mm) shorter on the non-Out version. Maybe this comes from the zippered pocket on the Copper Out Denim pants?

Alpinestars Copper Out Denim Pants non-Out version
The Copper Jeans, non-“Out” version.

Also, the non-Out jeans are available in three colors including black, dark rinse (a dark blue), and “Raw” which in photos look identical to the indigo of the Copper Out’s. I’d say it is the same as this is the color of the jeans I was sent and I can hardly tell the colors apart. The stitching is a giveaway though as the Copper Out jeans use a pale yellow thread while the other has a more neutral blueish-gray thread.

The knee differences start with the external versus internal armor pocket. The regular Copper Denim pants do not have the zippered external pockets of the Copper Out and instead have a mesh pocket on the inside of the leg. This pocket sits underneath a layer of aramid material and contains the same armor and also offers two height positions.

Overall there is not much reason I can come up with not to spend the extra $10.00 (USD) and get the Copper Out jeans over the Copper Jeans. Maybe if one prefers the extra “stealth” of the Copper jeans as they have not zippered knee pocket to give away their protective nature.

Conclusion

The Copper Out Denim riding pants will certainly do the job of looking the part for the commuter and urban riding where speeds aren’t usually going to be that high. The protection offered is very good compared to plain denim jeans but I would say it is just average when compared to similar riding jeans in the price range.

The excellent quality of construction and consistent sizing demonstrates Alpinestars’ commitment to quality control that I’ve come to expect from them. It’s not always that easy to keep these aspects consistent but it goes a long way to assure the customer that what you order will fit and last. I was pleased that both versions these jeans fit exactly as I hoped.

Pros

  • Aramid reinforcement in impact areas
  • Proper jeans “fit”
  • Adjustable knee armor
  • Easy access to knee armor pocket

Cons

  • Knee armor shape could be better
  • Hip armor not included

Specs

  • Manufacturer: Alpinestars
  • Price (When Tested): $239.95
  • Made In: Tunisia
  • Alternative models & colors: Indigo
  • Sizes: 28 to 40
  • Review Date: January 2019

Shopping Now? We Recommend:

webBikeWorld has worked closely with RevZilla over the years to provide our testers with products to review. In addition to being a great site to shop from, they’re also a great partner.

RevZilla

Free shipping on orders over $40
30-day no-nonsense return policy
Excellent selection of all major brands
Awesome pricing

Buy This Denim Pant on RevZilla

Amazon

Free shipping (with Amazon Prime)
30-day return policy
Excellent selection
Competitive pricing

Buy This Denim Pant on Amazon

Alpinestars Copper Out Denim Pants Image Gallery


The post Alpinestars Copper Out Denim Pants Hands-On Review appeared first on Web Bike World.