Categories
Aprilia Aprilia Shiver 900 Aprilia Shiver 900 review Gear Reviews Motorcycle Review Motorcycle Review Aprilia Shiver 900 Motorcycle Reviews Other Motorcycle Blogs review Web Bike World

2018 Aprilia Shiver 900 Review

#bearacer

As Naked Sport Bikes go, The Aprilia Shiver has been a contender since it’s launch in 2007 as a ride by wire 750cc machine. The 2008 Shiver SL 750 was reviewed by Web Bike World in August 2008.

This year, Aprilia gave the Shiver a new look and a new motor. An advanced traction control system was added to the Shiver as well as a state of the art 4.3” TFT Technology display.

The new motor represents a significant increase in power and torque.

I have been riding Harley Davidson bikes for the last twelve years and I felt it was time for a change. I had the opportunity to test out several new motorcycles this year and I really liked the handling of a naked sport bike.

I was at Blackfoot Motorsports in Calgary when the Shiver 900 caught my eye. I was in the market for a new bike and was looking at several different models. I sat on the Aprilia and I loved the way I felt on it. It spoke to me. I ended up trading my 2007 Harley Davidson FLHTCU on this new machine.

Aprilia Racing Logo

Specifications

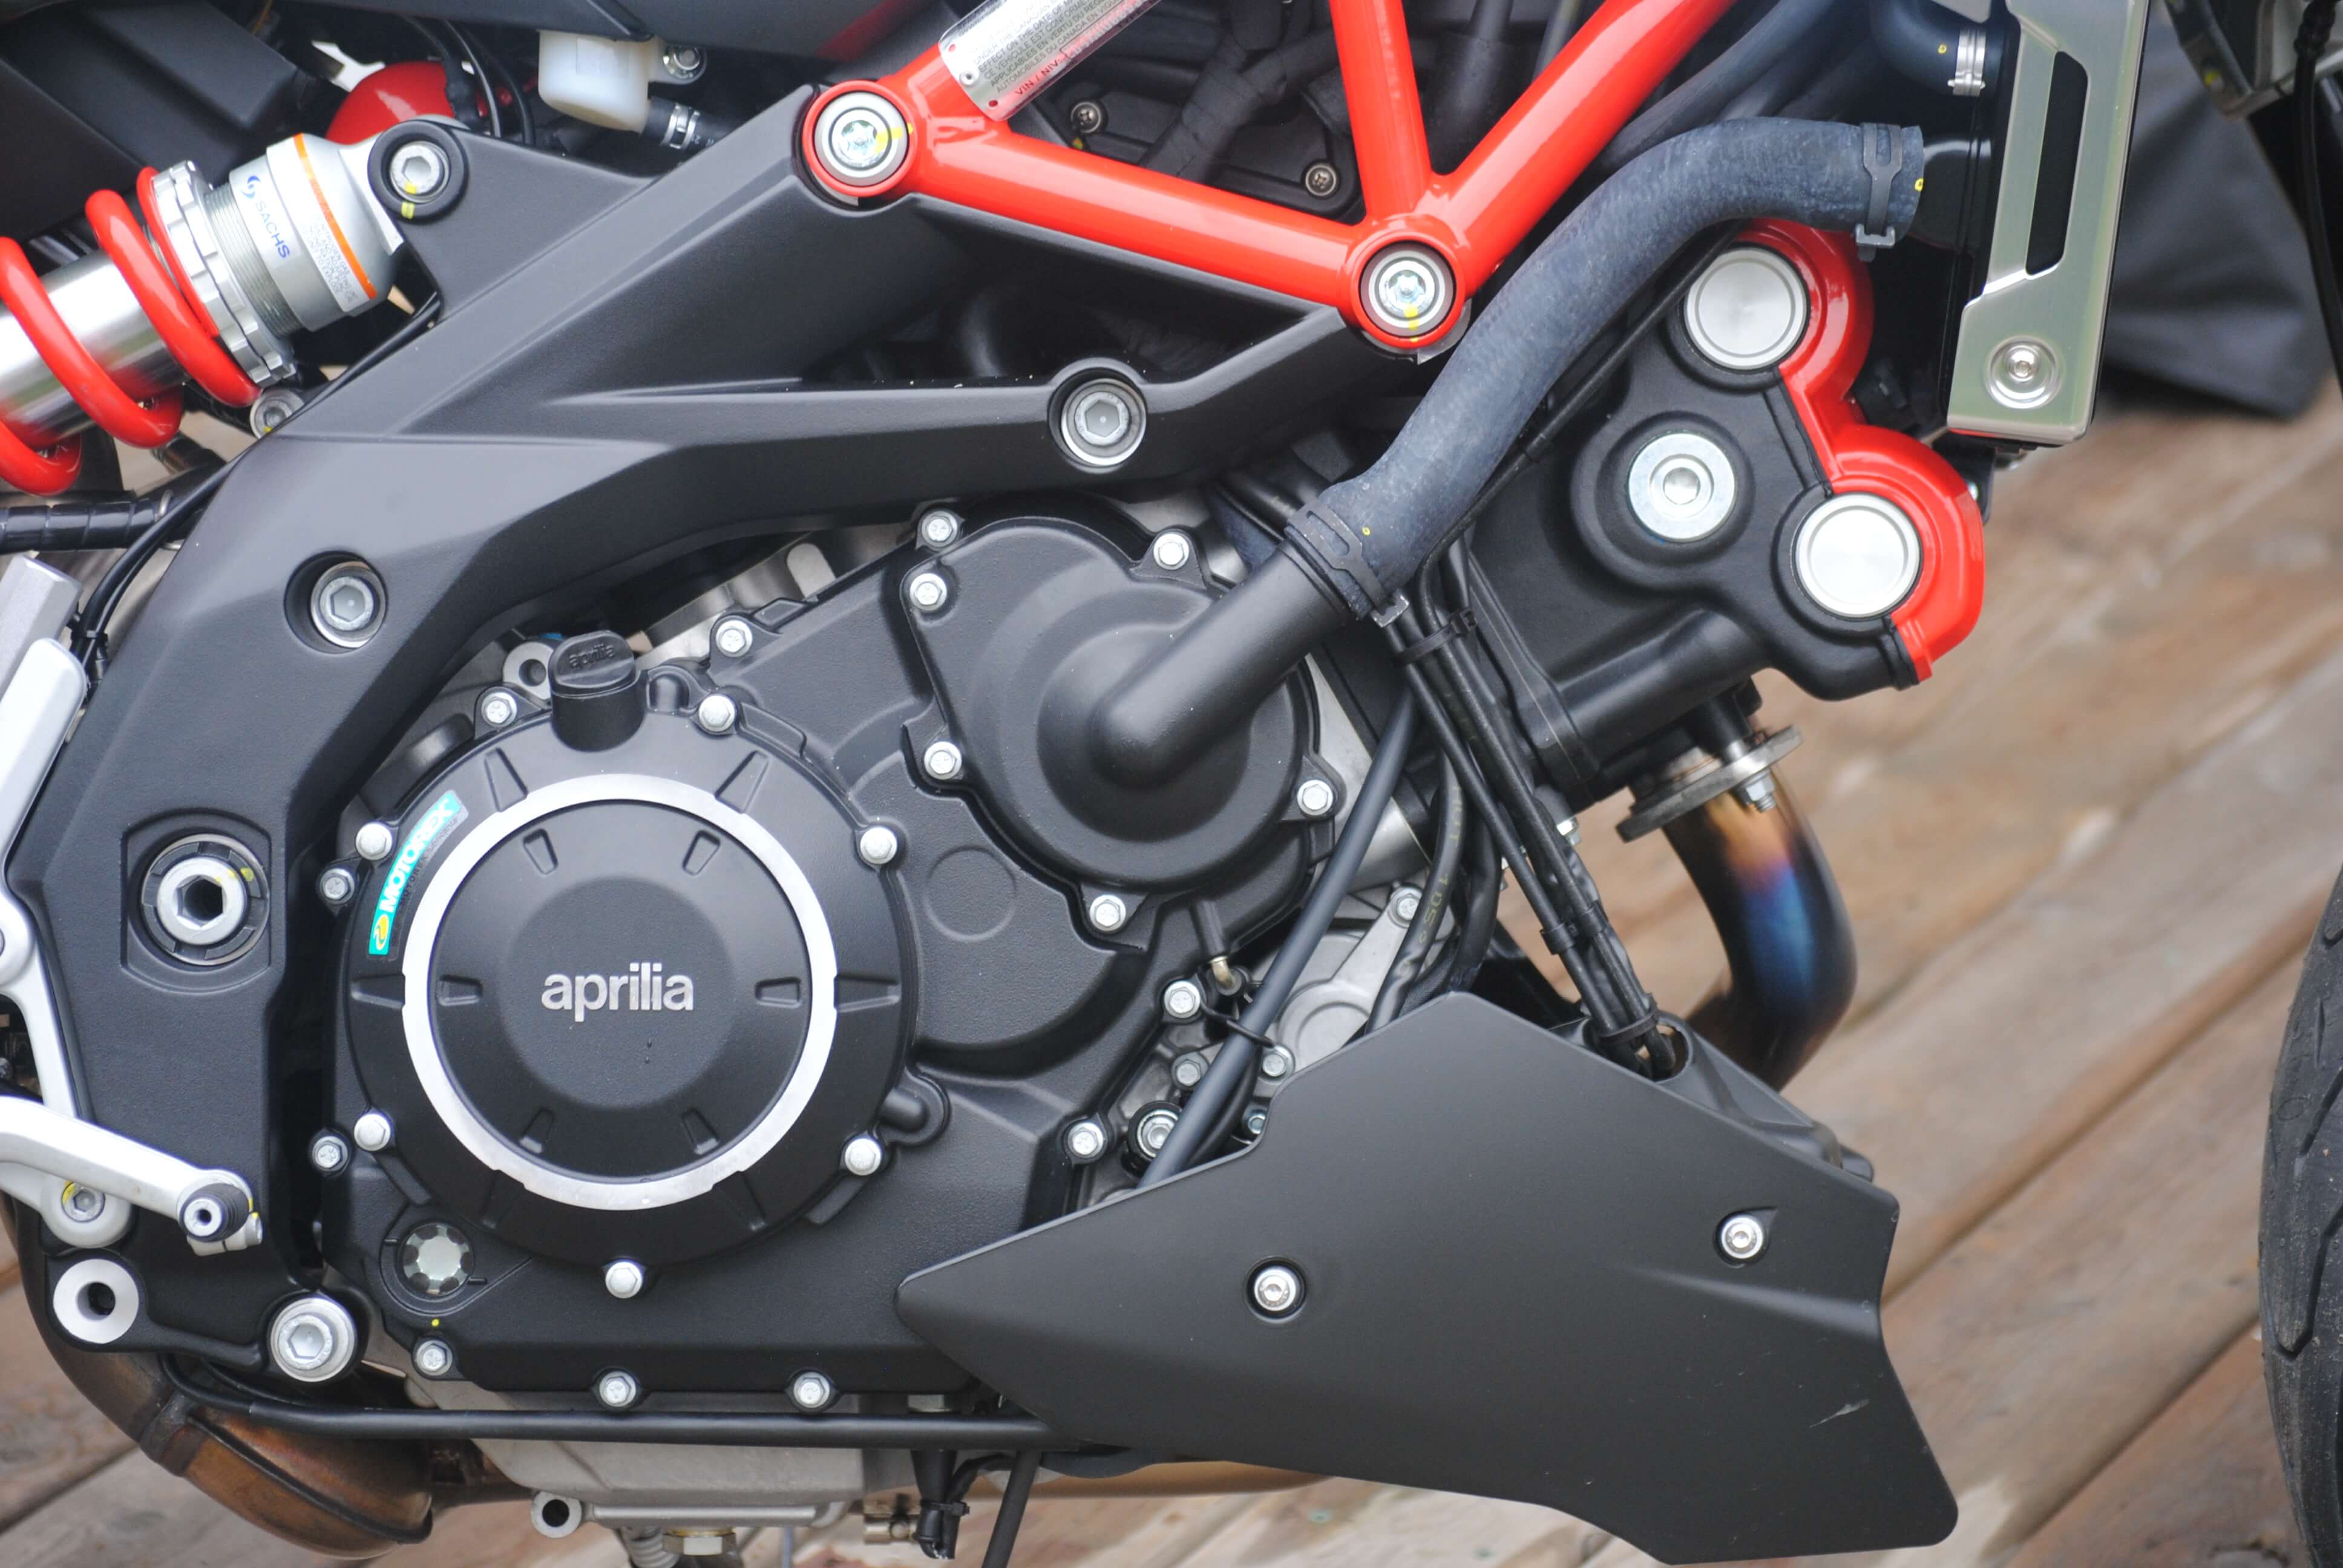
  • Aprilia V90 Longitudinal 90 degree v-twin engine four stroke, liquid cooled, double overhead camshaft with mixed gear/chain timing system, four valves per cylinder.
  • 70 kW (95.2 hp) @ 8,750 rpm
  • 90 Nm (66.4 lb-ft) of torque at 6,500 rpm
  • Integrated Engine Management System with Ride-by-Wire.
  • Digital Electronic Ignition, integrated with the injection
  • 100 % Stainless Steel 2 in 1 exhaust system with three-way catalytic converter and oxygen sensor.
  • Chain secondary drive
  • Three predetermined driving modes (Rain, Touring, and Sport)
  • Multi-Plate wet clutch, hydraulically operated
  • Modular tubular steel frame fastened to aluminum side plates by high strength bolts. Dismountable rear frame.
  • Kayaba upside-down front fork with adjustable hydraulic rebound, damping, and spring preload.
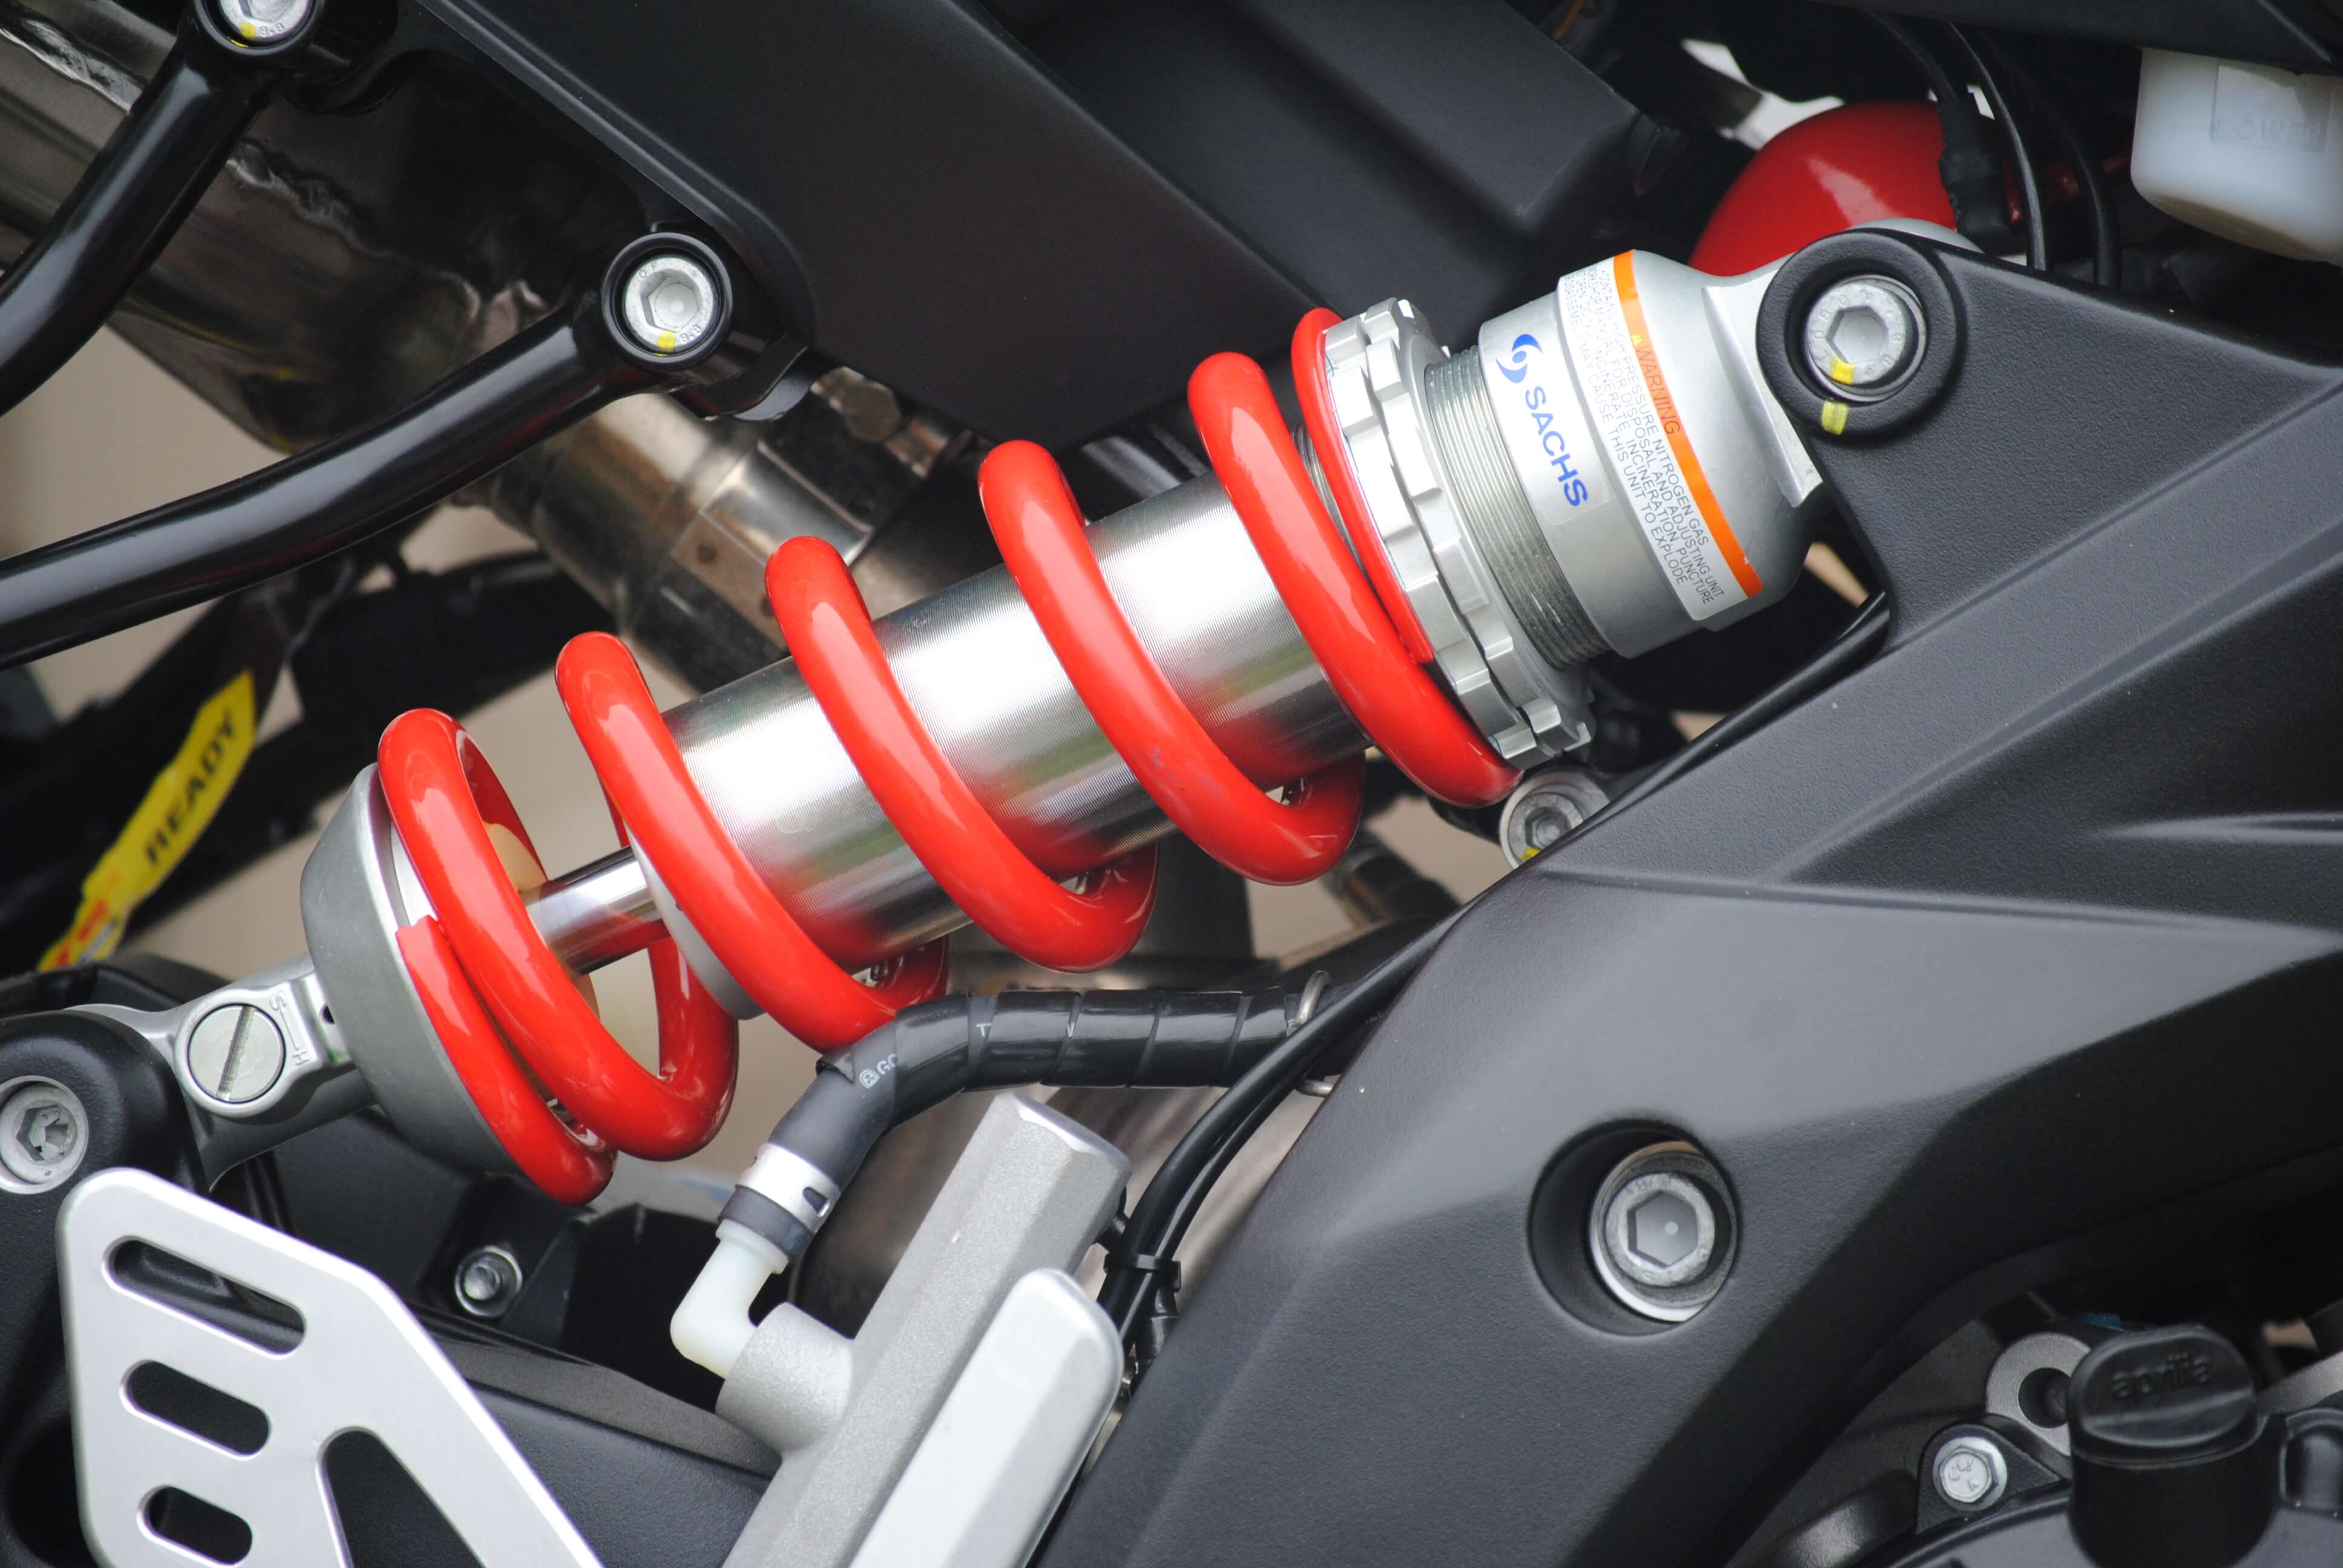
  • Aluminum alloy rear swingarm with stiffening truss. Hydraulic shock absorber with adjustable extension and spring preload.
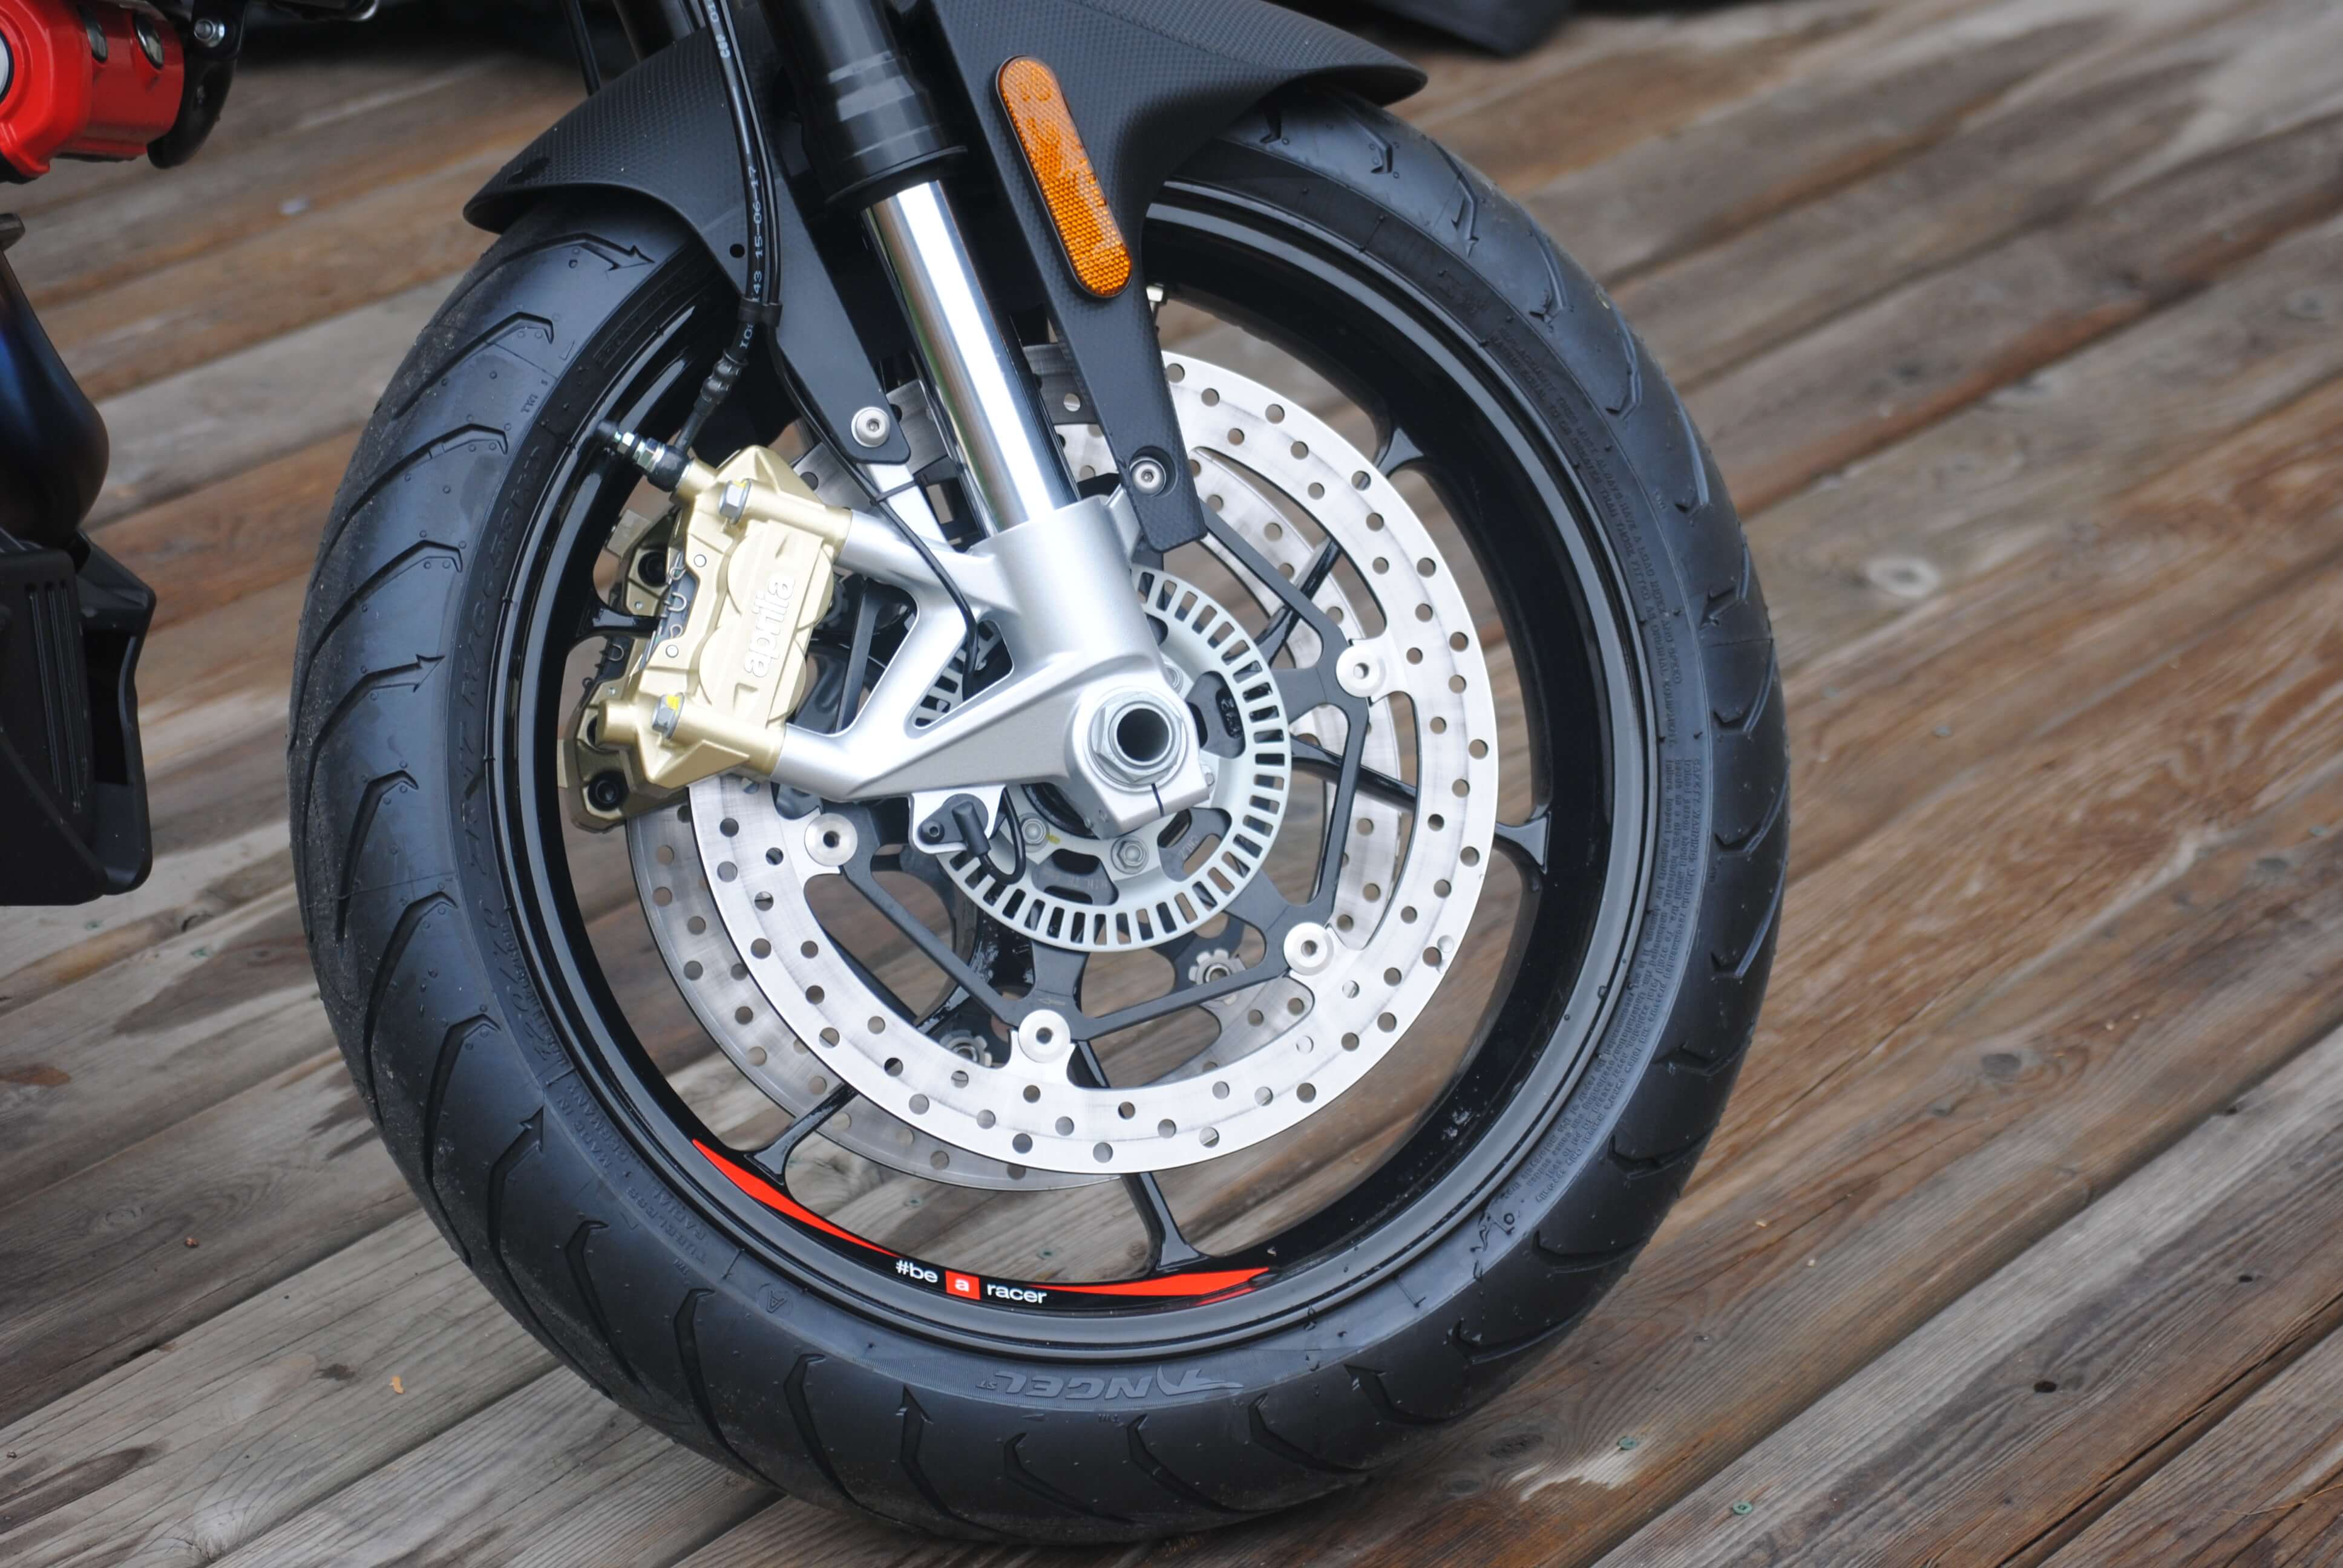
  • Front brake consisting of dual 320 mm stainless steel floating discs. Radial four-piston calipers.
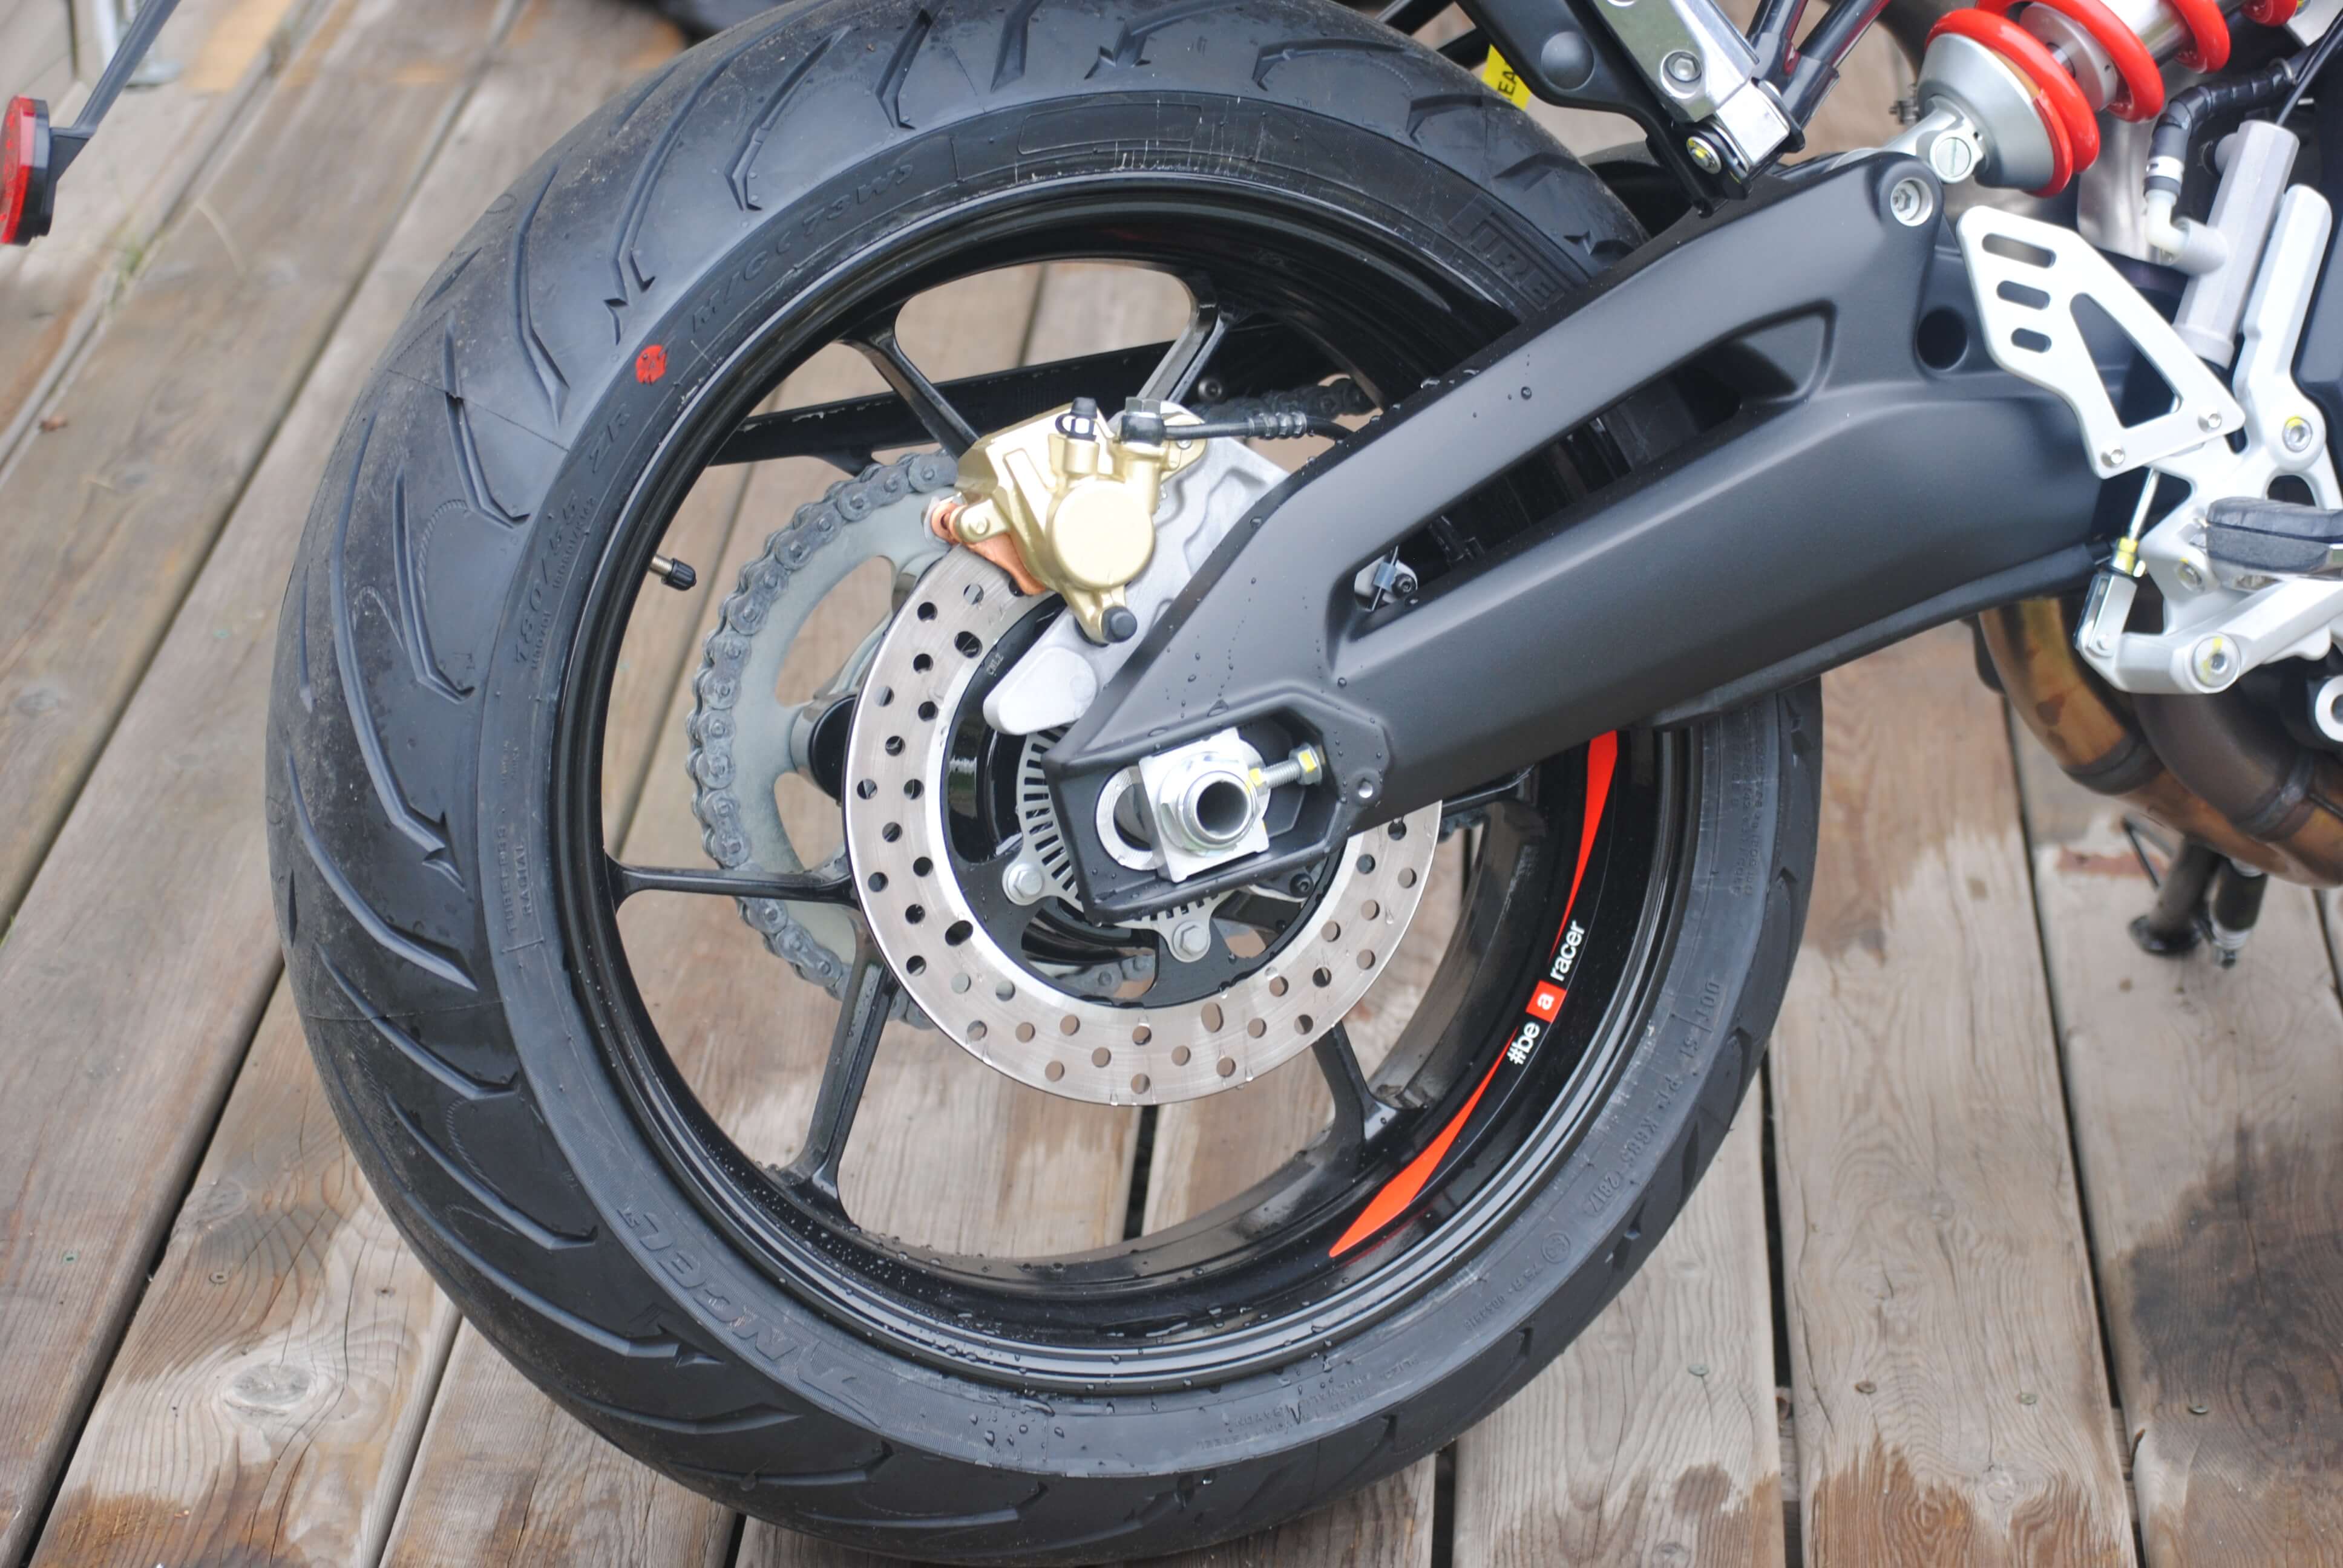
  • Rear brake consisting of a 240 mm stainless steel disc, single-piston caliper, and metal braided brake hose.
  • Continental two-channel ABS system
  • 15L (3.96 US gal) Fuel tank capacity
  • Tires: 120/70 ZR 17 front and 180/55 ZR 17 Rear
  • Starting at CAD$ 9,995

First Impressions

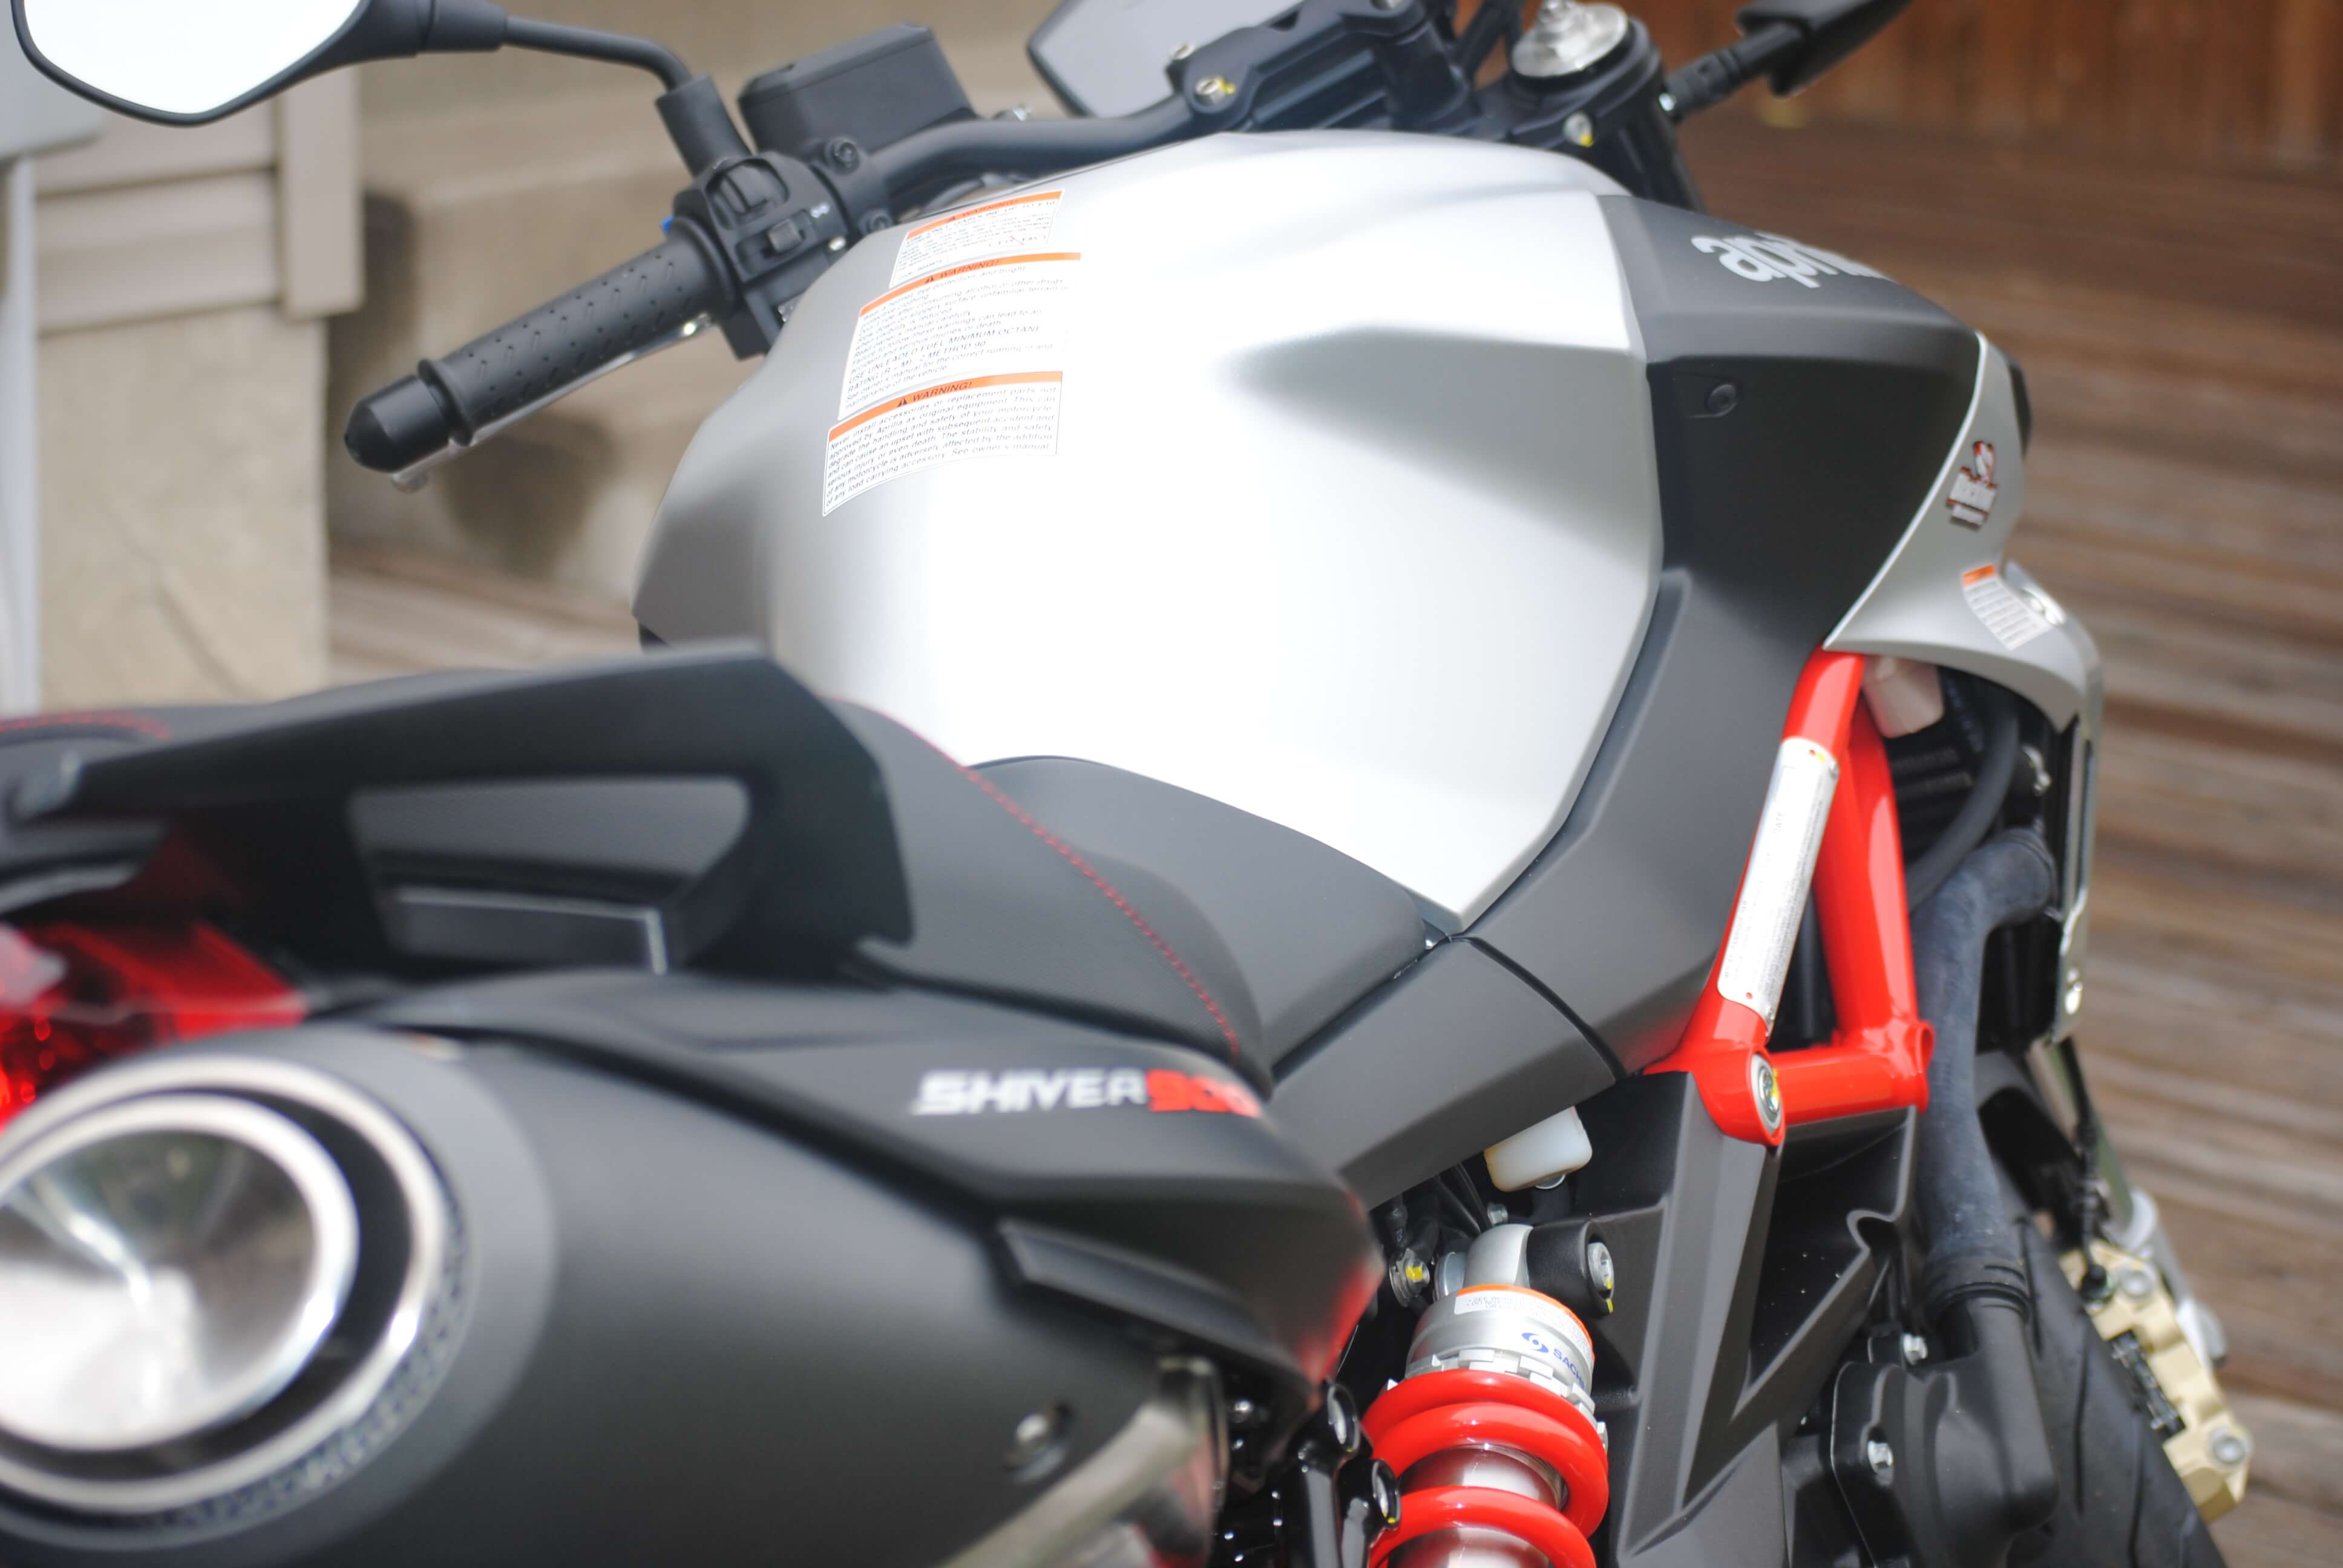
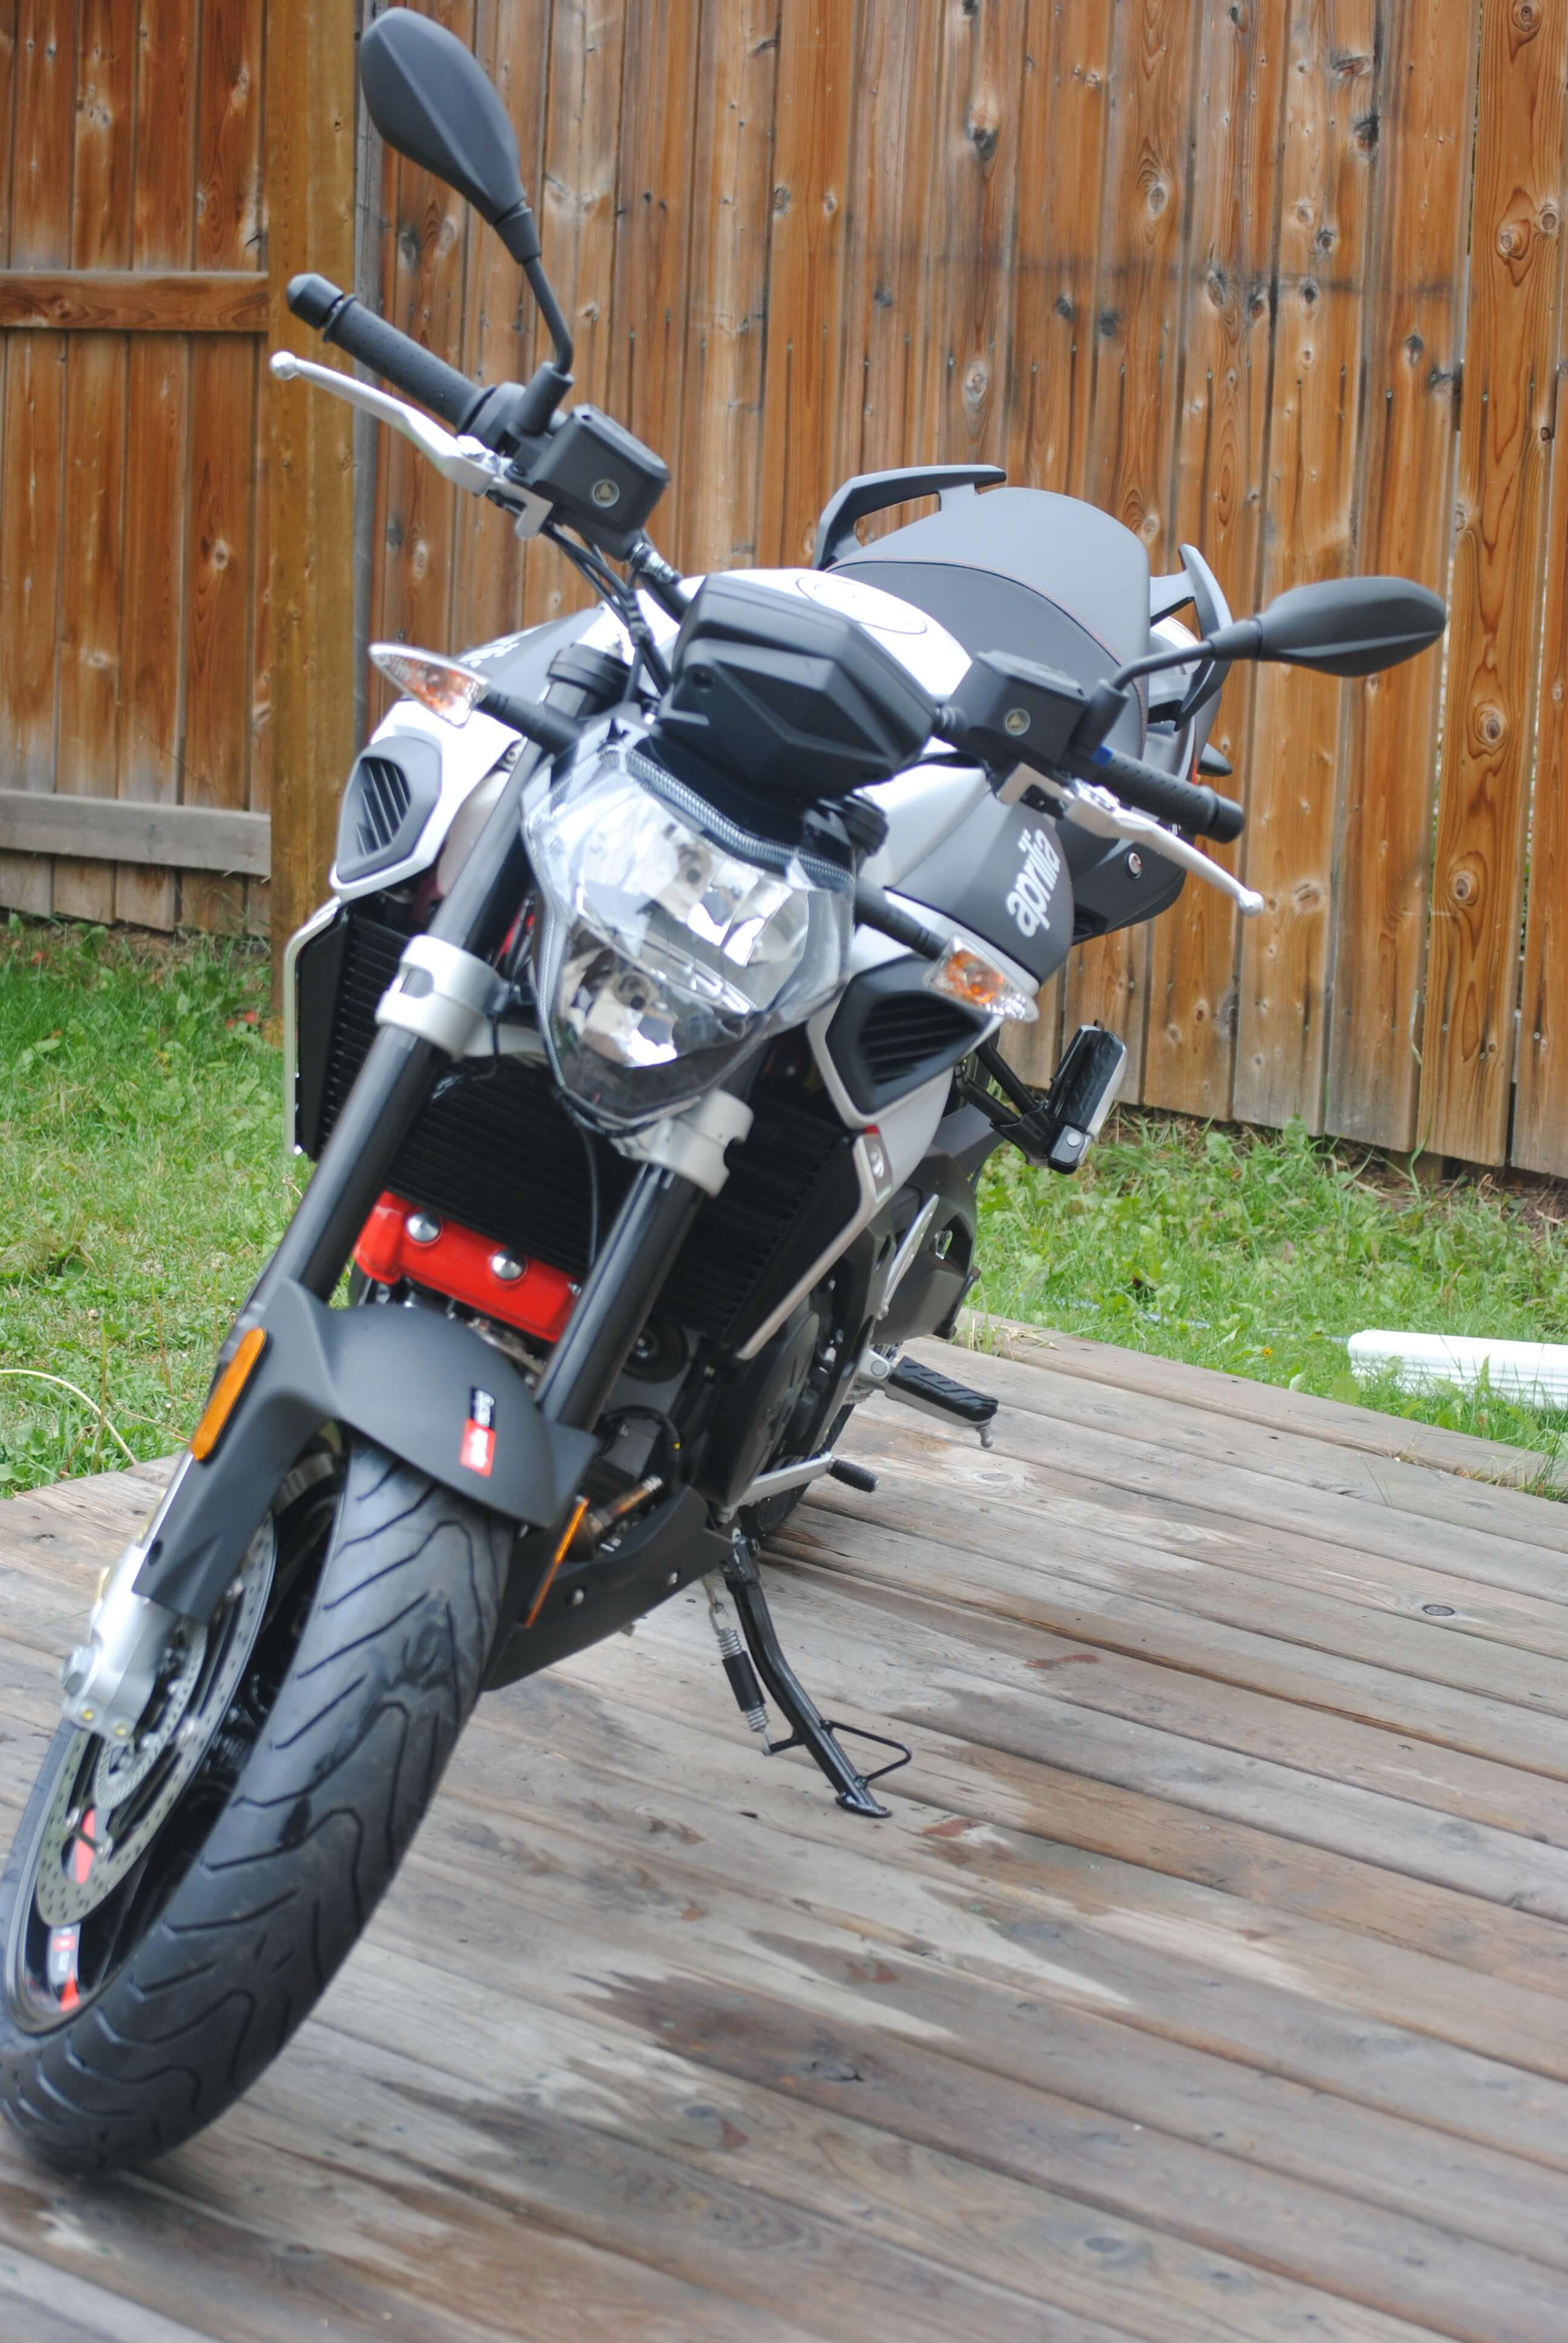
My first impression of the 2018 Aprilia Shiver 900 was the way the styling of the bike makes it look aggressive yet refined. I loved the color and the stance. It was undeniably Italian and the attention to details was present throughout the motorcycle.

I sat on the bike and the seat was just perfect for me. I am 5’9” and the bike felt very comfortable.

The handlebars are in almost the perfect position for me. I did not feel like I was sprawled out on the tank and I also did not feel like I was sitting completely upright like on a cruiser. The seating position is very comfortable.

2018 Aprilia Shiver 900 tank

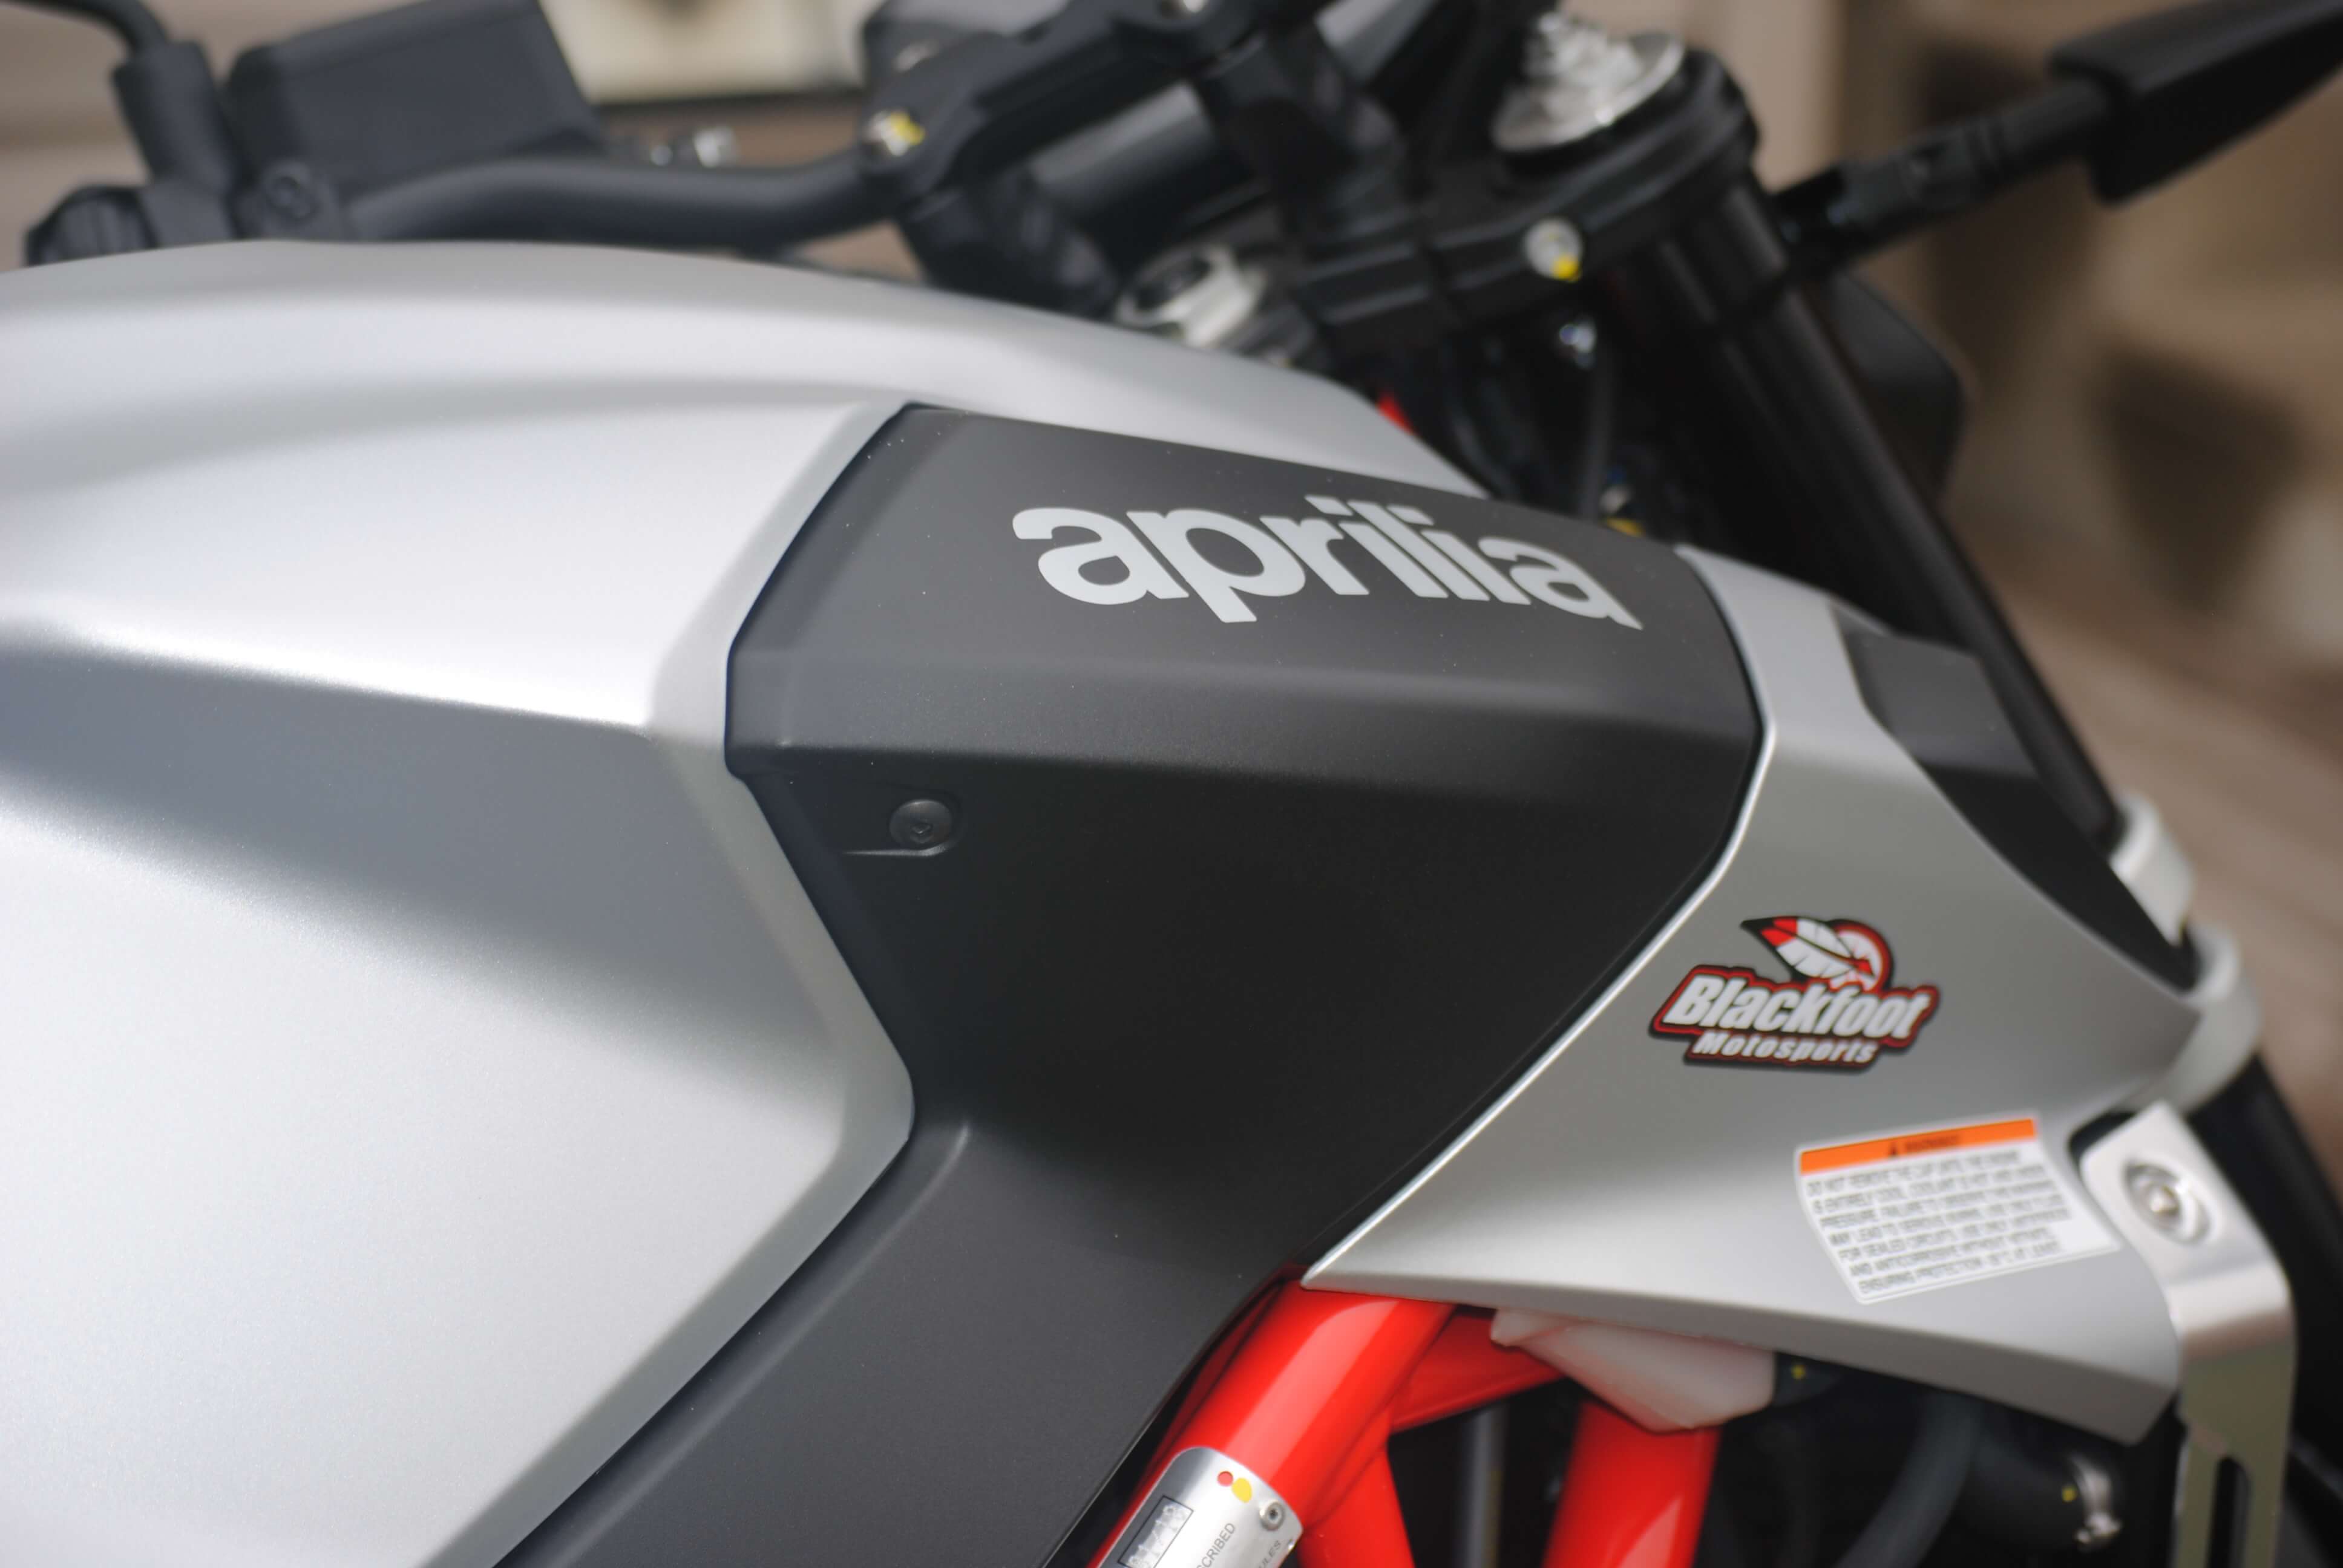
The tank is incredible! I love the width. The design is perfect for your knees to tuck up and the vents on the front give it an aggressive look.

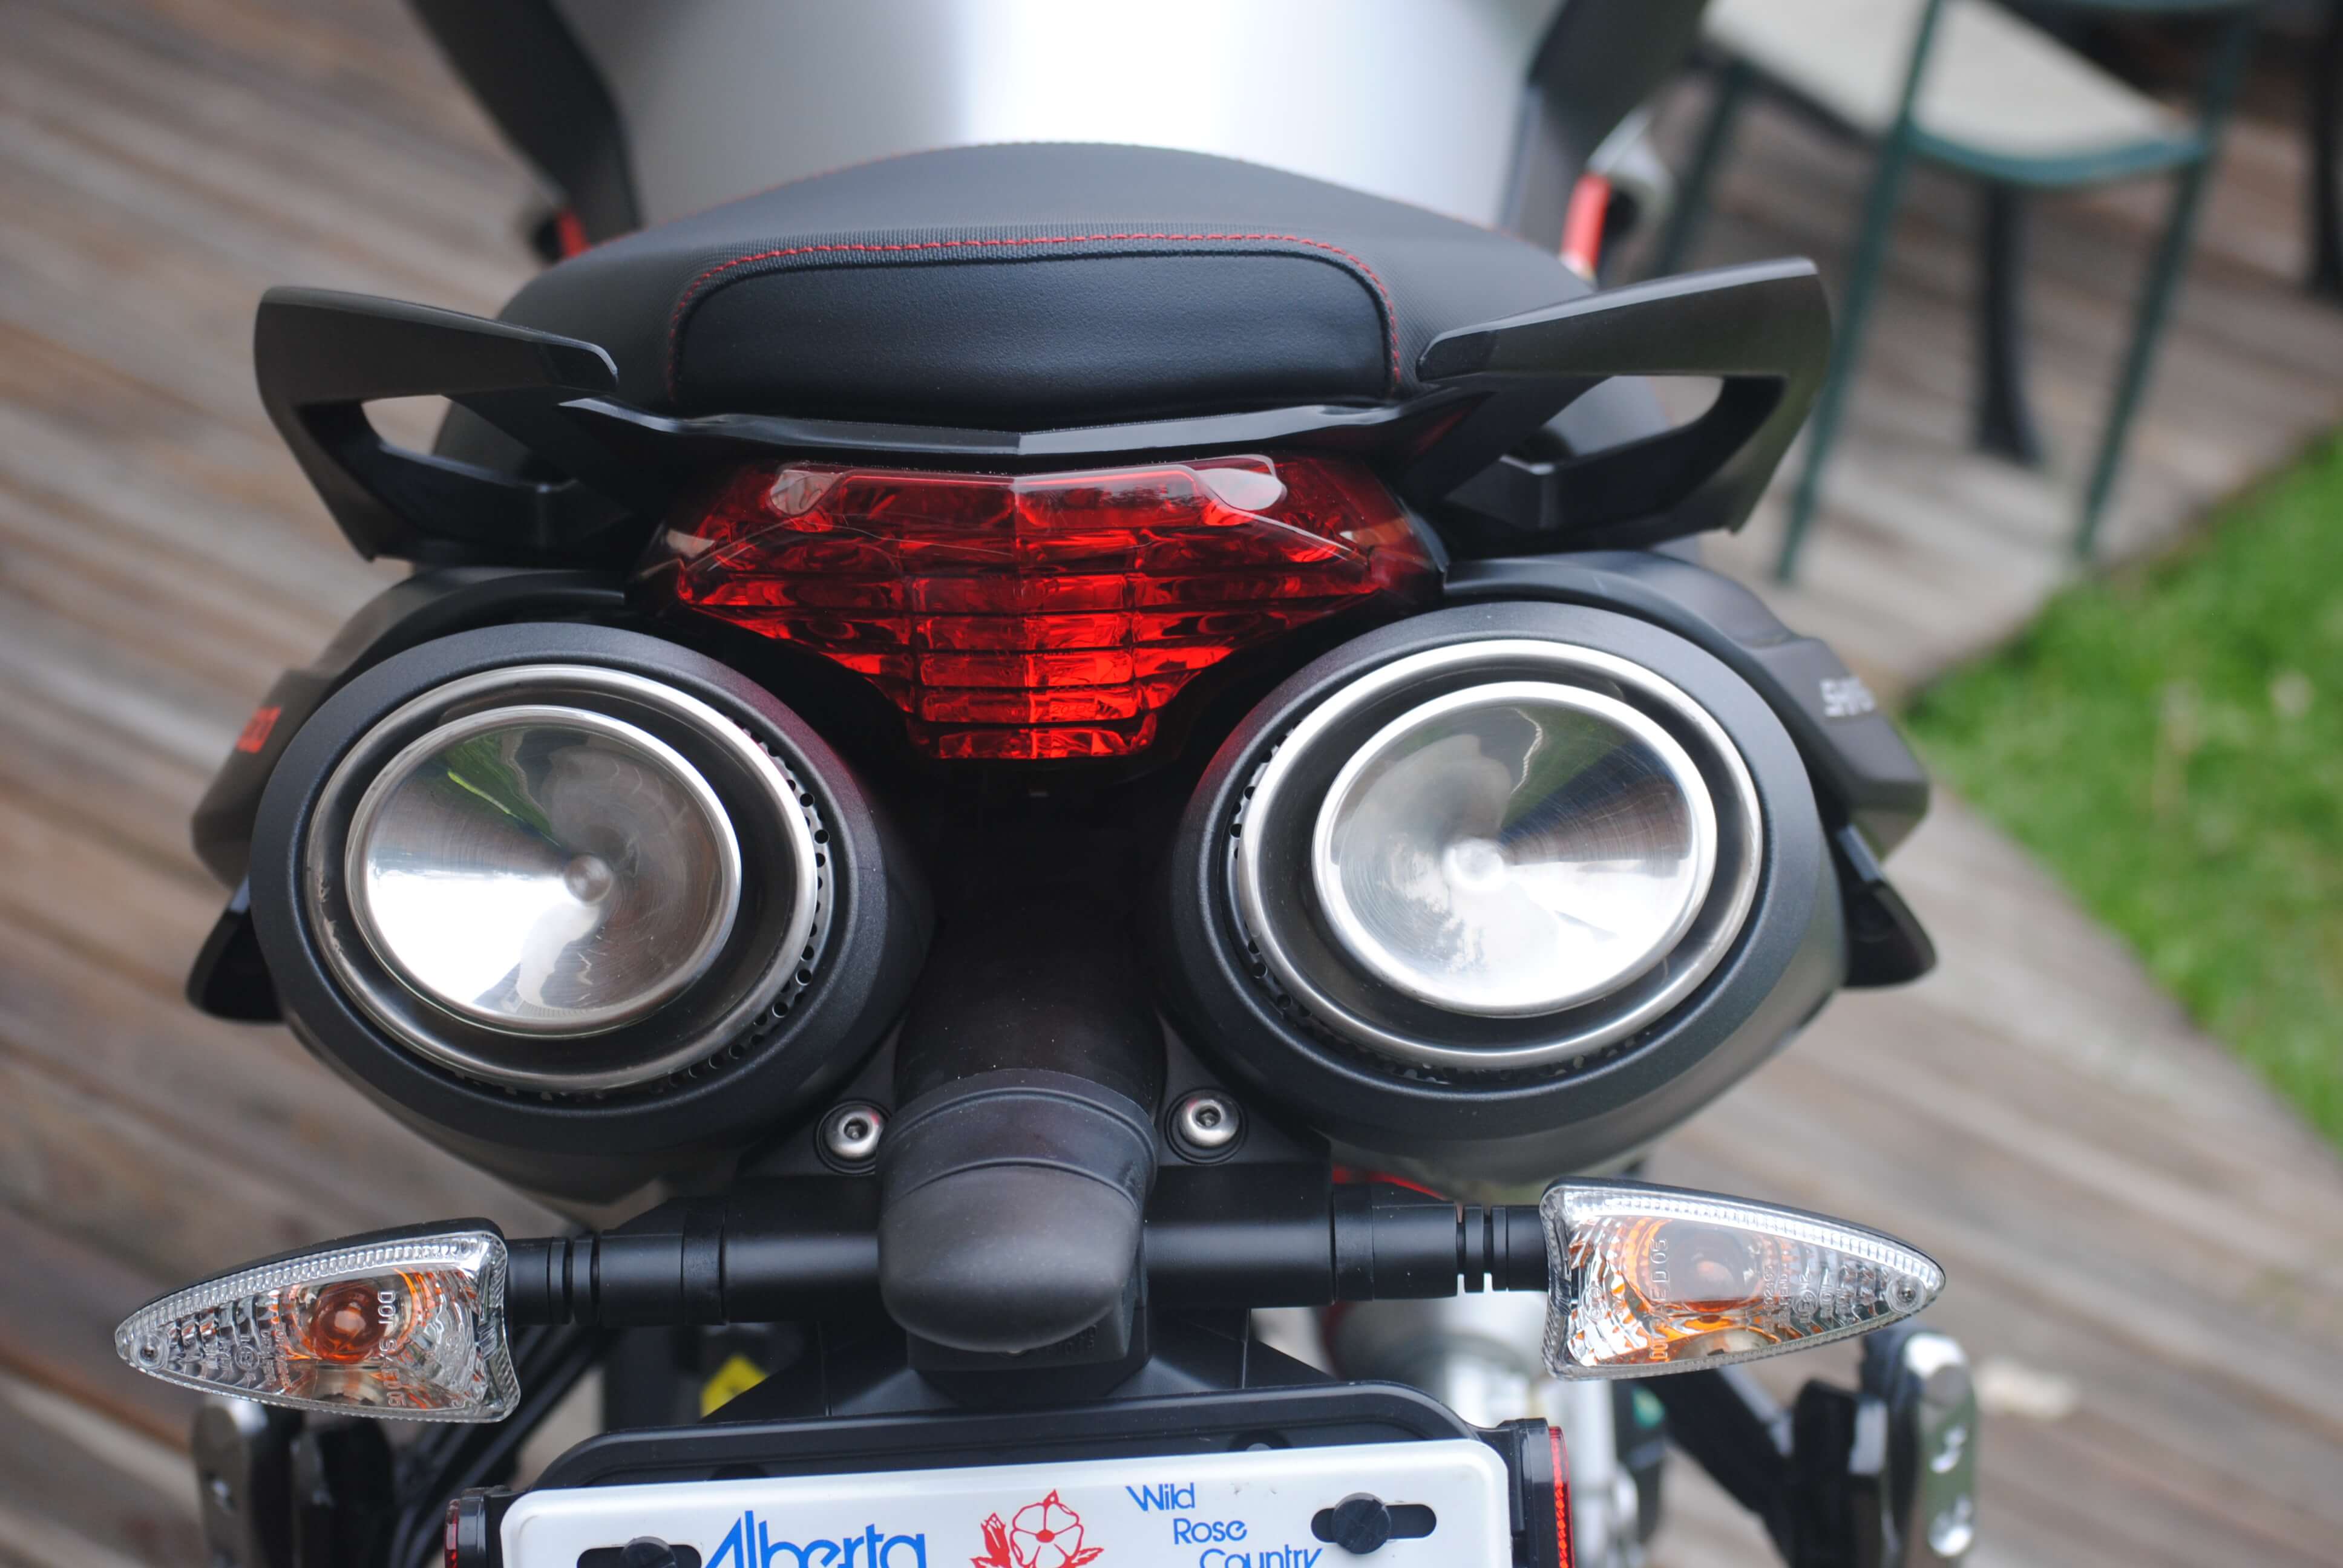
The seat is very nice. It is comfortable and the attention to detail is amazing. I love that the red stitching on the seat is the same color as the frame of the bike

2018 Aprilia Shiver 900 seat cushion

First Ride From The Dealer To My House

On the street, the Shiver 900 is an amazing ride. The linear power band gives you the sensation of control at all times. It is very smooth and precise. I loved the stability of the bike and the suspension is absolutely amazing.

I left the dealer on a very cold rainy day and I decided that I would try out the rain setting of the three driving modes. The bike performed wonderfully during my ride home. I was able to do a bit of urban riding along with some back roads going home.

One of the things that I really liked was the sound of this motorcycle. The exhaust is designed in such a way that both pipes come out directly under and behind the seat of the bike. The exhaust note is unlike any other bike on the market… It is refined, yet it still has the growl of a v-twin.

2018 Aprilia Shiver 900 v-twin

City Riding

As a city bike, the Shiver 900 is in its environment. It is nimble and able to perform in traffic the way a naked sport bike should. I was amazed at how well it handled as an urban commuter. It is extremely well balanced and this showed while riding at a slow speed. It was able to ride in traffic without any issues. It was very nimble when it came to avoiding potholes.

I was amazed at how nimble the bike is and how easy it is to ride.

The brakes are excellent on this bike. I really appreciate the level of responsiveness that the Shiver showed during city riding where you are required to brake on a regular basis whether to avoid another car or a pedestrian crossing the street. The front shocks are very well tuned and I did not feel the front end dip everytime I braked.

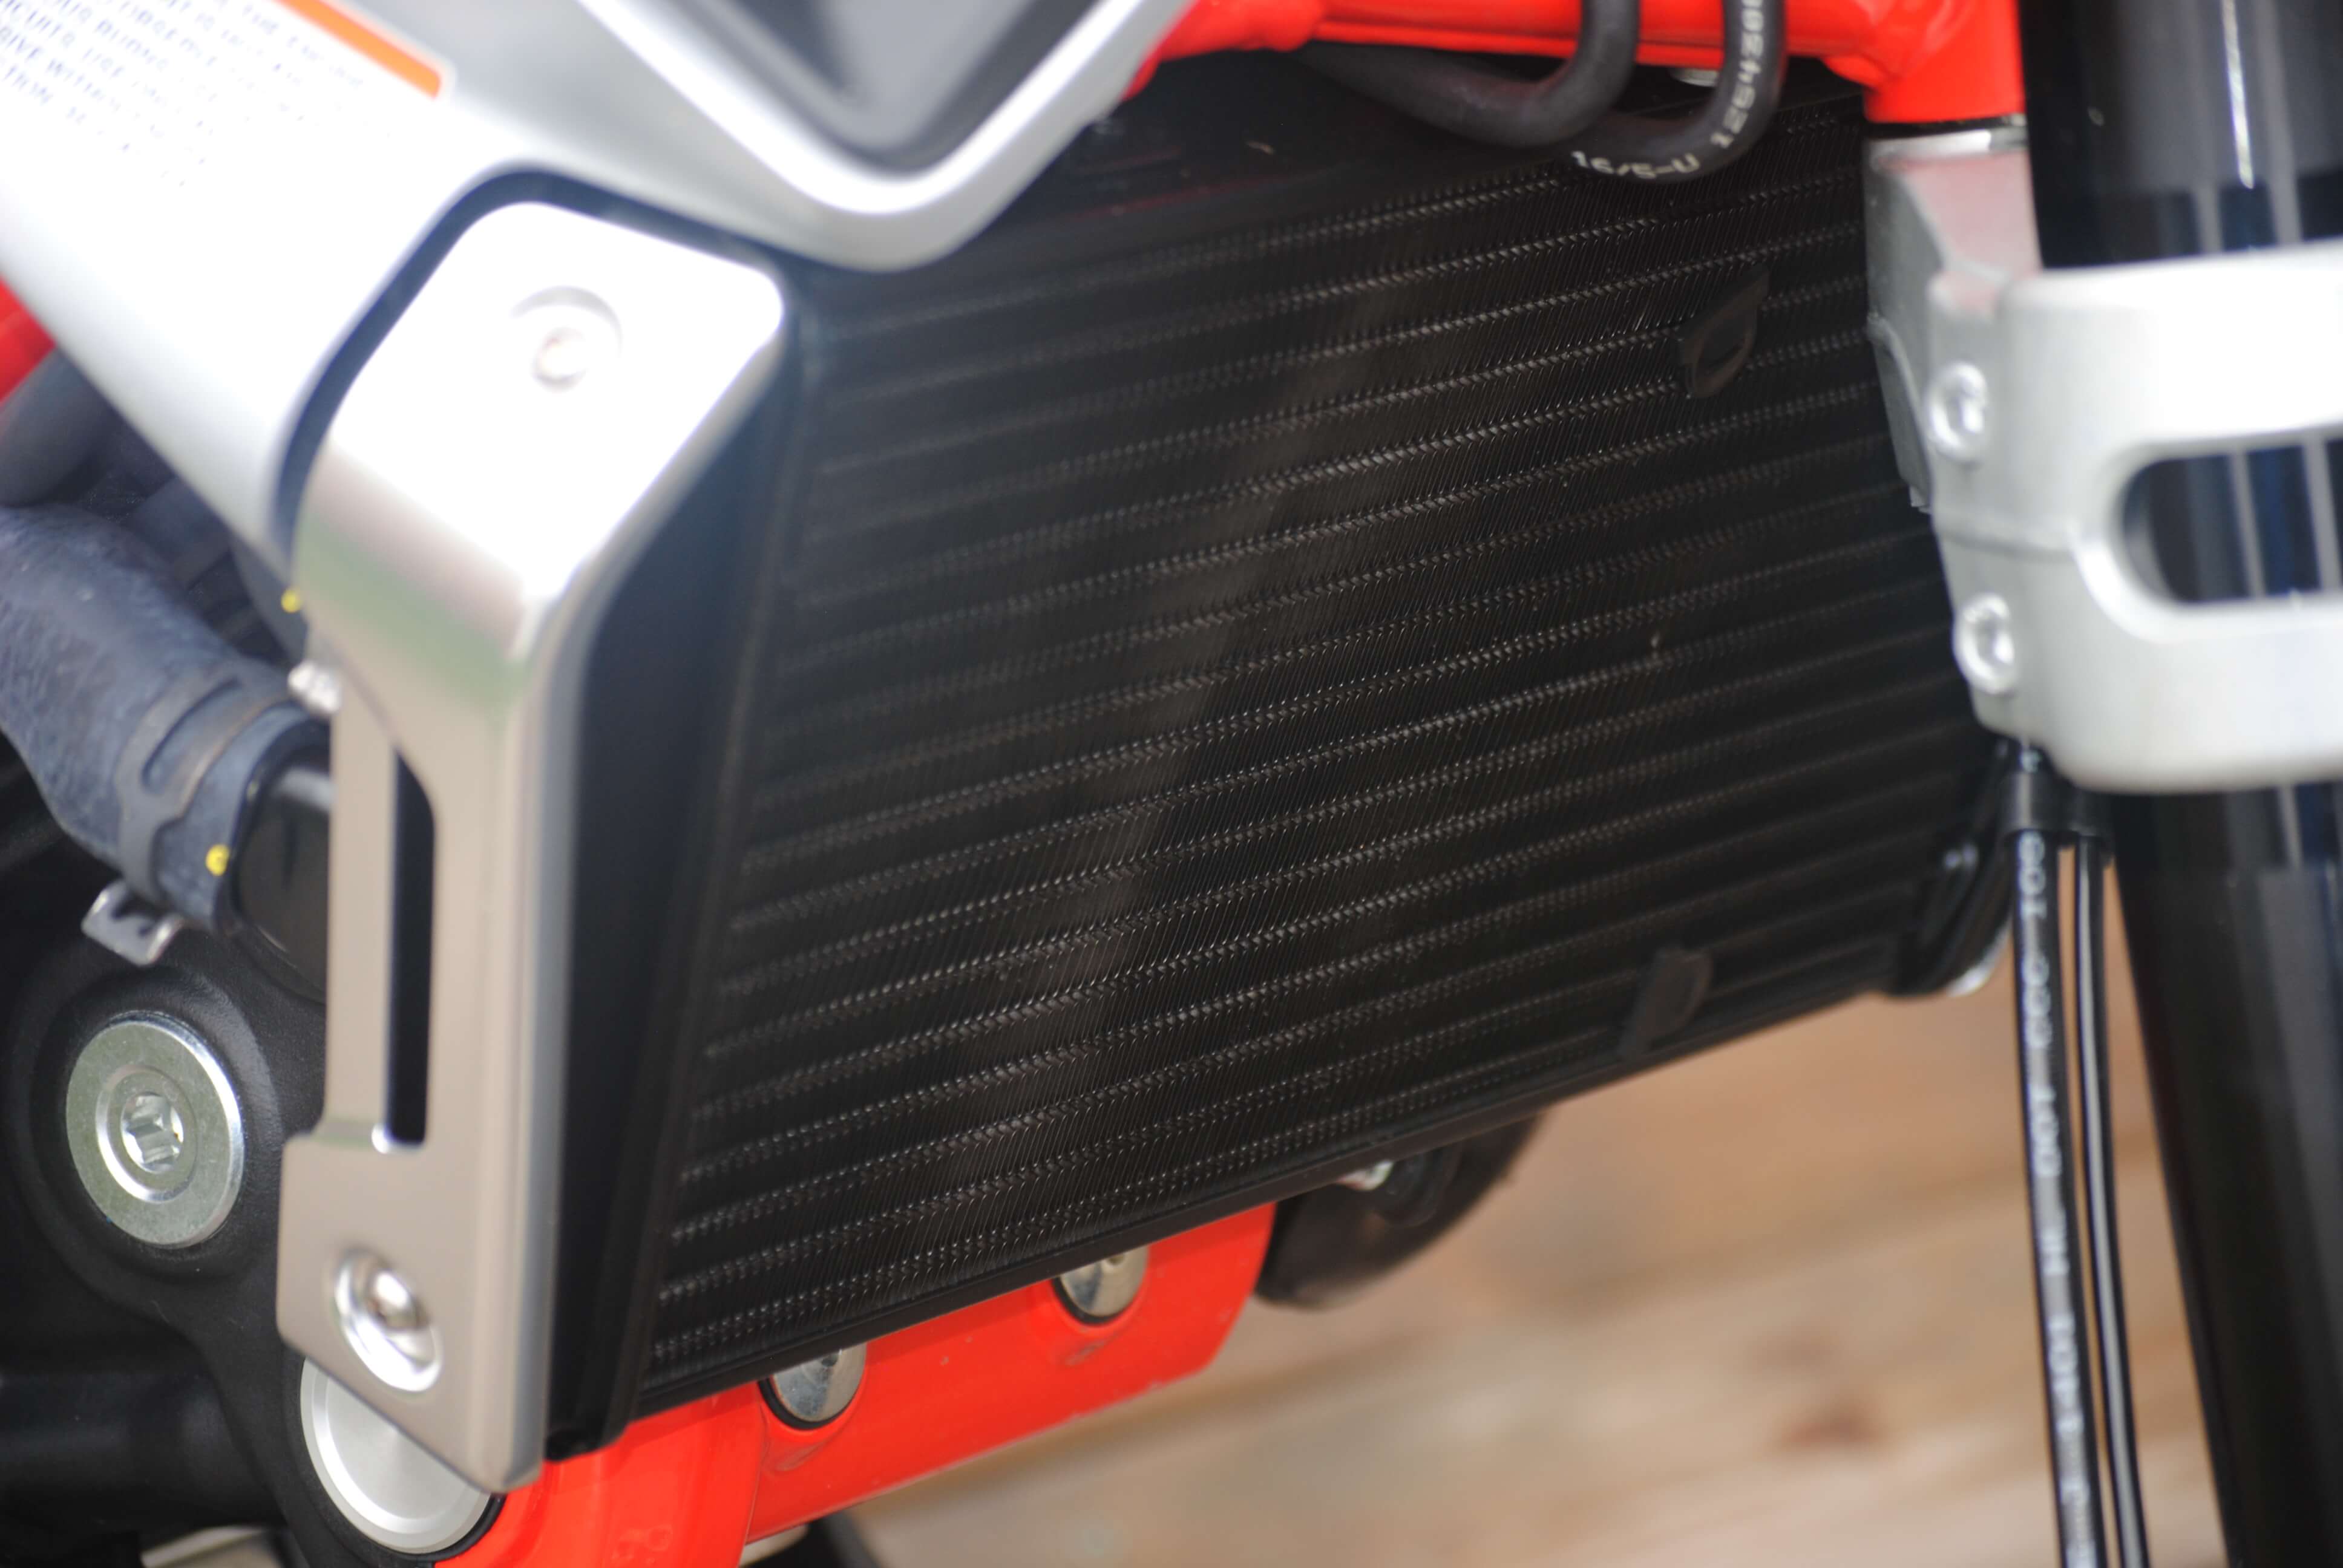
It was cold on the day I rode in the city; however, I am confident that the Shiver 900 will have no problem with overheating in the city. It is well equipped with an amazing cooling system.

2018 Aprilia Shiver 900 cooling system

Country Road Riding

The Shiver 900 is an amazing bike for twisties. It is very well balanced and the rear shock eats up what the road throws at it. It is extremely nimble and it feels very stable. It requires very little countersteer to get it to do what you want it to do.

I was able to test the touring setting on the Aprilia and what a difference the setting makes. It performed like a champ. The acceleration was really good and the bike was very responsive.

Given the bike is still in the break-in stage, I did not want to push it too hard; however, I was able to get a good feel for the acceleration and the handling of the Shiver and it was great. For me, the Shiver 900 is right at home on a country road and this is the type of riding I enjoy the most.

I was amazed at the amount of torque this machine has to offer. It is simply a pleasure to ride this bike.

The exhaust note of this bike when you are going down a country road is like music. I absolutely love the sound of a v-twin engine and this engine is a testament to the engineering that goes into manufacturing an Aprilia.

Time For Some Highway Riding

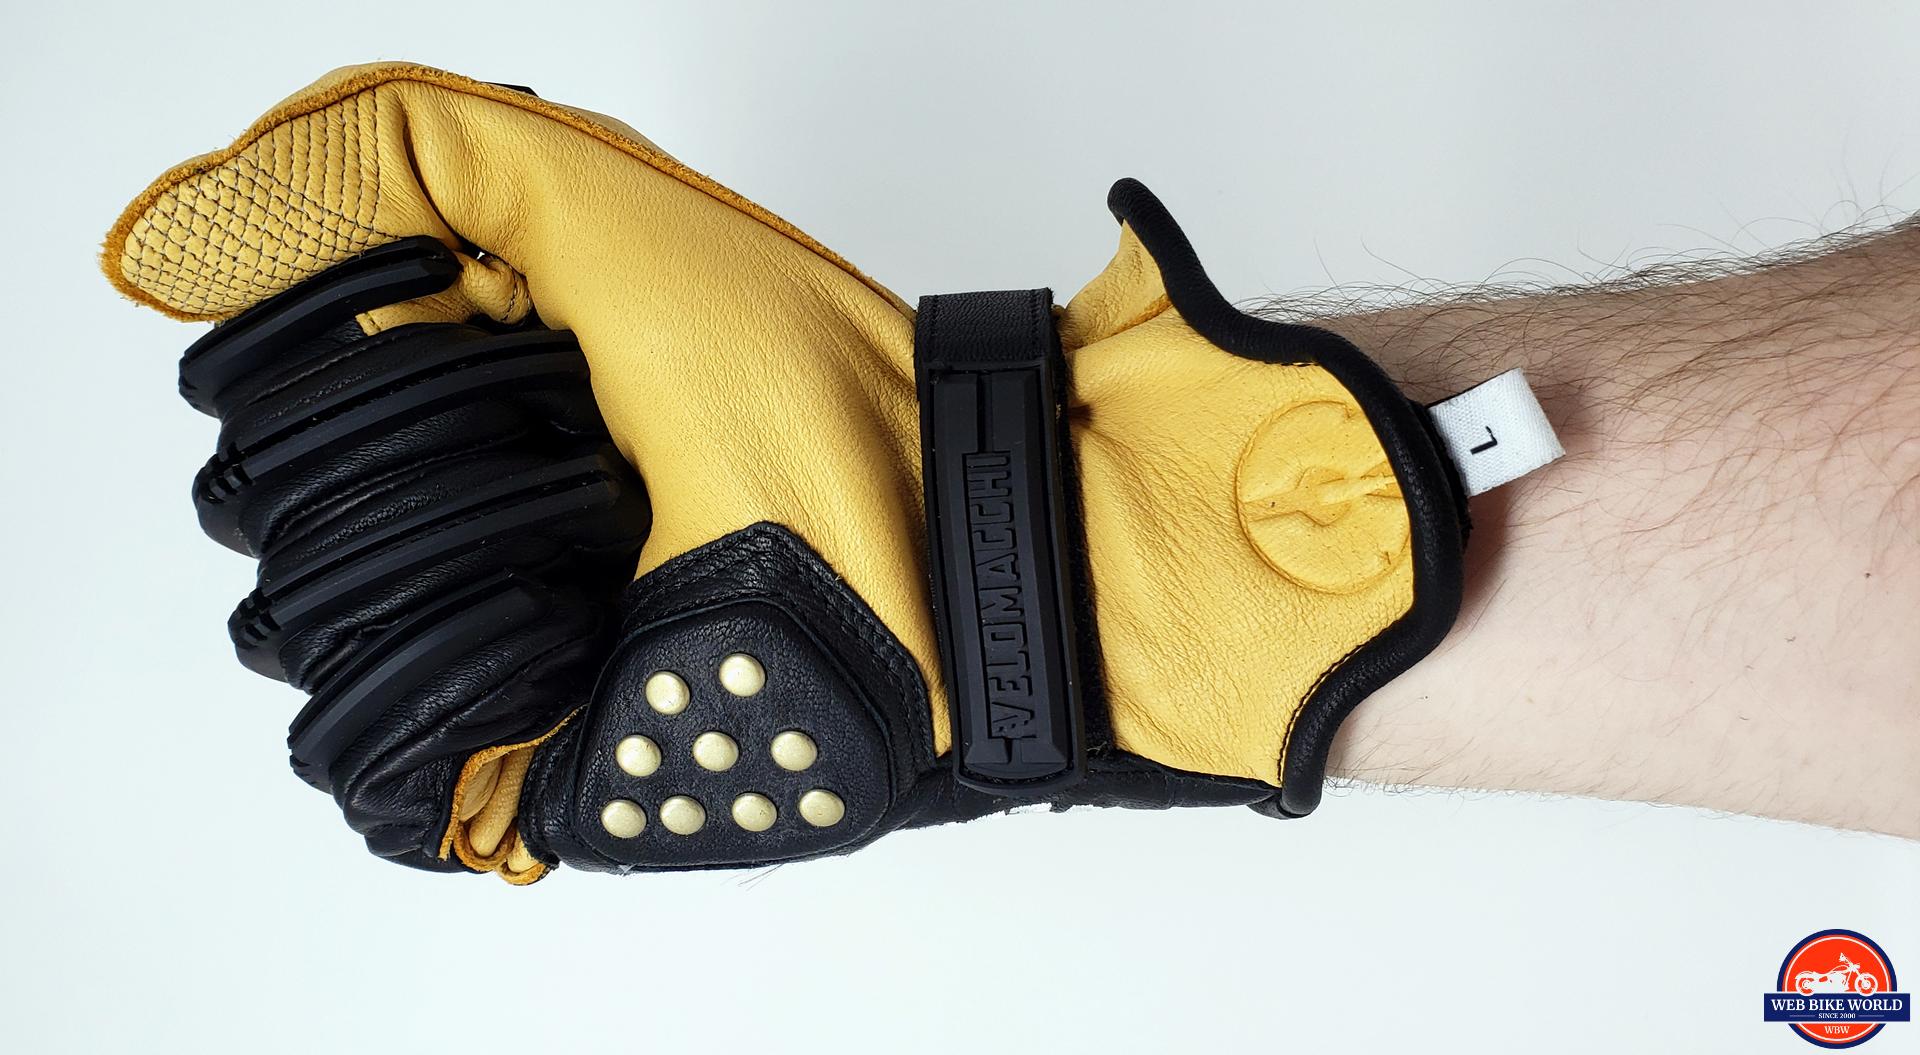
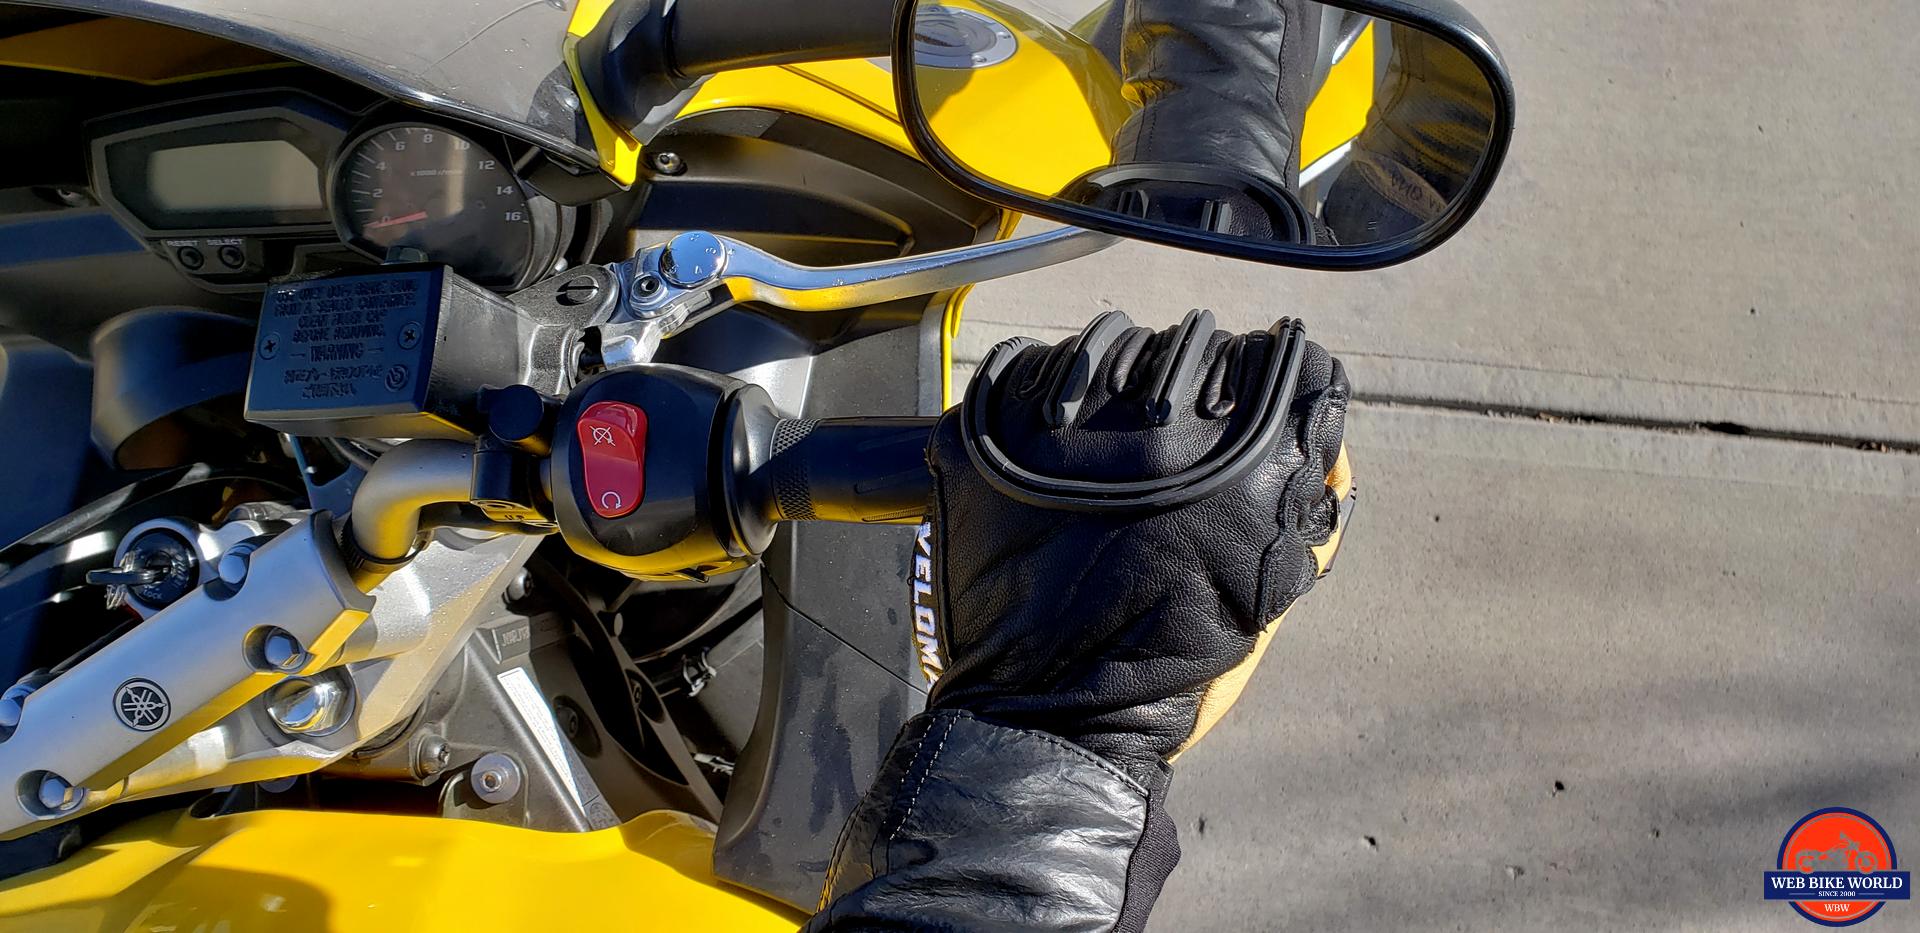
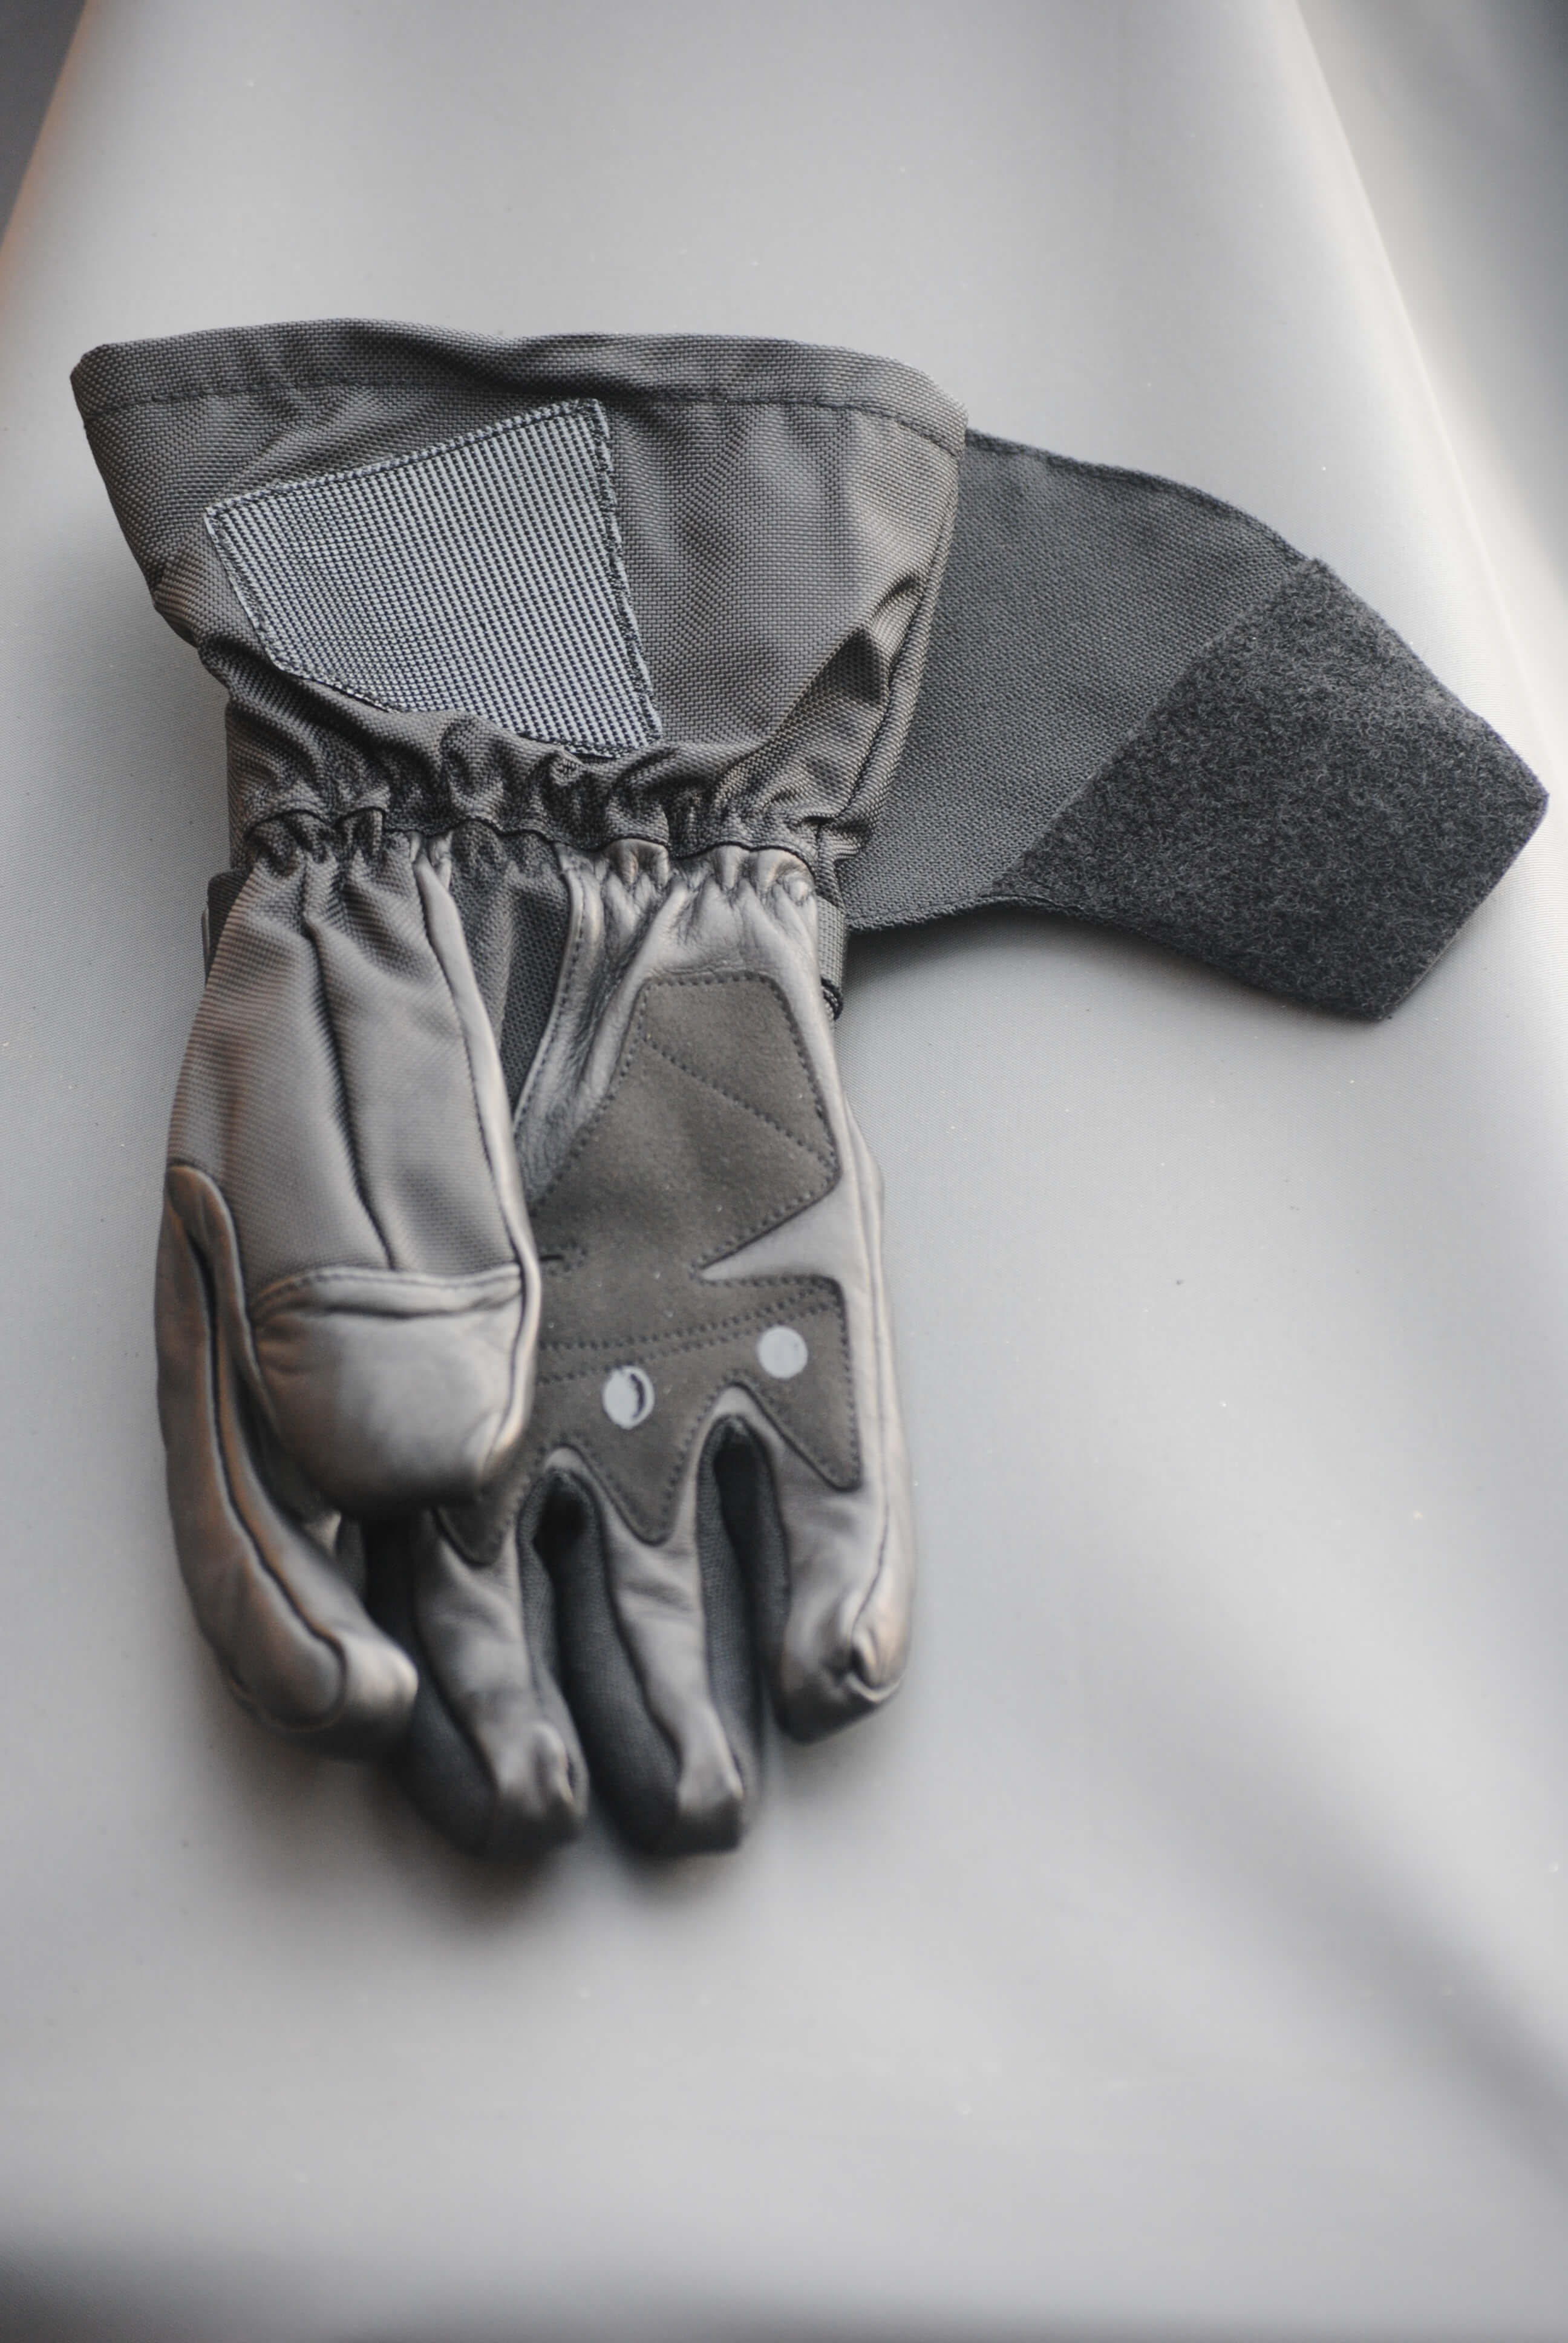
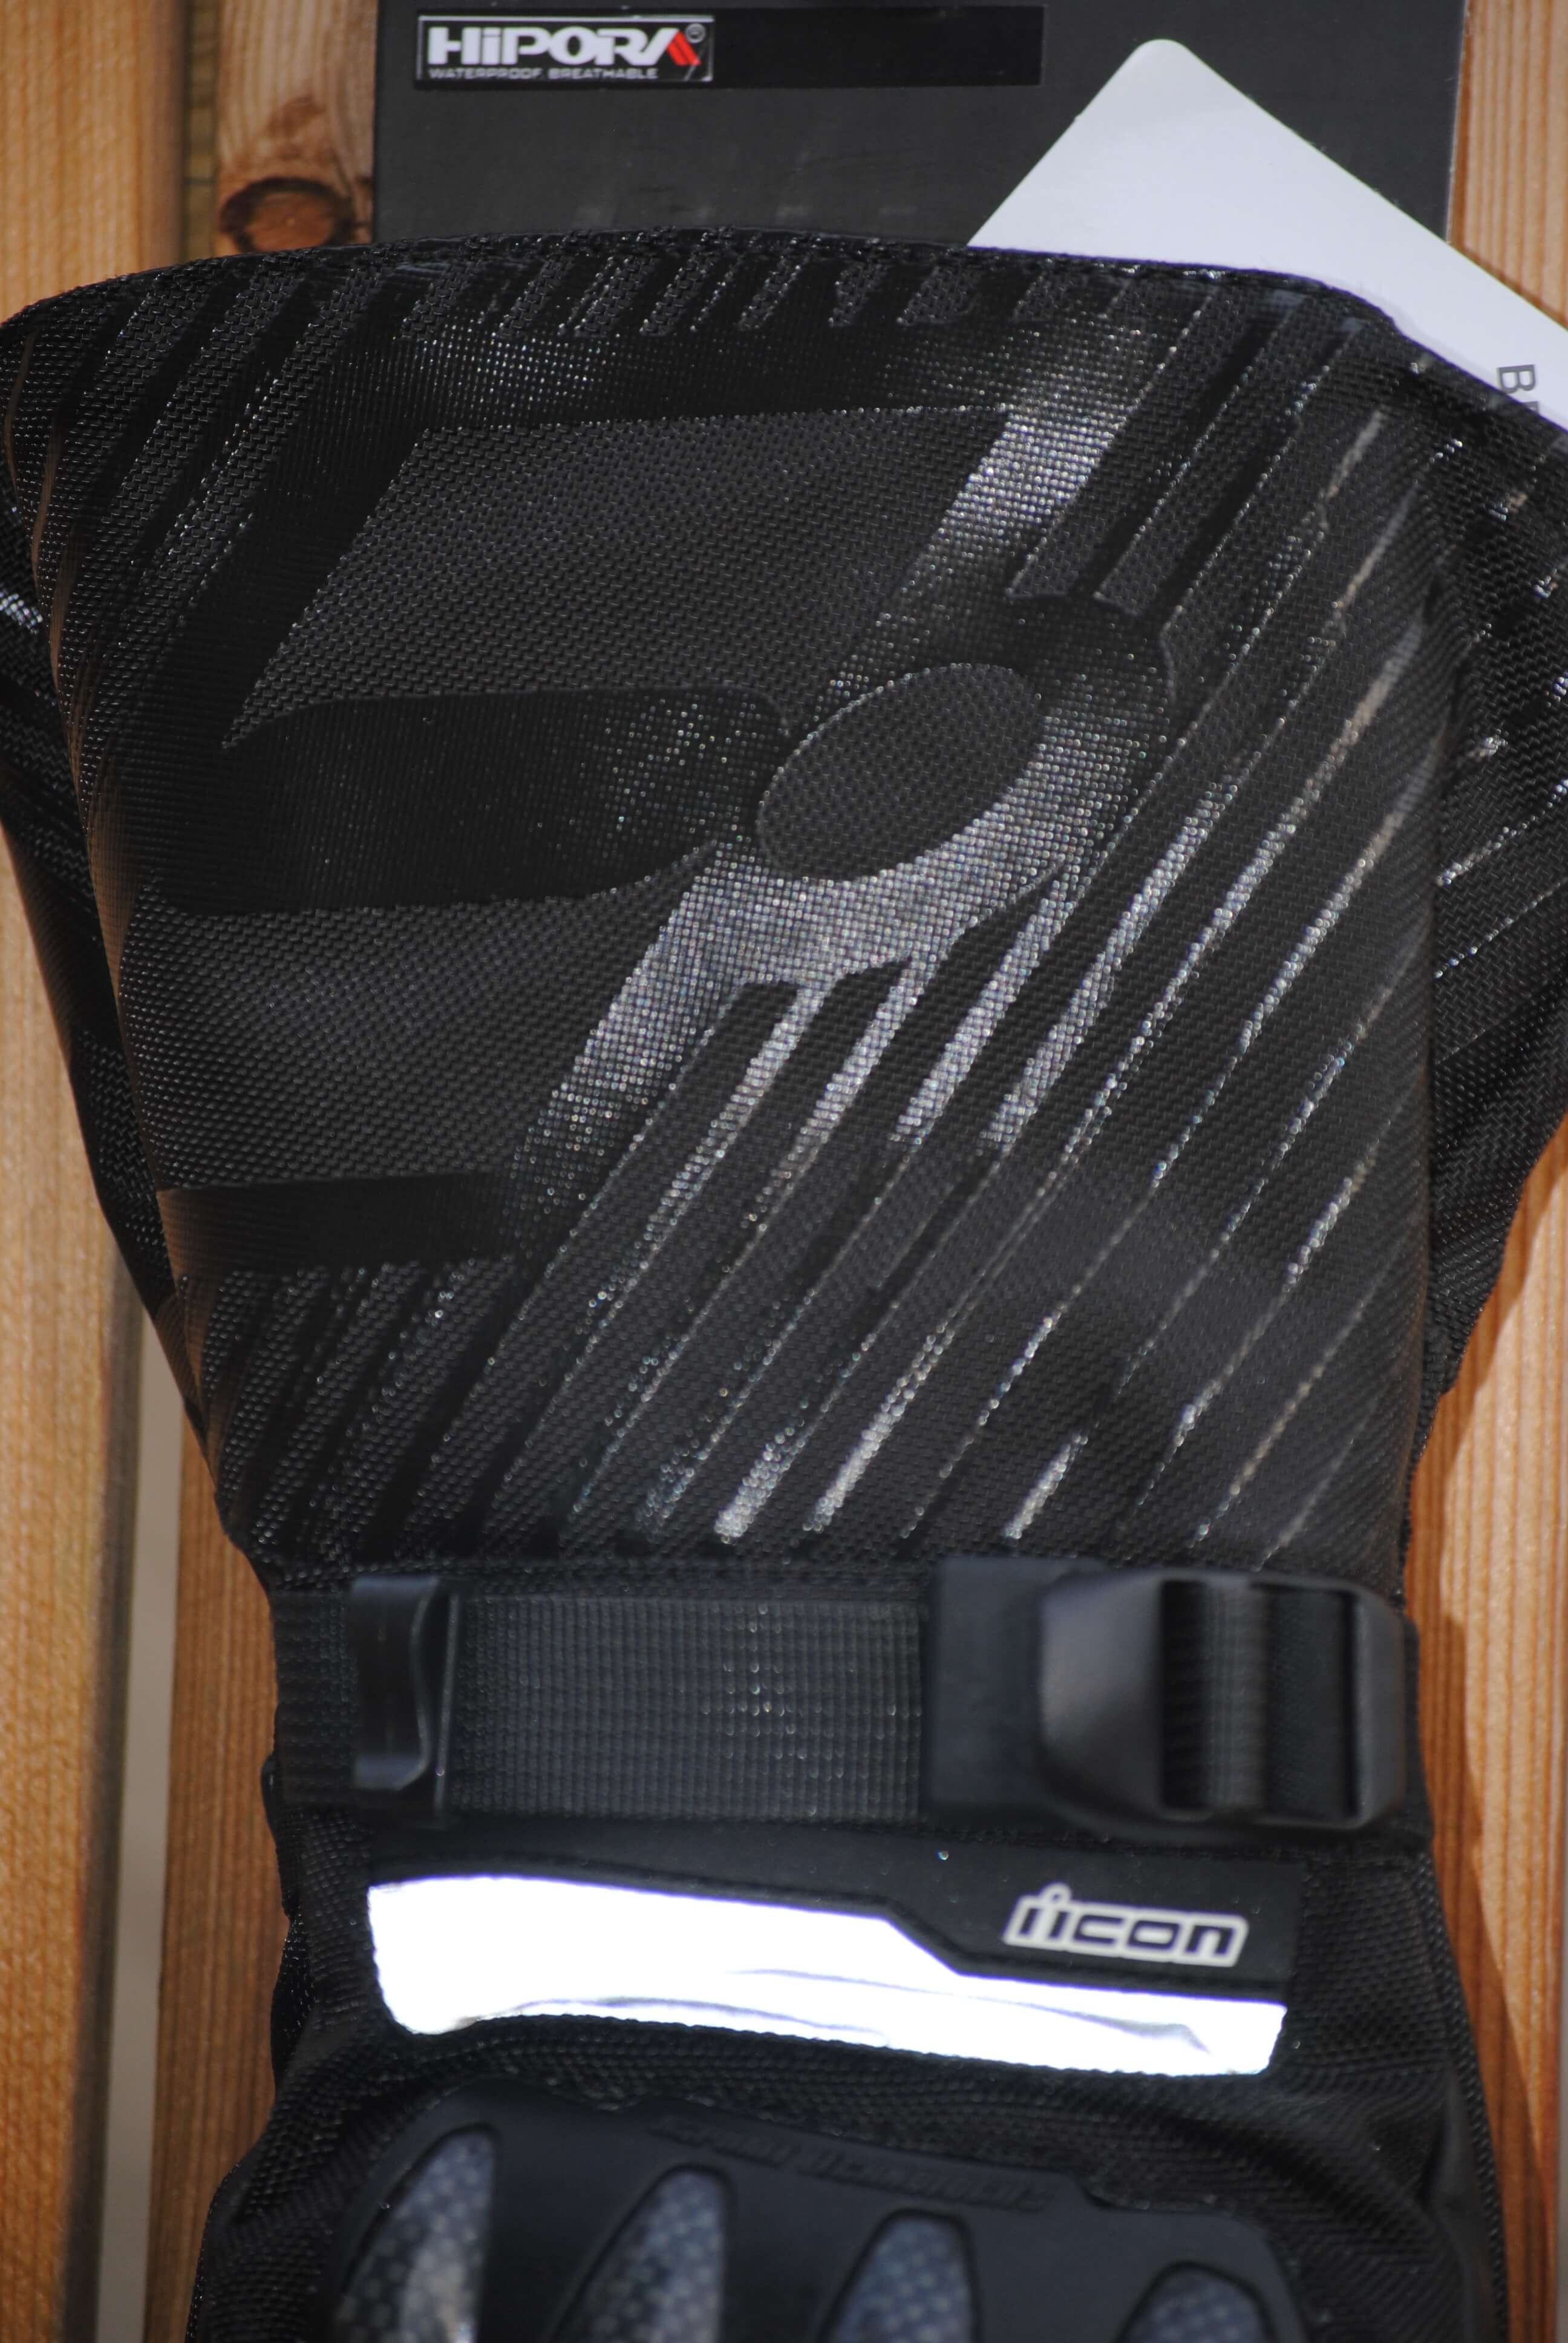
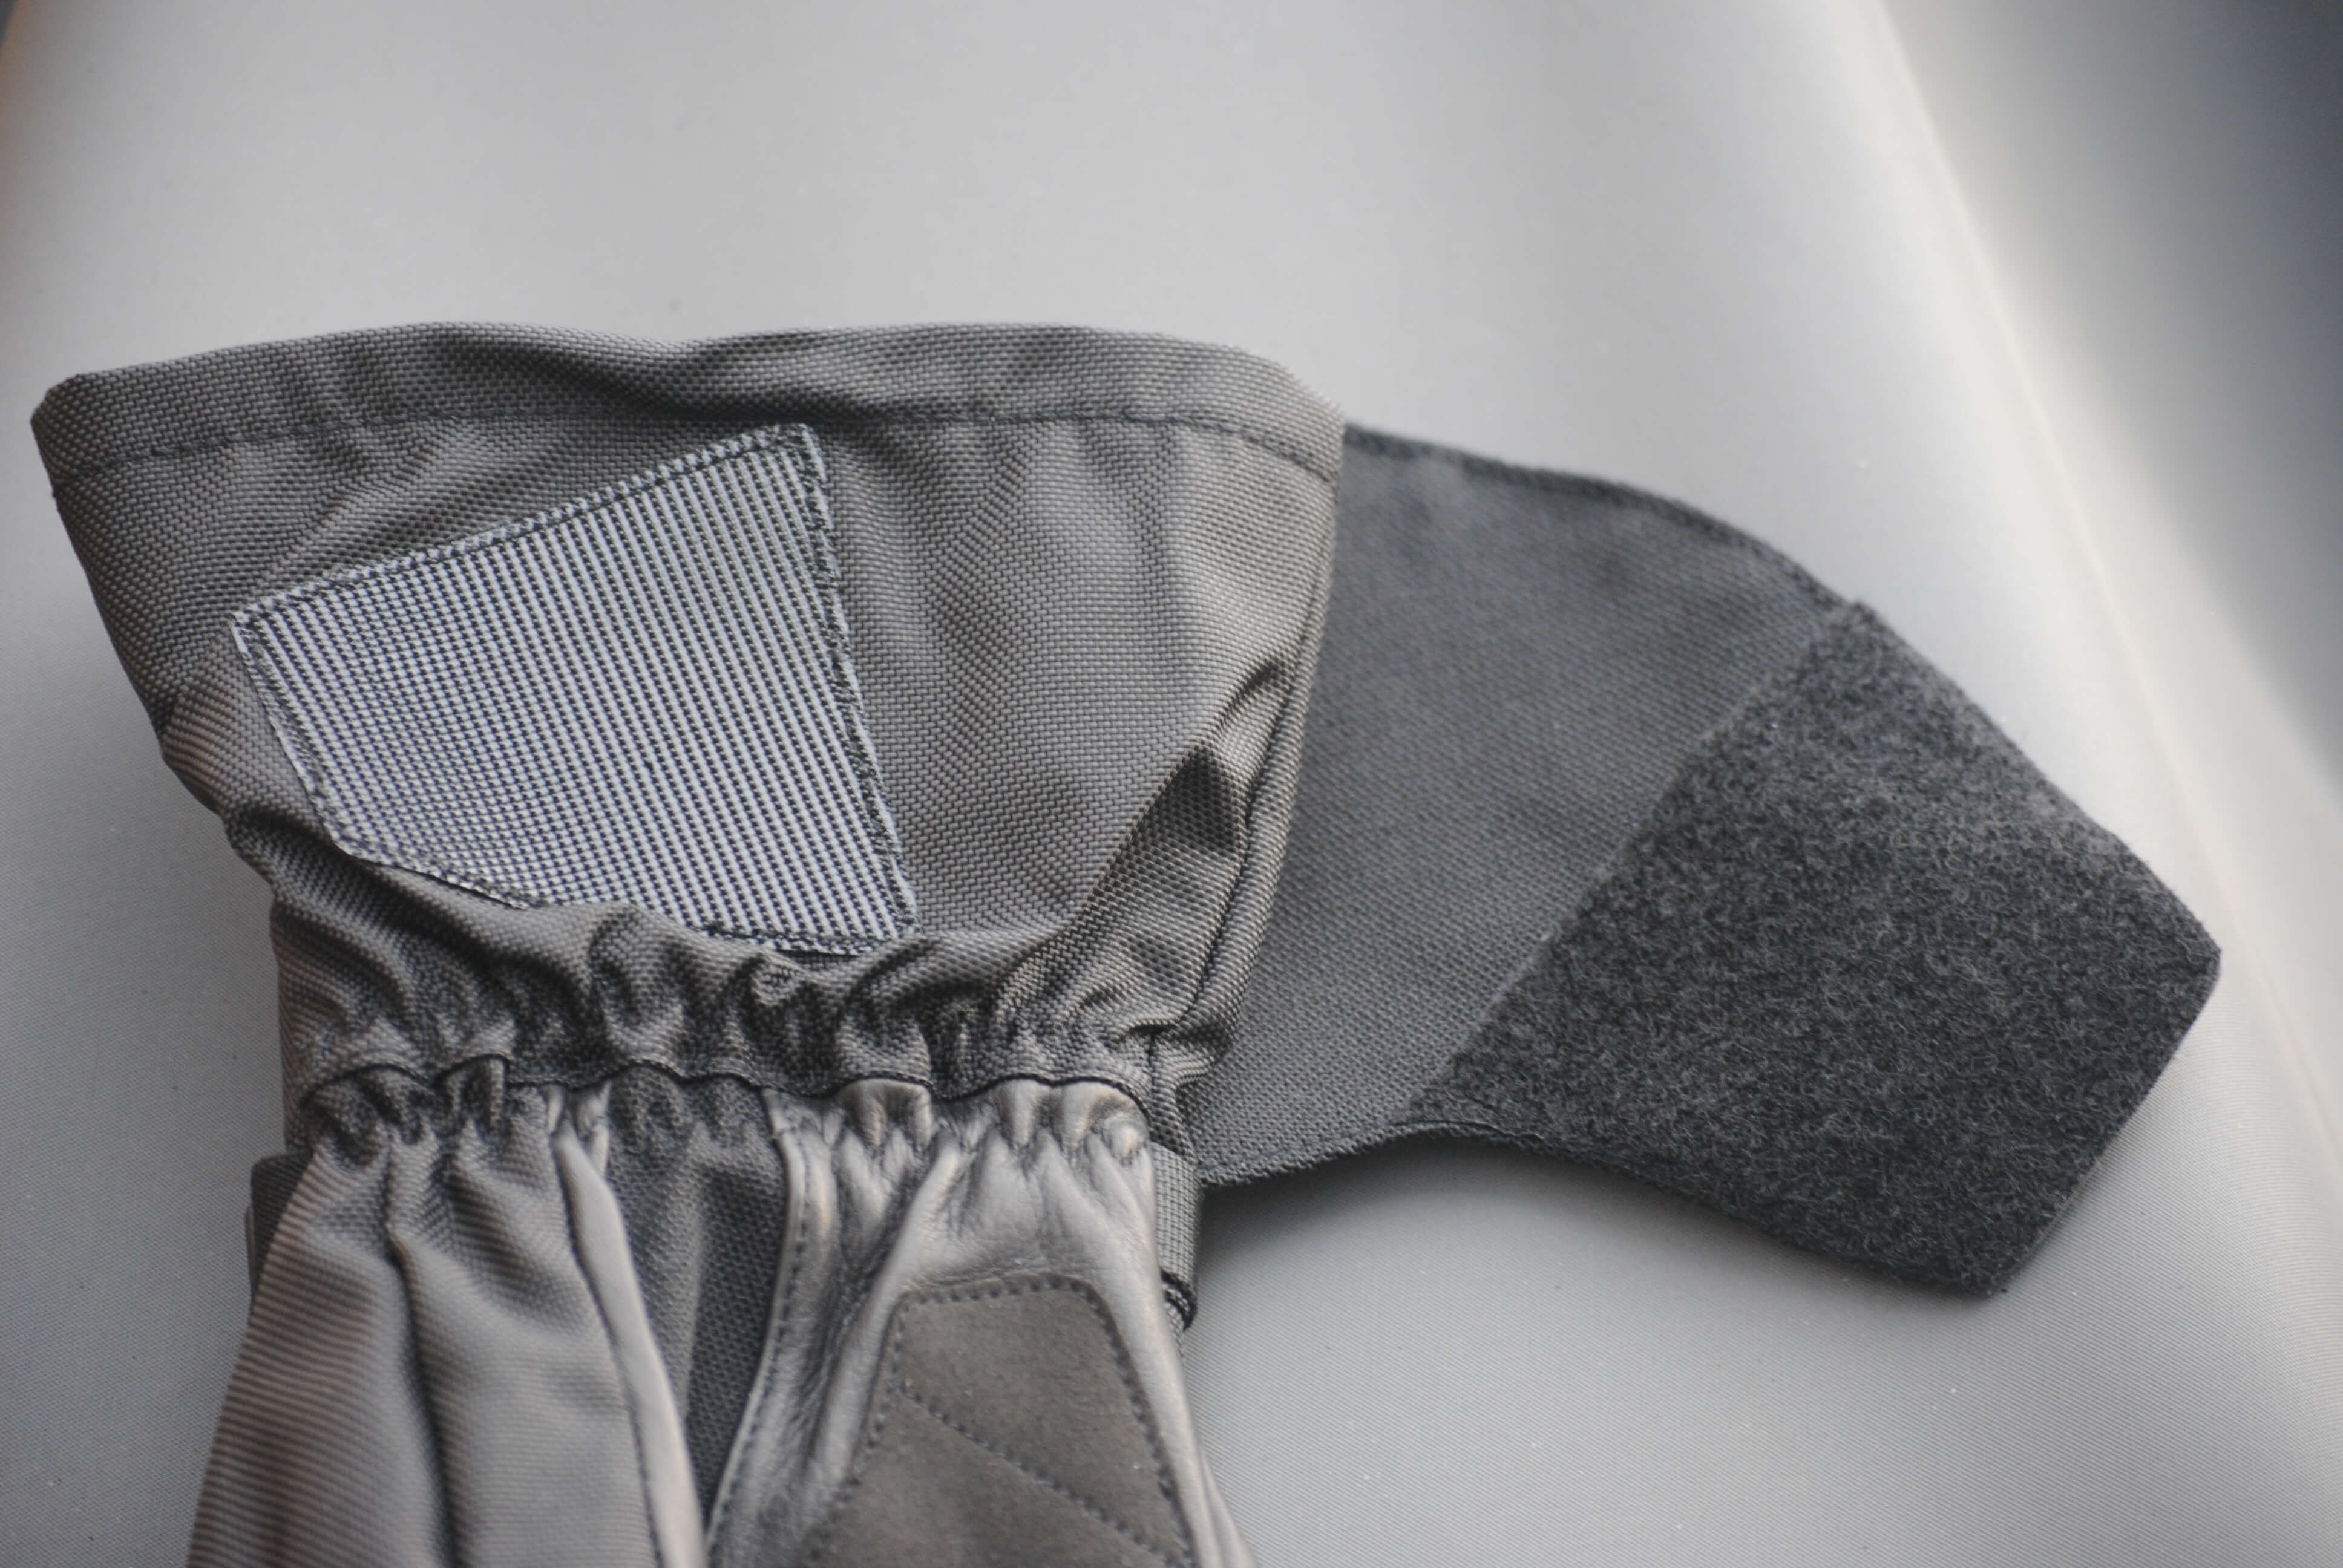
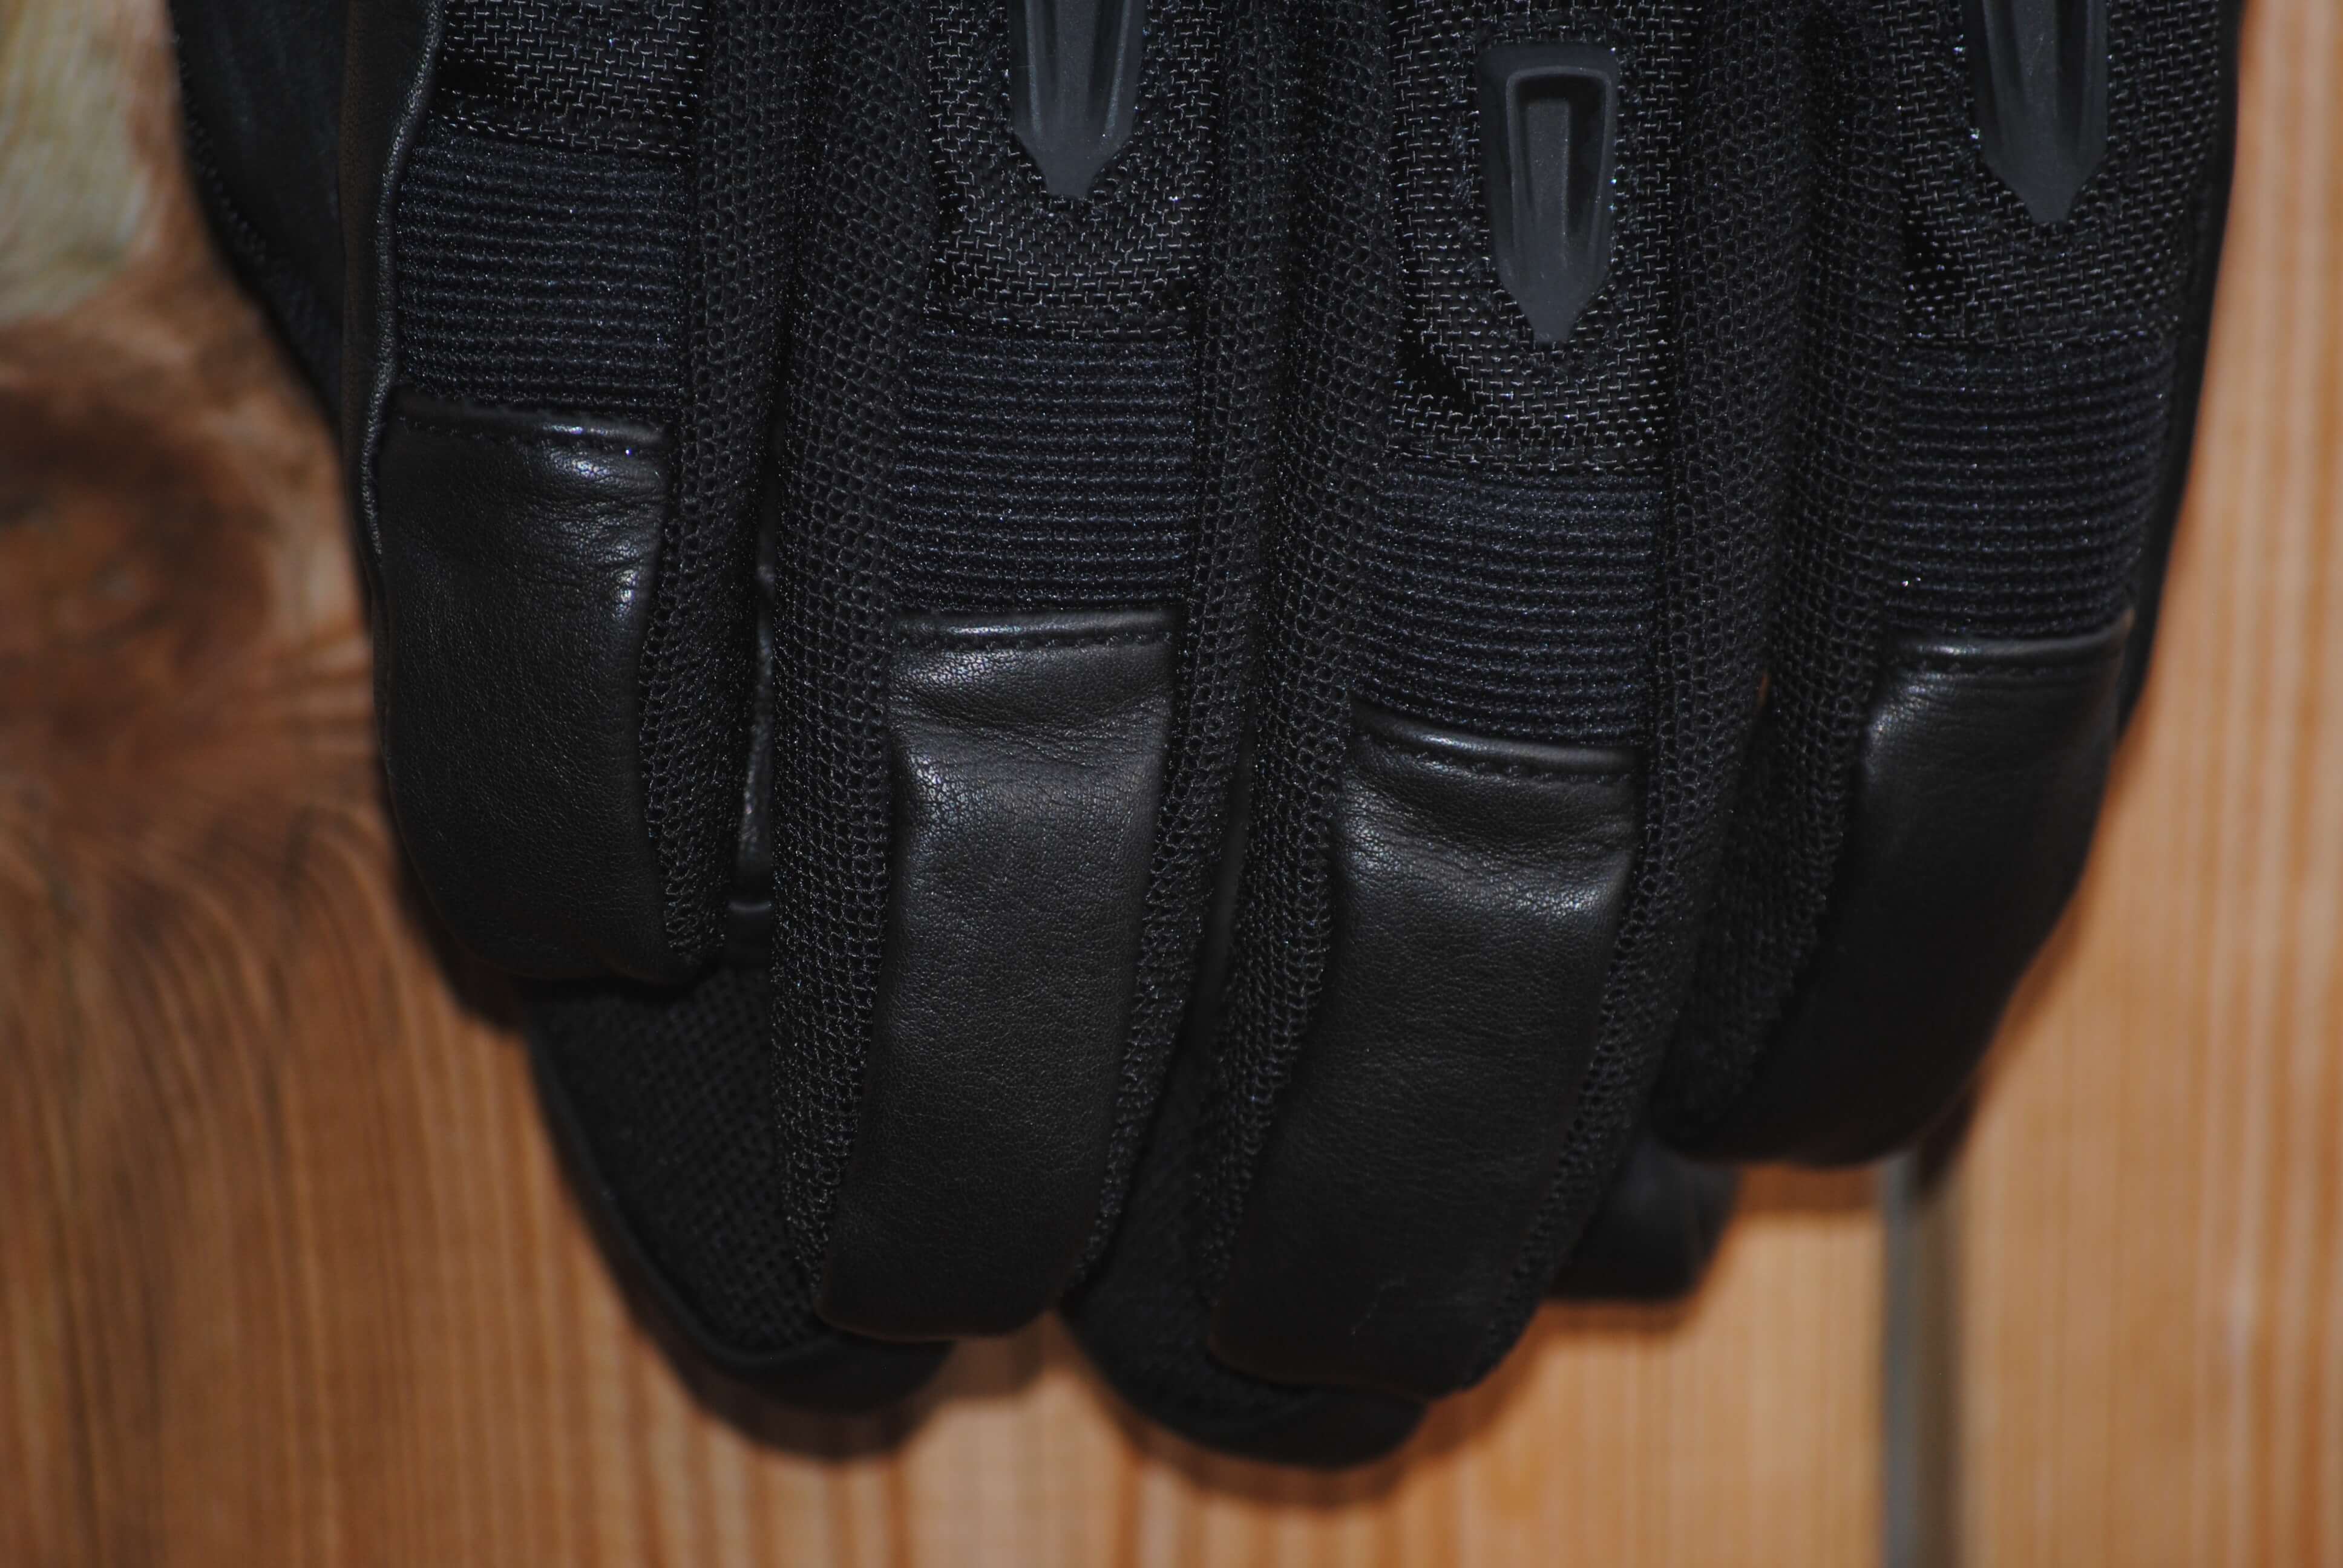
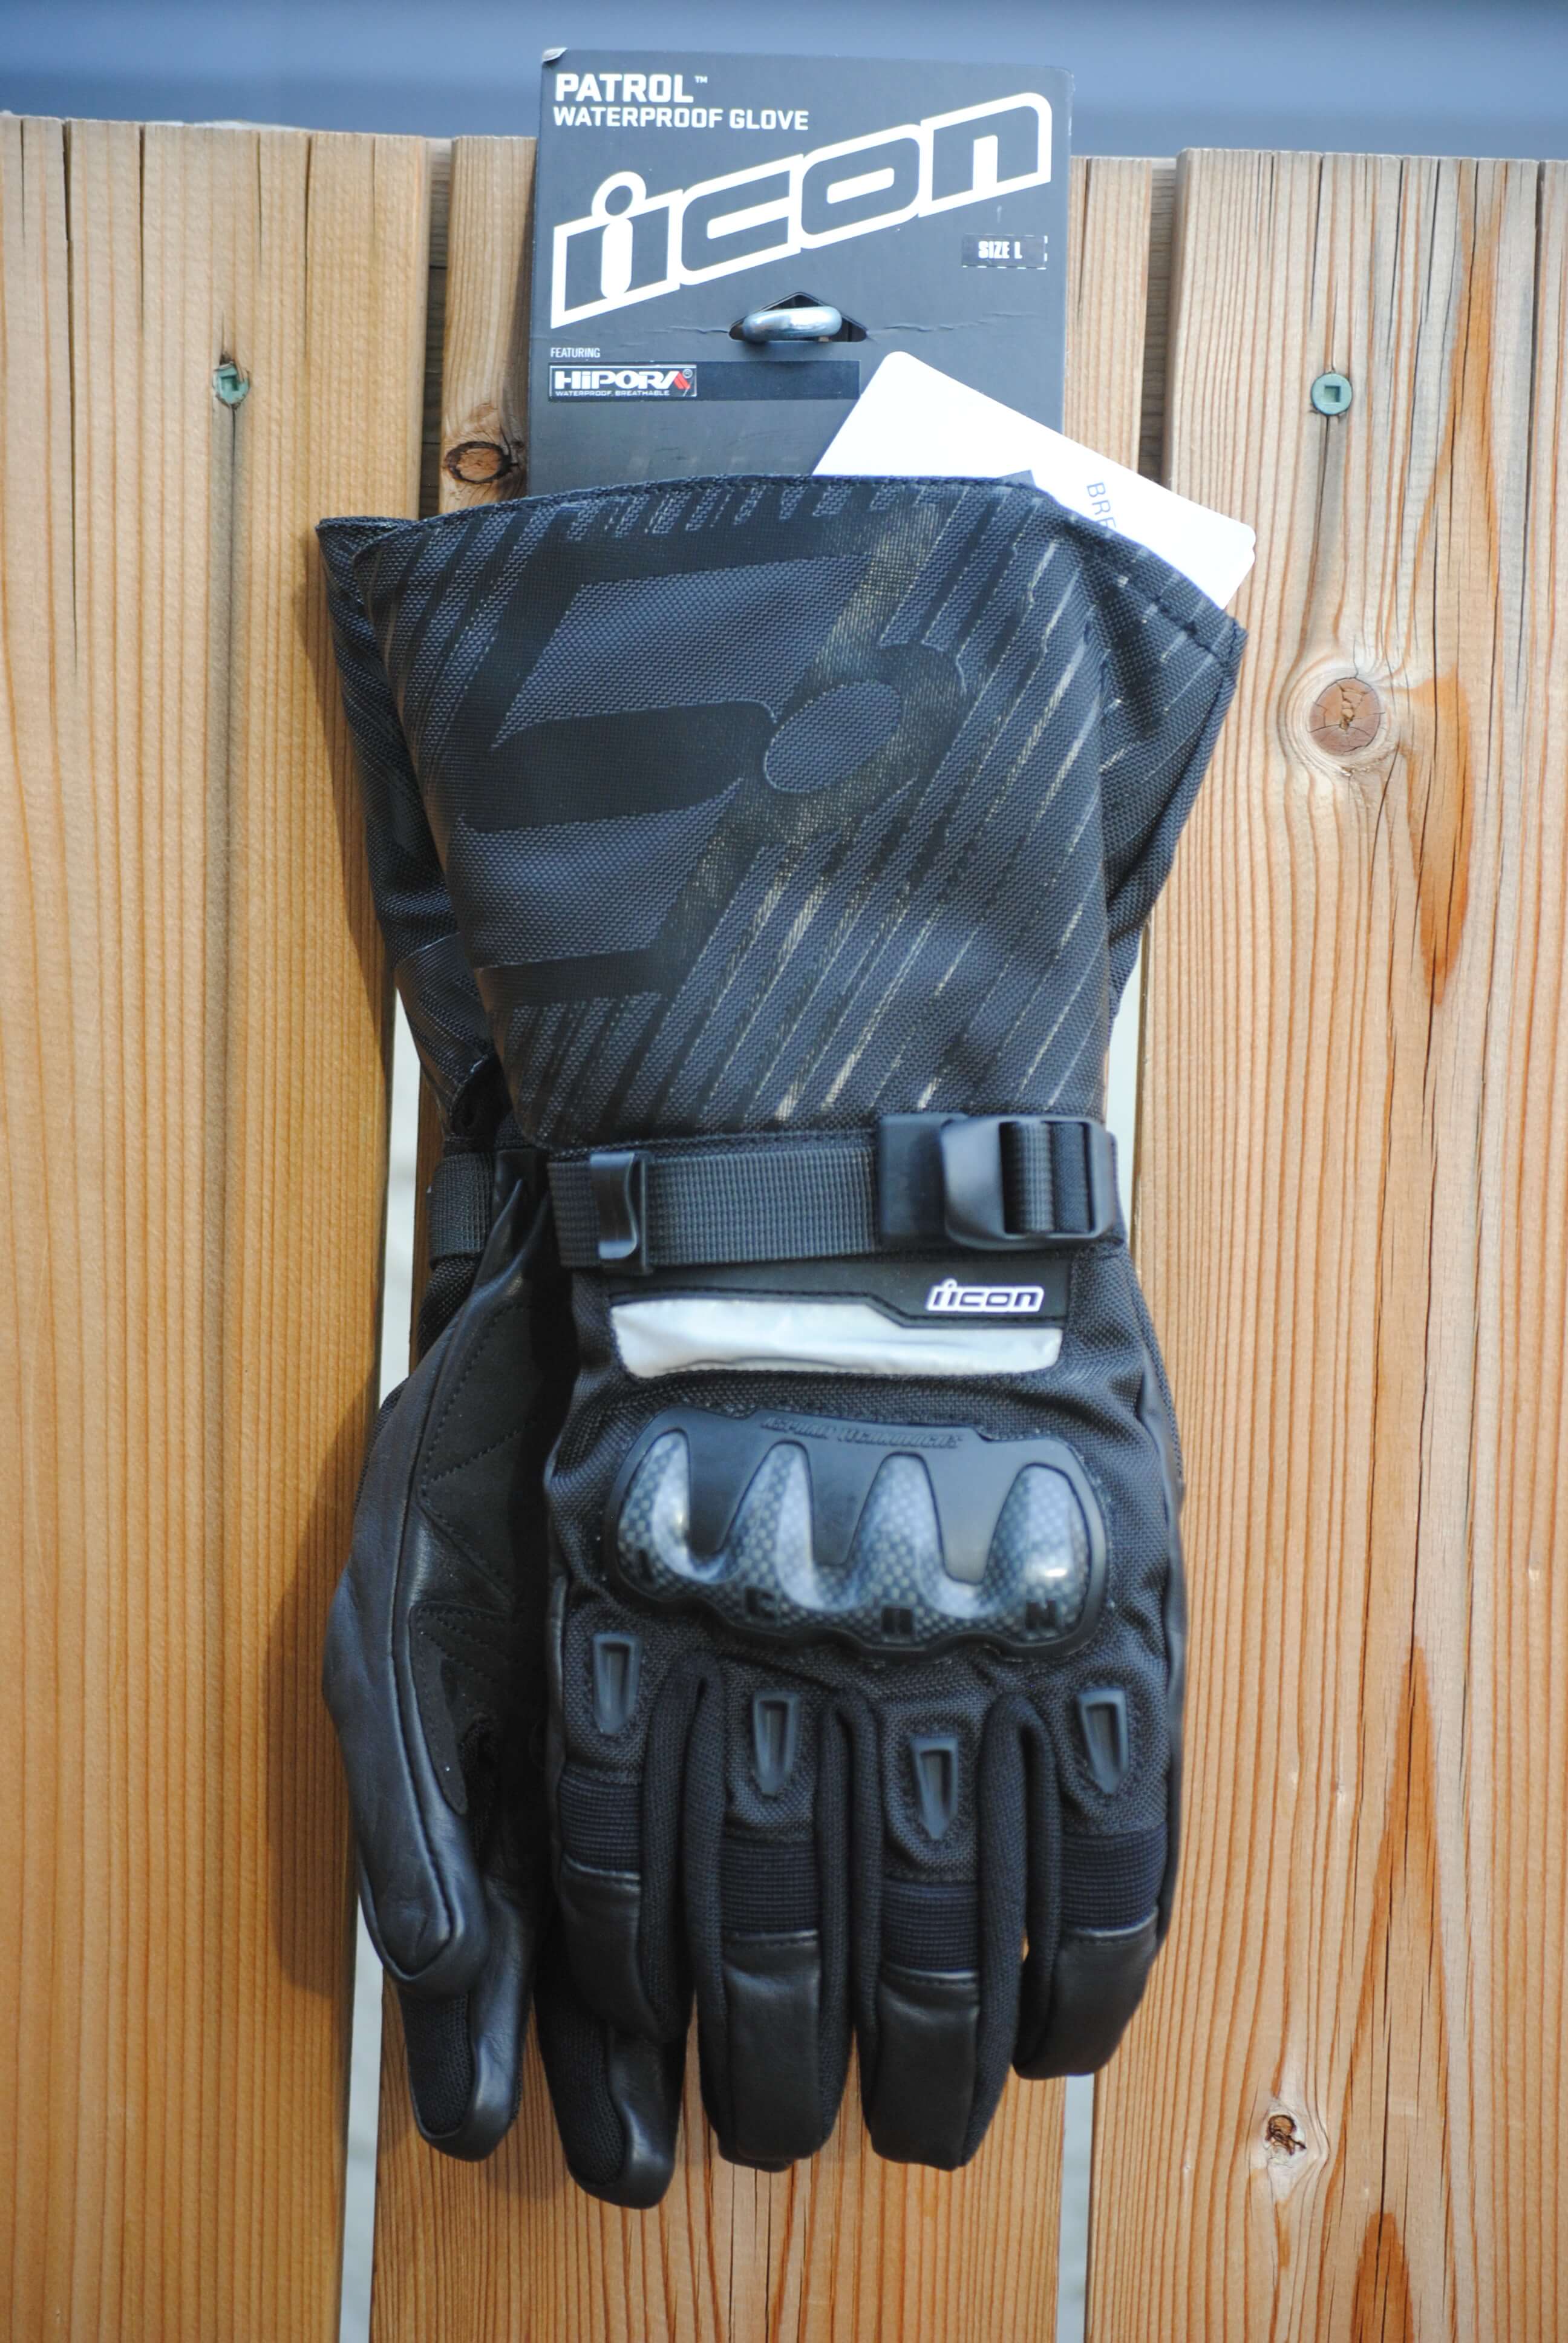
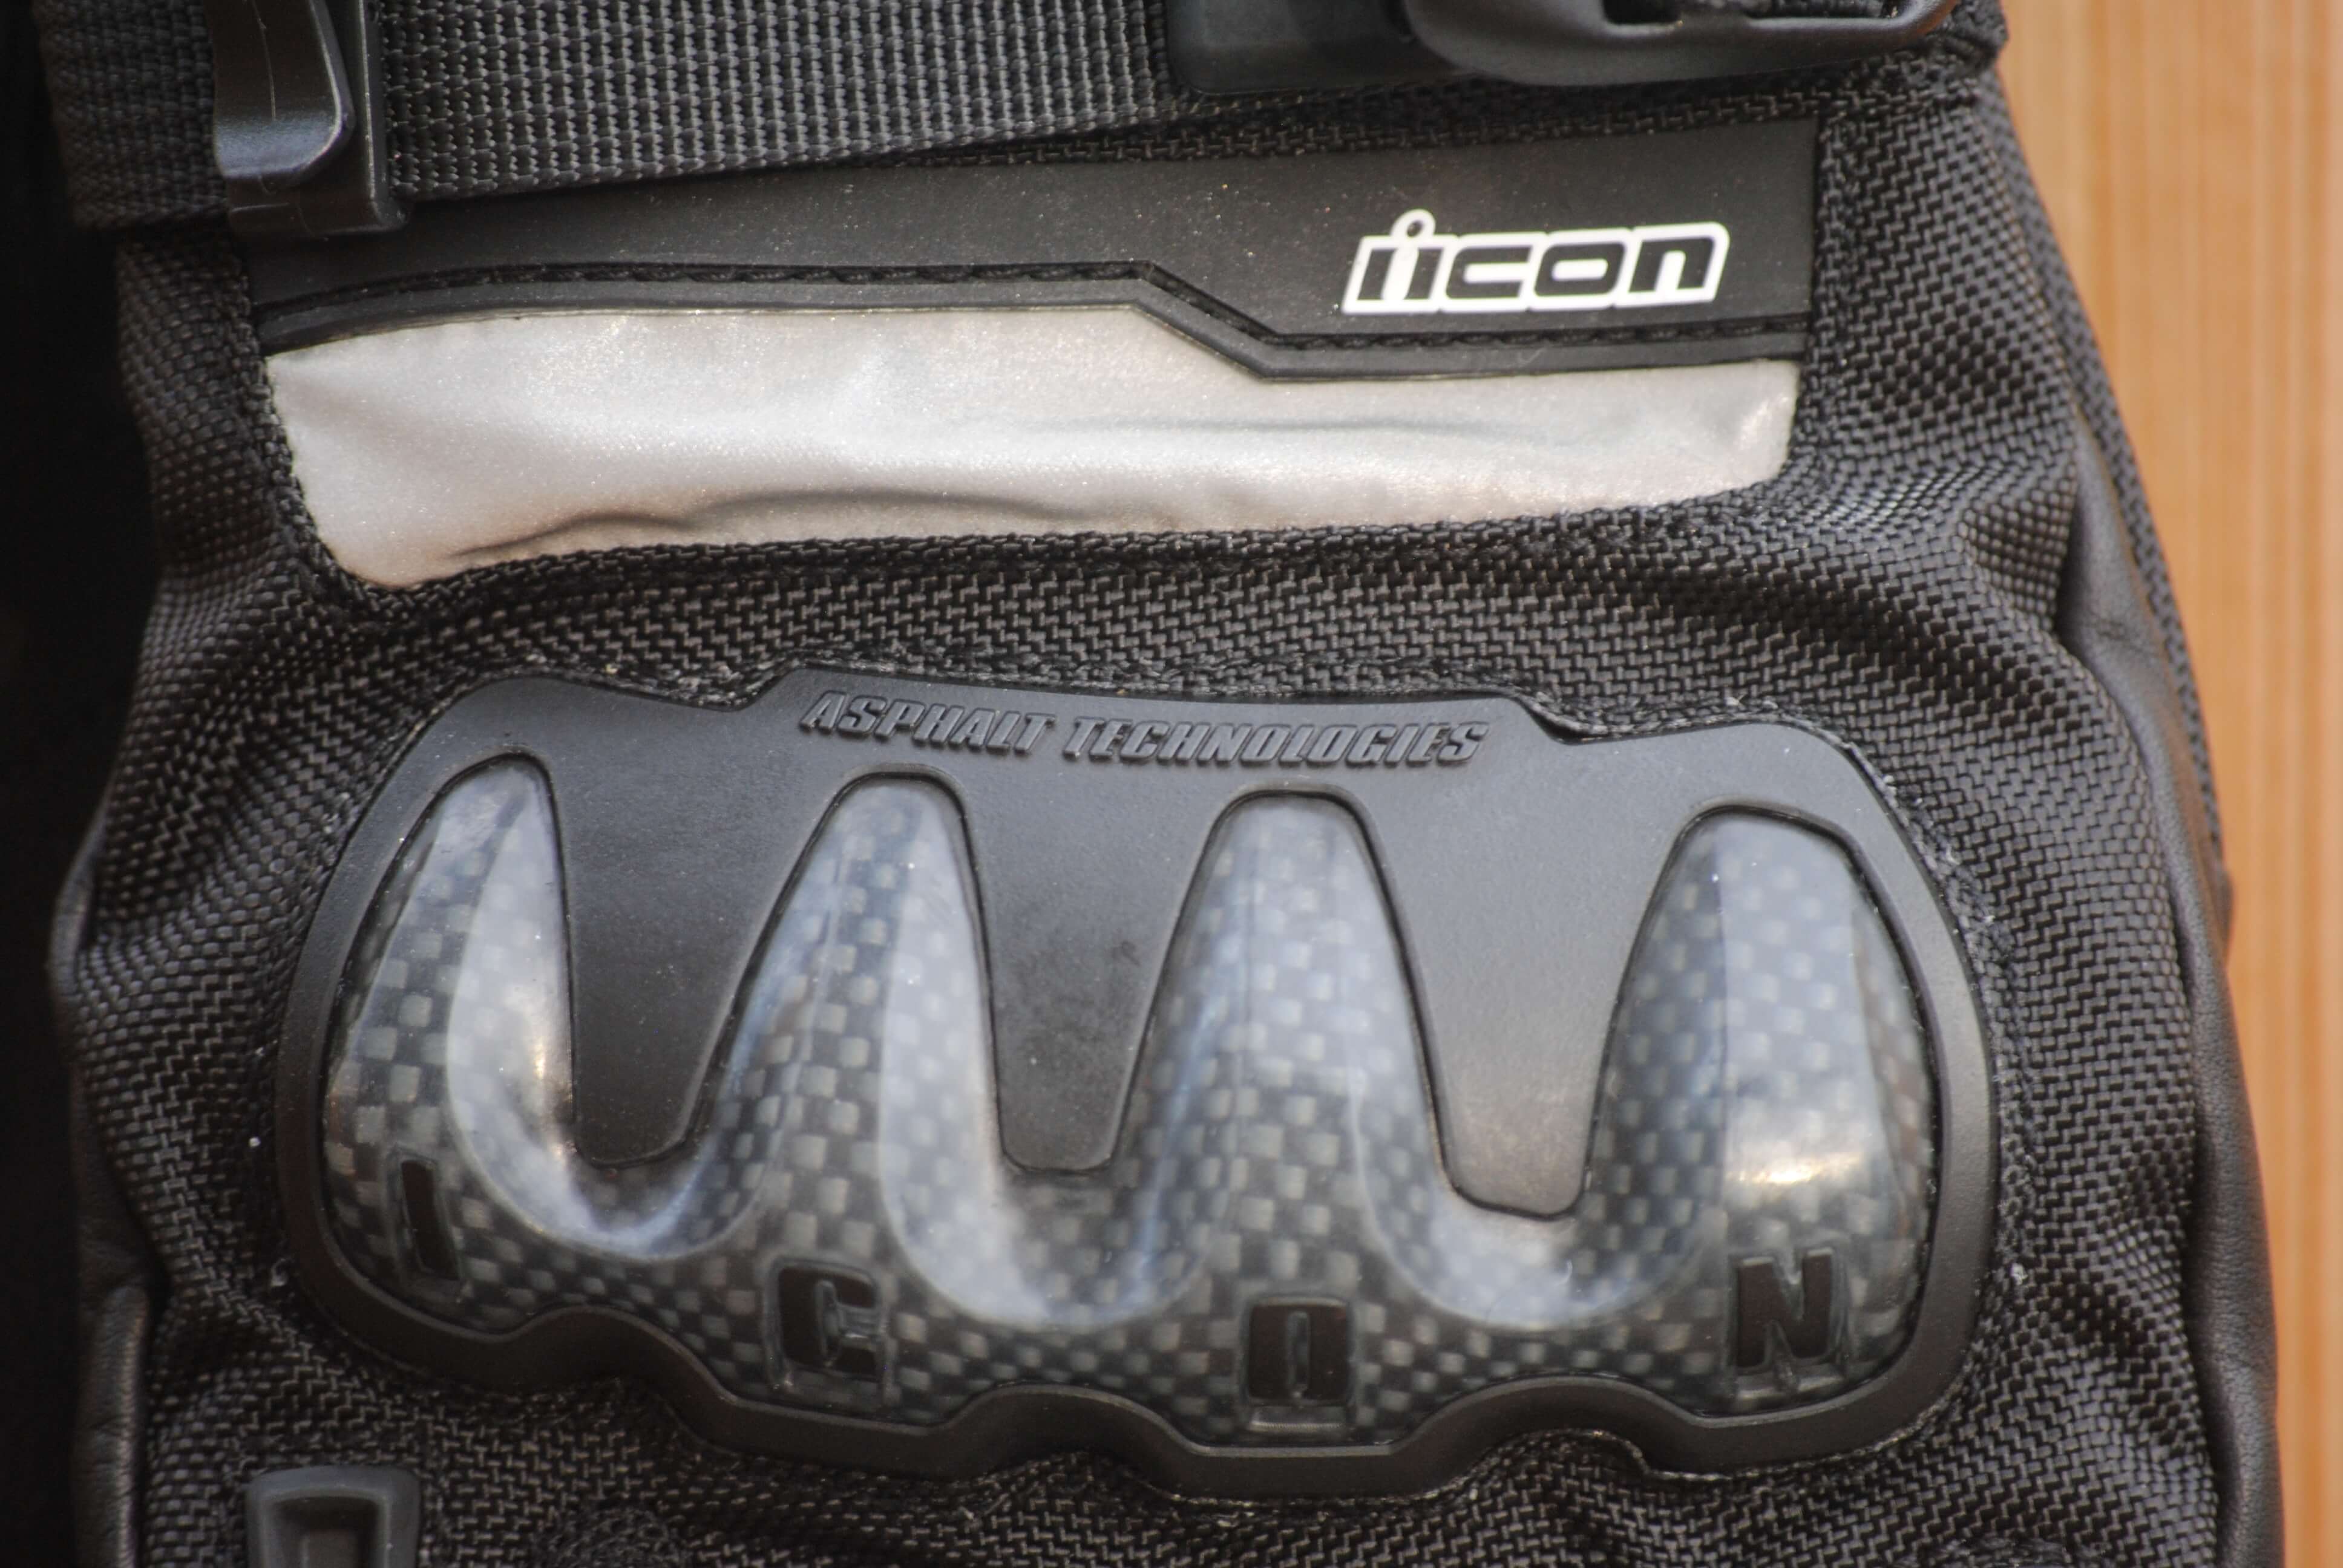
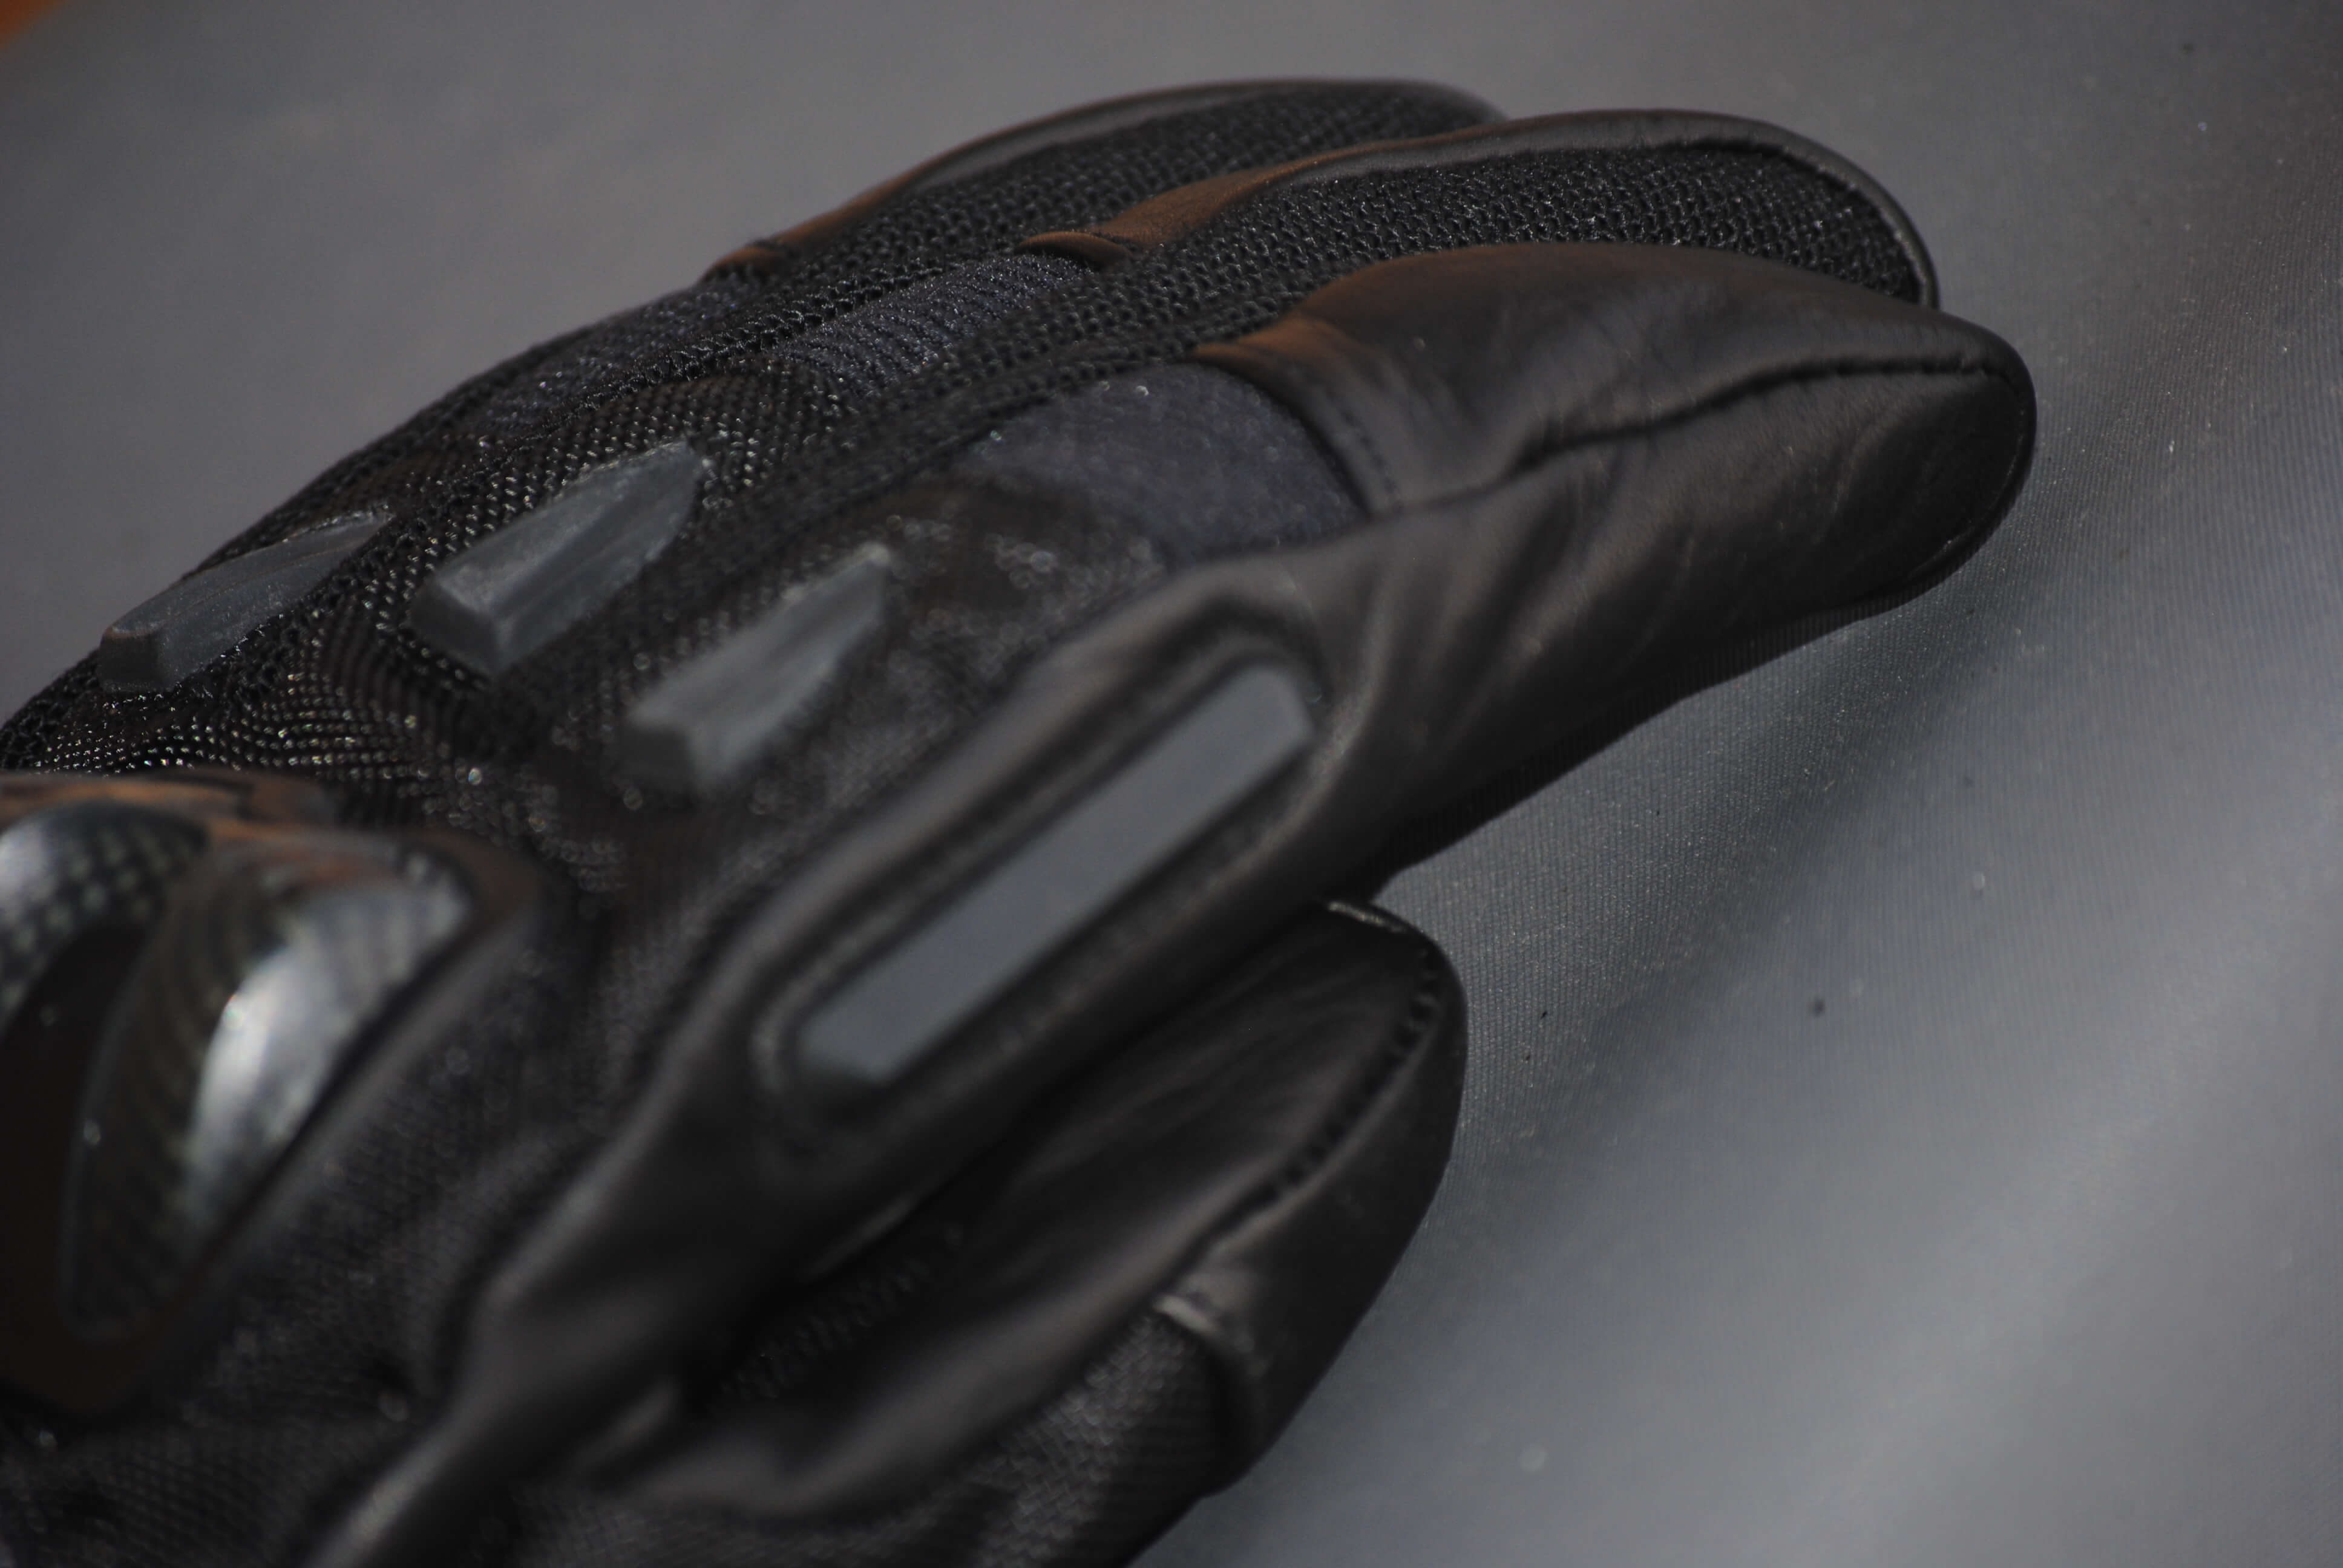
It was cold, but I knew I needed to go test out the Shiver 900 on the highway. I had my gear on, three-layer Cordura jacket, Cordura pants, and new gloves. I set out to see what this naked sport bike feels like on the highway.

The Shiver 900 did not disappoint on the highway.

I set the bike to sport mode and set out on Stoney Trail, the ring road that goes around the city of Calgary.

The motorcycle was extremely smooth in its acceleration. I was pleasantly surprised at how well the Shiver 900 feels on the highway. The wind is very present as one would expect on a bike without a windshield; however, the design of the bike seems to reduce the amount of wind in the helmet area. It was not unpleasant or overly turbulent to ride at highway speeds.

Passing a tractor-trailer was not a problem. I felt confident and the motorcycle has no issues with power in the low end, the mid-range, and at the top end. The Shiver does very well in all situations.

Riding Position

I was very comfortable on the Shiver 900. The seat is comfortable and at the right height for me. The handlebars are in the perfect position for me. I felt like I was in a very natural sitting position.

The foot position was very comfortable. I felt like I was in control of the bike the whole time.

2018 Aprilia Shiver 900
2018 Aprilia Shiver 900 tank

Digital Instrument Cluster

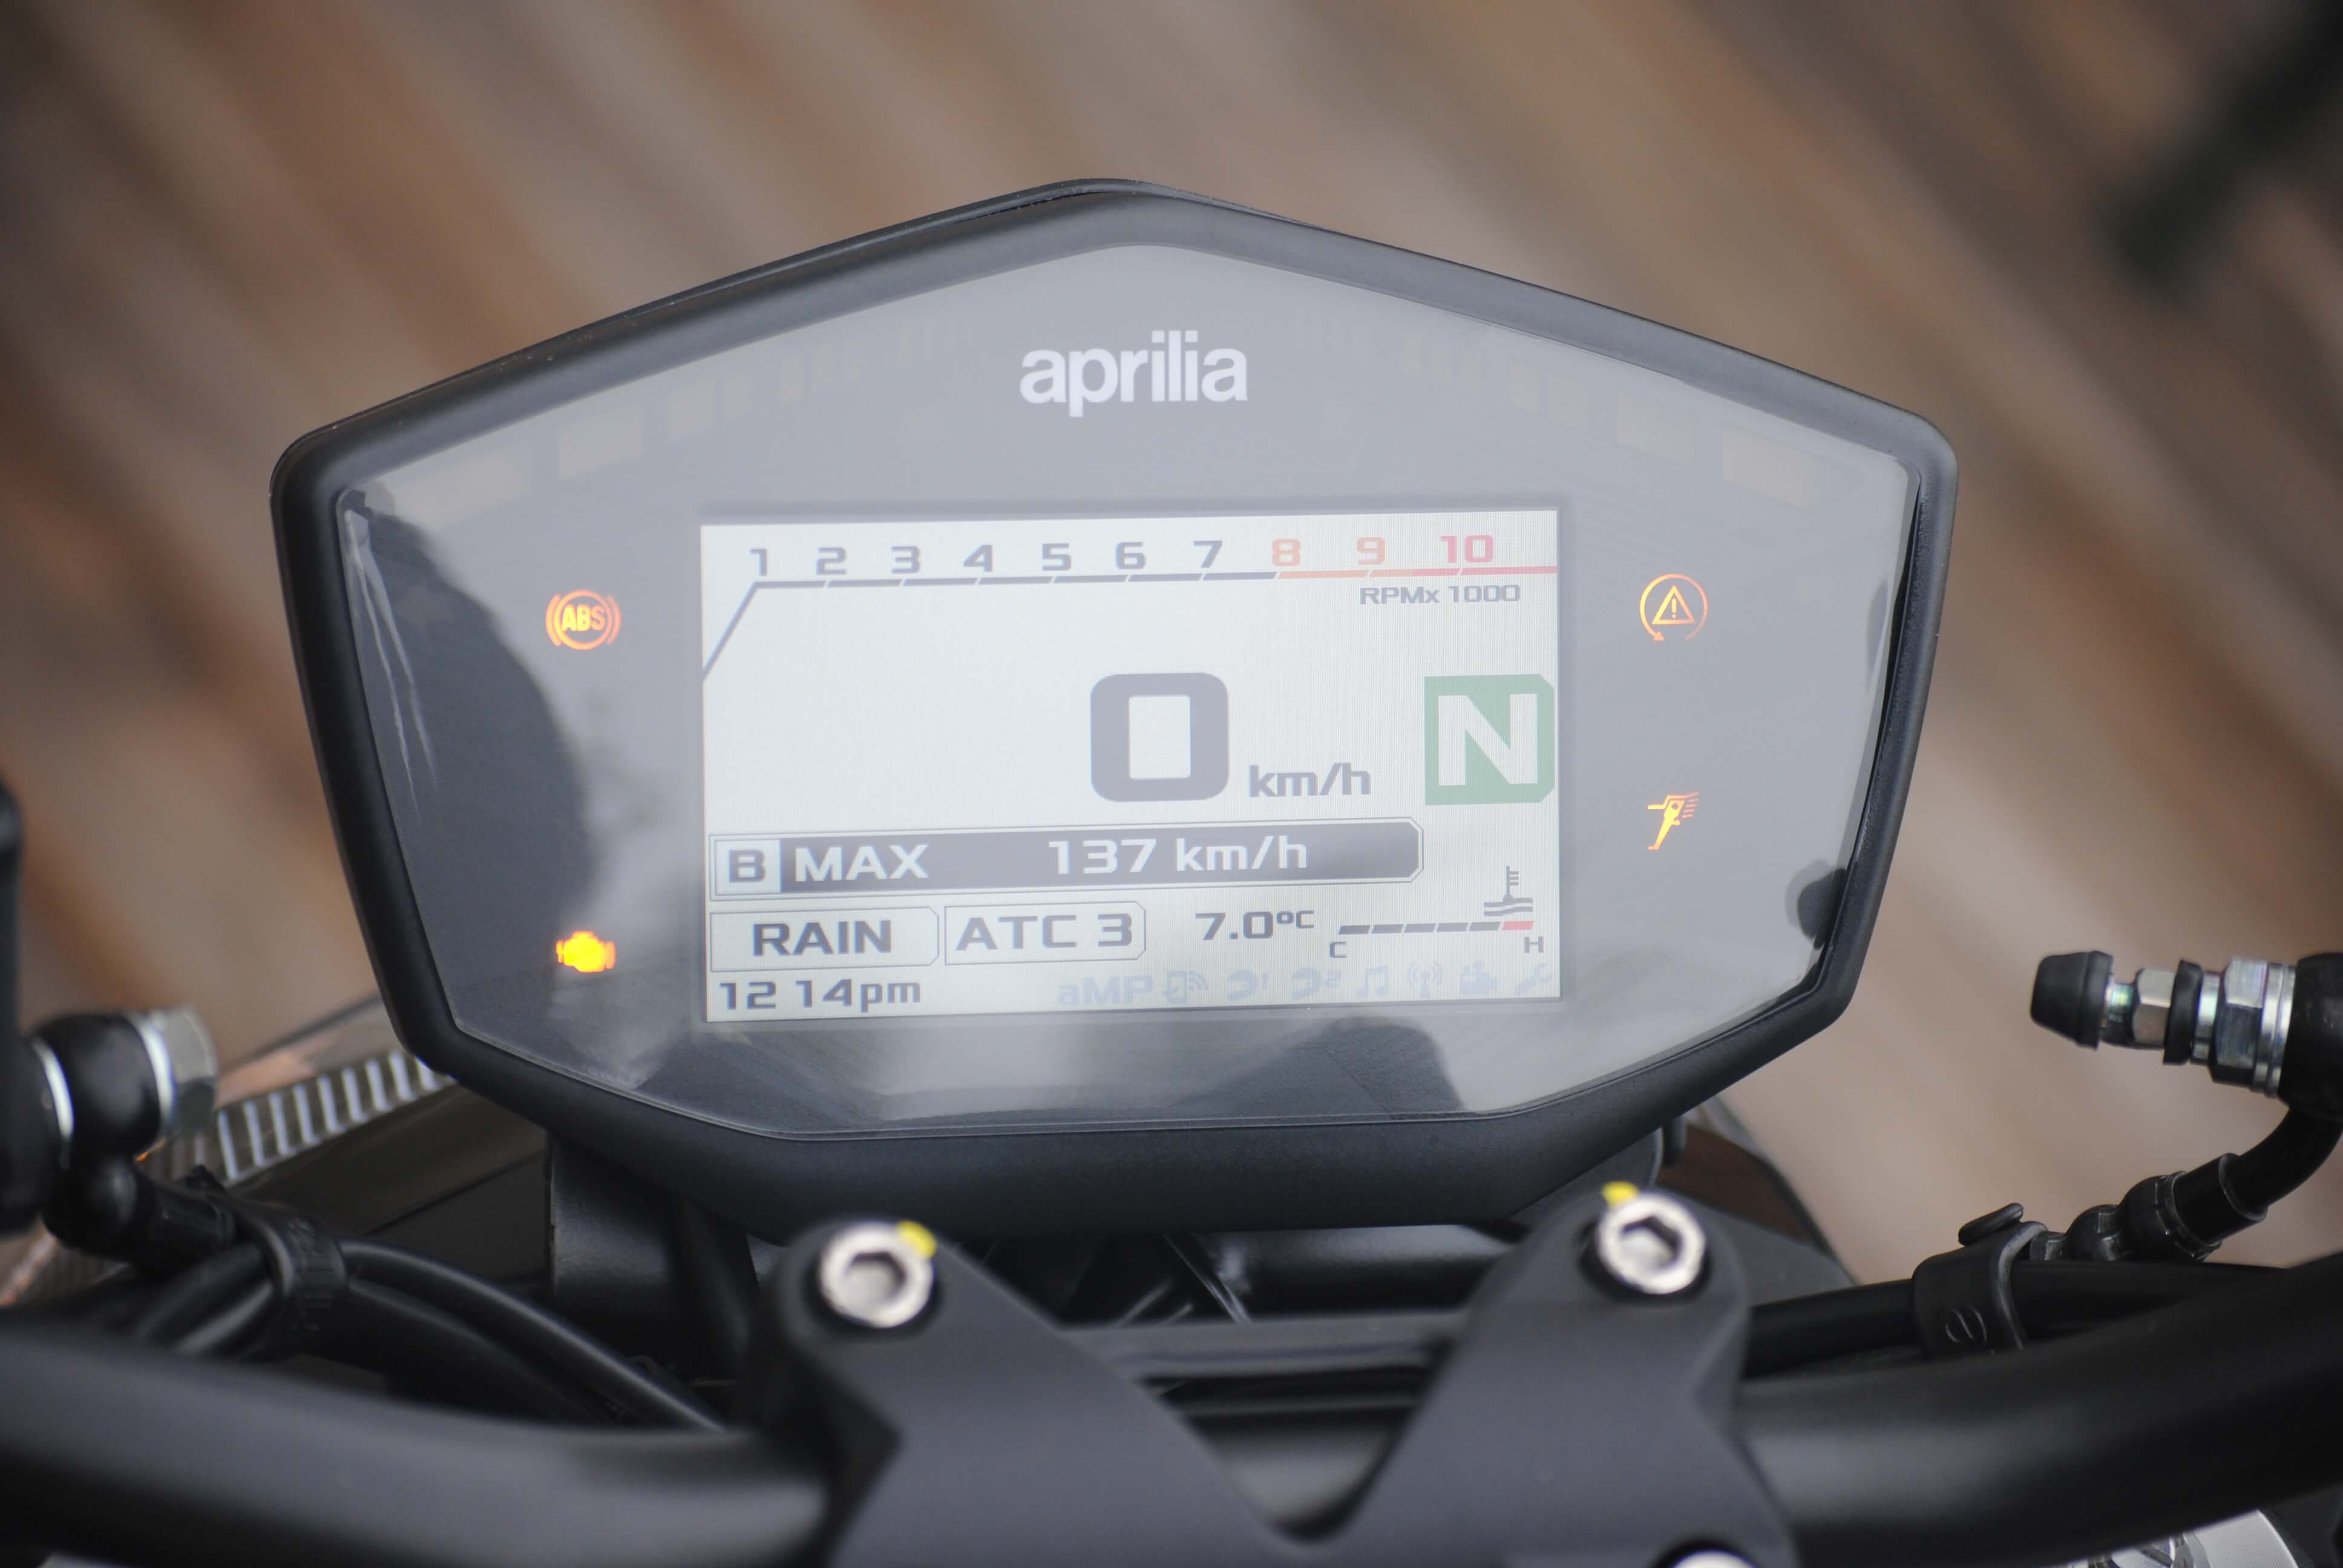
The Aprilia Shiver 900 has an ultra-modern TFT technology display that features a large 4.3” screen that adapts to daytime and nighttime. The information is clear and easy to read. I like that the information is very clear and easy to read at a glance. The information was very visible during the day as well as in the evening.

2018 Aprilia Shiver 900 tank digital instrument

Tires

The Shiver 900 comes equipped with Pirelli AngeI ST tires. 120/70 ZR 17 on the front and a 180/55 ZR 17 on the Rear.

These tires are designed for a sport touring application and I was really impressed at how well these tires performed on wet pavement. Especially given that they are brand new and have not been broken in yet.

These tires stuck on the road very nicely and I felt safe while riding on them.

Pirelli Angel ST tires

Brakes

The brakes on the Aprilia Shiver 900 are awesome. While riding, there were two situations that required me to apply the brakes with some force. On both occasions, the brakes functioned flawlessly.

The brakes on the shiver 900 consist of dual 320 mm stainless steel floating discs. Radial four-piston calipers on the front and a 240 mm stainless steel disc, single-piston caliper and metal braided brake hose on the back with a Continental two-channel ABS system.

2018 Aprilia Shiver 900 vrakes

Mirrors

The mirrors on the Shiver 900 are great. They are fully adjustable and give a clear view of the back of the bike. I did not find that there was much vibration in the mirrors while riding.

2018 Aprilia Shiver 900 adjustable mirrors

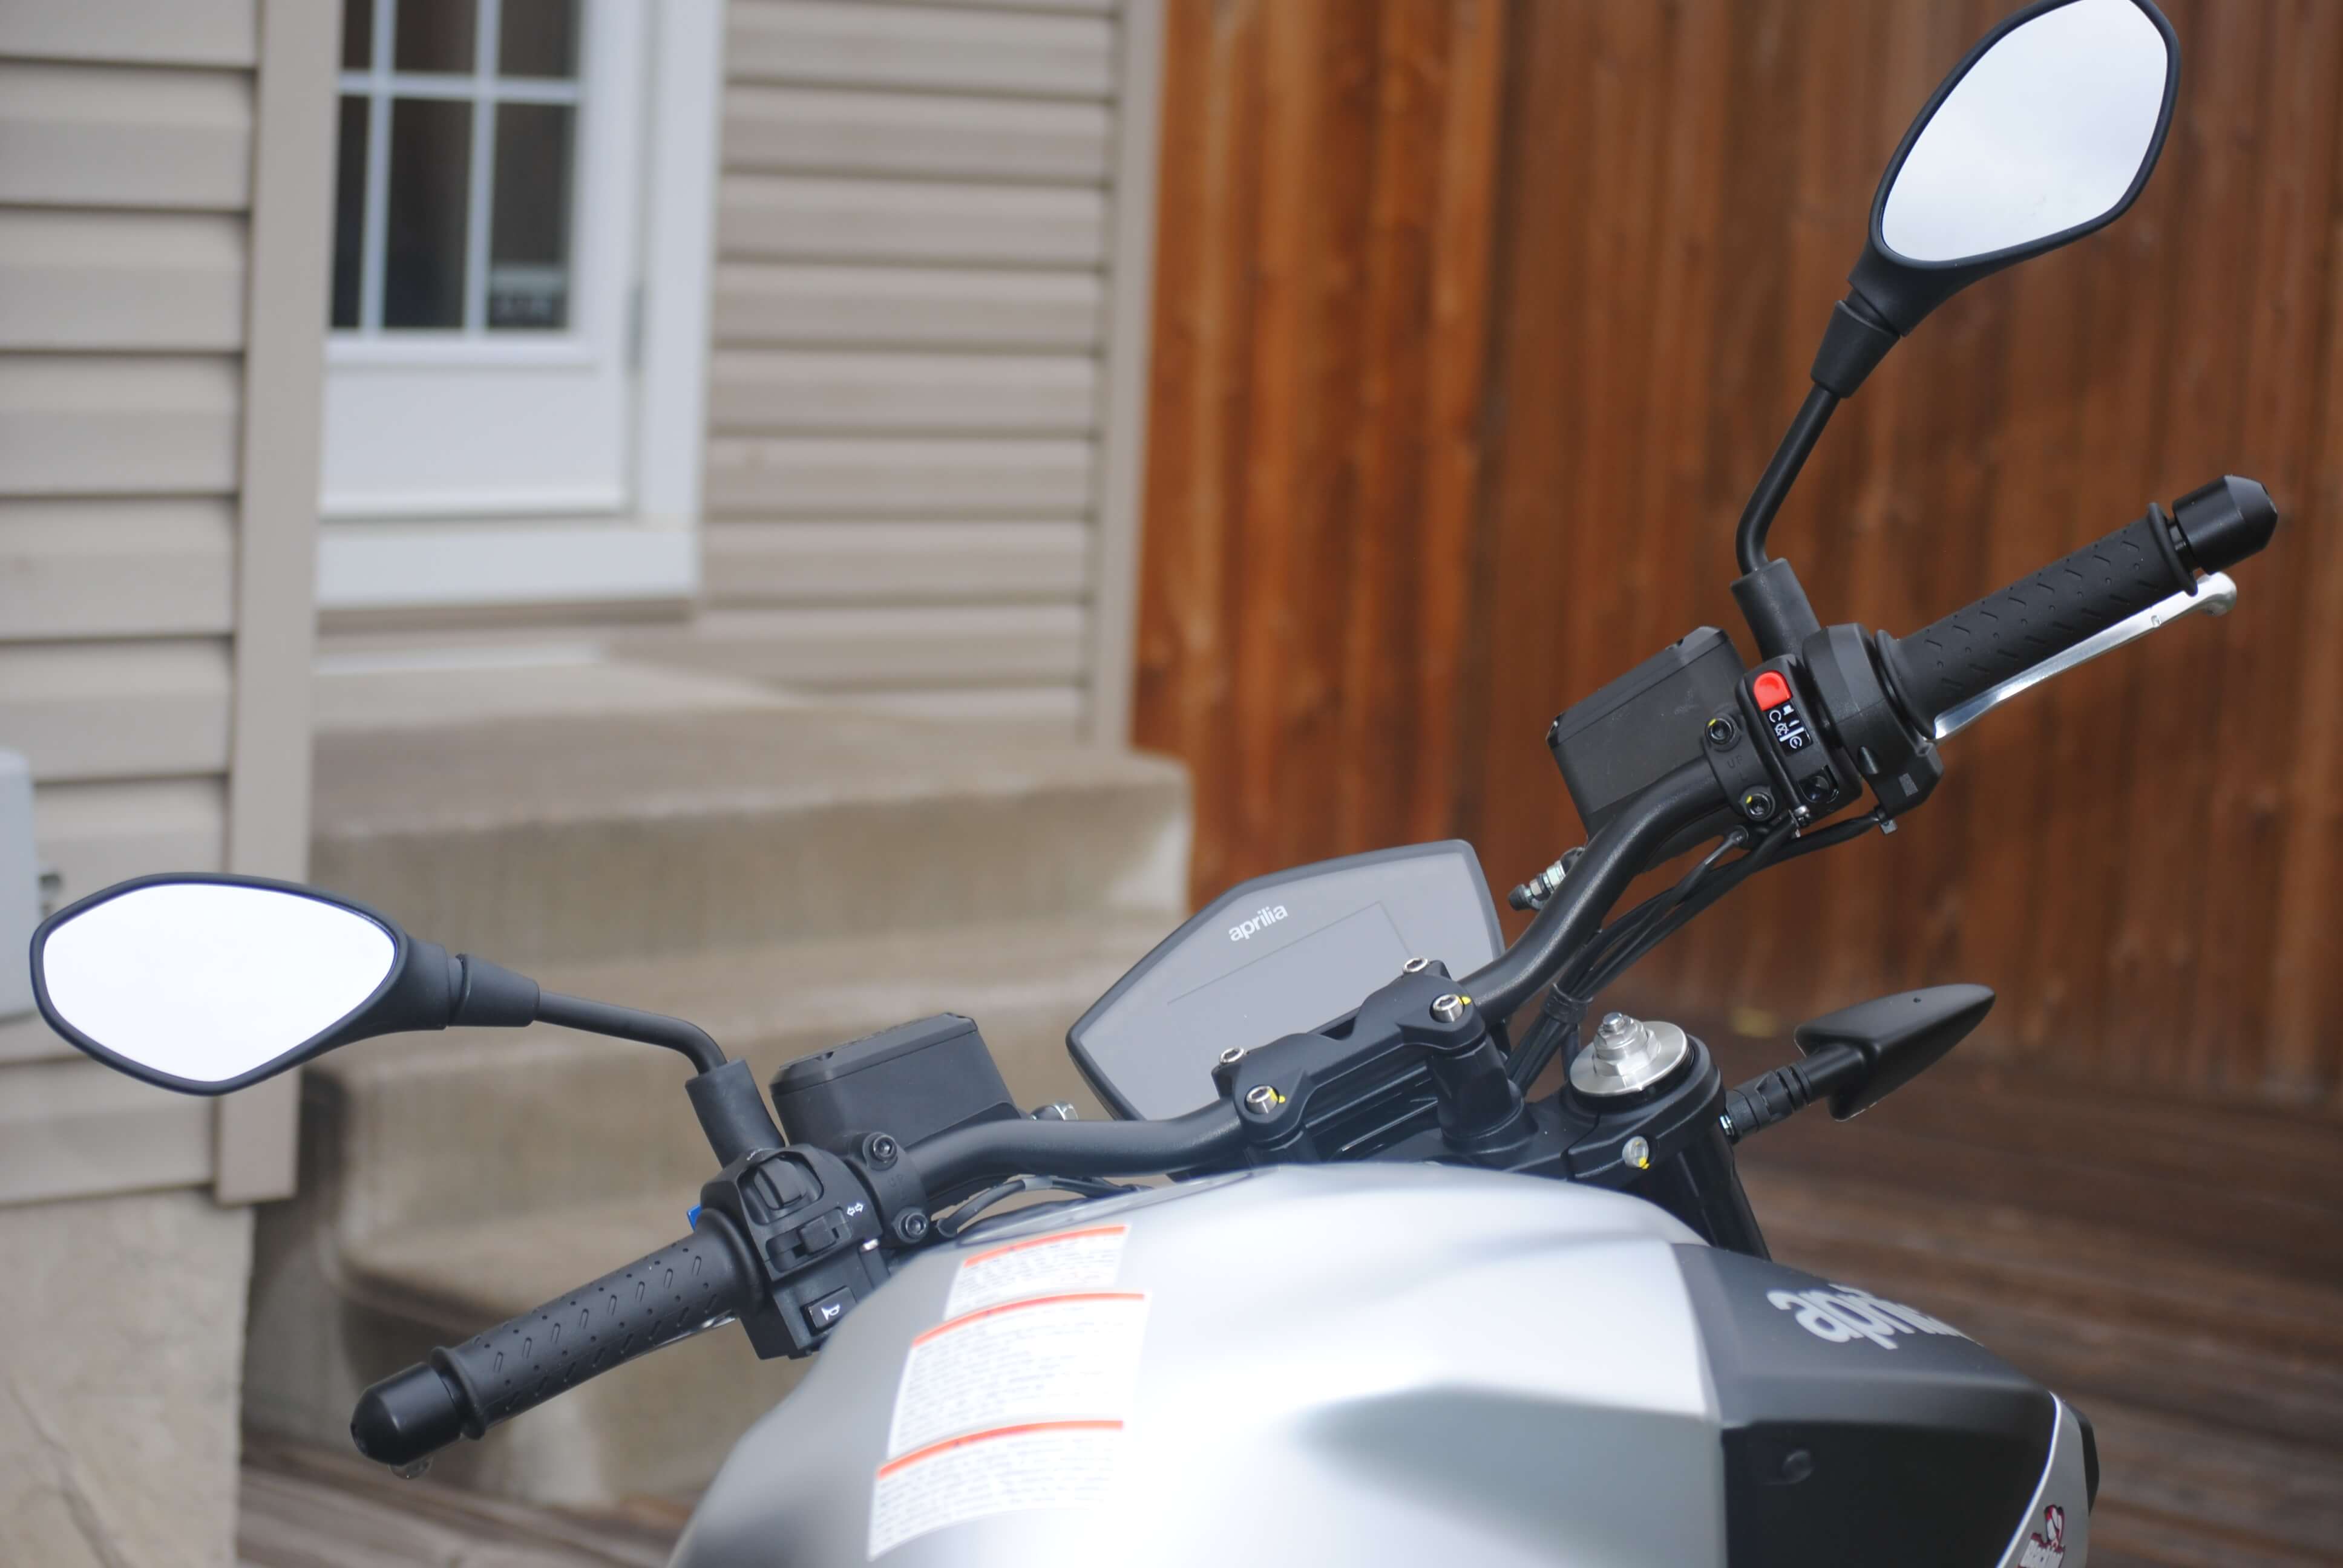
Earlier this year, I reviewed a Ducati Monster 821. I felt that the mirrors on the Monster were not very good and that an adjustable mirror is a must. I was glad to see that the Aprilia mirrors are indeed fully adjustable.

Front Headlight

2018 Aprilia Shiver 900 front headline

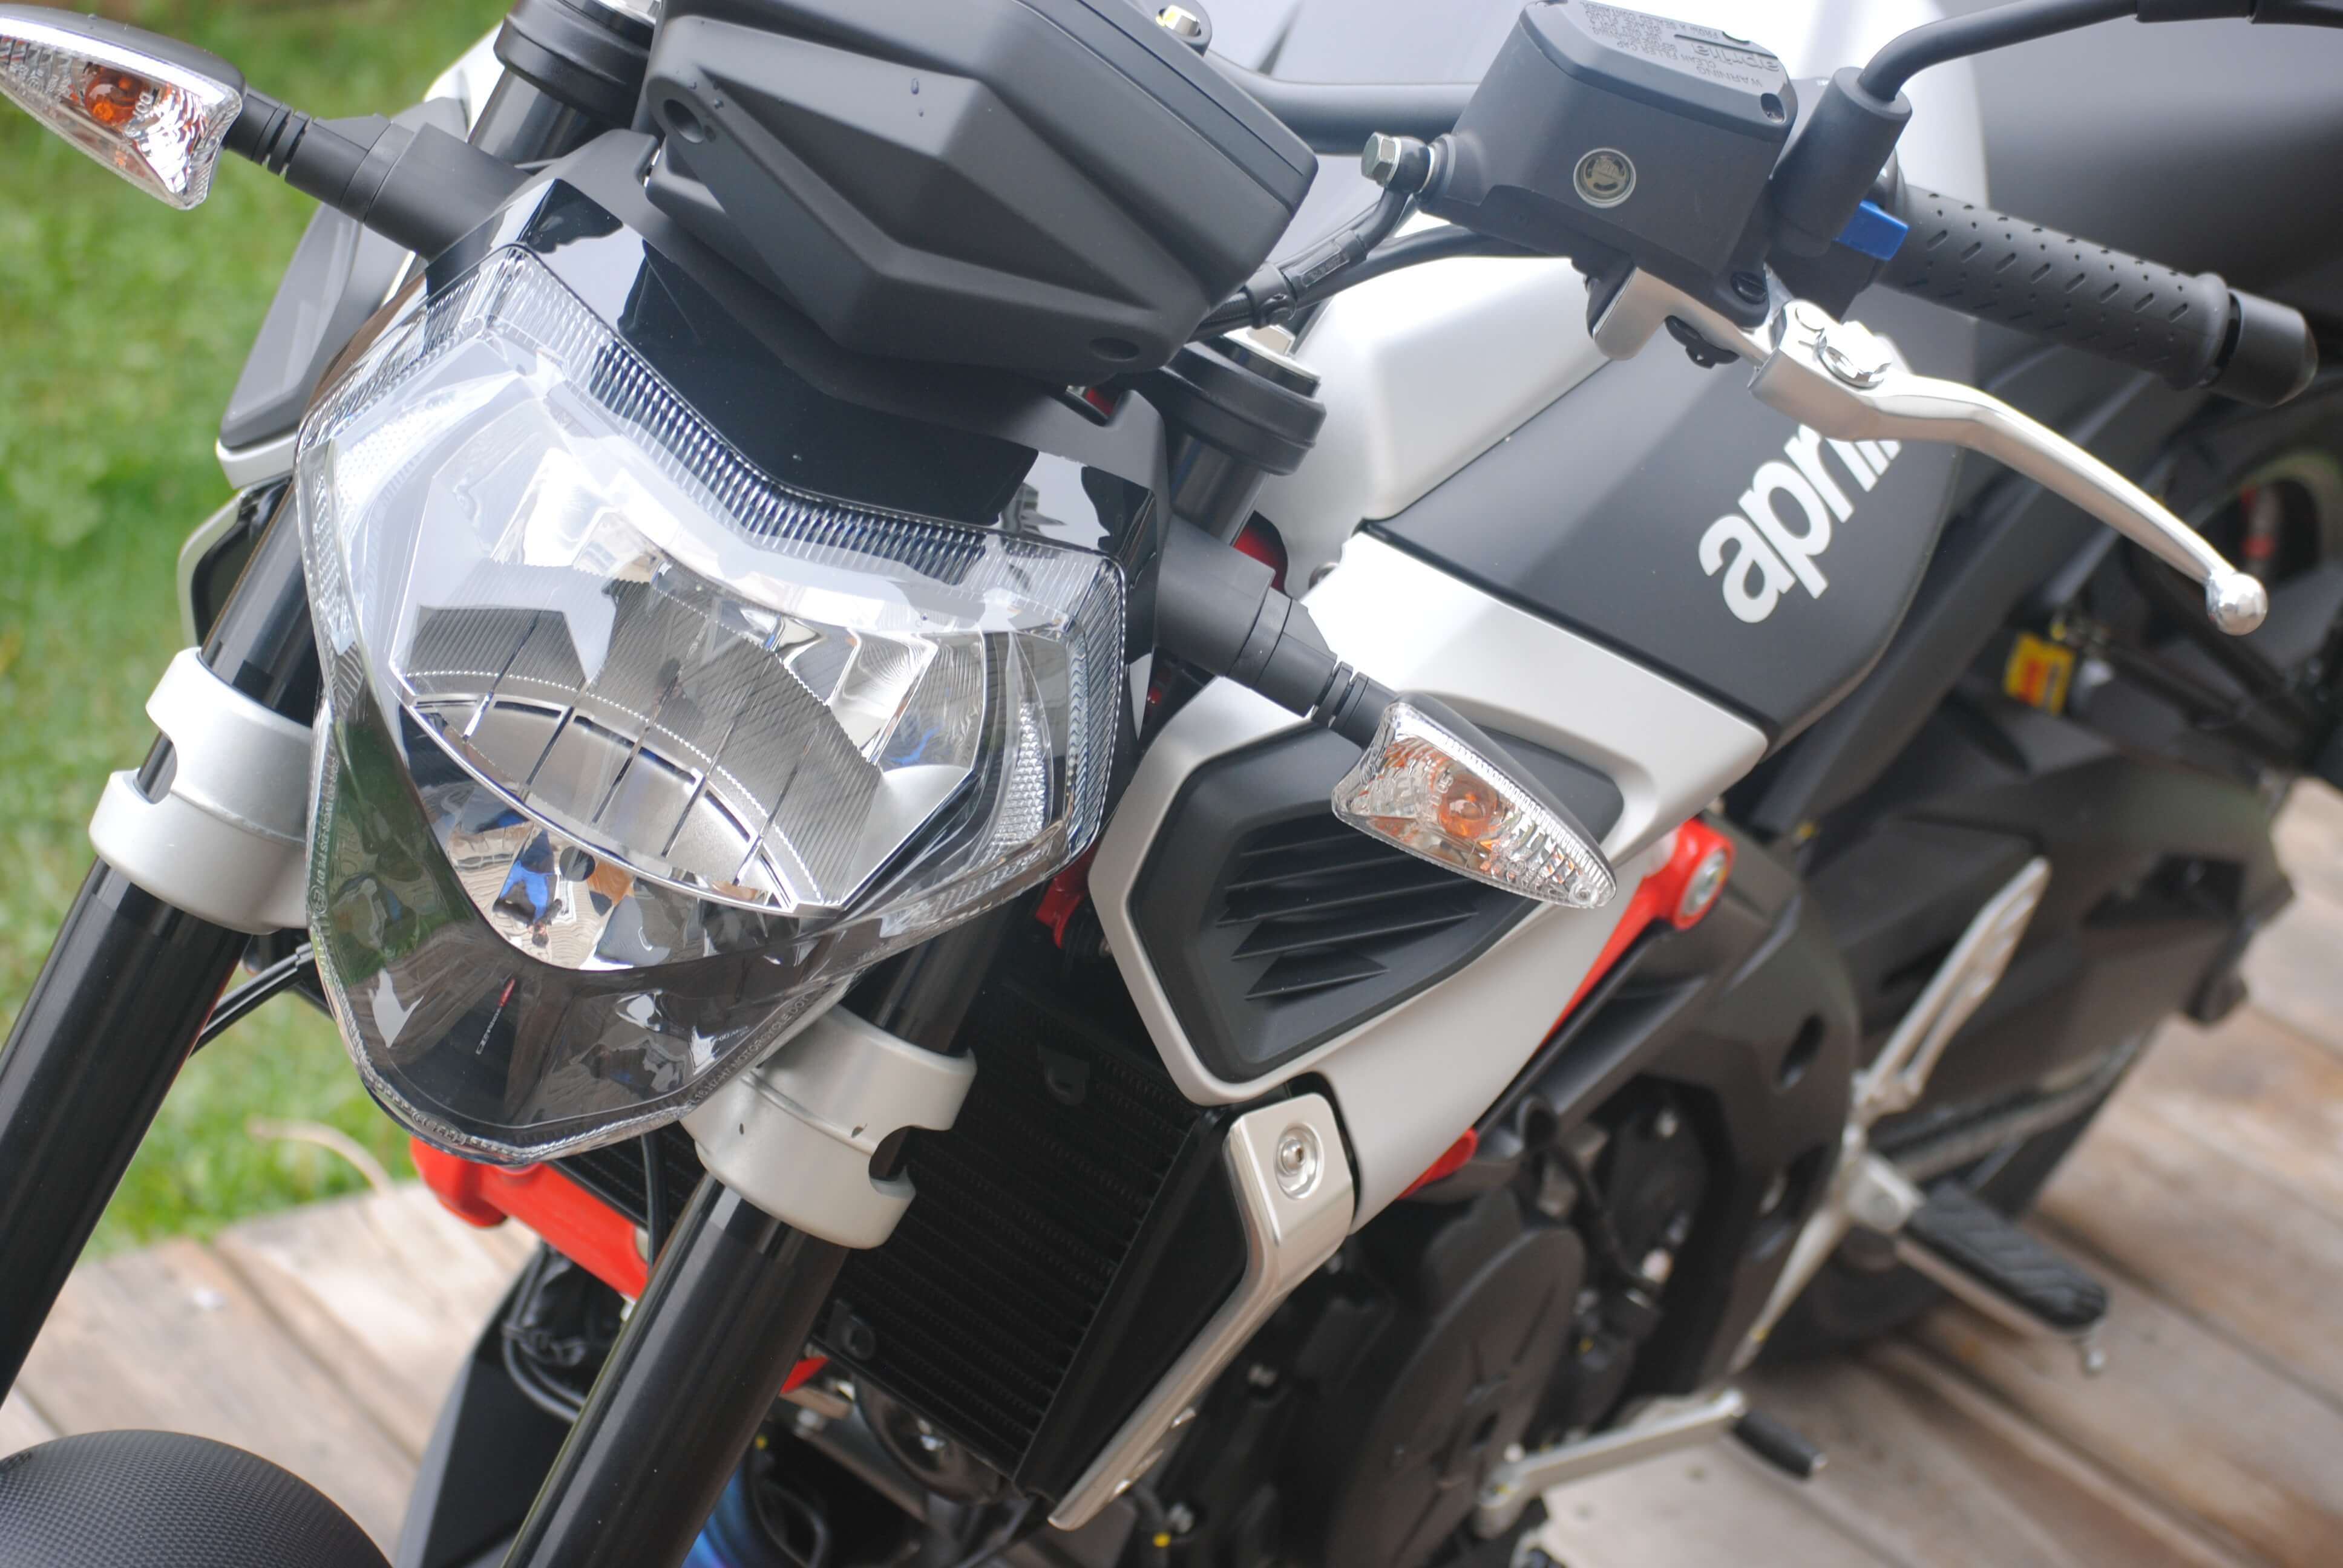
The Headlight on the Shiver 900 is very bright and has no problems illuminating the streets at night.

Exhaust

The Aprilia Shiver 900 features a stainless steel 2-1 system with three-way catalytic converter and oxygen sensor.

The exhaust note is refined yet guttural and in my opinion sounds absolutely amazing.

2018 Aprilia Shiver 900 exhaust

Conclusion

I like the Aprilia Shiver 900 a lot.

It is an amazing motorcycle and is a lot of fun to ride. The Shiver 900 is the quintessential naked sports bike. It’s light, nimble and has all the power you need. It has an aggressive look and comes with the pedigree of Aprilia’s 54 world titles. Price wise, it is an affordable motorcycle and very unique.

If I could change a few things about the Shiver 90, I would make heated grips a standard option. On a naked sport bike, the lack of a fairing makes it that your hands get extremely cold while riding. I mitigated this problem by adding a set of aftermarket heated grips to the Shiver.

The Shiver does have the option of installing a windscreen. The problem is that it is very expensive to purchase. I have purchased an aftermarket windshield to make my highway riding a bit more comfortable.

It comes with a 24 month, unlimited mileage warranty

I am fortunate to get the opportunity to ride different motorcycles on a regular basis for the purpose of reviewing. That being said, I chose the Aprilia Shiver 900 as my personal motorcycle. I love the look, the sound, the comfort, the performance and the handling of this bike and I would recommend this amazing motorcycle to my friends and family.

Aprilia Shiver 900 Image Gallery

The post 2018 Aprilia Shiver 900 Review appeared first on Web Bike World.

Categories
Gear Reviews Other Motorcycle Blogs review Riding Shoes Waterproof Riding Shoes Web Bike World

Alpinestars J-6 Waterproof Riding Shoes Review Copy

Introduction

Sometimes wearing motorbike boots feels a little rebellious. I remember, as a student, working at a university graduation ceremony and noticing that a lecturer I knew fairly well had a pair of boots on beneath his academic gown, jeans tucked in at the shin. It didn’t bother him in the slightest (the fact his battered Triumph baseball cap was still on his head gave that away).

For many of us, this devil-may-care attitude won’t fly, either in our minds or in the minds of our bosses but there is a solution out there – urban motorbike shoes. These are designed to look like regular shoes or trainers but have enough protection built in to protect you around town. In many ways, they’re like Kevlar jeans, but for your feet, containing a similar set of compromises.

The Alpinestars J-6 shoes I have worn for over a year now are of a suede leather construction and come in brown with a cream sole or a fully black version which, when worn with bike gear, look more like traditional boots. They have been completely waterproof, despite the lack of a coveted Goretex or Drystar label, and carry the CE level 2 protection mark. Read on to find out more.

Shopping Now? We Recommend:

webBikeWorld has worked closely with RevZilla over the years to provide our testers with products to review. In addition to being a great site to shop from, they’re also a great partner.

RevZilla

Free shipping on orders over $40
30-day no-nonsense return policy
Excellent selection of all major brands
Awesome pricing

Buy These Shoes on RevZilla

Fit & Comfort

To anyone not familiar with motorbike gear these boots look just like any normal pair of short boots out there, the fashion equivalent of a high-top trainer or a particularly strong looking pair of Converse! Look closer though and the details show that Alpinestars put a fair amount of thought into making this boot at home both on your bike and also on the streets too.

Alpinestars J6 Waterproof Shoes Rubber Sole

The flat sole has the Alpinestars logo molded into the soft rubber, the tongue of the boot is padded to protect the front of the foot in an impact and has a small brass tag, about an inch across on the top with the name of the brand. On the side of the shoe, the Italian company’s logo is again present, it being embossed into the leather. It’s all quite subtle but very stylish and gives an inkling as to the quality contained within.

Alpinestars have a reputation for making quite narrow fitments in their footwear but I didn’t find this to be the case with the J-6. I found them to be true to size and they have remained so, stretching only by a small amount. They fit as well now as they did when I was smitten by them in the shop.

I remember tying the laces when trying them on in the shop and noticing how the boot felt just like the most comfortable pair of casual shoes I had ever owned. Even the laces themselves seemed to be high-quality items, threaded through brass eyelets which have become polished with their use over time. It has not all been rosy in the garden though, my right foot used to become quite sore around the arch area but this occurred with any other flat shoes I have.

Changing the insole to a gel one helped for a while but it’s still something that bothers me from time to time and I don’t think I can blame the boot for this. Indeed, if I were to go out for a long walk and wanted a really comfortable shoe I tend to pick these up. When was the last time you could say that about any bike boot? As such, I reckon it deserves the full 100% for comfort and fit.

Construction

It’s great that the boots are comfortable but without the construction and safety credentials to back it up, I could never recommend them.

While researching this article, and closely examining my own pair of these, I’ve learned that the ankle and heel protectors are actually placed between the upper leather and the fabric padded interior of the boot. They’re practically invisible and you don’t feel them when putting the boots on or taking them off. Again, they just feel like regular comfy shoes.

Alpinestars J6 Waterproof Shoes Heel & Safety Construction

Underneath the foot, and above the sole of the shoe, there is another protector, these all contributing to the CE level 2 rating of the boot in the CE EN 13634 category that defines protection against abrasion, energy absorption of an impact etc.

Despite the good safety rating, I’m pretty convinced that I would rather have my full sized TCX S-Sport boot on rather than the Alpinestars J-6 if I were to be involved in an accident. I can really feel the protection of the TCX boot, partly because it does constrict some of my mobility, while the Alpinestars boot is so subtle as to make you forget that there is any protection built in at all.

That being said the TCX boot is a dedicated motorbike boot while the J-6 is not as dedicated to that one objective and so has to maintain comfort as well, which it does brilliantly. You can ride all day in these boots and then walk for miles in them without becoming sore (apart from my foot arch issue above which is probably unrelated to these boots).

Shopping Now? We Recommend:

webBikeWorld has worked closely with RevZilla over the years to provide our testers with products to review. In addition to being a great site to shop from, they’re also a great partner.

RevZilla

Free shipping on orders over $40
30-day no-nonsense return policy
Excellent selection of all major brands
Awesome pricing

Buy These Shoes on RevZilla

I wear them as casual shoes in the office after riding in through the daily traffic. They fit in with the “smart casual” business attire that many offices abide by these days and in most of the weather, they don’t cause my feet to feel like they’re being boiled in their own sweat.

Perhaps the most important thing to me when shopping for a pair of these casual boots was the need for them to remain properly waterproof. I never expected these, equipped with an unknown membrane as opposed to Goretex or Alpinestars proprietary Drystar membrane, to keep out the Irish rain.

However, these have kept out every drop. Granted I ride a faired motorbike with some protection from the fairing for my feet but over the last 15 months not one drop of water has managed to get into these boots. Truth be told, it still amazes me!

I do tend to apply some leather conditioner to the upper of the boot from time to time to keep it looking well but even without that, I am confident that they would remain bone dry inside. The little “Waterproof” tag on the side of the boot certainly means just that on the J-6.

Alpinestars J6 Shoes are waterproof

There was one thing I had to bring up – one of the soles squeaks. Every time I walk in the office on a hard surface the left boot lets out a quiet squeak. Once, having not worn them for nearly a month due to me being off of the motorbike for surgery, I returned to find the squeak had gone so I wondered is it that there is a small bit of moisture trapped in the sole which had dried out by then.

It hasn’t been there since the start, only occurring about 7 months into owning them, and that left boot is on the ground more than the right foot [the left boot always goes down to the road at traffic lights and such], so the moisture theory might hold true.

I tend to wear shoes out quite quickly but this, and a left sole wearing unevenly compared to the right, a trait I manage to maintain across all of my shoes, are the only signs that the boot is the age it is. No loose threads either.

Conclusion

I went into the local motorbike dealer, Lee Honda, to see their small selection of casual boots and intent on picking up a cheap pair for use around the city in the summer sun. Instead, the salesperson/parts-guy/worker showed me these Alpinestar J-6 boots. He happened to be wearing a pair himself and said that they were fully waterproof and so comfortable he wears them around the house.

Considering they were double the price of the Richa pair I had been eyeing up I immediately thought he was going for the upsell. I’m glad I tried the pair of them on though because they’ve proven to be all he said they were. If you’re in the market for a good short casual motorbike boot these should be the ones you try first.

Pros

  • Look like regular shoes/boots
  • Comfortable & stylish with a “smart casual” look
  • Completely waterproof
  • True to size

Cons

  • Less protective features than a standard bike boot

Specs

  • Manufacturer: Alpinestars
  • Price: $199.95
  • Alternative models & colors: Brown with Cream Sole or Black on Black
  • Sizes: 7, 8, 9, 10, 11, 12, 13, 14
  • Review Date: October 2018

Shopping Now? We Recommend:

webBikeWorld has worked closely with RevZilla over the years to provide our testers with products to review. In addition to being a great site to shop from, they’re also a great partner.

RevZilla

Free shipping on orders over $40
30-day no-nonsense return policy
Excellent selection of all major brands
Awesome pricing

Buy These Shoes on RevZilla

Alpinestars J-6 Waterpoof Riding Shoes Image Gallery

The post Alpinestars J-6 Waterproof Riding Shoes Review Copy appeared first on Web Bike World.

Categories
Gear Reviews Other Motorcycle Blogs review Riding Shoes Waterproof Riding Shoes Web Bike World

Alpinestars J-6 Waterproof Riding Shoes Review

Introduction

Sometimes wearing motorbike boots feels a little rebellious. I remember, as a student, working at a university graduation ceremony and noticing that a lecturer I knew fairly well had a pair of boots on beneath his academic gown, jeans tucked in at the shin. It didn’t bother him in the slightest (the fact his battered Triumph baseball cap was still on his head gave that away).

For many of us, this devil-may-care attitude won’t fly, either in our minds or in the minds of our bosses but there is a solution out there – urban motorbike shoes. These are designed to look like regular shoes or trainers but have enough protection built in to protect you around town. In many ways, they’re like Kevlar jeans, but for your feet, containing a similar set of compromises.

The Alpinestars J-6 shoes I have worn for over a year now are of a suede leather construction and come in brown with a cream sole or a fully black version which, when worn with bike gear, look more like traditional boots. They have been completely waterproof, despite the lack of a coveted Goretex or Drystar label, and carry the CE level 2 protection mark. Read on to find out more.

Shopping Now? We Recommend:

webBikeWorld has worked closely with RevZilla over the years to provide our testers with products to review. In addition to being a great site to shop from, they’re also a great partner.

RevZilla

Free shipping on orders over $40
30-day no-nonsense return policy
Excellent selection of all major brands
Awesome pricing

Buy These Shoes on RevZilla

Fit & Comfort

To anyone not familiar with motorbike gear these boots look just like any normal pair of short boots out there, the fashion equivalent of a high-top trainer or a particularly strong looking pair of Converse! Look closer though and the details show that Alpinestars put a fair amount of thought into making this boot at home both on your bike and also on the streets too.

Alpinestars J6 Waterproof Shoes Rubber Sole

The flat sole has the Alpinestars logo molded into the soft rubber, the tongue of the boot is padded to protect the front of the foot in an impact and has a small brass tag, about an inch across on the top with the name of the brand. On the side of the shoe, the Italian company’s logo is again present, it being embossed into the leather. It’s all quite subtle but very stylish and gives an inkling as to the quality contained within.

Alpinestars have a reputation for making quite narrow fitments in their footwear but I didn’t find this to be the case with the J-6. I found them to be true to size and they have remained so, stretching only by a small amount. They fit as well now as they did when I was smitten by them in the shop.

I remember tying the laces when trying them on in the shop and noticing how the boot felt just like the most comfortable pair of casual shoes I had ever owned. Even the laces themselves seemed to be high-quality items, threaded through brass eyelets which have become polished with their use over time. It has not all been rosy in the garden though, my right foot used to become quite sore around the arch area but this occurred with any other flat shoes I have.

Changing the insole to a gel one helped for a while but it’s still something that bothers me from time to time and I don’t think I can blame the boot for this. Indeed, if I were to go out for a long walk and wanted a really comfortable shoe I tend to pick these up. When was the last time you could say that about any bike boot? As such, I reckon it deserves the full 100% for comfort and fit.

Construction

It’s great that the boots are comfortable but without the construction and safety credentials to back it up, I could never recommend them.

While researching this article, and closely examining my own pair of these, I’ve learned that the ankle and heel protectors are actually placed between the upper leather and the fabric padded interior of the boot. They’re practically invisible and you don’t feel them when putting the boots on or taking them off. Again, they just feel like regular comfy shoes.

Alpinestars J6 Waterproof Shoes Heel & Safety Construction

Underneath the foot, and above the sole of the shoe, there is another protector, these all contributing to the CE level 2 rating of the boot in the CE EN 13634 category that defines protection against abrasion, energy absorption of an impact etc.

Despite the good safety rating, I’m pretty convinced that I would rather have my full sized TCX S-Sport boot on rather than the Alpinestars J-6 if I were to be involved in an accident. I can really feel the protection of the TCX boot, partly because it does constrict some of my mobility, while the Alpinestars boot is so subtle as to make you forget that there is any protection built in at all.

That being said the TCX boot is a dedicated motorbike boot while the J-6 is not as dedicated to that one objective and so has to maintain comfort as well, which it does brilliantly. You can ride all day in these boots and then walk for miles in them without becoming sore (apart from my foot arch issue above which is probably unrelated to these boots).

Shopping Now? We Recommend:

webBikeWorld has worked closely with RevZilla over the years to provide our testers with products to review. In addition to being a great site to shop from, they’re also a great partner.

RevZilla

Free shipping on orders over $40
30-day no-nonsense return policy
Excellent selection of all major brands
Awesome pricing

Buy These Shoes on RevZilla

I wear them as casual shoes in the office after riding in through the daily traffic. They fit in with the “smart casual” business attire that many offices abide by these days and in most of the weather, they don’t cause my feet to feel like they’re being boiled in their own sweat.

Perhaps the most important thing to me when shopping for a pair of these casual boots was the need for them to remain properly waterproof. I never expected these, equipped with an unknown membrane as opposed to Goretex or Alpinestars proprietary Drystar membrane, to keep out the Irish rain.

However, these have kept out every drop. Granted I ride a faired motorbike with some protection from the fairing for my feet but over the last 15 months not one drop of water has managed to get into these boots. Truth be told, it still amazes me!

I do tend to apply some leather conditioner to the upper of the boot from time to time to keep it looking well but even without that, I am confident that they would remain bone dry inside. The little “Waterproof” tag on the side of the boot certainly means just that on the J-6.

Alpinestars J6 Shoes are waterproof

There was one thing I had to bring up – one of the soles squeaks. Every time I walk in the office on a hard surface the left boot lets out a quiet squeak. Once, having not worn them for nearly a month due to me being off of the motorbike for surgery, I returned to find the squeak had gone so I wondered is it that there is a small bit of moisture trapped in the sole which had dried out by then.

It hasn’t been there since the start, only occurring about 7 months into owning them, and that left boot is on the ground more than the right foot [the left boot always goes down to the road at traffic lights and such], so the moisture theory might hold true.

I tend to wear shoes out quite quickly but this, and a left sole wearing unevenly compared to the right, a trait I manage to maintain across all of my shoes, are the only signs that the boot is the age it is. No loose threads either.

Conclusion

I went into the local motorbike dealer, Lee Honda, to see their small selection of casual boots and intent on picking up a cheap pair for use around the city in the summer sun. Instead, the salesperson/parts-guy/worker showed me these Alpinestar J-6 boots. He happened to be wearing a pair himself and said that they were fully waterproof and so comfortable he wears them around the house.

Considering they were double the price of the Richa pair I had been eyeing up I immediately thought he was going for the upsell. I’m glad I tried the pair of them on though because they’ve proven to be all he said they were. If you’re in the market for a good short casual motorbike boot these should be the ones you try first.

Pros

  • Look like regular shoes/boots
  • Comfortable & stylish with a “smart casual” look
  • Completely waterproof
  • True to size

Cons

  • Less protective features than a standard bike boot

Specs

  • Manufacturer: Alpinestars
  • Price: $199.95
  • Alternative models & colors: Brown with Cream Sole or Black on Black
  • Sizes: 7, 8, 9, 10, 11, 12, 13, 14
  • Review Date: October 2018

Shopping Now? We Recommend:

webBikeWorld has worked closely with RevZilla over the years to provide our testers with products to review. In addition to being a great site to shop from, they’re also a great partner.

RevZilla

Free shipping on orders over $40
30-day no-nonsense return policy
Excellent selection of all major brands
Awesome pricing

Buy These Shoes on RevZilla

Alpinestars J-6 Waterpoof Riding Shoes Image Gallery

The post Alpinestars J-6 Waterproof Riding Shoes Review appeared first on Web Bike World.

Categories
backpack Backpack Review Gear Reviews Luggage Reviews Motorcycle Backpack and Courier Bag Reviews Other Motorcycle Blogs review Speedway Backpack Velomacchi Web Bike World

Velomacchi 40L Speedway Backpack Hands-On Review

The Speedway & I Are Becoming Fast Friends

Wearing a backpack while riding a motorcycle is a huge killjoy for me. It throws off balance, restricts movement and makes me sweat where normally I wouldn’t.

I hate it and avoid it at all costs. That is until I met the Velomacchi Speedway.

Me riding a Honda CB500X wearing a Velomacchi 40L Speedway Backpack.

Shopping Now? We Recommend:

webBikeWorld has worked closely with RevZilla over the years to provide our testers with products to review. In addition to being a great site to shop from, they’re also a great partner.

RevZilla

Free shipping on orders over $40
30-day no-nonsense return policy
Excellent selection of all major brands
Awesome pricing

Buy This Backpack on RevZilla

Amazon

Free shipping (with Amazon Prime)
30-day return policy
Excellent selection
Competitive pricing

Buy This Backpack on Amazon

First Impressions

Velomacchi 40L Speedway Backpack.

When Velomacchi approached WBW by email about doing a review I took one look at it and said that if I liked it it would be a winner, because of my intense dislike for backpacks on bike rides.

Of course, I jumped at the opportunity to verbally tear this backpack to shreds as such.

Quality Materials

Once I had it in my hands and felt the canvas-style, stiff, yet flexible 1000D nylon exterior and laid witness to how much care and attention was evident in the construction my hard-line attitude softened. It’s lightweight, coming in around 3.5 to 4 lbs, yet feels strong and begs me to pack it up full and go traveling.

Velomacchi 40L Speedway Backpack.

The Backbone

There’s a stiff plastic insert running the length of the bag that keeps it standing up straight even when empty and set down on the floor. This also allows easier loading and unloading of items from the compartments and better fitment when worn.

No Hi-Viz?

I don’t see any reflective material on the backpack anywhere. As stylish as it is, I think being seen in low light is important especially since a large backpack like this will cover any reflective badging on a rider’s jacket.

Aluminum

I see the metal closures used on this bag are aluminum, beefy and chosen with quick access in mind. The chest harness looks ergonomically designed to flex and adjust to varied body shapes. The large, 1.5” round button for the sternum harness, in particular, grabs my eye along with a latched hook on the upper portion of the pack.

Helmet Hook

Helmet hook on the Velomacchi 40L Speedway Backpack.

The hook is for hanging a helmet on while you aren’t wearing it. I try it out to see if it works as intended. With the chinstrap done up, I find the hanging helmet doesn’t even swing around too noticeably when I have the pack on my back. Impressive!

Stitching

All the exterior stitching is sealed against moisture intrusion and there are magnets holding two closures shut. The whole front area of the bag is coated in a kiss of chemical to inhibit mud and dirt from sticking to it.

This is a smart and handsome piece of kit that screams “Facta Non Verba” (Deeds Not Words) which is the motto of the Merchant Marines. Velomacchi’s founder and CEO Kevin Murray’s Grandfather was a marine mechanic with the Merchant Marines and inspired Kevin to design and build equipment that performs above expectation under any adverse conditions encountered.

“Show me, don’t tell me” is often a motto in life for me and being that I’m a heavy duty mechanic myself I think along the same lines as Kevin’s Grandfather. I prioritize functionality over flash in my chosen gear.

Magnetic Sternum Tri-point Harness

This is the most impressive feature of this backpack by far to me.

Harness Comfort and Fitment

The tri-point harness can pivot and turn in three areas as the name implies. I found it worked in conforming to my individual body shape allowing the backpack to hug me tightly as desired without making me feel like I’m wearing a straightjacket.

Without anything inside, I barely noticed I was wearing it. With only a laptop inside the weight was so evenly distributed as a result of the harness design I still barely noticed it.

Me wearing the Velomacchi 40L Speedway Backpack.
Content weight is carried up high on my chest to prevent lower back fatigue thanks to the harness design. I found the width of the straps perfect for spreading out the pressure on my shoulders and chest.

Me wearing the Velomacchi 40L Speedway Backpack.

It really works well with standard amounts of gear inside. Of course being the eccentric tester that I am I had to push the envelope to see just how much punishment this bag can take.

More on this in “The Ride” section to come below.

Sizing Adjustments

Velomacchi 40L Speedway Backpack.
Changing strap lengths on the harness is a one-handed move once you get the hang of it. There are markings on the straps ranging from XS to XL giving you points of reference to get equality between the two sides.

Adjustable latch on the Velomacchi 40L Speedway Backpack.

Flip open cinches can be manipulated one-handed once you’re wearing the pack.

You first set the ones on each hip close to where you want it, then fine tune the two on the rib cage area. It’s a cam-over design that pinches the straps tightly to lock it where you want it. The system worked perfectly for me in maintaining a good fit at all times during testing.

Open & Close Done Easy

Many backpacks close up securely across the chest area using clicking plastic connections or zippers. The Kriega R35 Backpack is a good example of this.

I find those difficult or near impossible to latch/unlatch while wearing thicker gloves and having a full face helmet chinbar impeding my vision.

Velomacchi 40L Speedway Backpack.
This Speedway is so far ahead of those others in this regard it’s starting to lap them. It uses a spring-loaded quick connector system combined with a magnet. That means when you go to bring the two halves together and they come within an inch of each other the magnet takes over and connects them with a satisfying “CLICK!”

Velomacchi 40L Speedway Backpack.

It’s wickedly easy to do up. I usually get it closed on the first attempt and I’m able to undo it flawlessly with only one hand. The round aluminum locking button is easily twisted 90 degrees to unlock even with gloves on thanks to its size and knurled edges. After unlocking it, my index and second finger grip the projecting lip edge beside the button and split the harness bond.

Shopping Now? We Recommend:

webBikeWorld has worked closely with RevZilla over the years to provide our testers with products to review. In addition to being a great site to shop from, they’re also a great partner.

RevZilla

Free shipping on orders over $40
30-day no-nonsense return policy
Excellent selection of all major brands
Awesome pricing

Buy This Backpack on RevZilla

Amazon

Free shipping (with Amazon Prime)
30-day return policy
Excellent selection
Competitive pricing

Buy This Backpack on Amazon

Storage Compartments

The total capacity of this backpack is a claimed 40 liters spread out over 4 compartments. Velomacchi calls this a “weekender pack”, saying it can contain gear needed for 2 days.

There are two other Speedway backpack offerings in the 28 and 50-liter class available, but I chose the 40 to review because I feel the 28 too small to be of any significant worth and the 50 too large.

Just call me Goldilocks I guess because the 40L is juuuuuust right.

Roll Top Main Compartment

Velomacchi 40L Speedway Backpack.

The largest of the compartments runs the full width (12.5”) and length (21”) of the backpack. It’s 100% waterproof and the opening uses a flexible magnet for a closure.

After the magnet seals shut the material around it is rolled three rotations before coming flush with the top of the main body of the bag. On either side are aluminum hooks that slip into slots to keep it rolled shut.

Velomacchi 40L Speedway Backpack.

Annoying Hooks

I’m not a fan of these hooks because I find them awkward and finicky to put into place with a lot of gear in the bag. Conversely, opening it is very quick and easy which is nice.

Velomacchi 40L Speedway Backpack.
Other reviewers have commented on the hooks coming undone, but they held in place during my testing.

Velomacchi 40L Speedway Backpack.

Tan Colored Liner

The inside of the main compartment is lined with a rubberized material beige in color. This makes it easier to see contents when you open the bag to hunt for whatever you buried inside. It’s also easy to clean due to the material chosen.

Other 3 Compartments

The next largest compartment runs just below the lip of the main one. It’s the quickest and easiest to get into of the 4 compartments thanks to what’s supposed to be a waterproof YKK zipper. It has a 4” smaller opening than the main one and runs just about the same depth.

Unfortunately, this compartment isn’t satisfactorily waterproof. During my testing, I found water easily penetrated the zipper and soaked the contents. Very disappointing, but at least the main compartment stayed dry.

Waterproof Testing In The Shower

It’s October here in Alberta and there’s no rain to be had. In order to waterproof test the backpack I decided to take it in my shower for 20 minutes instead of attempting a rain dance ritual.

I noticed after 20 minutes the backpack was significantly heavier and sloshed when I took it off my back. Lo and behold I came to find a major design flaw with the hydration pack compartment. It doesn’t have drains at the bottom and had filled up with water! I dumped out the water and opened up the compartments to inspect paper I had placed inside to detect moisture.

Third Largest Compartment

Velomacchi 40L Speedway Backpack.

The flap covering the third compartment below the second one with the zipper is secured using two toggle-style closures on the end of elastics. Again, access is easy and it has several smaller pockets inside to house whatever you’d like. I was able to slip in several wrenches, tire irons, and other small tools.

I would use this as a tool holding area, although I’m having second thoughts now about that since tools get really dirty sometimes out on the trail and I wouldn’t necessarily want grease and oil inside the bag.

Velomacchi tool roll.

Photo by Velomacchi

Velomacchi makes a nice tool roll for $75 that could easily attach to the bottom of this bag to avoid that problem. This is a missed opportunity on their part, especially since comparable bags like the Klim Krew Pak come with a tool roll included and cost less.

Leaking Eyelets?

Velomacchi 40L Speedway Backpack.

The eyelets the toggle elastics pass through seem at first to be an obvious point for water leakage. Upon closer inspection, I found neoprene backing washers at the end of the elastics on the inside. This should keep water out unless the bag is submerged completely, whereupon all bets are off anyway. This backpack wasn’t made with SCUBA diving in mind after all.

This pocket did much better than the zippered ones at keeping water out during my shower testing. The paper inside was only just slightly damp at the bottom. I would obviously have preferred no water intrusion, but admit perhaps my shower testing was a bit over the top. Having said that I’ve been caught in very heavy rain before on the bike so it’s not totally unreasonable.

I like to push the limits in order to truly gauge quality.

Secret Pocket

Velomacchi 40L Speedway Backpack.

The final storage compartment is a small zippered one on the right side of the pack. Its zippered aperture runs about 6 inches across and in theory would be good for holding valuables to keep them dry and secure, yet handy.

When I had the main compartment jammed full and tried to get anything out of this secret side pocket it was difficult due to the bulging main compartment contents taking up most of the 40 liters of capacity.

The big problem is that water got inside this side pocket and soaked the paper during my shower testing. This secret pocket can’t be trusted to keep valuables dry as it turns out. You’ll have to put your passport in a ZipLock bag before storing it in here to have complete peace of mind.

Shopping Now? We Recommend:

webBikeWorld has worked closely with RevZilla over the years to provide our testers with products to review. In addition to being a great site to shop from, they’re also a great partner.

RevZilla

Free shipping on orders over $40
30-day no-nonsense return policy
Excellent selection of all major brands
Awesome pricing

Buy This Backpack on RevZilla

Amazon

Free shipping (with Amazon Prime)
30-day return policy
Excellent selection
Competitive pricing

Buy This Backpack on Amazon

Other Features

GoPro Mount

GoPro mount on Velomacchi Speedway 40L backpack.
Photo by Velomacchi

On the right chest strap, there’s a smooth patch of plastic intended for a GoPro or similar sticky camera mount. I tried mine out on there with the standard mount and found it because of the limited angle I couldn’t get good footage of the road ahead of me without installing another pivoting mount on the camera. Even standing up on the bike didn’t help much with the standard mounting bracket.

The other problem is that I found myself knocking the camera off whenever I would reach to undo the chest harness. Velomacchi recommends securing the camera with a strap in addition to the sticky base, but in reality, I think this just doesn’t work. I love the idea, but the reality is that I wouldn’t use it.

Hydration Pack Compartment

There’s a gap in behind the backboard where a hydration pack can be installed, but no bladder comes with the backpack as some competitor backpacks do.

As already mentioned, in heavy rain this pocket might fill up with water if you don’t have the main compartment packed full.

Tire Pressure Gauge Holder

Velomacchi 40L Speedway Backpack.

I like the elastic sleeve on the left chest strap to house a tire pressure gauge. Very handy indeed.

Emergency Contact Pouch

Velomacchi 40L Speedway Backpack.

Directly above the GoPro mounting pad, you’ll see a cross embroidered on the strap indicating the velcro aperture containing emergency contact information for the wearer. It’s a good idea, but you’ll need to ensure the contact info isn’t written on anything susceptible to water since water can enter around the velcro.

You’ve Got Options

If you still don’t want to wear this Speedway as a backpack, fear not. You can remove the chest harness rig and simply strap the bag down to your bike like you would any other piece of motorcycle luggage as it turns out.

On each corner of the bag, you’ll find nylon loops to thread straps through to secure it to your bike rack or seat. Brilliant!

The Ride

I’ve hashed plenty about the features by now and it’s high time to talk about how this bag performs on the road, in the wind at speed.

Where’s The Flap?

Velomacchi is a made-up word derived from two Latin ones. Velocita = Speed or Velocity, Macchina = Machine. Guess what they had in mind when they designed this backpack? No flapping at speed.

I can’t stand it when my gear or my bike vibrates or flaps so I was ready to rip this Speedway backpack a new “backdoor” if it failed to pass this test. Happily, even up to 90 mph, it didn’t flinch.

I tried everything within reason to get it to flap and couldn’t. I rode with the bag full and empty, but neither scenario produced any irritating noise.

Good job, Velomacchi!

How’d They Do That?

The stiff shell, when used along with the SENZA CODA strap management system employed on it to compress the bag shell to the contents, is the answer. Even the extra length of webbing straps left over after adjusting the harness to fit you tuck away nicely in behind the backboard so the wind can’t catch them.

How Much Are 40 Liters Exactly?

Velomacchi says you can store two days’ worth of belongings in this backpack. That’s a pretty conservative claim.

I took it to AimExpo in Las Vegas for a week and it swallowed everything I needed for the trip and time there. I punished it for 4 days straight hauling around heavy camera equipment, food, and beverages along with any and all souvenirs my wife and I picked up along the way.

Yeah, But What’s the Weight Limit?

I decided to answer this question and see if I could break this unbreakable bag by trying to overload it. No mercy will be had from me, so off I went to my garage to shove in everything I could in this bag.

Velomacchi 40L Speedway Backpack.

Here’s a photo of what I got inside. By the time all was said and done it was tight as a bowstring and I didn’t need to use the compression straps much, if at all. The bag has what appear to be only single stitching running everywhere on it (but it’s tough to tell if there are hidden stitches), so I wondered if stretching it would move anything too.

Nope. This is one hell of a strong backpack.

I could have put in twice as many wrenches pretty easily, but left a little room for sockets I would have brought along if this was a real adventure ride. After I filled the 1-gallon RotoPax full of gas I weighed the pack. 39 lbs were the final tally!!

Let’s Ride!

Me wearing the Velomacchi 40L Speedway Backpack.

I hefted the now very heavy pack onto my back and did up the harness. With this ridiculous amount of weight in it, I definitely noticed it was there.

The Speedway harness did an admirable job of keeping the weight tight to my body and I found it comfortable managing the weight other than when I would bend over to pick up something from the ground. At that point understandably this load mounted across my shoulder blades did throw off my balance and I nearly tipped over.

On the bike, the weight didn’t interfere with operation, which is most important to note and impressive. I was so confident that I decided to ride through the 6 inch deep snow covering my lawn even with all that weight in the pack.

The Final Verdict

Me riding through the snow while wearing the Velomacchi 40L Speedway Backpack.

I would still much rather strap luggage to the bike than use a backpack, but I admit this Velomacchi is making the idea of wearing a backpack more plausible for me.

From what I can find this is one of the most expensive backpacks made for motorcycling. The $299 sticker shock is understandable, but you are getting a very sturdy, high-performance backpack for a lot of money.

When it comes to the water leakage problems I found, I’m not certain any competitor backpacks would perform better. Notably, the main compartment didn’t leak one iota.

For hardcore riders going out facing intense off-road riding situations, this would be a decent backpack. It’s also the bag of choice for commuters who want this to be the last bag they ever buy. With a lifetime warranty and seemingly bulletproof durability, it probably could be handed down to your kids if you take care of it.

I doubt very much anyone could legitimately wear this bag out riding, bicycling or hiking with it.

One final problem was pointed out to me by a female friend I wouldn’t have thought of because I’m male. The latching system clamps tightly right across the wearer’s upper chest which would be very uncomfortable and possibly unstable on people who are… how do I put this? Voluptuous or well-endowed.

Suggested Changes

I have some suggested tweaks for the next generation some of which I already touched on.

  • Make all the compartments truly waterproof
  • Install drains on the bottom of the hydration bladder compartment
  • Include the tool roll and a hydration bladder with this bag
  • Find a way to accommodate the female market
  • Replace the latching hooks for the main compartment with something better
  • Add reflective piping to the trim of the bag for rider safety reasons
  • Do something to improve the GoPro mount or get rid of it

Pros

  • Mostly waterproof
  • Quality materials used in construction
  • Lifetime Warranty
  • Quick access to contents
  • Magnetic sternum latching system magic
  • Ergonomic
  • Unaffected by wind and mud
  • High capacity
  • hydration pack ready

Cons

  • Not friendly to the female form
  • ¾ of the pockets could leak in heavy rain
  • Lacks Hi-Viz or reflective elements
  • Expensive
  • GoPro mount isn’t trustworthy and won’t work with a standard mount
  • Awkward closures on magnetic roll opening
  • Needs a tool roll and hydration pack

Specs

  • Manufacturer: Velomacchi
  • Price (When Tested): $299
  • Made In: Vietnam, designed in the USA
  • Alternative models & colors: One color only
  • Sizes: 28L, 40L, & 50L
  • Review Date: November 3, 2018

Shopping Now? We Recommend:

webBikeWorld has worked closely with RevZilla over the years to provide our testers with products to review. In addition to being a great site to shop from, they’re also a great partner.

RevZilla

Free shipping on orders over $40
30-day no-nonsense return policy
Excellent selection of all major brands
Awesome pricing

Buy This Backpack on RevZilla

Amazon

Free shipping (with Amazon Prime)
30-day return policy
Excellent selection
Competitive pricing

Buy This Backpack on Amazon

Velomacchi 40L Speedway Backpack Gallery

The post Velomacchi 40L Speedway Backpack Hands-On Review appeared first on Web Bike World.

Categories
Gear Reviews Motorcycle Glove Reviews Other Motorcycle Blogs review Street Glove Reviews Web Bike World

Review: Velomacchi Speedway Gloves

They say that the first impression is the most important, so it’s best to make it count. On that basis, first impressions of the Velomacchi Speedway gloves – Velomacchi’s first foray into mass-produced digit defenders – are very positive. The 60s style jumps out at you and captures your attention almost immediately. These gloves will send you back a few decades and have you looking all the better for it.

But the Speedways are not without faults, and it’s those faults that keep these gloves from being truly exceptional. Problems with QC mean the gloves look excellent but lack polish; when examined up-close, both gloves have several areas where this lack of polish is visible. While minor, those of us that value fit and finish may struggle with a $150 pair of gloves with uneven trim and fraying threads.

These imperfections resulted in a lower score for the purposes of this review. On my hands and on the road, the Speedways are among the most comfortable gloves I’ve worn (even if they fit a bit bigger than the typical large).

Disclosure: Velomacchi provided these gloves at no-charge for the purposes of this review.

Shopping Now? We Recommend:

webBikeWorld has worked closely with RevZilla over the years to provide our testers with products to review. In addition to being a great site to shop from, they’re also a great partner.

RevZilla

Free shipping on orders over $40
30-day no-nonsense return policy
Excellent selection of all major brands
Awesome pricing

Buy These Gloves on RevZilla

Features

  • Made with deerskin and goatskin leather
  • Conductive finger and thumb tips
  • High-impact for finger protection and goggle wipe
  • Brass rivets on the hypothenar impact zone
  • Adjustable velcro wrist strap

Style

Velomacchi Speedway Leather Gauntlet Gloves

The Speedway’s are unconventional, even if you ignore the 60s theme. These gauntlet-style gloves feature external TPR rubber finger guards that are a marked visual differentiator compared to most gloves, and the palms provide extra protection via a leather palm pad that has brass rivets intermixed for extra abrasion resistance.

These safety elements become a foundational component of the overall style of the gloves. Even if you can ignore the brass rivets on the palm, there’s no way you can ignore the rubber finger guards- they’re unlike anything I’ve ever seen on a motorcycle glove. They extrude about 1/4″ from the top of the glove and are quite noticeable.

You can get the Speedway in tan/black, as I have here, or black on black. The black on black versions are a bit more incognito – the finger guards and palm pad blend in a bit better – but a bit more incognito doesn’t mean the same thing as actually being incognito. These gloves are attention-getting, and I personally think that’s a good thing.

A Funky & Good Looking Motorcycle Gove!

Branding is big and bold but contained to the side of the glove; the color scheme feels retro and elegant in comparison to many race or touring-inspired gloves.

Velomacchi Speedway Leather Gauntlet Gloves

Textures and materials are relatively consistent, helping the glove feel a bit more universal than gloves that showcase flashy graphics, color, and emphasized armor.

Velomacchi Speedway Leather Gauntlet Gloves

If you ignore the squeegee-esque rubber finger protectors (which, for the record, can indeed be used as squeegees- I tried) and the palm pad full of brass rivets, the Speedway’s pass for… okay, never mind. They’re definitely motorcycle gloves, but without all the usual flashy branding and colors.

These gloves have a distinct style that I find attractive, rubber finger guards and all. 

Shopping Now? We Recommend:

webBikeWorld has worked closely with RevZilla over the years to provide our testers with products to review. In addition to being a great site to shop from, they’re also a great partner.

RevZilla

Free shipping on orders over $40
30-day no-nonsense return policy
Excellent selection of all major brands
Awesome pricing

Buy These Gloves on RevZilla

Build Quality

Unfortunately, once you get up close to the Speedways, deficiencies in their build start to become noticeable. A frayed thread here, an off-angle cut there… none of these areas are critical – the structural integrity of the glove does not appear to be compromised in any way – but they are visible. The photos used in this review, for example, are from the day I received the gloves and before I had ever worn them on the road. To see frays and uneven cuts in a $150 pair of gloves is disappointing, even if the impacts are only cosmetic.

Velomacchi Speedway Leather Gauntlet Gloves

The QC issues exist on both gloves, but in different areas. This can partly be explained by how they’re made (by hand) but also speaks to what I feel is a misaligned price-point: these gloves should be $200 or $250 gloves, with excellent QC, vs. $150 gloves with mediocre QC.

Velomacchi Speedway Leather Gauntlet Gloves

These gaps in build quality, however frequent, are minor and, honestly, forgettable once I’m riding. The comfort of the glove and the dexterity they offer overshadow the gaps in build quality.

The feeling I’m given with these gloves is they had materials they wanted to use – deerskin and goatskin leather – and a price point they wanted to hit – $150 – and the gloves were reverse engineered to achieve those two factors. I’d have rather a bit more energy gone into quality control and the price raised a bit so that frays and strays weren’t visible as opposed to cutting corners to reach a lower price point.

Comfort

These are, by far, the most comfortable feeling motorcycle gloves I’ve ever worn. The deerskin interior is plush and downright pleasing to the touch. They feel soft and comforting, like I’m shaking hands with an old and very dear friend. That’s how I felt after the first time I put them on, and they’ve only gotten more comfortable since.

Velomacchi Speedway Leather Gauntlet Gloves

The gloves are warm and mostly unvented, save for a few holes on the sides of each finger. I’ve been wearing them in lukewarm weather for the most part, with temperatures averaging between 60 and 70 degrees. My hands have never felt cold and remain pretty comfortable overall.

Warm weather riding doesn’t result in buckets of perspiration, but if you live somewhere hot, gauntlet-style leather gloves are likely a recipe for sweat. The Speedway isn’t a hot glove in that it isn’t filled with insulation or padding, but the all-leather construction and minimal venting means that they can heat up inside.

Fit

Make sure you review the size chart and confirm before ordering. These gloves are the biggest large I’ve worn. I also have Fieldsheer Countour and REAX Tasker gloves on my bench right now, both size L, and the Speedways fit much larger than both. My fingers never feel like they reach the tip of the glove, and this results in a bit of loose material at the fingertips. This is most noticeable in the index finger, where I find I have to “pull” the glove back with my other hand if I want to use a smartphone.

Velomacchi Speedway Leather Gauntlet Gloves

Operating the motorcycle controls, and helmet audio controls, is fine. In fact, the Speedways communicate a good amount of feedback through the leather. But when operating sensitive devices, such as a smartphone, the index finger is all but useless for me unless I use the other hand to pull the glove taught.

Using the velcro wrist strap, you can adjust how the glove fits around your wrist. Unless, like me, you happen to have skinny wrists- then you’re limited in how tight you can get it, as you’ll run out of velcro quickly. I have 6.75″ wrists and find that I’m using the last 1/8″ of velcro to secure the strap.

The thing is that my hands fit into a large according to the Velomacchi’s size chart- my palm is 22.5cm wide and my finger is 11cm long. I bet I could have gotten a medium and found them to fit just fine. I recommend trying them on in person or shopping from a vendor that allows for no-hassle size exchanges.

Good Looking & Affordable, but With Some Corners Disappointingly Cut

Velomacchi Speedway Leather Gauntlet Gloves

The Speedway gloves are an interesting pair to review. On one hand, they’re the only glove I’ve ever worn where I got excited after opening the package. Between the two-tone leather, riveted palm pad, and awesome-but-also-weird rubber finger guards, the Speedway’s are definitely unique and worth getting excited over.

But, on the other hand, I expect better quality out of a $150 pair of gloves. Multiple loose threads, frayed ends, off-angle cuts, and other small gaps in their build quality are minor, individually, but frequent enough that it cheapens the overall experience.

Velomacchi offers a lifetime warranty on their products. I have not contacted them regarding the QC problems on these gloves, but I’d be inclined to had I purchased them.

Still, despite their flaws, these are also the gloves that I’ve enjoyed wearing the most this riding season. They’re comfortable – increasingly so as I wear them – and just so darn neat looking. They’re as much a conversation piece as they are a piece of safety gear… a description that is rarely applied to motorcycle gloves. The 3.5 star rating reflects that, as much as I enjoy wearing them, there are a few areas that could stand to be improved. If these gloves were to come without the visual defects that they have, they’d be a solid 4.5 star glove as far as I’m concerned.

Pros

  • Very comfortable
  • Good looks and unique style
  • Great dexterity thanks to exterior-mounted armor
  • Built-in squeegee

Cons

  • Small QC problems
  • Conductive fingertips are clunky
  • Fits large

Specs

  • Manufacturer: Velomacchi
  • Price When Tested: $149
  • Made In: Designed in USA / Made in Vietnam
  • Alternative Colors: Black on Black
  • Sizes: XS – XXL
  • Review Date: November 2018

Shopping Now? We Recommend:

webBikeWorld has worked closely with RevZilla over the years to provide our testers with products to review. In addition to being a great site to shop from, they’re also a great partner.

RevZilla

Free shipping on orders over $40
30-day no-nonsense return policy
Excellent selection of all major brands
Awesome pricing

Buy These Gloves on RevZilla

Photo Gallery

The post Review: Velomacchi Speedway Gloves appeared first on Web Bike World.

Categories
Gear Reviews Motorcycle Clothing Reviews Other Motorcycle Blogs review Web Bike World

Super Seer Cool Cap Head-On Review

Cooling Jade – Hype of Science?

To be completely honest, I am always pretty skeptical of a “new” discovery or process that claims to be better at, in this case, cooling. It can be very easy to manipulate tests and results of testing in a very controlled environment to produce the results needed to make a strong statement such as, “decreases the skin surface temperature by up to 10 degrees Fahrenheit”.

In too many cases, the manufacturer is testing the product under controls which will rarely, if ever, apply to use in the real world. With this in mind, I was determined to research the concept of COOLJADE and see if there was any real science behind it.

And I am glad to report that there is definitely some science to back up the name and the statement made by the Super Seer Corporation of Evergreen, Colorado.

How It Works

Sweating is your body’s natural means of cooling. The sweat that is on your skin is basically water in its liquid form. This liquid is cooler than your body temperature so it begins to draw heat from your body. As the temperature of the liquid increases, it then becomes vapor which releases the heat and helps to cool your body.

The trick is to capture as much liquid as possible against your body so that it can efficiently cool your skin. If the sweat is wiped from your skin or drips off, you lose its cooling benefit. And this is where the COOLJADE technology comes into play.

Any fabric that is designed to be used in a hot environment needs to be thin and breathable to provide maximum comfort to consumers. But that same thin material also needs to be extremely absorbent.

The desired goal is to capture as much sweat from the body as possible for evaporation and maximum cooling benefit. When the micro crushed jade particles are infused into the fabric, they provide an exponential increase in the fabrics absorbent quality.

In short, the jade particles are greatly increasing the surface area of the fabric but on a microscopic level that is undetectable to the human eye or even the human touch. This infusion makes it possible for the Cool Cap to offer super-efficient evaporation and cooling for a riders head and in some cases that increase evaporation can actually decrease the skin temperature by 10 degrees.

So in the case of the Cool Cap from the Super Seer Corporation, this is not just a claim from an ultra-controlled test environment, this product will provide better cooling in the real world.

Bargain Pricing

My past experience had been with a Nike brand skull cap and several Under Armor skull caps. On average, I was paying about $17 – $20 each for the other major brand caps, so the $20 price tag on the Cool Cap is very reasonable considering the fact that I found it to be a superior product.

The Cool Cap

Features

Super Seer Cool Cap blue stitching

The Cool Cap is made from a ventilated COOL JADE mesh fabric that provides great airflow. Think of the mesh fabric that is used for jackets that allow for almost complete airflow and doesn’t ripple or flap in the wind, and that is similar to these caps.

The shape of the cap is fairly typical as it is comprised of four triangular pieces and then a solid band of fabric at the base. But what is very unique about the Cool Cap is the awesome flatlock seams which allow the cap to stretch for a comfortable custom fit.

This stretch fabric also eliminates the need for any elastic which can cause irritation under a helmet. In addition, these seams are precisely finished on the inside of the cap so there are no rough areas or even a noticeable difference in thickness. This is an important feature for riders who have very short hair or no hair, as thick seams can cause abrasions, blisters, and discomfort when wearing a snug helmet for a long period of time.

Comfort and function are the most important features in any skull cap but the Cool Cap doesn’t stop with just those two great benefits. Due to the unique fabric and construction, this cap is one size fits all. I know, we have heard that a lot when it comes to motorcycle gear but this time you can really buy into the statement.

I wear an extra-small helmet or sometimes a small depending on the style and manufacturer. On the other end of the spectrum, my husband wears an extra-large helmet in most brands, but we were both able to wear the same Cool Cap very comfortably. Obviously, the Cool Cap fit us each a little differently but it was still very functional. I did end up tucking the edges of the baseband slightly at my ears but had no issues with it becoming bulky.

In addition to being infused with jade particles, the cap also has a special anti-odor compound woven into the fabric which deters microbe growth and helps to fight odor build up in your helmet.

I am also very happy that the Cool Cap is machine washable. Living in a hot climate, I was forced to do a lot of hand washing of other skull caps in the past. But these chemical-free caps can be thrown in a washing machine and will air dry very quickly to be ready for your next ride.

Super Seer Cool Cap mesh fabric material

The Designs

Currently, the Cool Cap is offered in a black COOLJADE infused mesh fabric with blue stitching. And in case you are wondering, the black material offers SPF 50 protection.

  • The S-7001-1 model has no logo imprint.
  • The S-7001-2 through S-7001-7 offer a variety of logo imprint options on the front and back of the cap which are related to law enforcement.

All of the caps are offered to law enforcement officers as well as civilian riders who want to show their support for the men and women in blue.

Super Seer Cool Cap logo printed version

My Experience

My experience with the Cool Cap has been in temperatures in excess of 100 degrees and in a full face helmet. Phoenix is said to have a dry heat but I do know that when wearing other caps under my helmet, the fabric and especially the elastic band and the base of the cap would become soaked with sweat and would not evaporate very well in my helmet.

I never had that issue with the Cool Cap. The Cool Cap provides great evaporative cooling even in the tight fit of my full face helmet. I also noticed that the lining of my helmet was drier than when I had used other brands of the cap. And even though the Cool Cap uses no elastic bands, it remained in place and very comfortable even during longer rides.

In the past, I have noticed that sweat build up in the other caps would cause my head to itch and even to cause some abrasion issues but that never happened when wearing the Cool Cap. I will continue to wear the Cool Cap and don’t foresee ever having a reason to try another type of cap.

A Potential Miss

For this hands-on test, I was able to wear the Cool Cap for a little over a month in pretty warm conditions. I also washed the cap several times due to the weather conditions. At this point, I am still very satisfied with the Cool Cap. As I mentioned before, the caps are being worn by my husband and myself, which provides some drastically different testing.

In my case, I am wondering if the cap will continue to remain a comfortable fit on the small end of the spectrum and not stretch out while my husband hopes that this does not shrink over time. But at this point, about 6 washes into their lifetime, they are holding their shape and elasticity very well.

The Verdict?

I am surprisingly happy with the Cool Cap. I never expected the dramatic differences as compared to other caps and it is well worth the $20 price.

Super Seer Cool Cap is made in the USA

As I noted at the beginning of this review, I was very skeptical of the 10 degrees cooler claim. But after reading about the technology and then experiencing the Cool Cap, I am very happy to have access to the product. The cost is very reasonable and the product will definitely enhance my rides in hot weather.

Pros

  • Great Airflow
  • Good Wicking
  • 50 SPF Protection from Black Fabric
  • No Elastic to Bind
  • Extreme Comfort
  • COOLJADE Natural Cooling Feature
  • Affordable
  • Machine Washable

Cons

  • Potentially Less Durable
  • No Color Choices
  • Could Lose Stretch After Repeated Washing

Specs

  • Manufacturer: Super Seer Corporation
  • Price (When Tested): $20
  • Made In: USA (designed and manufactured in Colorado)
  • Alternative models & colors: Multiple logo designs on black mesh
  • Sizes: One Size Fits All
  • Review Date: September 2018

Super Seer Cool Cap Image Gallery

The post Super Seer Cool Cap Head-On Review appeared first on Web Bike World.

Categories
Gear Reviews Motorcycle Glove Reviews Other Motorcycle Blogs review reviews Waterproof Glove Reviews Web Bike World

ICON Patrol Waterproof Gloves Hands-On Review

Introduction

For those of you who follow my articles, you may remember my review on the Ninja 1000 abs that I wrote last month.

I found myself reviewing a 2018 Ninja 1000 abs as well as an X Moto 2 jacket and pants. It was raining and right around freezing when I did this review. The jacket and pants worked excellently and I was not cold or wet – however, the leather riding gloves I was wearing were awful. After less than an hour on the bike, my left index finger started to feel weird. I stopped and checked my hand and my finger was actually starting to turn blue.

I decided to get a new pair of gloves. I decided to purchase a pair of ICON Patrol Waterproof Gloves. Here is my impression of these gloves after testing at home as well as on the road on my 2018 Aprilia Shiver 900. Keep an eye out for the upcoming review at Web Bike World.

ICON was founded in 2002 in Portland Oregon. They list their core mission as protecting riders whenever and however they can.

Please note: I purchased these gloves and they were not provided for review.

First Impressions

I received my parcel containing the ICON Patrol Gloves and was quite eager to open it. At first glance, I immediately noticed how well constructed these gloves are. They are also very stylish. I loved the mix of waterproof textile along with the leather palm. The small reflective strip on the glove looks very smart and serves a purpose during low light riding.

ICON Patrol Waterproof Gloves closeup of wrist and gauntlet design

Construction

The ICON Patrol Waterproof Gloves are constructed of very good quality materials from the premium goatskin palms to the waterproof textile, These gloves are very high quality. Small features have been incorporated into the gloves to increase the comfort and performance.

For example, these gloves come with injected thermoplastic knuckles for hand protection, a shield wipe on the left index finger as well as a pre-curved palm and finger design to reduce hand fatigue as well as blisters.

ICON Patrol Waterproof Gloves injected thermoplastic knuckles

One of the main reasons I purchased these gloves was the fact that my trusty leather gloves I normally wear left me with a touch of frostbite from riding in the rain at cold temperature. I wanted to make sure that the gloves were indeed waterproof.

I donned the gloves and headed to the sink. I ran the cold water and put my hands under the tap for a good 4 minutes. The water did not permeate the glove and I was very satisfied with the waterproofing claim that these gloves provided.

ICON Patrol Waterproof Gloves are really waterproof

Protection

The ICON Patrol provides amazing protection against the elements. They are a level 3 waterproof glove which means that they feature a Hipora ® waterproof liner, taped seams and a cinch at the wrist.

In addition to protection in inclement weather, the Patrol gloves offer excellent hand protection. A co-molded knuckle offers protection to the back of the hand as well as leather fingertips will provide protection against abrasion in the event of a fall.

ICON Patrol Waterproof Gloves leather fingertips

Finally, the gloves being gauntlet offers protection against the wind and the rain. As far as protection against the weather, the ICON Patrol gloves are constructed of superior heat retaining materials to keep the wearer comfortable in colder weather.

Sizing, Fit, & Retention

The ICON Patrol Glove fits small. I usually wear a medium glove, but with the Patrol, I was glad I ordered a large as a medium would have been a bit snug on my hand. I followed ICON’s sizing chart that prompted me to measure the width of my hand. I was surprised to see that the chart recommended a large glove but I was happy I did when I received the parcel.

All sizing aside, the gloves fit well… like a glove. I am quite happy at the fitment. The gloves have a natural curve in the palm and fingers. This is a nice feature as it already has the broken-in feel. The gloves feature a strap around the wrist as well as velcro straps to cinch up the cuff.

ICON Patrol Waterproof Gloves wrist velcro strap

Once the glove is adjusted, the retention factor is excellent. It feels great on the hand and does not become a hindrance to tactile responsiveness.

My only complaint on the fit is that they feel a bit bulky. This may be because It is the first pair of gauntlet gloves I have ever purchased and I may need to adapt from a short glove to a glove that is designed to go over my riding jacket.

Road Testing

I wore the ICON Patrol Waterproof Gloves on a cold day. It was 0 degrees Celsius (32 degrees Fahrenheit) but I did not care, I needed to get out for a ride. It was early in the fall for a snowstorm, but nonetheless, Mother nature had her mindset and we got 18 inches of snow.

I was sure that my riding season was done. A week went by and the snow that was still very present on the front lawn of my house and the roof of my shed was nowhere to be found on the streets of Calgary… as mentioned earlier, I just purchased my 2018 Aprilia Shiver 900 and I wanted to go out for a rip… I got geared up and headed out for a ride.

The gloves were great. I did not feel like I was wearing a new pair of gloves. Although they were new, they felt like they were broken in from the factory. The gloves were very warm, even in this cold weather. I installed a set of aftermarket heated grips on my bike and I did not turn them on once during my ride.

I met up with fellow writers and riders Jim Pruner and Jennifer Angelina for a meeting and then off I went. I rode for a better part of the afternoon. I tried out the gloves in the city and on the highway. They performed very well. My hands did not get cold and did not get fatigued. I was able to use the controls on the bike without any issues and the grip from the goatskin in the palm of the glove really gave me the feeling of being in control.

ICON Patrol Waterproof Gloves goatskin palm

A few days before finishing this article, the weather in Calgary changed again and it warmed up considerably. I rode into work at my regular job on Monday morning. It was 7 degrees Celsius (45 degrees Fahrenheit) in the morning and it went up to 15 degrees Celsius (59 degrees Fahrenheit) in the afternoon for my commute home.

The gloves still felt comfortable; however, they were a bit warm. My commute is about 30 minutes, I rode a bit more because it was a very nice afternoon, so about 50 minutes on the bike from my work to my home. At the end of the ride, my hands were quite warm and were just starting to sweat.

Conclusion

I have very few negative things to say about these gloves.

They are very well constructed, very well priced, and they are made of good quality materials.

The ICON Patrol features construction choices that make it a worthy pair of gloves. The co-molded knuckles, the goatskin palm with added grip are a start. It also includes the shield wipe on the left index finger as well as the pre-curved design. All this comes with a 1-year warranty.

ICON Patrol Waterproof Gloves palm side up full view

The gloves look amazing. I love the aggressive styling and the use of different materials in the manufacturing process. They are available in multiple sizes from small to XXXL.

In colder weather, these gloves are amazing. They are designed to keep your hands warm and they do so very well. In warmer weather, they are a bit warm. I would not wear these gloves in the heat of summer. I believe that this would not be very comfortable.

The fitment of the gloves is good; however, make sure that you check the ICON website and check out the size chart before ordering. They fit a bit small, so be cognizant of that. I recommend these gloves. They are good solid gloves and you do get a lot for you money.

Pros

  • Comfortable
  • Stylish
  • Waterproof
  • Well Constructed
  • Affordable

Cons

  • Bulky
  • Cold climate use only

Specifications

  • Manufacturer: ICON
  • List Price (2018): US $75.00
  • Colors: Black
  • Sizes: S, M, L, XL, 2XL, 3XL
  • Review Date: October 2018

ICON Patrol Waterproof Gloves Image Gallery

The post ICON Patrol Waterproof Gloves Hands-On Review appeared first on Web Bike World.

Categories
Gear Reviews Harley-Davidson Other Motorcycle Blogs review Web Bike World

2018 Harley Davidson Sport Glide Test Ride

The Not So Sport Glide

2018 Sport Glide.

Have you ever really wanted to like a motorcycle and had it disappoint you? That’s what happened to me with Harley’s new Sport Glide. It’s not awful or anything like that, but it’s not what it could have been with some better execution on the part of Harley’s designers.

With a Sport label and featuring cruise control along with detachable hard bags and fairing, I thought this would be a sporty cruiser equally capable of mastering long rides and sharp corners.

As it turns out, it can do those things, just not as well as I hoped. It’s not a sport tourer, or even worthy of the sport cruiser label.

Numbers and Noteworthy Features

  • 107 cubic inch (1746 cc) engine with 78 hp and 105.5 pound-feet of torque at 2750 rpm
  • Standard ABS and cruise control
  • Inverted front forks with adjustable preload on the rear suspension
  • 30 degrees of rake
  • 698 lbs wet
  • 26.5-inch seat height
  • 47 mpg

First Impressions

I like the simple look of this bike, especially with the front fairing detached. It presents as a clean and classy Harley Davidson motorcycle in that form.

Me riding a 2018 Harley Davidson Sport Glide.

The fairing intrigues me. I love the potential of it providing some good wind protection, but I have serious doubts it will be effective at all. It looks too short and small to be anything more than cosmetic. I’m eager to find out just what this bike is about.

The Ride

The Engine and Transmission

2018 Harley Sport GLide air cleaner housing and gas tank.
The torque is excellent from the Milwaukee 107 cubic inch engine. The Sport Glide flexes that rear wheel muscle to pull powerfully away from stop signs and many other vehicles on the road. It’s terrific to have full torque almost from idle at the rider’s disposal. Full credit to Harley for building this updated engine in comparison to the old twin cam one. It may be all new, but it still has that lovely Harley exhaust note people like me adore.

That torque combined with a six-speed transmission mesh very well and I experienced no missed shifts or desire to change anything about it. In true Harley form, the bike clunks loudly when you drop it into first gear, but other shifts happen smooth and solid.

The Lack of Sport Performance

Me riding a 2018 Harley Davidson Sport Glide.

Around town and on back roads at regular speeds the Sport Glide moves around well overall when we speak of its powertrain. I had no complaints until I decided to find out whether it would live up to the Sport side of its name by accelerating past 100 mph. Any legit sport touring bike should be smooth at that speed, but the SG was just plain scary.

Right around the 100mph mark, it started shuddering strongly and making me very uncomfortable. I’m not sure whether it could be blamed on the Michelin Scorcher tires and 30 degrees of rake not meshing well with the cold asphalt that day (it was only 54 degrees), but this bike had no interest in going fast.

Comparatively, my experience test riding the new Fat Bob last fall was just the opposite. That bike was noticeably more powerful with its 114 cubic inch engine, lighter weight and very smooth ride even above 100mph. That bike wants to go fast and handles it well.

2018 Harley Davidson Sport Glide.

Too Harsh?

Am I perhaps being unreasonably critical? Yeah, maybe.

It’s true there isn’t a single road (other than racetracks) in North America that I can legally ride this bike over 90 mph and it performs just fine in that normal range of speeds. Still, I was hoping for more, whether that’s reasonable or not.

Cornering

Me riding a 2018 Harley Davidson Sport Glide.

The Sport Glide is one of the new generations of Softails which is supposed to handle better than ever before thanks to a completely redesigned frame. That’s definitely the case for this Sport Glide compared to previous Harleys, but again the Fat Bob is noticeably better in the corners.

What A Drag

When I took some tight turns I found my heel dragging almost right away on the road because of the angle and height of the footpegs.

Me riding a 2018 Harley Davidson Sport Glide.

I’m not tall at 5’7, nor do I have skis for feet by any reckoning so that shouldn’t have been happening. If I lifted my foot up and rested my heel on top of the pegs I could corner nearly as sharply as on the Fat Bob, but that’s not a reasonable thing to expect to do with a bike named Sport Glide.

Suspension

Preload adjuster handle on a Sport Glide.

The suspension is decent in the front and rear. I like that the rear is easily adjusted now with a manual dial behind the driver’s right leg.

Rear suspension preload adjuster handle on a Sport Glide.

I didn’t find the forks dove exceedingly under hard braking. Generally, I can say Harley did good with it.

The Seat

The seat is one I just can’t figure out.

018 Harley Sport Glide.

The one on the Fat Bob is the most comfortable stock Harley seat I’ve sat on. That sounds really weird, but is definitely the case even compared to stock seats on the big baggers for my backside. I really wish they had gone with it on the Sport Glide instead of the one they did.

2018 Sport Glide seat.

My main complaint with the Sport Glide seat is that after riding for an hour it produced a dent right where my tailbone rests on it. There was a noticeable pucker in the leather when I got off it and I think over time this would only get worse to the point of failure.

It’s also wickedly uncomfortable to have your tailbone dig into the foam progressively deeper while out riding.

No Passengers

The rear seat isn’t something any passenger would want to use long. They may as well have just left it a solo seat.

The Convertible Aspect

Two Sport Glides showing with and without fairing and bags installed.
The fairing and saddlebags come off quickly and easily thanks to latches inside the bags and ones on the inside of the fork tubes near the triple tree up front.

Quick detach front fairing from a 2018 Harley Davidson Sport Glide.

This design is efficient and seems bulletproof. The fairing can’t be easily stolen off the bike when it’s parked unattended because when the steering lock is engaged you can’t get fingers in far enough to unlatch the release on one side.

The bags are hard and leather covered with nice logos on each side. I had no trouble removing and reinstalling them afterward with only one or two attempts at learning how it all works.
Full marks to Harley on doing these things right.

The Instrument Panel

2018 Sport Glide gauges and gas tank.

The dash is a 5-inch diameter speedometer with an LCD display below it mounted on the gas tank. It’s not too hard to see how fast you’re going, nor are the warning light for ABS, neutral, low fuel, oil pressure, high beam or indicators for turn signals.

The only problem is you have to look down to access the information. It’s par for the course with many Harley Softails and helps keep the style of the bike sharp. From a practical standpoint, I’m really not a big fan though.

The fuel gauge is a good feature along with the distance to empty, digital tech and trip meters. It’s actually a very good setup, just not located well.

The Style

I think a better name for this bike would be Style Glide.

2018 Sport Glide Engine.

The rims are unique with their bending, polished aluminum spokes front and rear that somewhat resemble shuriken (ninja stars!).

2018 Sport Glide front wheel.

No other builder mixes a distinct package of physical features so well of chrome highlights and blacked out contrasting areas than the Bar and Shield in my opinion. Often imitated, but never duplicated this bike is a looker without question.

The Little Things

Rear tire on a 2018 Harley Davidson Sport Glide.

The Michelin Scorcher tires even have small depressions around the edges of the rubber that are shaped like the Harley logo. Small badging and tasteful, low key branding on the side of the gas tank among other locations on the engine and saddlebags is all done just right.

In short, I give it two thumbs up in the looks department.

Who Is It For?

Who should buy this Harley? Who is Harley trying to target with this Sport Glide? I really can’t make up my mind about the answer to that question.

Me riding a 2018 Harley Davidson Sport Glide.

At first, I thought it would be an excellent option for riders that can’t physically handle the big touring bikes and their 900+ lb weight, but who still want to go on long rides.

The fairing on the Sport Glide just isn’t big enough to make really long rides in wind comfortable, so I’m going to stop looking at this machine as a legitimate touring bike alternative now.

I think this is one for people who want a bike they can quickly, easily and noticeably change the look of. That’s really it because the truth is this is just a Heritage Classic with modern styling and a less useful quick detach windshield when you drill down to the core.

I thought I understood what Harley was going for with this bike, but it turns out either I was right, but they missed the mark or I’m wrong and have no idea what the Sport Glide is for.

So Much Potential

Me riding a 2018 Harley Davidson Sport Glide.

This bike could have been much more if they had built it more like the Fat Bob, but put in some touring features.

It should have had the 114 engine in it, not the 107.

The footpegs should have been raised to allow sharper cornering.

The windshield should be at least 8” taller.

Change the rake to 28 degrees and raise the exhaust slightly to allow for sport cruiser cornering.

Fix the seat.

The sad truth is that I really wanted to like the Sport Glide, but I don’t. I can’t see it selling well or staying in the Harley lineup long either unless they really tweak it, but I could be totally wrong.

What’s New for the 2019 Sport Glide?

The 2019 Sport Glide is virtually identical to the 2018 other than the shape of the primary drive case. The photo below shows the new, narrower primary case with the smaller diameter derby cover on it.

A primary cover on a 2019 Heritage Classic Softail.

There is a better cooling effect on the oil and primary drive gears gained due to the shape change according to the sales staff at Calgary Harley Davidson who I’d like to thank for offering up this bike for a test drive and review.

A Harley Sport Glide at Calgary Harley Davidson.

Final Shots

I haven’t enjoyed writing this downer of a review. I like Harleys and all motorcycles, but this one just does very little for me, sadly. It’s pretty ordinary overall and I prefer to review bikes I feel make a statement or fit a rider’s needs better than on average.

It would have been more worthwhile for Harley to have built a touring friendly version of the Fat Bob instead of the Sport Glide, because the Fat Bob IS the Softail with sport handling.

That’s about to change though with the new 2019 FXDR 114 from what I hear, but that’s a whole different review than this one.

Steel sculpture of an eagle.

Pros

  • Cruise control
  • Quick detach windshield and locking hard bags
  • Great torque from the M8 107 engine
  • Bright, LED headlight

Cons

  • Uncomfortable seat easily dents
  • Unstable at high speed (got sport?)
  • Fairing isn’t large enough to protect the rider from the wind

Specs

  • Manufacturer: Harley Davidson
  • Price (When Tested): $22,399 and up
  • Made In: USA
  • Alternative models & colors: 6 different paint choices
  • Sizes: 107 engine only
  • Review Date: September 26, 2108

Harley Davidson Sport Glide Image Gallery

The post 2018 Harley Davidson Sport Glide Test Ride appeared first on Web Bike World.

Categories
Gear Reviews Modular Helmet Reviews Motorcycle Helmet Reviews Other Motorcycle Blogs review Simpson Web Bike World

Simpson Mod Bandit Helmet Review

The Mod Bandit Stole and Broke My Heart

Me wearing a Simpson Mod Bandit helmet with the chin bar raised.

I stopped by the Simpson booth at AimExpo last week to see what they had in store with their unmistakably stylish line of helmets. I was surprised to be presented with the announcement of their first modular helmet design called the Mod Bandit.

Simpson Mod Bandit Helmet.

I knew right away this posse of Simpson representatives visiting from New Braunfels, Texas needed to let me be the first to review this beauty of a helmet. I want to thank them for obliging me in that request. Without hesitation, they gladly handed over their newborn modular into my care for a helping of in-depth analysis and testing.

Thank y’all very much!

Shopping Now? We Recommend:

webBikeWorld has worked closely with RevZilla over the years to provide our testers with products to review. In addition to being a great site to shop from, they’re also a great partner.

RevZilla

Free shipping on orders over $40
30-day no-nonsense return policy
Excellent selection of all major brands
Awesome pricing

Buy This Helmet on RevZilla

First Impressions

Everyone’s Crazy ‘bout A Sharp Dressed Helmet

I love the fact this helmet doesn’t broadcast its modular design.

Simpson Mod Bandit Helmet.

Yes, the tell-tale seam is still there on each side of the chin bar, but it’s hard to notice them because of the pair of contrasting chrome colored mesh slits running parallel to the chin bar set against the black shell on each side. These vents appear slightly whisker-like as if this helmet is the face of a black panther. That idea is furthered by the vertical slits on the front-center section of the chin bar too. They look like fangs to me… so awesomely badass and distinctly Simpson.

Simpson Mod Bandit Helmet.

Light As A Feather

This helmet is close to being the same weight as my AGV Sportmodular Carbon and is much lighter than either the Shoei Neotec II or Schuberth C4! Review AGV review, C4 review, Shoei Neotec II.

Simpson Mod Bandit Helmet.

I weighed the Mod Bandit myself and found it rung up 3 lbs 5 oz thanks to its tri-composite shell combined with a polycarbonate alloy chin bar design. There’s also a carbon fiber version coming which I have to believe will weigh exactly the same as the lightest in class 2.85 lb AGV Sportmodular does.

Is Simpson really calling out AGV, Shoei, and Schuberth to a shootout at high noon with the Mod Bandit?

Simpson Mod Bandit Helmet.

Donning this Simpson is a breeze compared to the AGV. I like the larger width of the opening on the bottom and the fact I don’t have to lift up the chin bar in order to install the helmet on my head.

Shell Coating

This is a matte black helmet featuring a rubbery coating. It provides a reliable, non-slip grip while handling the Mod Bandit which I appreciate in a lightweight brain bucket. I sometimes find it easy to bobble and drop helmets.

Simpson Mod Bandit Helmet.

The matte finish means fingerprints show up easily if you have sweaty hands or just finished polishing off some delicious Texas BBQ, so I found myself cleaning the helmet exterior fairly often to keep it looking good.

Tough Stuff

I’m pleased to find this matte coating proved to be tougher than others we had problems with in past reviews. In particular the Shoei Neotec II and Schuberth C4. Those helmets both seemed to develop blemishes and scratches even with claimed careful handling on our tester’s part. On the other hand, it was Cam involved in both incidents and perhaps he just had too much red meat in his diet or something at that time.

Simpson Mod Bandit Helmet.

At any rate, I didn’t manage to turn this Simpson into a scratch and dent special item during my review time. When I was bringing it through customs at the Las Vegas airport the security officers weren’t especially gentle with it while sending it through the X-ray machines either.

Shopping Now? We Recommend:

webBikeWorld has worked closely with RevZilla over the years to provide our testers with products to review. In addition to being a great site to shop from, they’re also a great partner.

RevZilla

Free shipping on orders over $40
30-day no-nonsense return policy
Excellent selection of all major brands
Awesome pricing

Buy This Helmet on RevZilla

Branding

The Simpson logo is classy and strong looking to me. I found the usage of it on the helmet was just enough to let you know who built it without being distracting from this headgear’s focal style points.

Simpson Mod Bandit Helmet

The logo on the front is just a sticker that isn’t clear coated and I wonder how long it will take to start peeling back when exposed to heat, rain, and wind. So far so good, but it’s only been about 500 miles of perfect sunny weather.

Visor Quick Release System

Simpson Mod Bandit Helmet

While at AimExpo I spent some time learning how to solve the mechanical riddle that is the Arai visor retention system. People who are used to it make it look easy to remove and install, but believe me when I say you have to hold your tongue just right and practice in order to do it smoothly.

Simpson Mod Bandit Helmet

This Mod Bandit system, on the other hand, is straightforward. Each side of the visor has a round retainer that twists 90 degrees to either lock or unlock the visor retainers. These plugs have spring loaded detents to keep them from falling out giving peace of mind to the user. The system is close to idiot proof because when locked the Simpson name will end up parallel to the ground running left to right. Nicely done! It’s not possible to install them wrong from what I found.

Visor Positions

Another feature done right on this Simpson is the way they set up the slightly open visor position rest.

Simpson Mod Bandit Helmet

There’s a small plastic stop on the left side that is fairly effective at keeping the visor cracked open about 1/8 of an inch providing copious amounts of air into the wearer’s face when desired.

Simpson Mod Bandit Helmet

The large lip on the left side of the visor for lifting it up is quick and easy to use even when wearing gloves while flying down the road. When I pop open the visor it automatically stalls open thanks to the small bump it rests on. The wind pressing on the visor is what keeps it propped open, and I found when I wanted it closed all it took was a flick of my left hand to overcome the stop.

On a naked sport bike or any other where your face is right out in the wind blast, you’ll have to ride faster than 90 mph in order for the wind to eventually win out and close the visor in my experience. On one with a fairing, it should stay open nearly indefinitely.

Bumps In the Road

Having said that, I found riding over bumpy sections of road would gradually knock the visor shut after a time and I’d have to re-open it. I’m still rating this feature as excellent comparatively. The C4, Neotec II, and AGV modulars’ visors won’t stay open once the wind starts flowing even at low speeds across them while the Simpson visor will stay cracked open at all regular, legal speeds.

The former three helmets have a smoother visor adjustment and infinite ranges of open positions on their visors whereas the Simpson only has 4 positions above open.

Visor Points

Seal

A large, flexible rubber seal runs around the perimeter of the visor, but I didn’t get the opportunity to test it in the rain. This time of year it’s more likely to snow here at home and in Vegas, well… good luck with that. In looking at it I would wager to say it would seal just as well as any other quality helmet on the market.

It worked perfectly at keeping the wind out and didn’t cause whistle at any speed.

Visor Options

I tested the helmet in Vegas with the smoke or dark tint visor option. When combined with the inner sun lens I found it perfect for out in the bright desert of Nevada, but too dark when I rode through a tunnel.

Simpson Mod Bandit Helmet

When I took the helmet back home to continue testing it was equipped with a clear visor which I prefer overall leaving sun protection solely to the integrated lens. Having said that, I prefer the looks of the smoke or iridium visor. This helmet will ship with the clear visor from the factory.

There’s an iridium visor made to fit the Mod Bandit available for $80 while the smoke one is $60.

Integrated Sun Lens

Optically I found no issue with the visor or integrated sun lens. They were obstruction and flaw free.

The eyeport view is great and provided the peripheral view I expected.

Me wearing the Simpson Mod Bandit helmet

The sliding switch for lowering or raising the sun lens is located behind and slightly lower than the pivot point on the left side of the visor. That makes it a little slower than average to locate quickly while riding since most other helmets have it down on the lip of the shell other than the Neotec II which is like the Simpson in this regard. I much prefer having it up off the lip of the shell because having it down there can interfere with the installation of clamp on style BlueTooth units.

Simpson Mod Bandit helmet

I find the action on the slider switch a bit stiff, especially compared to the C4 which is smooth like whipped butter. This one on the Mod Bandit works well and has friction points at the top and bottom of the slide to hold the lens all the way extended or retracted. I did find in the fully lowered position the lens would nibble on my nose the same way it does in my AGV Sportmodular, but I prefer that much more than if it didn’t come down far enough to cover my full field of view.

Simpson did this right too.

Simpson Mod Bandit helmet

PinLock Ready

The visors all come with the necessary holes used to install a PinLock shield. It’s a shame it doesn’t come with the helmet already because that would really give great value for the price.

I found little to no problem with fogging in the 85-degree weather I tested the helmet in while in Vegas, and when I got home I was able to test it in cooler temperatures down to 42 as well. The only time it didn’t clear fogging was when I was at a standstill and purposely exhaled through my mouth into the completely closed helmet. As long as I was moving the airflow through the helmet kept it clear.

I would still recommend opting for the PinLock if it’s in your budget, especially if you live in a humid climate.

Shopping Now? We Recommend:

webBikeWorld has worked closely with RevZilla over the years to provide our testers with products to review. In addition to being a great site to shop from, they’re also a great partner.

RevZilla

Free shipping on orders over $40
30-day no-nonsense return policy
Excellent selection of all major brands
Awesome pricing

Buy This Helmet on RevZilla

Venting And Airflow

I already touched on the excellent airflow made possible by the cracked open visor rest, but what about when the visor is fully closed?

Simpson Mod Bandit helmet

Those four chrome colored, mesh slits on the chin bar are excellent for allowing the rider to breathe easy. The four “whisker” ones are always open and flowing air up to orifices in the chin bar to help prevent fogging, but it also cools the rider’s face at the same time.

Simpson Mod Bandit helmet

The “fangs” have actual sliders on the inside of the chin bar that can be opened or closed with some effort because you have to reach past the chin curtain to move them. It would be way easier if the sliders were located on the outside, but that would spoil the look.

The chin curtain is made of neoprene and seals very nicely around my chin to keep airflow coming only through the fang and whisker vents on the chinbar. It is removable if you prefer not to have it there.

Upper Vents

Simpson Mod Bandit helmet

There are two sliding vents on the crown area of the helmet I had no issue opening or closing. In addition to channeling cool air along the top of the wearer’s head effectively, air also flows down to the top of the visor from these top vents to help with fogging.

Exhaust Ports

Hot and humid inside air is exhausted out four chrome mesh vents on the back of the Mod Bandit. I noticed the inner padded liner sits apart from the EPS foam liner inside the shell and there are grooves running in the foam that allow terrific cooling flow to pass over the wearer’s head.

Simpson Mod Bandit helmet

In short, this helmet really keeps you cool and comfortable from a temperature perspective. For me, it was superior to the C4 and Neotec II systems, but not quite as good as the AGV.

Fit And Comfort

Padding And Liner

Simpson Mod Bandit helmet

The padding is covered in a smooth nylon that is removable, washable, hypoallergenic and antimicrobial as you would expect. It was equally as easy to remove and install as any other good helmet I’ve examined.

Bluetooth Installation

Simpson has built in large areas around the ears in the padding that make installation and adjustment of speakers, wiring and microphones in this helmet a breeze. That also means the wearer’s ears don’t fold up when pulling on this helmet unless they’re unusually large.

Additionally, locating the sun lens slider switch up out of the way results in my SENA 30K installation in the Mod Bandit being quick and pain-free.

Intermediate Oval Or Long Oval?

Here’s the first real problem I had with the Mod Bandit. It hurts my head when I wear it over an hour to the point I have to take it off. My head shape is Round Oval, but typically I seem to be able to wear Intermediate Oval helmets without too much discomfort.

What's Your Head Shape?

What I’m finding lately is not all IO helmets are created the same surprisingly. There are degrees of that shape which manufacturers all bring to life slightly differently. Despite the fact the Mod Bandit is IO I would say it definitely leans more towards the Long Oval end of the IO spectrum.

When I wear it the fit is snug all around, but as you might expect the padding on the sides of my temples become pressure points fairly soon because the shape is more suited to someone with a longer and narrower head shape. If you have tried on other IO helmets and found they pinch on your forehead and/or back of your skull then this Simpson design will likely fit you more comfortably than it will me. If you’re a prototypical IO head shape I think you’ll find the fit perfect.

On The Road

Wind Noise

The gaps around the ear areas that make putting the helmet on or installing BlueTooth speakers easy have a negative effect on noise, unfortunately.

Me riding a 2019 Harley Davidson FXDR wearing a Simpson Mod Bandit helmet.

My AGV Sportmodular folds my ears up when I put it on because it fits extremely snug in that area by comparison. This is a bit irritating when donning the helmet, but once I unfold my ears and the helmet is in place the padding practically seals my ears off from the outside world and I feel like I’m wearing earmuff style hearing protection. It’s comparably quiet out on the road as a result and I have difficulty hearing conversations while wearing it.

The Mod Bandit is very loud for me out on the road. The combination of it not being more forgiving to a Round Oval head shape and the open areas around my ears create quite a roar at any speed above 45 mph. It makes me unhappy to admit this helmet that appeals to me on many levels just isn’t comfortable or quiet enough for me to enjoy wearing, but it’s the truth.

This is just for my individual head though.  As I mentioned if your head shape is more IO or LO the experience should be completely different.

Lift, Pull And Drag Aerodynamics

I experienced zero lift or pull issues even in crosswinds with the Simpson. It’s obviously wind tunnel tested. All bets are off once the chin bar is raised, however. I wouldn’t ride with it up faster than about 45 mph because the wind starts to lift it quite easily then.

When it comes to drag I definitely noticed the helmet is dramatically quieter when you ride in an upright or standard riding position compared to a sporty one. The wind noise is more of a hissing roar compared to the booming roar I experienced while riding on my Ninja H2SX leaned forward.

2 Shell Sizes

I find the lack of pull and lift surprising because this helmet is only available in 2 shell sizes. Meaning it will be a fairly large helmet for anything above Small/medium. It doesn’t feel big on my head at all, but i suspect that’s mainly due to the light weight.

Compare that to the C4 which is also only available in two shell sizes but feels huge on my head and makes me look like a bobblehead doll.

Chin Bar Action

Simpson Mod Bandit helmet.

With such a lightweight chin bar there isn’t much momentum gained when you try and close it. That means you have to forcefully slam it shut in order to get it to latch. I find the AGV is the same way with its carbon fiber chin bar being so light. Forget about using a gentle touch while using the Mod Bandit. In general, you have to use more strength to manipulate switches and moving parts on this helmet. Certainly, it’s not the end of the world, nor would it even register with many people unless you’ve spent quality time with other more refined helmets.

Once latched shut it holds steady and true even in the wind. Compare this ham-fisted approach to the silky smooth C4 chin bar and you may feel a bit disappointed, but the C4 is notably one whole pound heavier overall so that smoothness comes with a price.

Lockable Chin Bar

Simpson Mod Bandit helmet.

Simpson put in a locking tab on the right side of the helmet that can freeze the chin bar in the raised position. I’d never use this feature to be honest. I do ride with the chin bar up when at slow speeds sometimes, but I can’t picture a time I would want it raised for good. The chin bar never fell down while riding with it raised in the unlocked position.

Chin Strap

Simpson Mod Bandit Helmet.

The chin strap is a standard double D ring design that is proven and easy to use. I would have preferred a ratcheting style, but that’s just me. I found the foam on it softened the pressure nicely on my chin and the width was just right from a comfort perspective.

What I didn’t care for is the way the chin strap loop hangs down in the wind and flaps while riding. I remedied this problem by tucking it up in behind the chin curtain once I lowered the chin bar.

Final Verdict?

Here’s a really stylish helmet built with all the features I demand, that just doesn’t fit my head properly. That’s not Simpson’s fault, it’s simply my genetic pattern coming in to play sadly. It is very loud for me and might be for other head shapes as well thanks to the gap around the ears in the padding.

Simpson Mod Bandit helmet in Canmore, Alberta with 4SR 96 Stingray gloves.

If you prioritize as I do this is a great helmet to buy. I rank criteria in the following order (with the assumption it’s DOT/ECE compliant):  Comfort, light overall weight, airflow inside the face area, reasonably quiet on the road and an internal sun lens as my top five needs. If it has those traits I’ll buy that helmet in a flash and wear it happily.

The Mod Bandit has 3 out of my top 5 going for it and the comfort factor is highly subjective. That’s why I rate it a 4 out of 5 stars.

I feel the purchase price of $479.99 is on the high end of reasonable for what you get. It has many features of the top tier helmets at a slightly lower price point. I would say Simpson should include the PinLock for that price to make it even more competitive.

The unique look is priceless if you value individuality. It’s a great platform to work off of if you like to custom paint your brain buckets.

Pros

  • Excellent ventilation
  • Badass Simpson style
  • Ultra Lightweight by modular standards
  • Reasonably Priced
  • Durable Finish on shell
  • 3 styles of PinLock ready visors
  • Optically clear visor and integrated sun lens
  • Easy to use visor quick release
  • Comfortable fit for intermediate and long oval head shapes
  • Bluetooth systems install easily
  • ECE and DOT certified

Cons

  • Round oval heads don’t fit well
  • Noisier in sport riding position
  • Visor isn’t infinitely adjustable
  • Chin strap flap

Specs

  • Manufacturer: Simpson Race Products
  • Price (When Tested): $479.99
  • Made In: USA
  • Alternative models & colors: White, Black, Flat Black, Carbon
  • Sizes: XS to 3XL
  • Review Date: October 17, 2108

Shopping Now? We Recommend:

webBikeWorld has worked closely with RevZilla over the years to provide our testers with products to review. In addition to being a great site to shop from, they’re also a great partner.

RevZilla

Free shipping on orders over $40
30-day no-nonsense return policy
Excellent selection of all major brands
Awesome pricing

Buy This Helmet on RevZilla

Simpson Mod Bandit Gallery

The post Simpson Mod Bandit Helmet Review appeared first on Web Bike World.

Categories
Fieldsheer Gear Reviews Motorcycle Jacket Reviews Other Motorcycle Blogs review Textile Jacket Web Bike World

Fieldsheer Cadence Women’s Textile Jacket Review

With the Albertan riding season now coming to a close, it’s time for the review of this Cadence to go live. We’ve had the Cadence in our possession since May but decided to wait until cooler weather before publishing this review. That time came and, I have to say, I’m impressed with how the Cadence has handled lower temperatures.

The Cadence is a sub-$300 textile ladies jacket, with touring style and comfort. The jacket features plenty of ventilation, considerable storage, and a removable Thermo-Guard liner that helps it weather the cool… weather… in stride.

My wife Melissa – shown here – provided her thoughts while I penned this review. The Cadence is available from a number of online outlets as well as from Fieldsheer directly.

Features

From Fieldsheer:

  • Rugged and Durable 600D Carbolex-HD Construction
  • Pre-Formed Riding Position Fit
  • Phoslite® Reflective Logo for Nighttime Visibility
  • Rainguard® Waterproof Membrane
  • Thermo-Guard™ Removable Full Sleeved Quilted Liner
  • Integrated Armadillo® CE Level 1 Armor in Shoulders and Elbows
  • Contoured EVA Back Pad
  • Micro-Fleece Padded Mandarin Collar
  • Two-Stage Lower Sleeve Adjusters
  • Adjustable Wrist Closure
  • Adjustable Waist Belt Straps
  • Zippered Hip Expanders
  • Heavy-Duty ESO Zippers
  • Two Hand Pockets
  • Two Chest Storage Pockets
  • 8in Zipper Attachment for Fieldsheer Pant Integration
  • Belt Loop for Attachment to Pants

Aesthetics & Style

Fieldsheer Cadence Review

Fieldsheer Cadence ReviewThe Cadence comes in an always-exciting Khaki Green, with tan, grey, and black accents. I wouldn’t say that the Cadence is particularly exciting in terms of style, but I would say that it’s almost nondescript enough to pass as something other than a motorcycle jacket. Almost.

The front of the jacket showcases four large pockets – one at each breast, and two at the waist – and a raised collar that snaps shut, providing a decent amount of neck protection against wind and small road debris. Most of the jacket is the same flat khaki color and texture; the exception is the forearms, which are ridged and feel as though they are filled with foam.

A strap and buckle sits midway up either side of the jacket- with them, you can adjust the Cadence quite significantly, adjusting the fit by several inches (each side has 3 notches in the strap) if you want.

Each arm is accented by tan inserts and two snap-straps: one to adjust forearm width, and the other for adjusting the sleeve opening width. Just above the elbow is an arm vent, which opens and closes in a snap (pun intended).

Fieldsheer Cadence ReviewI would have really liked to have seen some high-viz accents on the arms or shoulders, as the good heat-management properties and touring styling of the jacket make it likely that riders will wear it once the sun sets. A little bit of safety goes a long way, and the lone high-viz accent – the Fieldsheer logo stitched at the base of the neck at the rear of the jacket – doesn’t do a great job in keeping you nighttime visible.

The rear of the jacket is also quite spartan, with the Fieldsheer logo and the two vents on either side of the waist serving to break up the glorious khaki green. Branding on the Cadence is kept to a minimum.

Overall, the Cadence is a fine looking, if somewhat muted, touring jacket that most riders will find fits their styling sensibilities.

Roder Protection & Safety

Fieldsheer Cadence ReviewThe Cadence is decidedly average in terms of protection, coming equipped with CE level 1 armor in the elbows and shoulders. A foam back pad is also included, though I wouldn’t count on it to provide much more than a token amount of protection in the event of a crash or fall.

CE level 1 is a decent level of protection, but CE level 2 would’ve upped impact resistance by a fair degree and bolstered the Cadence’s safety credentials. Of course, considering the jacket is priced under $275, the use of CE level 1 makes sense. You can replace most of the level 1 armor with level 2 if you feel so inclined.

The back pad and shoulder armor can be removed easily enough, but the elbow armor is a bit trickier due to its location. You can’t pull the sleeve through the jacket easily to turn it inside out (because of the armor), so you have to access it via the openings at the wrist. It isn’t laborious to remove the armor, just a bit tricky due to limited accessibility and visibility.

Comfort

Fieldsheer Cadence Review

According to Melissa, the Cadence is comfortable and flows a decent amount of air through it when you’re at speed. Vents on the arms, sides, and rear of the jacket help keep you cool and all can be opened/closed via snaps. The Thermo-Guard liner is quite good at keeping you warm, reducing interior airflow to a minimum. Melissa removed it for most of the summer, only putting it back in the Cadence in September.

Ergonomics are good, as is mobility. Assuming a proper fit, you shouldn’t have any problems with mobility/flexibility. The jacket does have a slight pre-formed riding position fit, but it isn’t nearly as aggressive as the fit on the Suzuka racing jacket is- it’s just enough to keep it from crimping too much when you’re behind the bars.

Ventilation

Fieldsheer Cadence Review

There are three vented areas on the Cadence: just above the elbow on each arm, the upper back, and lower back (near the waist). The arm and waist vents open/close via snaps, while the back vent is always “open”. Since the back vent is tucked underneath overlapping material, it generally isn’t a concern regarding water penetration.

Fieldsheer Cadence Review

Waterproofing

A ventilated textile jacket is not waterproof, and the Cadence is no exception. Water resistance is good overall, but if you want something waterproof, you’ll want to consider other jackets. The Cadence will be sufficient for most riding situations, but you’ll get wet if you find yourself caught in the rain.

Closing the vents does a decent job keeping you dry, but remember these are snaps vs. zippers and don’t completely seal. Don’t go play with a hose or decide that riding in a downpour is the way to go and you’ll make it out just fine.

Other Comfort ItemsFieldsheer Cadence Review

You can connect the Cadence to your belt or riding pants via the rear loop. The loop is only single-stitched, though, which is surprising given the force that would be placed on this area in a fall or slide.

A few nice touches:

  • The collar is lined with fleece, helping keep it comfortable for periods of long riding. The fleece is soft and doesn’t irritate the skin.
  • You can zip/unzip sections on either side of the jacket near your hips, allowing the Cadence to adjust as needed for a more comfortable fit. This is in addition to the waist belt/buckles.
  • With the interior liner removed, the Cadence weighs approximately 3.5lbs- heavy enough to feel reassuring but light enough to remain comfortable on long rides.

Storage

Fieldsheer Cadence Review

Good news: the Cadence has pockets everywhere! Six on the front (four sealable pockets and two hand pockets), an interior zip-up pocket on the right breast, and a Velcro-sealed pocket on the interior left. They are all a decent size and each can hold keys, a wallet, and a phone.

Build Quality

Fieldsheer Cadence Review

Most connecting sections, as well as high-impact areas, are double-stiched. The stitching is also very cleanly done, which not only helps contribute to the feeling of polish and quality on the Cadence, but also plays a part in the overall clean-cut presentation of the jacket. The Cadence looks as good as it feels, and it’s reassuring to see that it’s made as well as it looks it like it ought to be.

The outer shell is made of Carbolex-HD, a water-resistant synthetic fabric that is made from polyester fibers. Fieldsheer claims that Carbolex-HD has been tested using ASTM standards and found to be four times stronger than other nylon fabrics and twice as strong as standard Carbolex. Fortunately, neither Melissa nor myself have had an opportunity to test this hands-on, so we’re going to take Fieldsheer’s word for it on this one.

After four solid months of use, we have found a few stray stitches, mostly around the external left breast pocket. The rest of the jacket looks relatively new despite the miles it’s seen. I have no reason to believe the jacket wouldn’t survive for the next few years of regular wear and riding.

Affordable, Comfortable, & Storage-Friendly

The Cadence is a good jacket that’s priced right. We like the ample storage available, and we like that all of these pockets – aside from two of the front pockets – can be snapped or zipped closed.

In most respects, the Cadence plays in the playground it’s competing in. Comparably priced jackets from brands like Icon, REV’IT, Tourmaster, and the like offer similar features/functionality. The main difference is that some jackets that are closer to the $300 mark include CE level 2 armor in the shoulders and elbows, whereas you’ll have to pony up some extra cash to have level 2 integrated into the Cadence. As of the time of this writing, Fieldsheer sells Armadillo CE level 2 shoulder armor of $15 and a level 2 back pad for $25. No level 2 elbow armor is offered for sale on Fieldsheer’s website.

Assuming you’re not into racing, most riders will find the Cadence properly equipped as is. Aside from lacking high-visibility sections, there’s not much to fault in the Cadence.

Disclosure: Fieldsheer provided the Cadence at no-charge to webBikeWorld for the purposes of this review. 

Pros

  • Pockets, pockets everywhere!
  • Comfortable fit that is adjustable at the waist, hips, and forearms.
  • Interior Thermo-Guard liner does its job.
  • Arm and back vents flow air nicely through them.
  • Two-year warranty

Cons

  • No level 2 elbow armor available from Fieldsheer
  • Needs more high-visibility strips

Specs

  • Manufacturer: Fieldsheet
  • Price (When Tested): $269
  • Made In: Bangladesh
  • Alternative models/colors: None
  • Sizes: XS – XL, size chart here
  • Review Date: October 2018

The post Fieldsheer Cadence Women’s Textile Jacket Review appeared first on Web Bike World.